
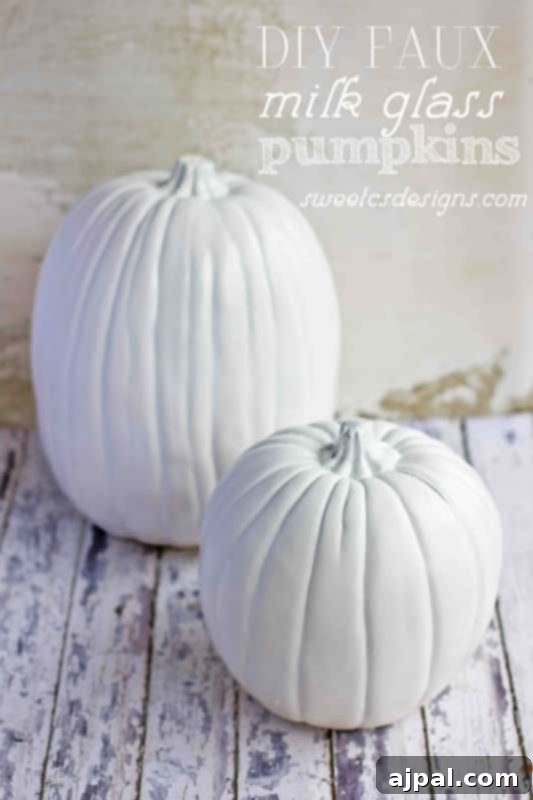
Transform Your Fall Decor with Elegant DIY Faux Milk Glass Pumpkins
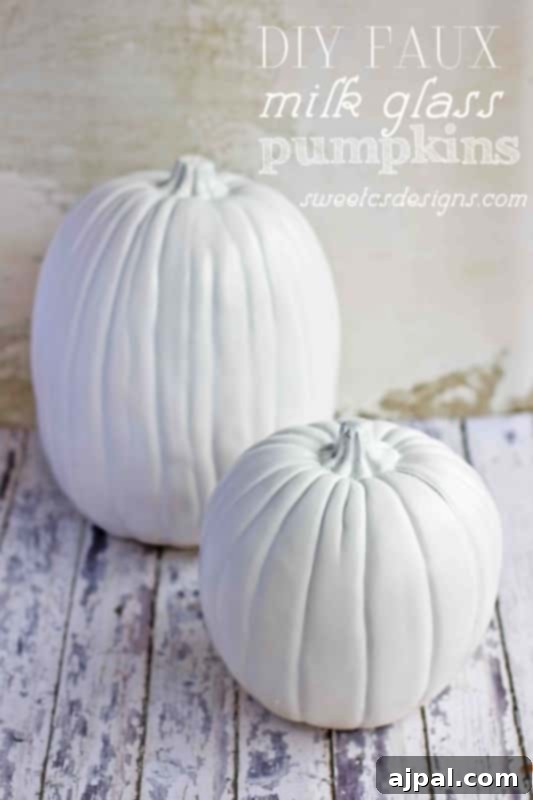
As the leaves begin to change and the crisp air ushers in the beauty of autumn, many of us eagerly anticipate decorating our homes for the season. However, traditional fall decor, often dominated by vibrant oranges and deep blacks, doesn’t always align with every home’s aesthetic. If you cherish a more refined, timeless, and versatile look, then crafting your own DIY faux milk glass pumpkins is the perfect project for you. These elegant pieces offer the classic charm of antique white glass, allowing you to seamlessly incorporate fall’s warmth into your home without compromising your existing decor style.
The allure of milk glass lies in its serene beauty and ability to transcend seasons. Real antique milk glass pieces are highly sought after for their understated elegance, blending effortlessly with various interior designs from rustic farmhouse to sleek modern minimalist. With this simple DIY project, you can replicate that coveted look using inexpensive foam or plastic pumpkins, achieving a sophisticated, glass-like finish in a matter of minutes. Imagine the satisfaction of transforming ordinary pumpkins into stunning decor that you can display from late summer through the harvest months, Thanksgiving, and even deep into the winter season. This project is not just about making a decoration; it’s about creating a versatile accent that enhances your home’s ambiance year-round.
Why Choose Faux Milk Glass Pumpkins for Your Seasonal Decor?
Opting for faux milk glass pumpkins offers a multitude of benefits that extend far beyond their aesthetic appeal:
- Timeless Elegance: Unlike seasonal trends that come and go, the classic look of milk glass never fades. These pumpkins bring a touch of vintage sophistication that complements almost any decor scheme, making your home feel refined and inviting.
- Unmatched Versatility: One of the biggest advantages is their adaptability. While perfect for fall, their neutral white hue allows them to transition smoothly into other seasons. Display them with fresh florals in late summer, alongside gourds and leaves for autumn, as part of your Thanksgiving tablescape, or even nestled among pinecones and evergreen boughs for winter and Christmas. This eliminates the need for constant decor changes, saving you time and effort.
- Cost-Effective Chic: Real milk glass can be expensive, and high-end seasonal decor adds up quickly. By choosing to DIY, you can achieve a luxurious look for a fraction of the cost. Inexpensive foam or plastic pumpkins, combined with a can of quality spray paint, are all you need to create a high-impact display.
- Easy and Quick Craft: This project is incredibly beginner-friendly and requires minimal crafting skills. You can create a stunning collection of these pumpkins in just an afternoon, making it a perfect weekend activity that yields impressive results almost instantly.
- Customizable Aesthetic: While the core project focuses on a pristine white finish, you have the flexibility to choose different pumpkin shapes and sizes, from small accent pieces to larger statement decor. You can even experiment with subtle distressing techniques if you desire a more aged appearance, though for a true milk glass look, a smooth, glossy finish is ideal.
Gathering Your Essential Materials
Success in any DIY project begins with selecting the right materials. For your faux milk glass pumpkins, you’ll need just a few key items:
The Pumpkins: Your Blank Canvas
The foundation of your project will be plastic or foam pumpkins. These are readily available in various shapes and sizes at craft stores, dollar stores, and seasonal departments, especially as fall approaches.
- Foam Pumpkins (e.g., “Funkins”): These are lightweight, easy to paint, and often come in realistic pumpkin shapes. They are durable and can be stored and reused for years.
- Plastic Pumpkins: Also a great option, especially if you find them at a bargain. Ensure they are clean and free of any stickers or residue before painting.
- Choosing Sizes: For the most visually appealing display, select a variety of sizes – small, medium, and large. Grouping different sizes together creates a dynamic and professional vignette.
The Paint: Achieving the Milk Glass Finish
The secret to the authentic milk glass look lies in the right spray paint.
- Paint + Primer Combination: This is crucial. A “paint + primer” formula ensures excellent adhesion to the smooth surface of plastic or foam pumpkins and provides superior coverage, often requiring fewer coats. This will save you time and ensure a durable finish.
- Glossy Finish: To truly mimic the reflective quality of glass, opt for a “glossy” finish. While semi-gloss might work, a full gloss will give you the most convincing milk glass effect. Avoid matte or satin finishes for this specific look, as they will appear flat and less like glass.
- Bright White Color: A pure, bright white is essential for the classic milk glass aesthetic. Off-white or cream colors can work for a softer, aged look, but for true milk glass, aim for a crisp, clean white.
- Brand Recommendations: Brands like Valspar (as mentioned in the original content), Rust-Oleum, and Krylon all offer excellent paint + primer, glossy white spray paints. Look for cans with a comfortable spray nozzle and good reviews for even coverage.
- Quantity: Plan on at least one can of spray paint for every 3-5 medium-sized pumpkins, depending on their original color and the paint’s coverage. It’s always better to have a little extra than to run out mid-project.
Essential Tools and Safety Gear
Don’t forget these important items for a smooth and safe crafting experience:
- Drop Cloth or Cardboard: To protect your work surface from overspray.
- Gloves: To keep your hands clean.
- Face Mask/Respirator: Absolutely essential for spray painting to protect your lungs from fumes.
- Well-Ventilated Area: Always work outdoors or in a very well-ventilated space like an open garage.
- Optional: Elevated Stand: Small dowels inserted into foam pumpkins or placing them on upside-down paper cups can make it easier to paint all sides without touching the wet surface.
Step-by-Step Guide: Crafting Your Milk Glass Masterpieces
Step 1: Preparation is Key
Before you even pick up the spray paint, proper preparation ensures a flawless finish.
- Clean Your Pumpkins: Wipe down each pumpkin with a damp cloth to remove any dust, dirt, or residue. Let them dry completely.
- Set Up Your Workspace: Lay down your drop cloth or cardboard in a well-ventilated outdoor area. Make sure there’s enough space around each pumpkin for you to move freely and apply paint evenly.
- Protect Yourself: Put on your gloves and face mask before you begin.
- Shake the Paint: Vigorously shake your spray paint can for at least one minute (or according to manufacturer instructions) to ensure the paint and primer are thoroughly mixed. This prevents clumping and ensures an even spray.
Step 2: The First Coat – Building the Base
The first coat is about achieving initial coverage, not full opacity. Thin, even coats are critical to preventing drips.
- Hold Distance: Hold the spray can approximately 8-12 inches away from the pumpkin surface.
- Apply Lightly: Begin spraying off the pumpkin, then move in a smooth, sweeping motion across the surface. Overlap your passes slightly.
- Work Your Way Down: Start at the top of the pumpkin and work your way downwards, covering all visible surfaces evenly. Don’t worry if you see some of the original pumpkin color showing through; the goal is a light, consistent layer.
- Address the Stem: Decide if you want to paint the stem white as well for a completely uniform look, or leave it its natural color for contrast. If painting, give it a light coat now.
Step 3: Drying Time – Patience Pays Off
Resist the urge to apply a second coat too quickly. Proper drying time between coats is essential for a smooth, durable finish.
Allow the first coat to dry completely to the touch, which typically takes 15-30 minutes, depending on your climate (humidity slows drying time significantly). The paint should not feel tacky before you proceed. Insufficient drying time can lead to drips, uneven texture, and bubbling.
Step 4: The Second Coat & Beyond – Achieving Opacity
Once the first coat is dry, it’s time to build up the color and achieve that opaque, glass-like finish.
- Flip and Repeat: Carefully turn the pumpkins upside down (or to an unpainted side if you used an elevated stand).
- Apply Another Light Coat: Repeat the same light, even spraying technique. Pay attention to any areas you might have missed during the first pass.
- Check for Coverage: After this second coat, assess the coverage. For most pumpkins, two to three light coats will be sufficient to achieve a fully opaque, bright white finish that mimics milk glass. If you still see the original color peeking through, allow this coat to dry and apply a third light coat.
- Preventing Drips: If you notice any paint starting to drip, stop spraying that area immediately. Do not try to wipe it while wet; let it dry, and you can gently sand it down later if necessary before applying another light coat. The key is multiple thin layers, not one thick one.
Step 5: Final Cure – The Finishing Touch
Even after the paint is dry to the touch, it needs time to fully cure and harden. This is crucial for durability.
Allow your faux milk glass pumpkins to cure for at least 24-48 hours in a well-ventilated area before handling them extensively or placing them in your final display. This ensures the paint is completely set, preventing scratches, smudges, and fingerprints.
Styling Your Faux Milk Glass Pumpkins
Once your pumpkins are dry and cured, the fun of decorating begins! Their neutral elegance makes them incredibly versatile for styling.
- Chic Centerpieces: Arrange a collection of varying sized faux milk glass pumpkins in the center of your dining table or coffee table. Enhance the display with metallic accents (gold or silver candles), natural elements like pinecones or fresh greenery, or even simple white floral arrangements.
- Elegant Vignettes: Create curated displays on mantels, shelves, or console tables. Group the pumpkins with antique books, framed photos, small white ceramic vases, or other vintage-inspired decorative objects.
- Entryway Welcome: Place them in your entryway alongside a decorative mirror, a beautiful plant, and a scented candle to create a welcoming and stylish first impression for guests.
- Seasonal Transitions:
- Fall: Pair them with deep green eucalyptus, burlap, twine, or natural wood elements.
- Thanksgiving: Integrate them into a tablescape with rich autumn colors like deep reds, oranges, and browns through linens or small floral arrangements.
- Winter/Christmas: Mix them with silver or gold ornaments, frosted branches, faux snow, or sparkling fairy lights for a magical winter wonderland feel. Add small sprigs of holly or red berries for a festive touch.
- Beyond Pumpkins: The same technique can be applied to other inexpensive decor items like ceramic vases, glass jars, or even plastic fruits for a cohesive, elegant white collection throughout your home.
Troubleshooting and Tips for Success
While this is an easy project, keeping a few tips in mind can ensure the best results:
- Preventing Drips: Always use multiple light coats rather than one heavy one. If a drip occurs, let it dry completely, then you can gently sand it with fine-grit sandpaper and reapply a very light coat.
- Achieving Smoothness: Ensure your pumpkins are clean before painting. Shake the paint can thoroughly. Apply paint in consistent, sweeping motions from the recommended distance.
- Uneven Coverage: If the coverage is uneven, it might be due to not shaking the can enough or inconsistent spraying. Allow drying, then apply another light, even coat.
- Paint Adhesion: Using a paint + primer combo is crucial. If you notice the paint not adhering well, it might be a very slick plastic surface; a very light sanding with fine-grit sandpaper (to create a slight ‘tooth’) before the primer/paint can help.
- Safety First: Never underestimate the importance of ventilation and protective gear. Spray paint fumes can be harmful.
Elevate Your Home with DIY Elegance
Creating your own faux milk glass pumpkins is a delightful and rewarding DIY project that brings sophisticated charm to your home decor. Their timeless elegance and incredible versatility make them a smart choice for seasonal decorating, allowing you to create beautiful displays that transition effortlessly from late summer through the holidays. With just a few simple materials and a bit of creativity, you can transform ordinary pumpkins into stunning, antique-inspired pieces that will be admired for seasons to come. Embrace the satisfaction of crafting beautiful decor by hand and infuse your living space with this classic, refined aesthetic. Happy crafting!