
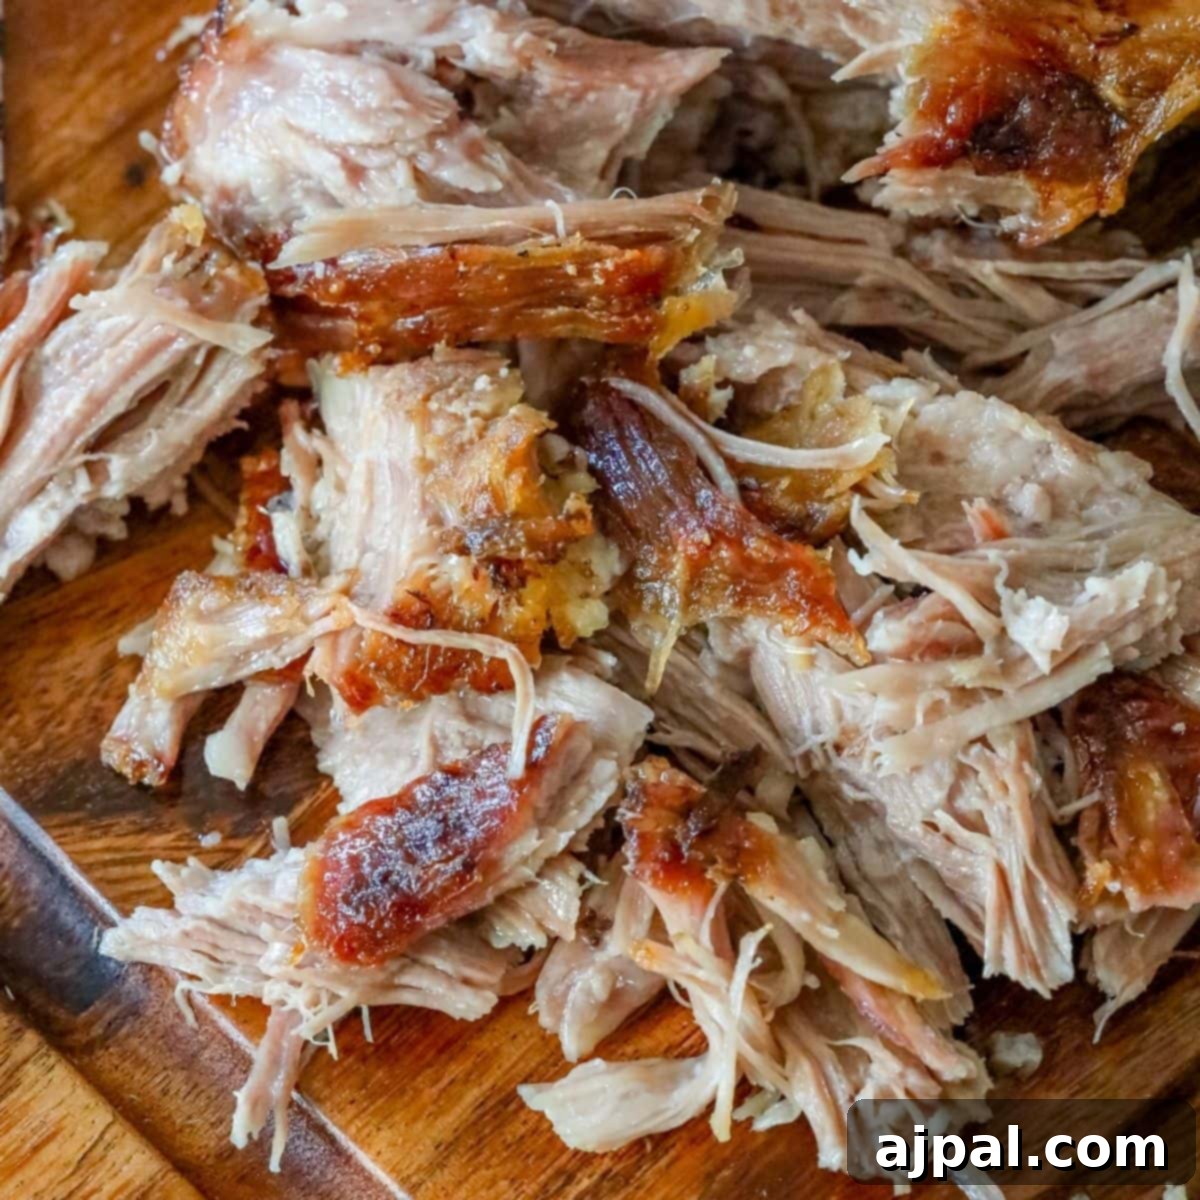
Craving tender, juicy pulled pork with an irresistibly crispy, crunchy skin, but don’t have a smoker or a sunny day for barbecue? This incredible Crispy Baked Pork Shoulder recipe is your ultimate solution! Designed for delicious results right from your oven, it delivers all the crave-worthy flavor and texture you desire, without the fuss of outdoor smoking. This method has quickly become a household favorite, proving that you don’t need fancy equipment to achieve spectacular pulled pork with that coveted crispy finish.
Prepare to elevate your pulled pork experience to new heights. We’re not just slow-cooking pork; we’re crafting a culinary masterpiece with a succulent, shreddable interior enveloped by a deeply flavorful, crispy crust. This contrast of textures is what makes this baked pork shoulder truly stand out, promising a taste sensation that’s both comforting and exciting.
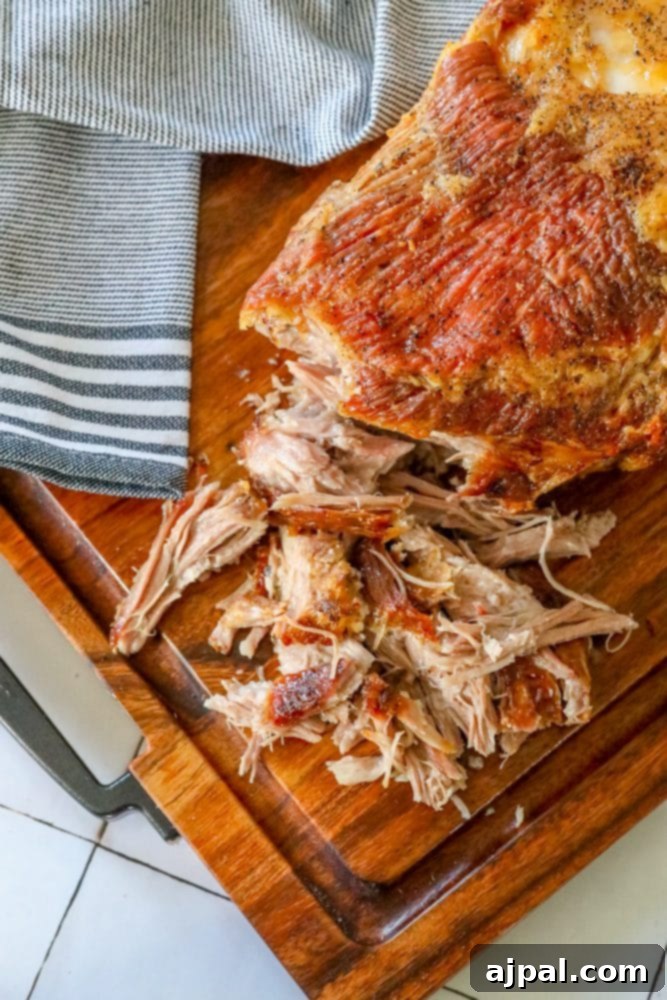
We understand that navigating recipes online can sometimes be challenging. To make your cooking journey as smooth as possible, we’ve organized this guide with clear headings and a comprehensive table of contents below. Feel free to jump to any section that interests you most, whether you’re looking for ingredients, step-by-step instructions, or expert tips.
Table of Contents
- How to Make Crispy Baked Pork Shoulder
- Essential Ingredients for Crispy Pulled Pork
- Step-by-Step Baking Method
- Rest & Shred for Perfection
- Mastering Crunchy Pork Shoulder: Tips and Tricks
- FAQ About Crispy Baked Pork
- What to Serve With Crunchy Baked Pork Shoulder
- More Delicious Pork Recipes
How to Make Crispy Baked Pork Shoulder
When preparing pork shoulder, the traditional wisdom almost always points to a “slow and low” cooking approach. This method, often associated with smoking, aims to break down tough connective tissues, render fat, and transform the meat into an incredibly tender, fall-apart texture perfect for shredding. Our Crispy Baked Pork Shoulder recipe embraces this fundamental principle but adds a crucial, final step that sets it apart: an intense high-heat blast to create that signature, irresistible crispy skin.
Essential Ingredients for Crispy Pulled Pork
Crafting the perfect crispy baked pork shoulder requires just a few key ingredients. While the core seasonings are simple, don’t underestimate their power in building a rich flavor profile and an incredible crust:
- Pork Shoulder: Opt for a well-marbled cut, ideally with a good layer of skin and fat cap. This is crucial for developing both the tender, juicy interior and the coveted crispy exterior. A Boston butt, which is part of the pork shoulder, also works wonderfully.
- Celtic Sea Salt or Kosher Salt: Essential for seasoning the meat deeply and helping to draw out moisture from the skin, which promotes crisping. Its coarse texture also helps form a great crust.
- Fresh Cracked Black Pepper: Adds a pungent, earthy heat and a textural element that perfectly complements the rich pork.
- Garlic Powder (Optional but Recommended): Imparts a savory depth and a mild, roasted flavor that enhances the overall taste profile of the pork.
- Adobo Seasoning (Optional): A versatile, bold blend often featuring garlic, oregano, and pepper. It introduces a tangy, smoky, and slightly citrusy complexity, contributing to a more dynamic flavor.
- Smoked Paprika (Optional): Brings a hint of sweetness and a deep, smoky aroma, intensifying the flavors of the outer crust and giving it a beautiful reddish hue.
Step-by-Step Baking Method
While this recipe might seem lengthy with its approximately 8-hour cooking time, the active preparation is surprisingly minimal. Most of the time is hands-off, allowing your oven to do the heavy lifting in transforming the pork into a tender and crispy delight. Follow these simple steps for perfect results:
Preparation
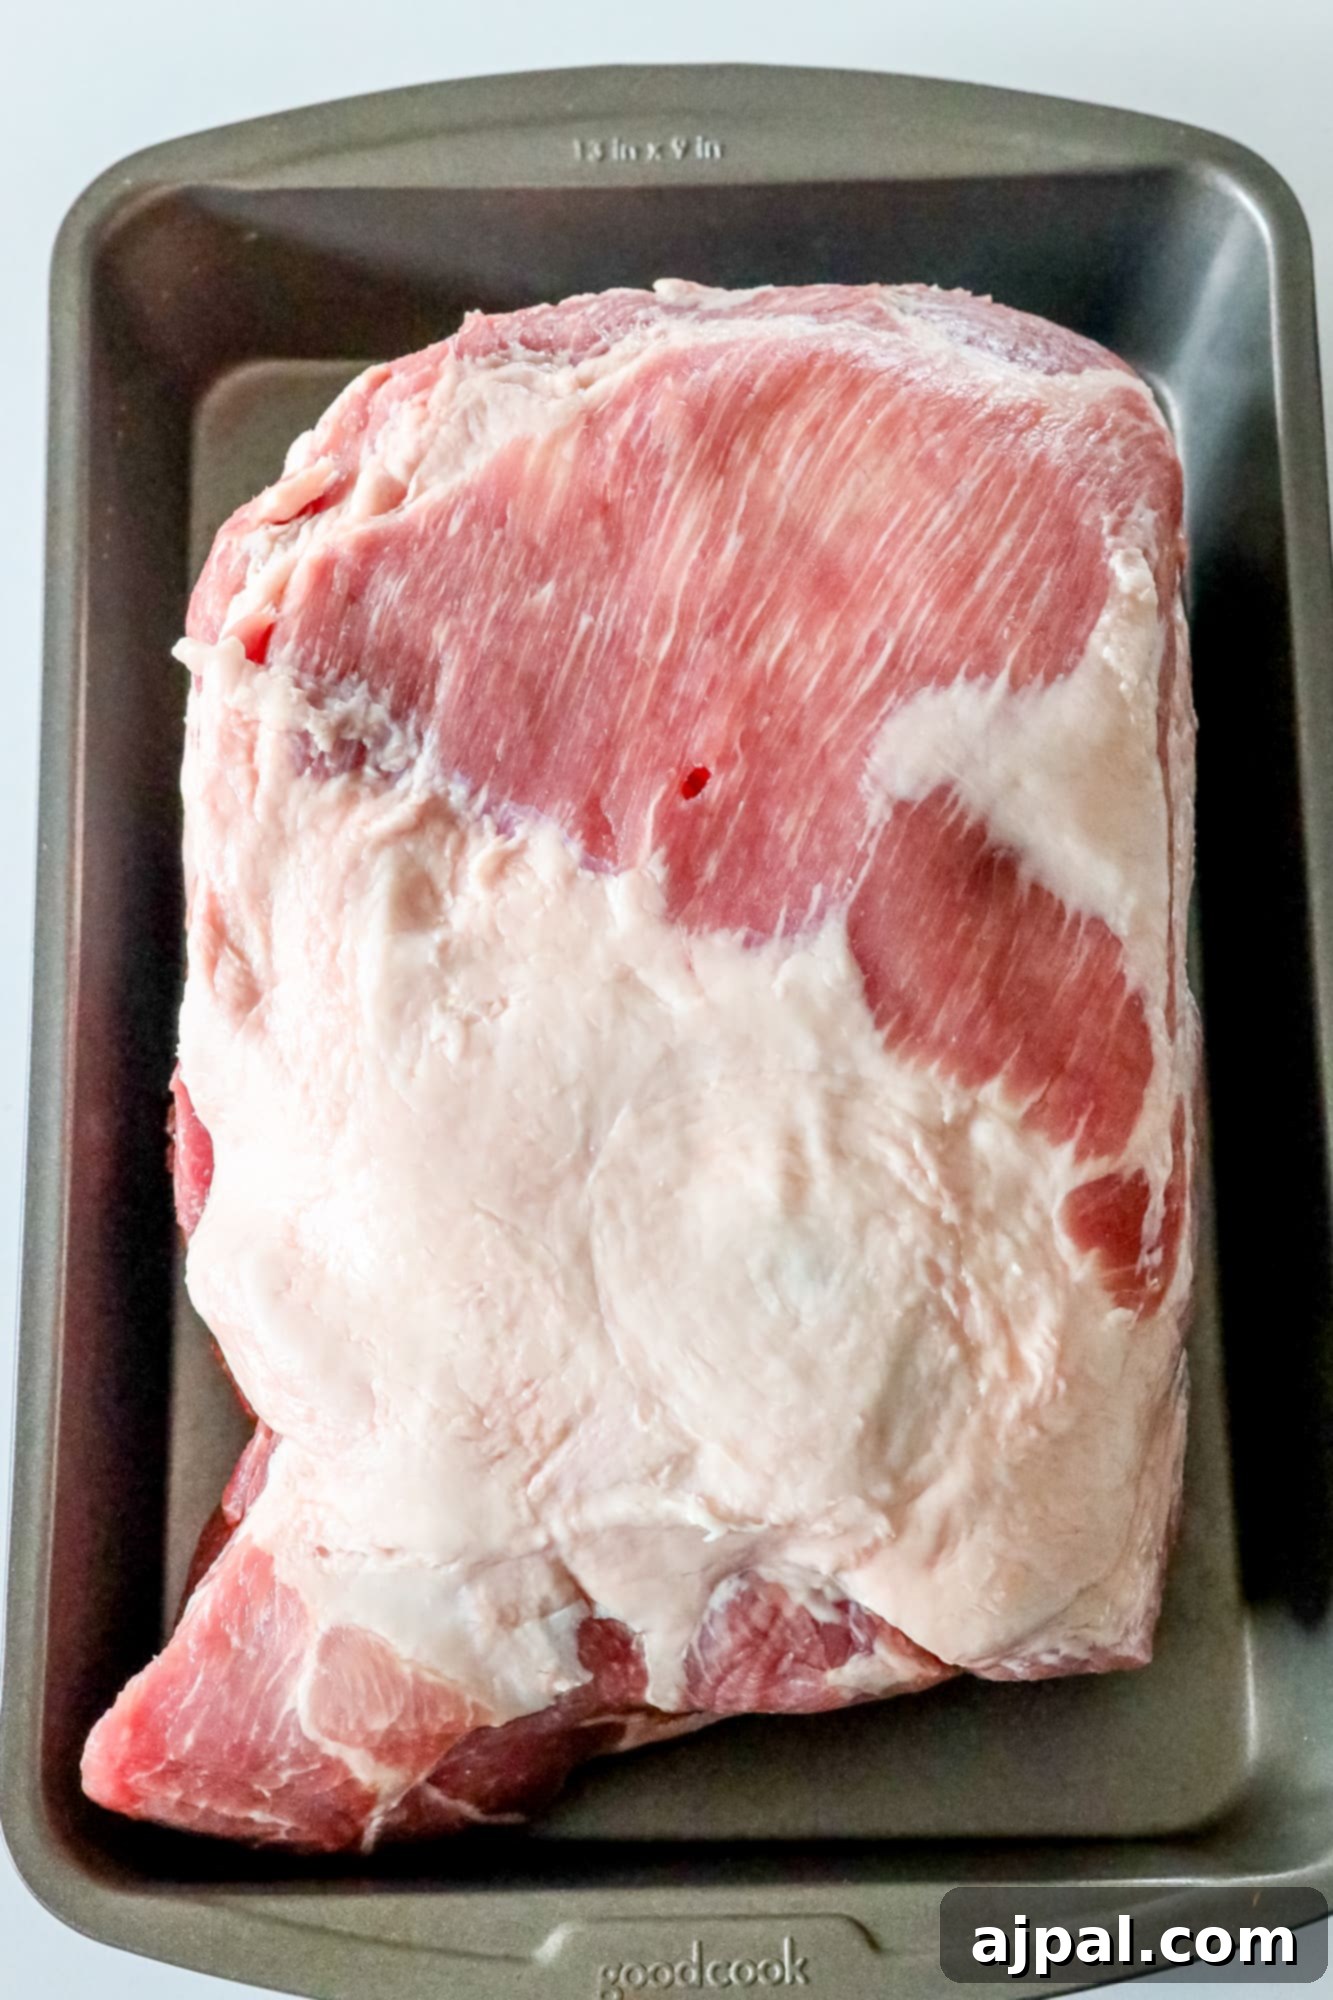
Position your oven rack in the middle of the oven and preheat to a low 250 degrees Fahrenheit (120°C). Line a sturdy baking sheet or roasting pan with aluminum foil for easier cleanup. Place a wire cooling rack or a roasting rack directly over the foil-lined pan. This setup is crucial, as it allows air to circulate around the pork, ensuring even cooking and aiding in the crisping process.
Seasoning the Pork
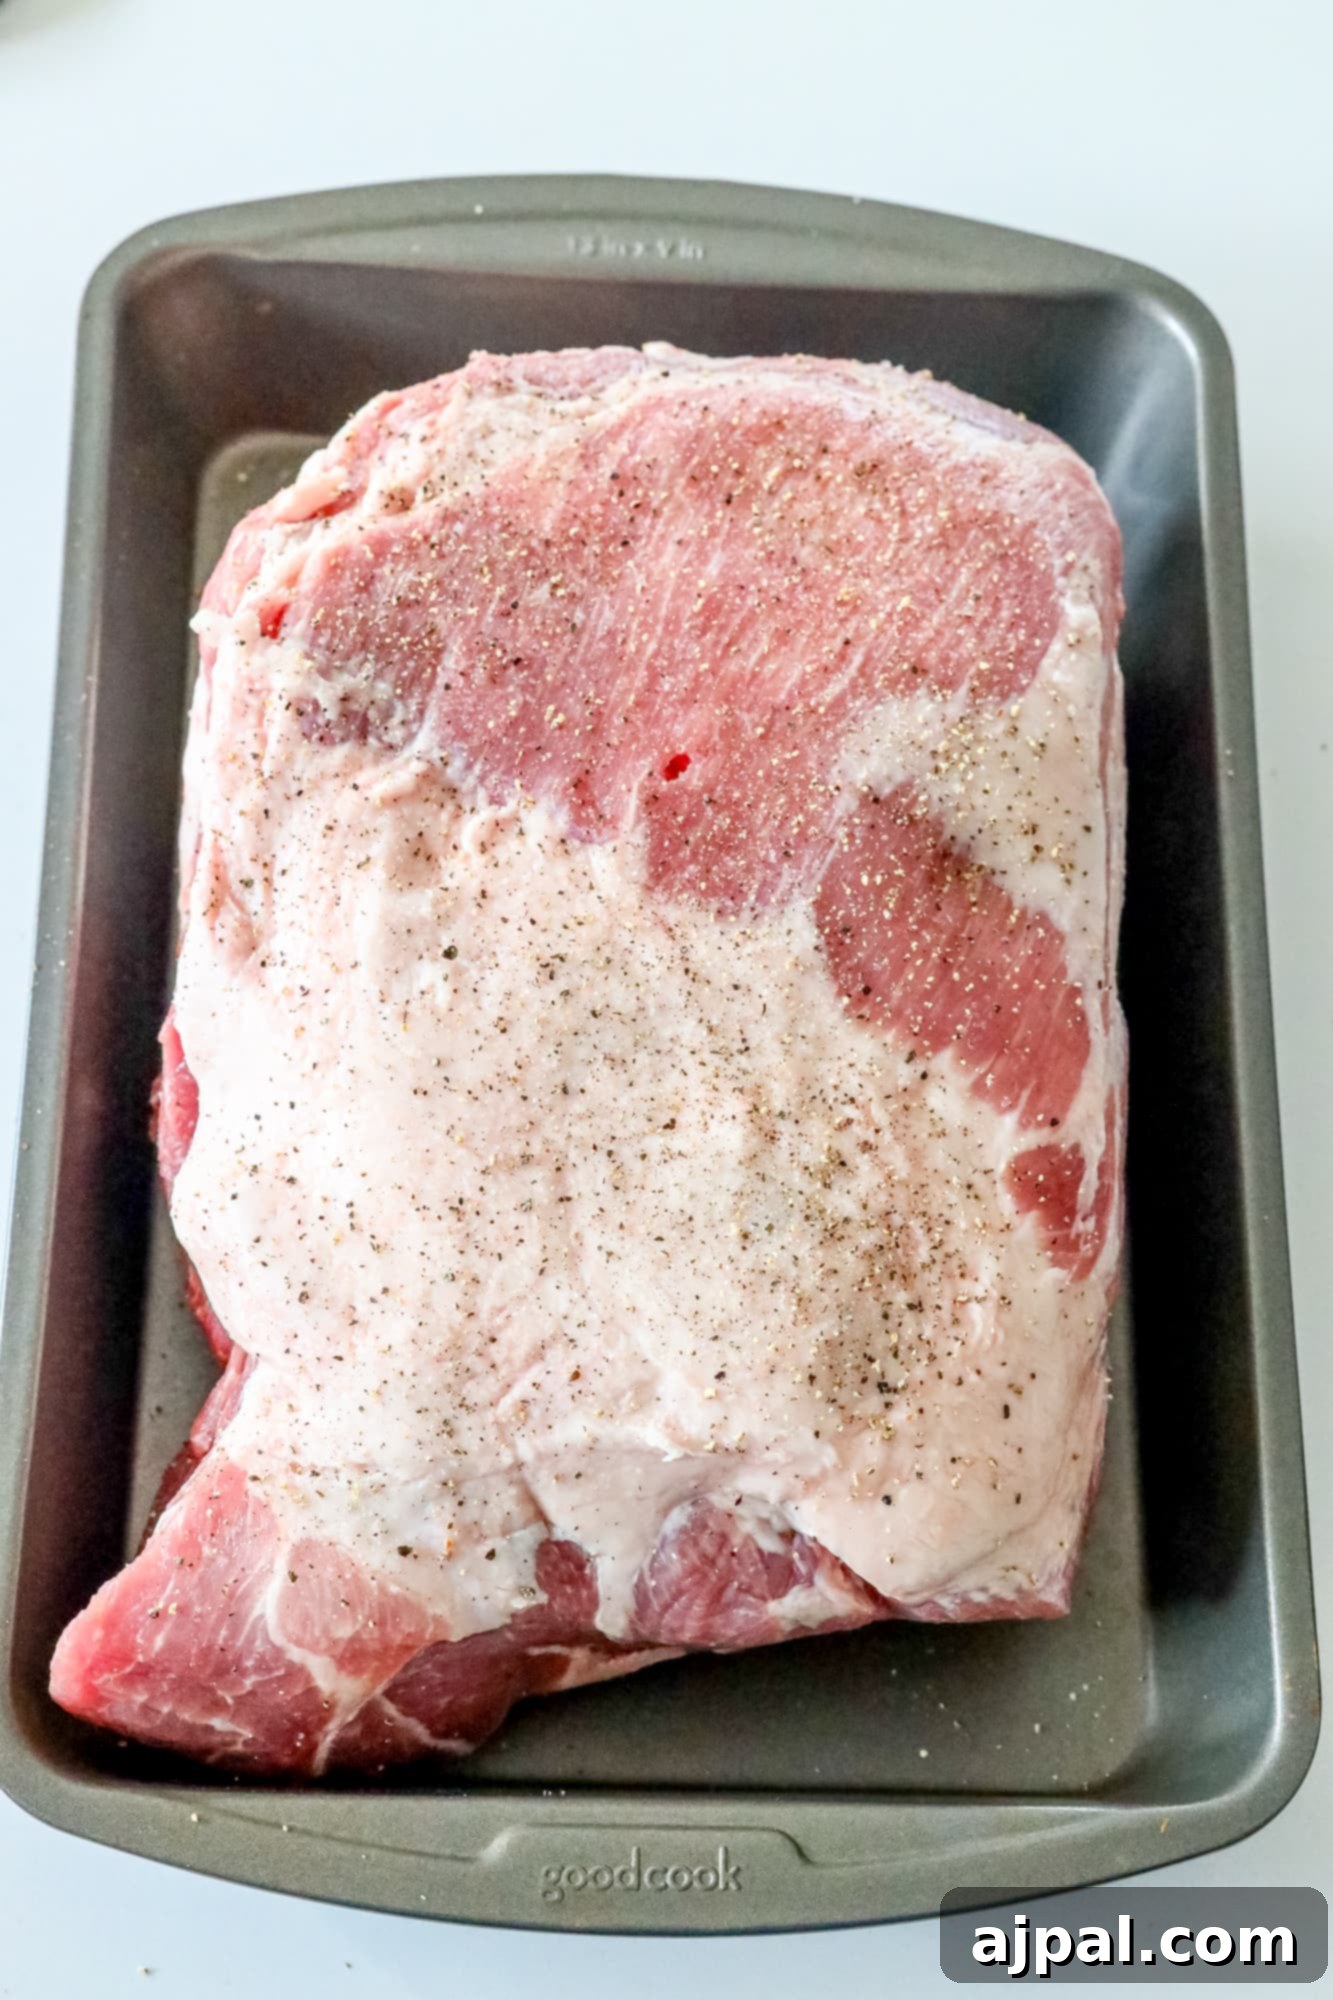
Before seasoning, pat the pork shoulder thoroughly dry with paper towels. This step is vital for achieving a crisp crust. Liberally season the entire surface of the pork with salt, pepper, and your chosen optional spices like garlic powder, adobo seasoning, and smoked paprika. Don’t be shy with the seasoning; it forms the foundation of the flavorful crust. Massage the spices into every crevice, ensuring comprehensive coverage.
Slow & Low Roasting
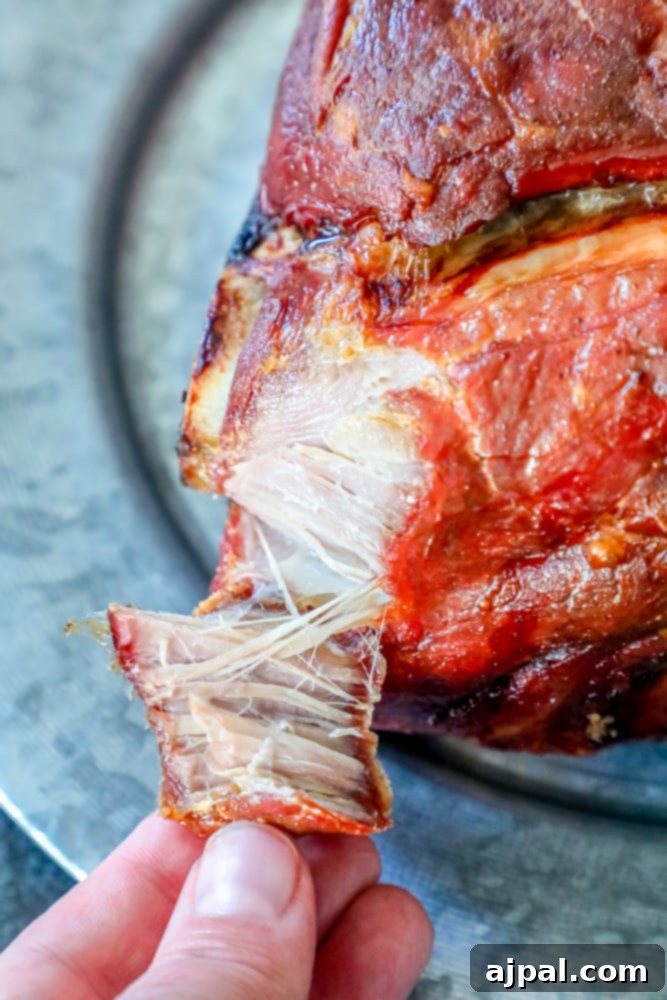
Carefully place the seasoned pork shoulder onto the wire rack in your preheated oven. Allow it to roast undisturbed for approximately 8 hours. The goal here is not speed, but patience. The low temperature and extended cooking time will slowly break down the tough connective tissues and render the fat, resulting in incredibly tender meat that can be easily pulled or shredded with gentle pressure from a fork. You’ll know it’s ready when the meat practically falls apart.
Achieving the Crispy Skin
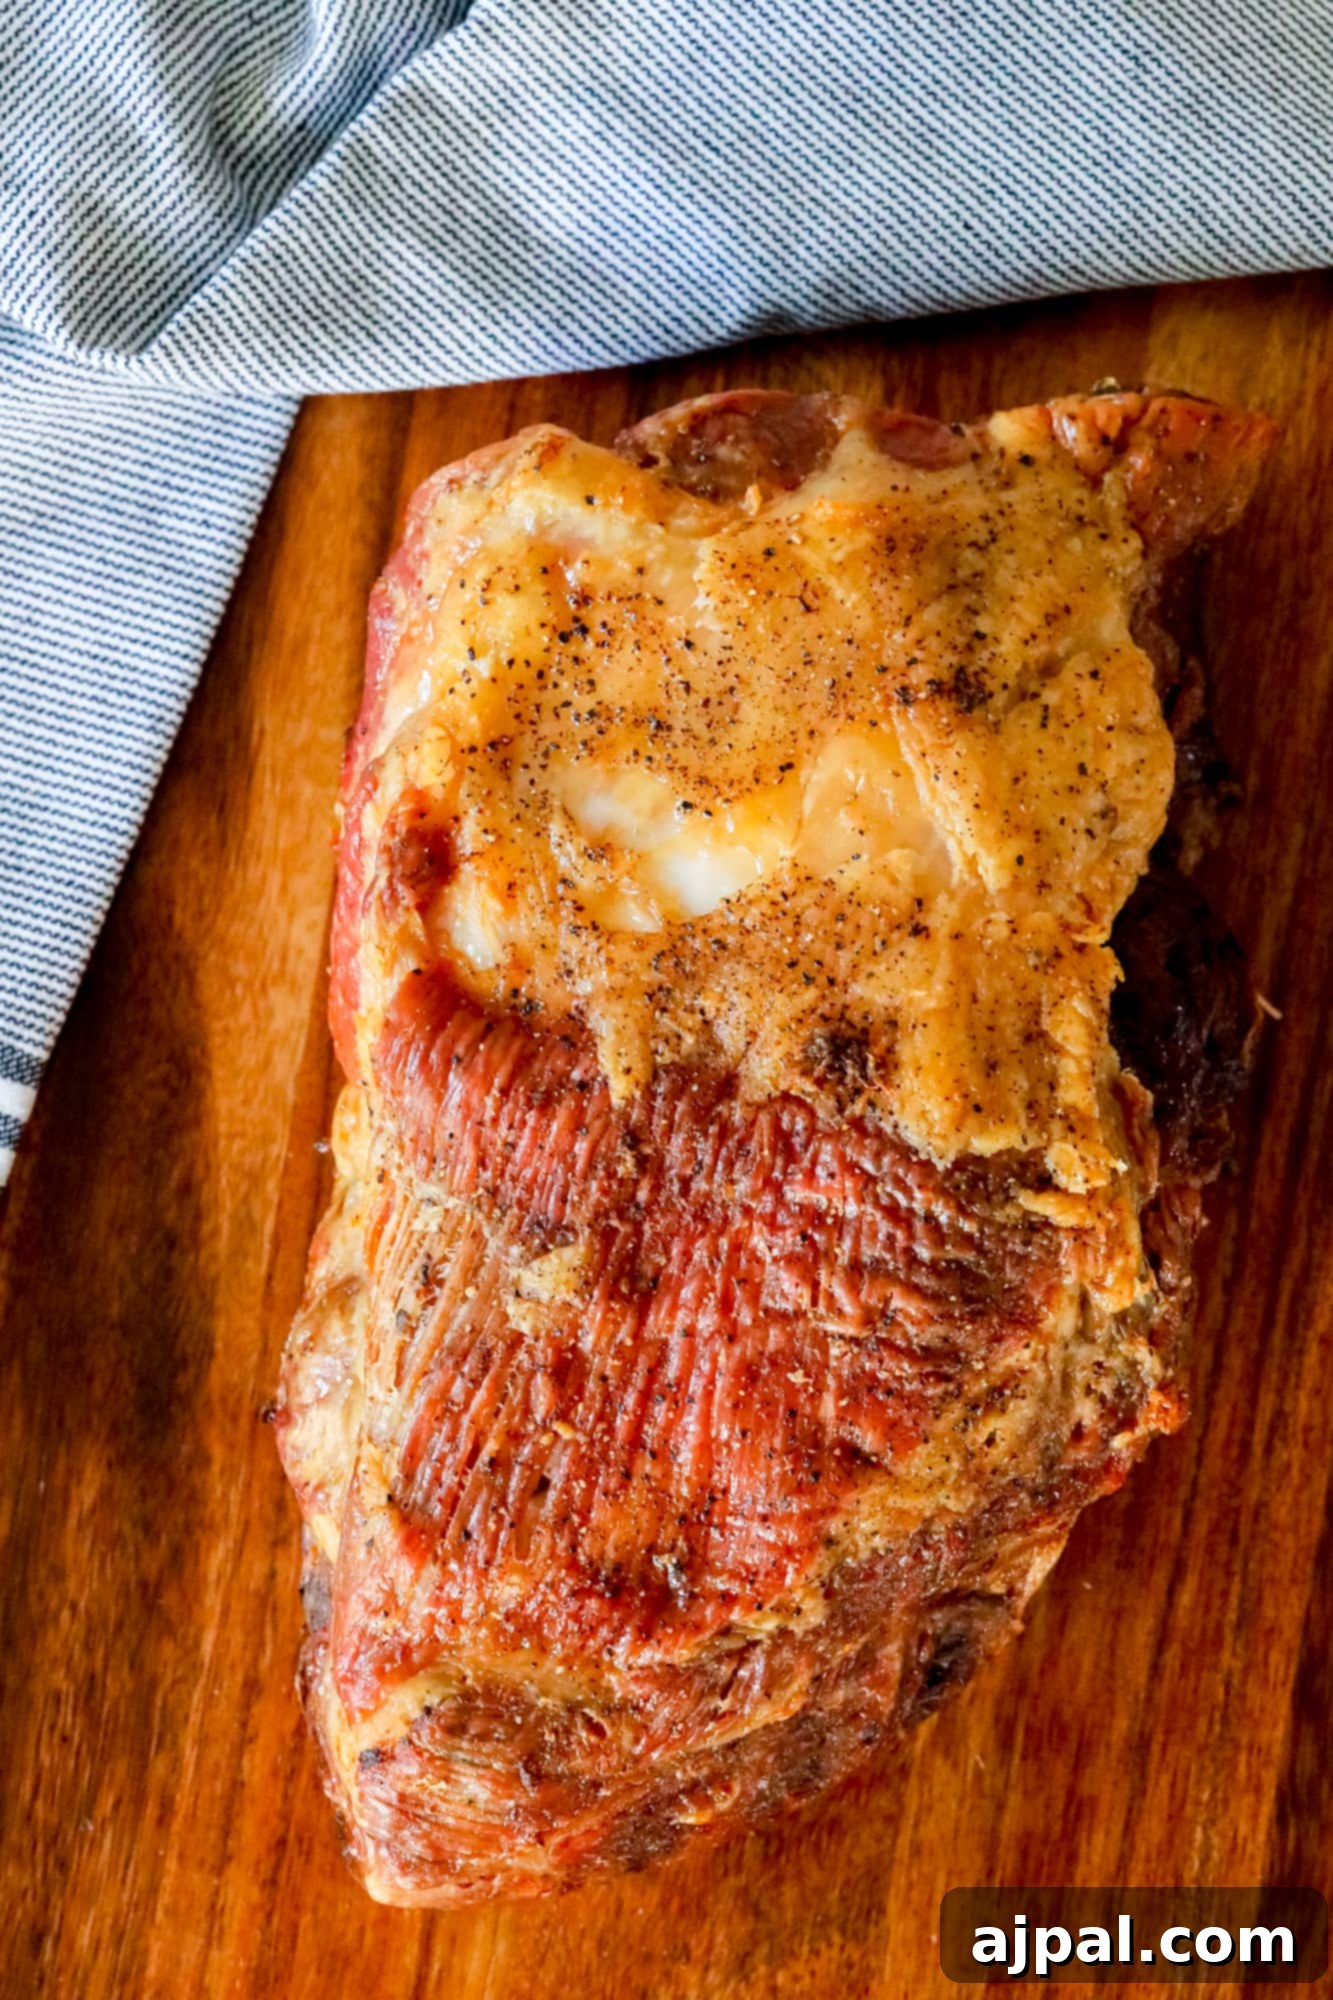
Once the pork is fork-tender, remove it from the oven and set it aside. While it rests briefly, increase your oven temperature dramatically to 500 degrees F (260°C). Allow the oven to fully preheat to this high temperature – this is critical for achieving a blistered, crispy skin. Once hot, return the pork to the oven. Monitor it closely, rotating the pork shoulder every five minutes or so to ensure an even crisp and blistered texture around all sides. This high-heat blast typically takes about 20-30 minutes.
Rest & Shred for Perfection
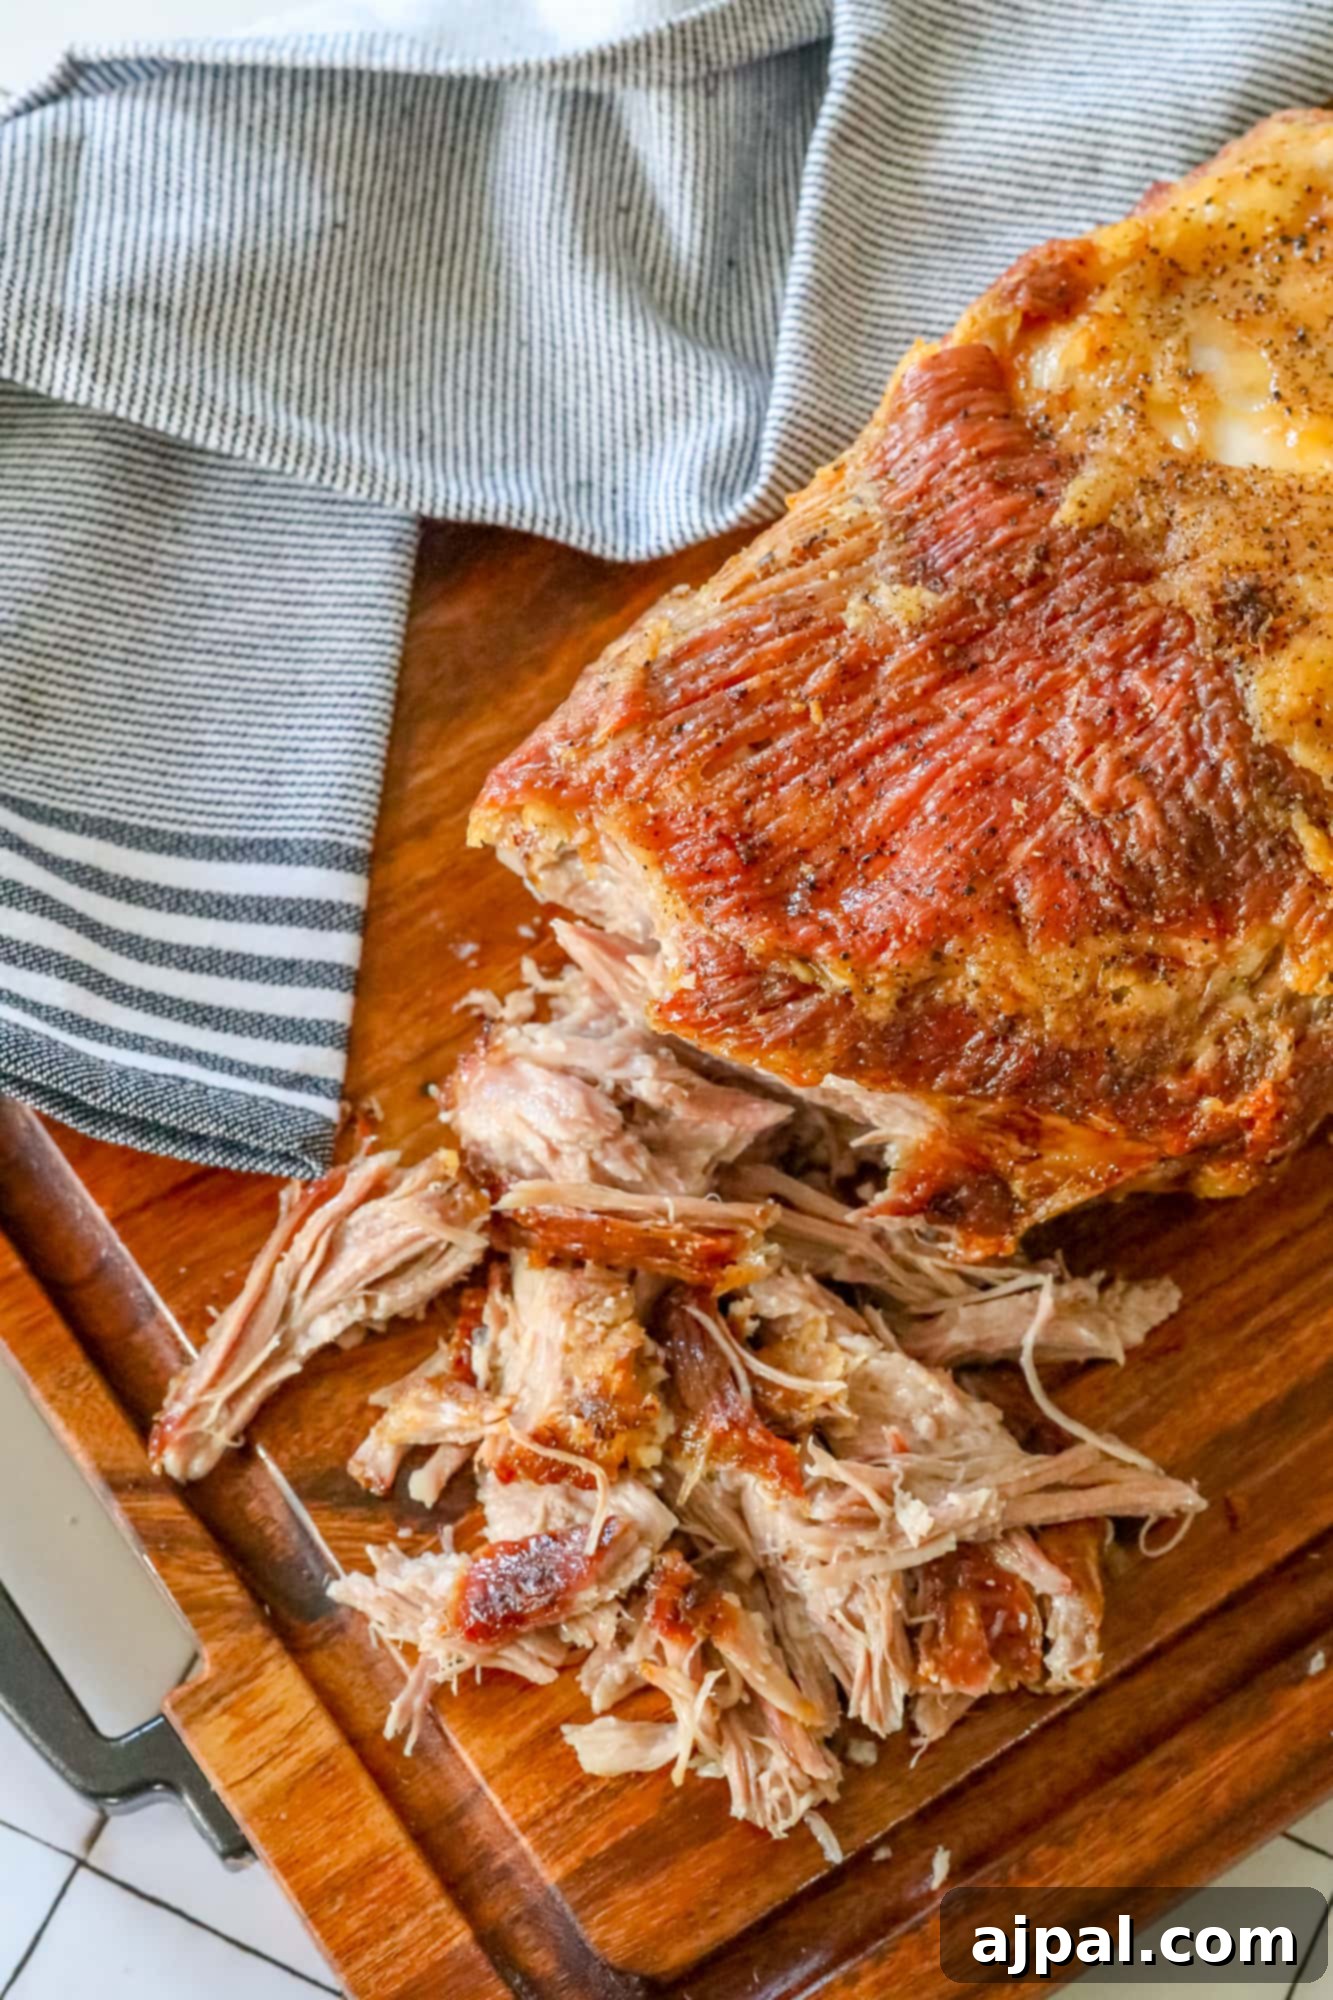
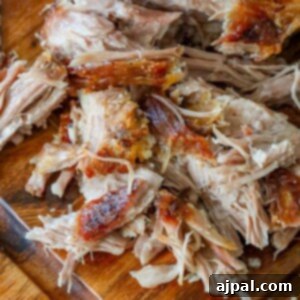
When the pork skin has reached your desired level of crispiness and golden-brown perfection, remove the pork shoulder from the oven. Tent it loosely with aluminum foil and let it rest for at least 20 minutes. This resting period is crucial; it allows the juices to redistribute throughout the meat, ensuring every bite is incredibly moist and flavorful. After resting, use two forks or a pair of meat claws to shred, pick, or pull the tender pork meat. Combine some of the crispy skin pieces with the shredded pork for the ultimate texture combination. Serve immediately and enjoy!
Mastering Crunchy Pork Shoulder: Tips and Tricks
Achieving the perfect crispy baked pork shoulder involves a few key techniques and considerations. Here are some in-depth tips and tricks to ensure your pulled pork is a resounding success every time:
Choosing the Right Cut: Pork Shoulder vs. Pork Butt
While often used interchangeably for pulled pork, “pork shoulder” and “pork butt” (also known as Boston butt) are distinct cuts, both originating from the shoulder area of the pig, not the rear. The pork butt comes from the upper part of the front shoulder, offering excellent marbling and an ideal fat-to-meat ratio, making it incredibly tender and flavorful when slow-cooked. Pork shoulder, or picnic shoulder, is from slightly lower down the leg and typically includes more of the skin and bone. For this specific recipe, we highly recommend using a cut that includes the skin and a generous fat cap, as this is precisely what allows us to develop that sought-after crispy, crunchy exterior that truly elevates this dish. While pork butt works well for tender pulled pork, opting for a pork shoulder with skin will yield the best crispy results.
Preparing Your Pork Shoulder for Success
Proper preparation is paramount for both tenderness and crispiness. Begin by patting your pork shoulder completely dry with paper towels. Any excess moisture on the surface, especially on the skin, will hinder the crisping process. If your pork shoulder has a very thick fat cap, you may want to score it lightly in a crosshatch pattern (without cutting into the meat) to help the fat render more efficiently and allow seasonings to penetrate better, leading to an even crispier finish.
The Art of Slow Roasting for Ultimate Tenderness
The lengthy slow roast at 250°F (120°C) is where the magic of tenderness happens. This low temperature gradually breaks down collagen and connective tissues into gelatin, transforming a tough cut into meltingly tender meat. You’ll know the pork is done when it registers an internal temperature of around 195-205°F (90-96°C) when checked with a meat thermometer in the thickest part. More importantly, it should be “fork-tender,” meaning a fork inserted into the meat should twist easily with minimal resistance, and the meat should almost fall off the bone (if bone-in). Don’t rush this stage; patience is rewarded with superior texture.
Mastering the Crispy Skin
The final high-heat crisping stage is what defines this recipe. After the long roast, remove the pork and increase your oven to 500°F (260°C). Return the pork to the extremely hot oven for 20-30 minutes. The intense heat will quickly render any remaining fat in the skin, causing it to puff up and become incredibly crisp and golden. Rotate the pork every 5-7 minutes to ensure even crisping and prevent burning. Watch it carefully, as ovens can vary, and the skin can go from perfectly crisp to burnt very quickly.
Essential Kitchen Tools
You don’t need a gourmet kitchen for this recipe, but a few basic tools will make the process much smoother:
- Roasting Pan or Baking Sheet: A sturdy, oven-safe pan is essential for holding the pork and collecting rendered fat.
- Wire Roasting Rack: Critical for elevating the pork above the pan, allowing air to circulate and ensuring the bottom of the pork crisps as well as the top.
- Aluminum Foil: For lining the pan (for easy cleanup) and tenting the pork during resting.
- Meat Thermometer: While fork-tenderness is key, a thermometer provides reassurance regarding doneness.
- Meat Claws or Two Forks: Indispensable for efficiently shredding the tender pork.
Low-Carb and Keto Considerations
Pork shoulder is naturally a fantastic choice for low-carb and ketogenic diets due to its high fat and protein content and virtually zero carbohydrates. However, it’s crucial to be mindful of added ingredients:
- Seasonings and Rubs: Many commercially prepared pork rubs contain sugar or high-carb fillers. Always check ingredient labels or make your own keto-friendly rub using spices like salt, pepper, garlic powder, onion powder (in moderation, as some contain carbs), smoked paprika, and chili powder.
- Sweeteners: If a recipe calls for brown sugar, substitute with a 1:1 ratio of golden monk fruit sweetener or erythritol to maintain sweetness without the carbs.
- BBQ Sauces: This is where hidden carbs often lurk. Traditional BBQ sauces are typically laden with sugar. Opt for sugar-free or homemade keto-friendly BBQ sauces. Vinegar- and mustard-based sauces are often lower in carbs, as is Alabama white sauce.
FAQ About Crispy Baked Pork
For food safety, pork shoulder is technically safe to eat when it reaches an internal temperature of 145°F (63°C). However, for pulled pork, you’ll want to cook it much longer, typically until it reaches an internal temperature between 195-205°F (90-96°C). At this temperature, the connective tissues have broken down sufficiently, making the meat incredibly tender and easy to shred. We primarily rely on the “fork-tender” test for this recipe rather than just temperature for optimal texture.
Absolutely! Given the long cooking time, pre-cooking the pork shoulder can be a huge time-saver. You can roast the pork for 5-6 hours the day before, then cool it, wrap it tightly in foil, and refrigerate. On the day you plan to serve, let it come closer to room temperature for about an hour (or add an extra 30-40 minutes to the roasting time if cooking directly from the fridge) before finishing the slow roast and then proceeding with the high-heat crisping step. It will turn out perfectly juicy and crispy.
For this specific crispy skin pulled pork recipe, a pork shoulder (or picnic shoulder) with its skin and a good fat cap is ideal. The skin is essential for achieving that glorious crispy crunch. While a boneless pork butt will yield fantastic tender pulled pork, it won’t give you the same crispy skin experience unless you add pork belly or crackling separately. If using a pork butt, be aware that it might cook slightly faster due to its typically smaller size and less bone.
Store any leftover shredded pork in an airtight container or a sealed plastic bag in the refrigerator for up to 3-4 days. For longer storage, it can be frozen for up to 3-4 months. To reheat, the best method for maintaining some crispiness is to spread the pork (including any crispy bits) on a baking sheet and reheat in a preheated oven at 350°F (175°C) until warmed through and the skin crisps up again. You can also reheat in a skillet or microwave, but the crispy texture may be diminished.
What to Serve With Crunchy Baked Pork Shoulder
This incredibly flavorful and crunchy baked pork shoulder is versatile and pairs wonderfully with a wide array of side dishes. Whether you’re planning a casual family dinner or a festive gathering, here are some ideas to complete your meal:
Classic BBQ Pairings
For a traditional pulled pork experience, serve the shredded pork on soft buns with your favorite BBQ sauce. Add classic sides like:
- Creamy Coleslaw: The cool, crunchy tang of coleslaw perfectly balances the richness of the pork.
- Macaroni Salad: A creamy, satisfying side that’s always a crowd-pleaser.
- Baked Beans: Sweet and savory, baked beans are a quintessential BBQ accompaniment.
- Cornbread: Ideal for soaking up all the delicious juices.
- Crispy French Fries: For an extra dose of satisfying crunch.
Creative Pulled Pork Sandwiches
Elevate your pulled pork sandwiches with these exciting topping combinations:
- Korean BBQ Style: Toss the pulled pork with a savory Korean BBQ sauce and top with kimchi or a vibrant Asian slaw for a sweet, spicy, and tangy kick.
- Spicy Enchilada Twist: Combine the shredded pork with green chili enchilada sauce, then pile it onto buns and top with Monterey Jack cheese, shredded lettuce, and sliced jalapeños for a delightful Mexican-inspired sandwich.
- Classic American Deluxe: Mix the pork with your favorite BBQ sauce, then add crispy fried onion strings, crisp iceberg lettuce, and a fresh slice of tomato for a hearty and satisfying bite.
Beyond the Sandwich: Innovative Serving Ideas
Pulled pork isn’t just for sandwiches! Get creative with these delicious meal ideas:
- Pulled Pork Hash: Sauté hash browns with diced onions and bell peppers, then combine with shredded pulled pork. Pan-fry until crispy for a hearty breakfast skillet. Top with a fried egg for an ultimate brunch experience.
- Loaded Mac and Cheese: Transform a classic comfort dish by topping a creamy, cheesy macaroni and cheese with a generous portion of shredded pulled pork.
- Pulled Pork Tacos or Nachos: Use the flavorful pork as a filling for tacos or a topping for nachos. Add hot sauce, salsa, black beans, corn, and plenty of cheese for a vibrant, shareable dish.
- Pulled Pork Stuffed Potatoes: Bake large potatoes until fluffy, then load them with pulled pork, sour cream, cheese, and chives for a complete meal.
Suggested Side Dishes from Our Kitchen
Here are some of our favorite side dishes that perfectly complement this crunchy pulled pork:
- The Best Deviled Egg Recipes Ever
- Blistered Shishito Peppers
- The Best Creamy Broccoli Cauliflower Salad Recipe
- Easy Jalapeno Cheddar Bread
- The Best Easy Oven Roasted Asparagus Recipe
- Easy Sautéed Squash and Zucchini Recipe
- The Best Easy Keto Garlic Butter Rolls Recipe
- Restaurant Style Instant Pot Pinto Beans
- Brown Butter Bacon Baked Brussels Sprouts Recipe
More Delicious Pork Recipes
If you’re a fan of succulent pork dishes, you might also love our Green Chile Pork Carnitas. They’re perfect in tacos and also fit perfectly into a low-carb and keto lifestyle!
Explore More Recipes
Easy Macaroni Salad Recipe
The Best Easy Coleslaw – Just 4 Ingredients
Homemade French Fries in Air Fryer
Easy Bacon Sriracha Deviled Eggs Recipe
We hope you thoroughly enjoy creating and savoring this fantastic Crispy Baked Pork Shoulder recipe. If you love it as much as we do, please consider leaving a five-star review and sharing your culinary creations on social media by tagging us and using #sweetcsdesigns!
Only have 30 minutes to get dinner on the table? Sign up for our 30-minute dinner plans direct to your inbox!
Find and shop my favorite products in my Amazon storefront here!
The Best Crispy Baked Pork Shoulder
Servings: 12
Cook: 8 hrs
Additional Time: 20 mins
Total: 8 hrs 30 mins
Equipment
- All-Clad HA1 Hard Anodized Nonstick Roaster Cookware
- Loisa Adobo Seasoning
Ingredients
- 1 pork shoulder, 8-10 pounds
- 1 tsp fresh cracked pepper
- 1 tsp sea salt
- 1 tsp garlic powder
- 1 tsp adobo seasonings
- 1 tsp smoked paprika
Instructions
- With the oven rack in the middle of the oven, preheat oven to 250 degrees F (120°C).
- Line a baking sheet or roasting pan with foil.
- Set a wire cooling rack or roasting rack over the foil-lined baking sheet or roasting pan.
- Season pork liberally with salt, pepper, garlic powder, adobo seasonings, and paprika. Ensure the entire surface is covered.
- Place the seasoned pork on the rack and put it in the oven.
- Roast until the meat can be easily pulled by gently twisting with a fork when inserted into the pork shoulder, about 8 hours.
- Remove pork from the oven and tent with foil. Let it rest for at least 20 minutes, or up to two hours if prepping ahead of a party.
- Preheat oven to 500 degrees F (260°C).
- Let the oven fully preheat. This high temperature is crucial for crisping.
- Add the pork to the oven and let the skin puff and get crispy. Rotate every five minutes to ensure an even blister around the pork shoulder.
- When the pork is crunchy on all sides, after about 20 minutes, remove from the oven, tent with foil, and let rest for 20 minutes.
- Pick, shred, or pull the pork meat, combining some of the crispy skin pieces for texture, and serve immediately.
- Store leftovers in an airtight container or plastic bag for up to six days in the refrigerator, or up to four months in the freezer.
Nutrition
Carbohydrates: 1g
Protein: 5g
Fat: 5g
Saturated Fat: 2g
Polyunsaturated Fat: 3g
Cholesterol: 20mg
Sodium: 408mg
Nutrition information is automatically calculated, so should only be used as an approximation.
Additional Info
Cuisine: American