

Welcome to a recipe that promises to transform your ordinary gatherings into extraordinary feasts with minimal effort: Easy Ham and Cheese Sliders! These incredibly delicious and effortlessly simple sandwiches are a true delight, bursting with a savory blend of mustard, tender ham, and perfectly melted cheese, all baked to golden perfection. If you’re searching for a crowd-pleasing appetizer, a quick weeknight dinner, or the ultimate game-day snack, look no further. These sliders are designed to impress with their irresistible flavor and remarkable ease of preparation.
Don’t want all the extra details in a recipe post? We provide a skip to recipe button in the top left corner, as well as a clickable table of contents, just below, to help make this page easier to navigate.
At our core, we believe that cooking should be an enjoyable and empowering experience for everyone, regardless of their culinary background. As home cooks ourselves, without formal training, we understand the importance of clear explanations and practical insights. That’s why we meticulously add detailed tips and insights to all our recipes – because understanding why a dish works, and what each ingredient contributes to the final flavor, builds confidence in the kitchen. Our ultimate goal is to empower even the most beginner home cook to feel capable and inspired to create delicious meals.
Table of Contents
- Irresistible Easy Ham and Cheese Sliders
- Why These Ham and Cheese Sliders Are a Must-Try
- Key Ingredients for Perfect Ham and Cheese Sliders
- Step-by-Step Guide to Making Ham and Cheese Sliders
- Pro Tips and Tricks for the Best Ham and Cheese Sliders
- Frequently Asked Questions About Ham and Cheese Sliders
- Delicious Sides to Serve with Ham and Cheese Sliders
- Easy Ham and Cheese Sliders Recipe Card
Irresistible Easy Ham and Cheese Sliders
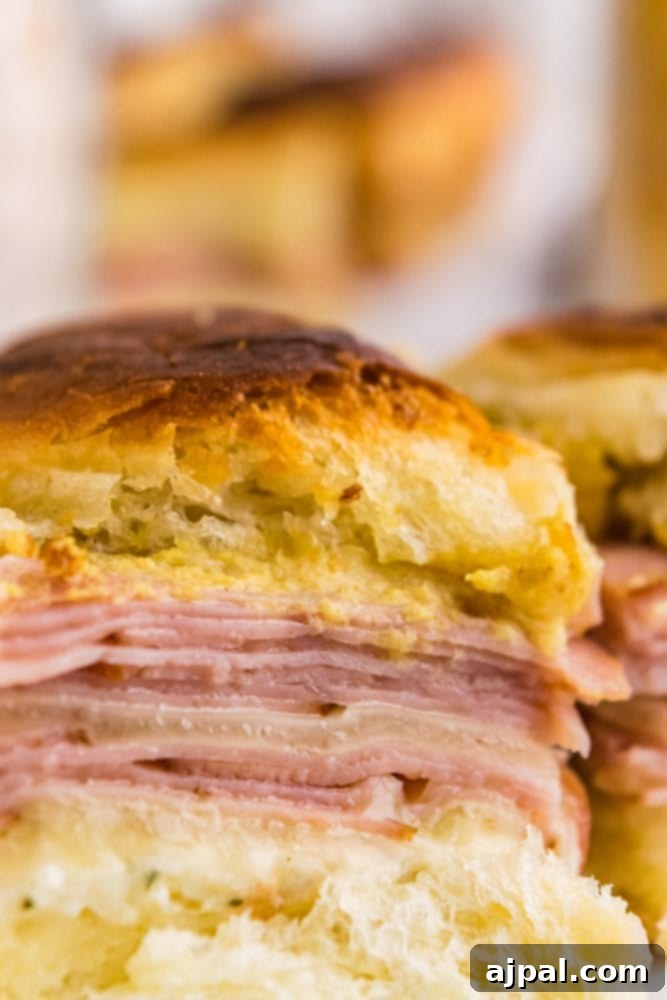
If you’re a fan of classic ham and cheese sandwiches, prepare to fall in love with these baked ham and cheese sliders! They take the simple joy of a sandwich and elevate it into a warm, gooey, and utterly delicious experience that’s perfect for any occasion. These sliders are designed for maximum flavor with minimum fuss, making them an ideal choice for feeding a crowd without spending hours in the kitchen.
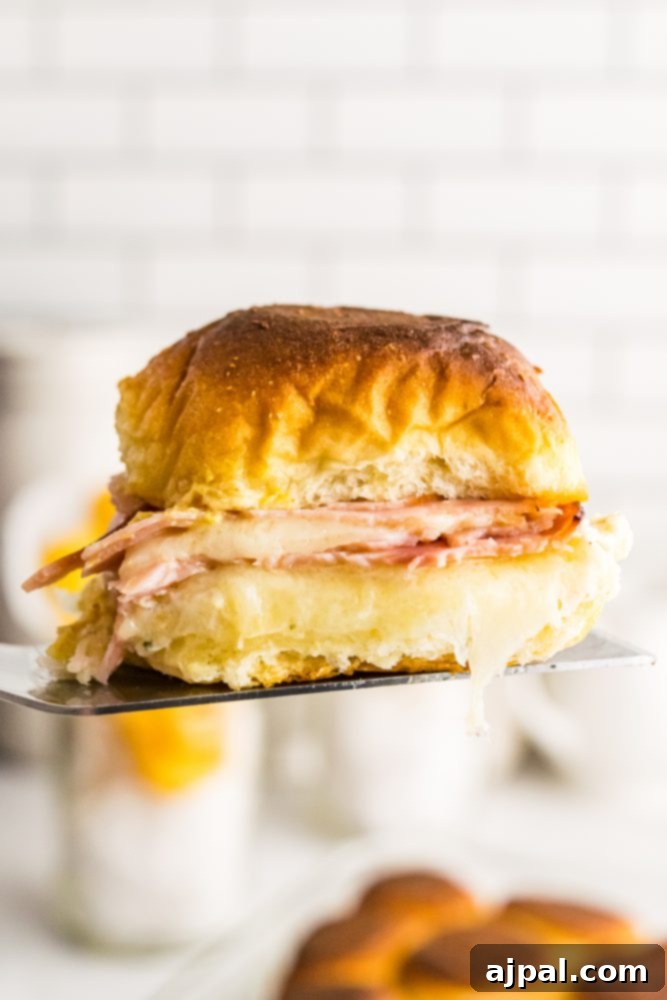
What makes these ham and cheese sliders truly stand out? It’s the harmonious blend of sweet Hawaiian rolls, savory deli ham, a dynamic duo of cheeses, and a tangy mustard-ranch butter sauce that gets baked directly into the buns. This method creates an incredibly moist, flavorful, and visually appealing appetizer or light meal that’s both comforting and exciting. Whether you’re hosting a casual get-together, need a quick family dinner, or looking for a portable lunch, these baked ham and cheese sliders consistently deliver smiles.
Why These Ham and Cheese Sliders Are a Must-Try
Our easy ham and cheese sliders are more than just a recipe; they’re a solution for delicious, stress-free entertaining and everyday meals. Here’s why they deserve a permanent spot in your recipe collection:
- **Effortlessly Simple:** From prep to oven, these sliders come together in a flash. The brilliant technique of slicing the entire block of Hawaiian rolls at once dramatically cuts down on assembly time, making them incredibly convenient for busy schedules.
- **Crowd-Pleasing Flavor:** The combination of sweet, soft rolls, salty ham, two types of melting cheese, and a zesty mustard-ranch butter glaze creates an explosion of flavors and textures that appeals to everyone, from picky eaters to gourmet enthusiasts.
- **Perfect for Any Occasion:** These versatile ham and cheese sliders shine as party appetizers, game-day snacks, easy weeknight dinners, or even a delightful brunch offering. They are hearty enough to satisfy yet light enough not to spoil a meal.
- **Customizable:** While the classic ham and cheese is a winner, this recipe is a fantastic canvas for culinary creativity. Feel free to experiment with different deli meats, cheeses, and spices to tailor them to your taste or what you have on hand. We’ll share some variation ideas later!
- **Irresistibly Cheesy and Buttery:** Baking the sliders ensures that the cheese melts into a gooey, savory layer, while the butter sauce soaks into the rolls, creating a wonderfully moist and tender texture with crispy edges.
We genuinely believe you’ll adore these simple yet spectacular baked ham and cheese sliders as much as our family does. They’re a testament to how simple ingredients can create something truly memorable.
Key Ingredients for Perfect Ham and Cheese Sliders
Crafting these incredible baked ham and cheese sliders begins with selecting the right ingredients. Each component plays a crucial role in building the irresistible flavor and texture that makes this recipe a standout.
- Hawaiian Rolls: The foundation of our sliders! These sweet, soft, and slightly chewy rolls are ideal because they come in a connected block, allowing you to slice them in half all at once. This saves significant time and effort compared to working with individual buns, ensuring a cohesive and easy assembly. Their inherent sweetness also perfectly complements the savory ham and tangy dressing.
- Ranch Dip or Dressing: This ingredient provides a rich, creamy, and savory layer that adds incredible depth. Ranch’s blend of herbs and spices creates a fantastic flavor profile that truly elevates these sliders. If ranch isn’t available, mayonnaise can be a substitute, but be aware that you might miss some of the distinctive richness and herbaceous notes that ranch brings.
- Dijon Mustard: A key player in our signature sauce, Dijon mustard brings a sophisticated zing. Its slight bitterness, combined with a subtle spiciness often derived from white wine and horseradish, cuts through the richness of the ham and cheese, providing a delightful counterpoint that brightens every bite. It’s essential for that classic ham and cheese sandwich experience.
- Melted Butter: Butter is the secret to a golden, soft, and flavorful top crust. Brushed generously over the buns before baking, it helps the rolls toast beautifully and ensures they remain tender. It also acts as a carrier for the garlic powder, infusing the entire top layer with savory goodness.
- Garlic Powder: For a convenient and consistent savory boost, garlic powder is our go-to. It distributes evenly and provides that beloved aromatic garlic flavor without the sharpness of fresh garlic. For those who prefer a more intense garlic punch, a small amount of finely minced fresh garlic can be added to the melted butter.
- Swiss Cheese: Known for its mild, nutty flavor and excellent melting properties, Swiss cheese creates a beautifully gooey layer without overpowering the other ingredients. Its delicate taste allows the ham and the tangy dressing to shine, while its low melting point helps bind the slider together seamlessly.
- White Cheddar Cheese: This cheese brings the desired sharp, tangy, and robust cheesy flavor that’s crucial for a truly satisfying slider. White cheddar melts wonderfully, contributing to the gooey texture and adding a bold, irresistible bite that perfectly balances the milder Swiss and the sweetness of the rolls.
- Sliced Ham: The star protein! For the best results, opt for thin, high-quality sliced ham. You have a lot of flexibility here: cured, uncured, honey-baked, or peppered ham all work wonderfully. Each type will lend a slightly different character to your sliders, so choose your favorite or experiment to find your ideal match. The thinness ensures each slider is easy to eat and perfectly balanced.
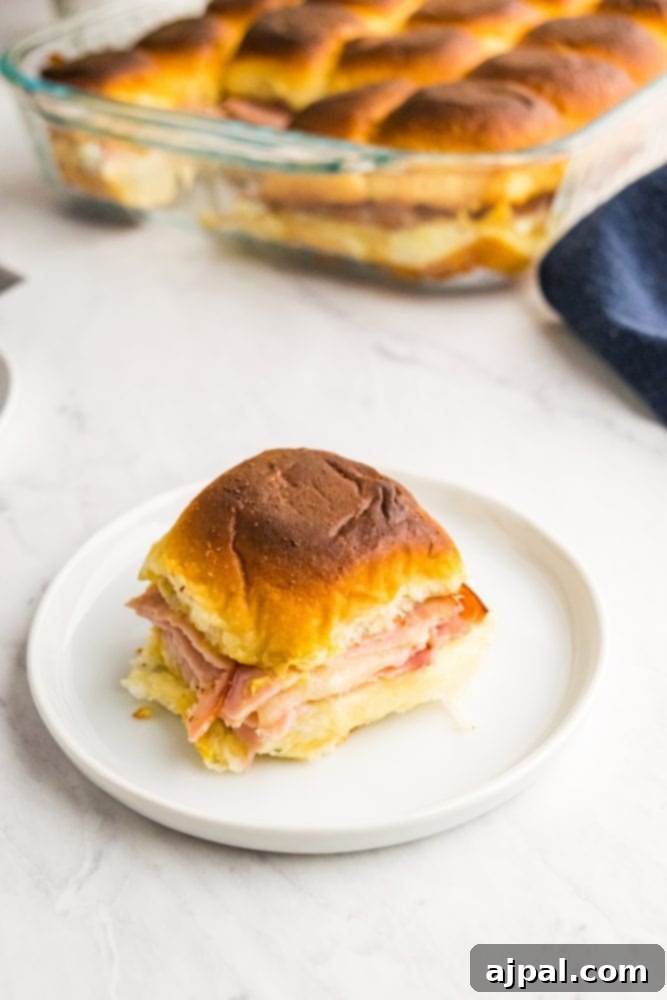
Step-by-Step Guide to Making Ham and Cheese Sliders
Once you’ve gathered all your delicious ingredients, assembling these baked ham and cheese sliders is incredibly straightforward. Follow these simple steps for perfect results every time:
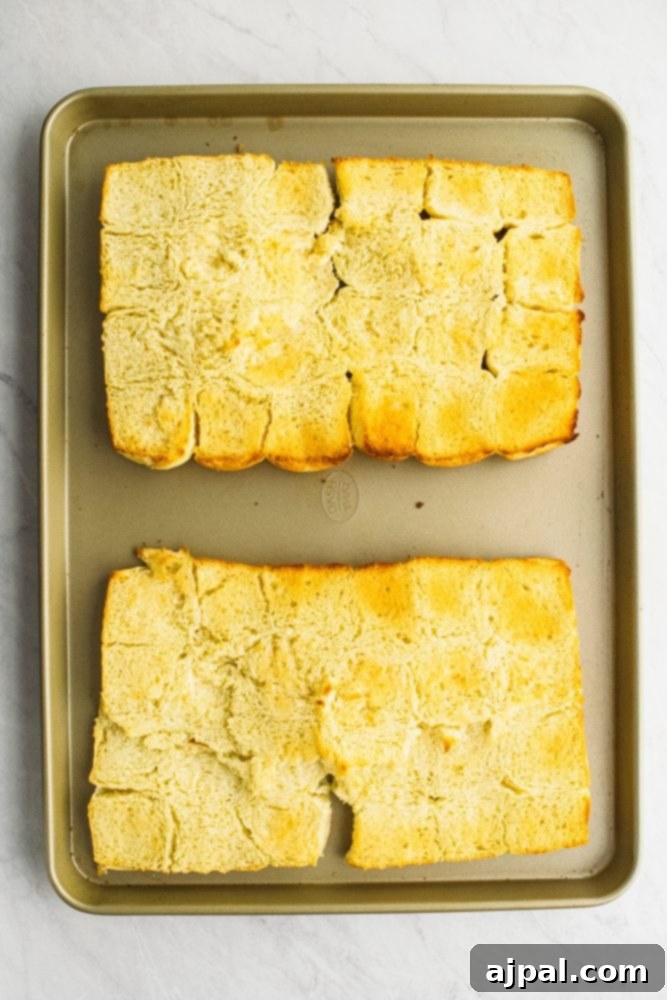
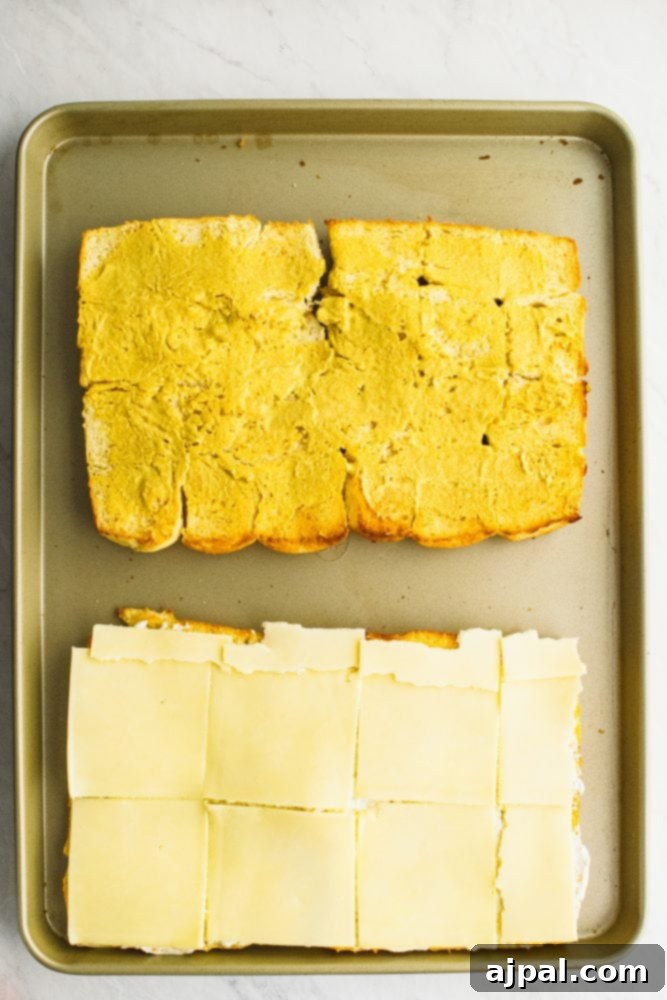
1. Preheat Oven & Prep Rolls: Begin by preheating your oven to 375°F (190°C). Carefully remove the Hawaiian rolls from their packaging, keeping them as one connected block. Using a long, serrated knife, slice the entire block of rolls horizontally in half, creating a top section and a bottom section. Place both cut sides facing up on a baking sheet. Lightly toast them in the preheated oven for about 8 minutes, just until they are slightly golden and fragrant. This step helps prevent the rolls from becoming soggy and adds a delightful texture.
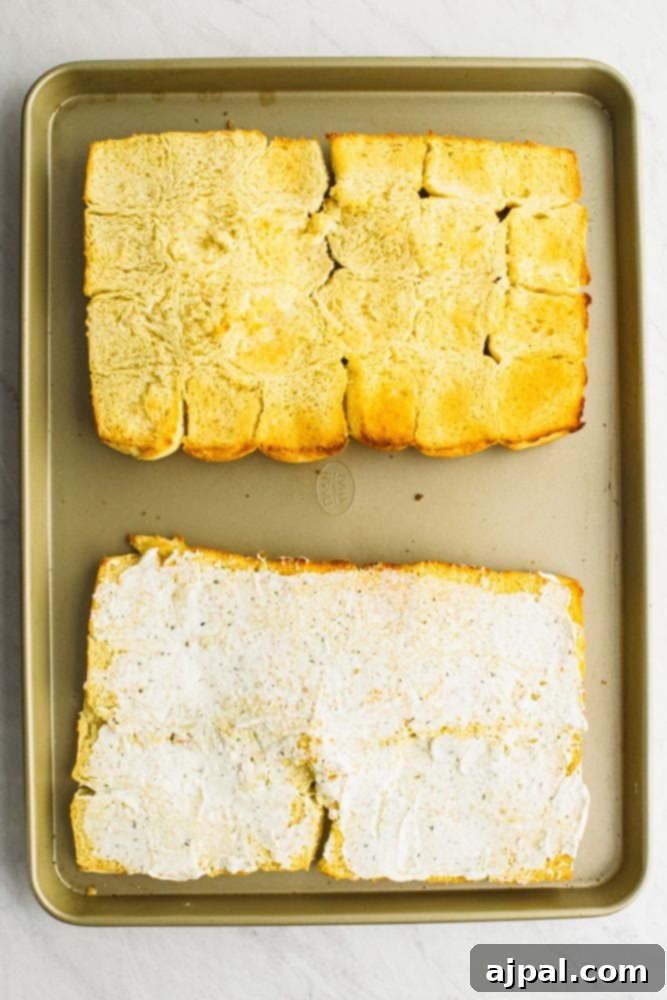
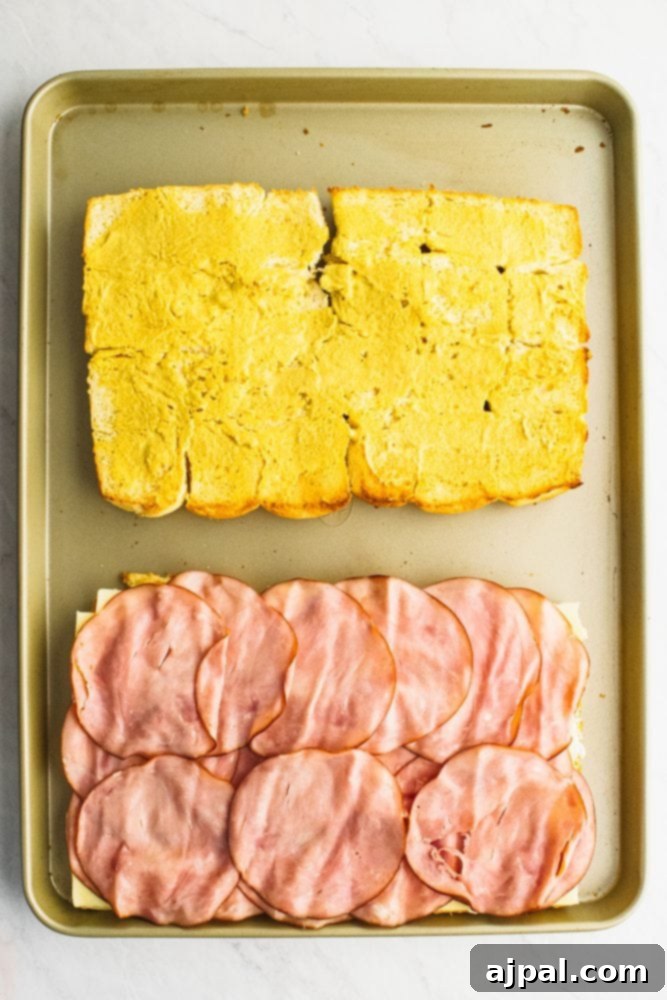
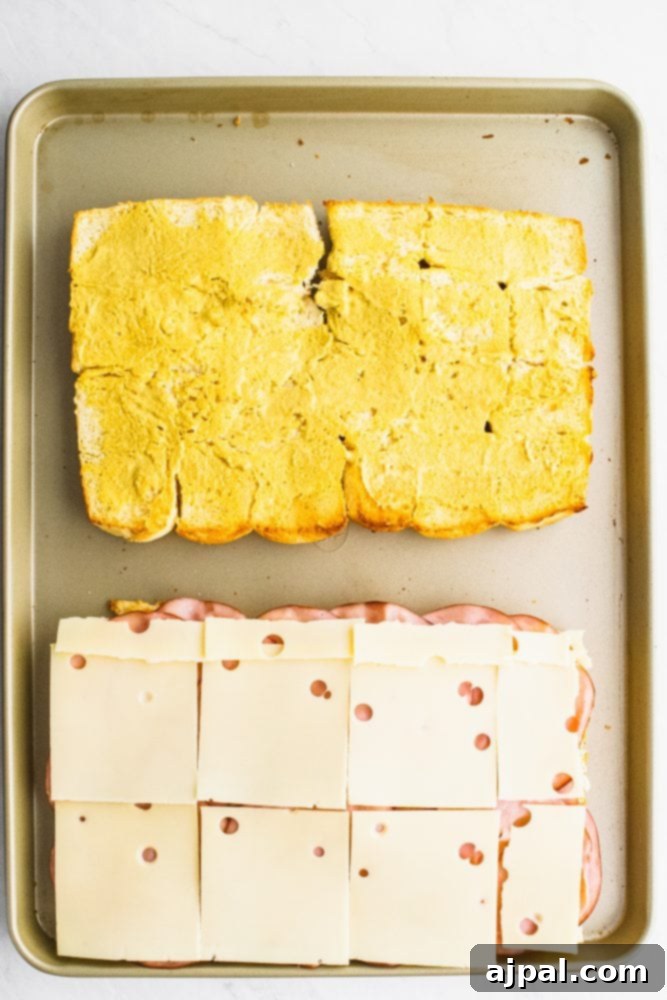
2. Assemble Layers: Remove the toasted rolls from the oven. Evenly spread the Dijon mustard across the inside of the top buns and the creamy ranch dressing over the inside of the bottom buns. Next, arrange the slices of white cheddar cheese uniformly over the ranch-coated bottom buns. Follow this with half of your sliced ham, ensuring an even layer. Then, place the Swiss cheese slices over the ham, followed by the remaining ham slices. This layering technique ensures a balanced flavor in every bite and helps the cheeses melt perfectly. Carefully place the top buns back onto the assembled sandwiches.
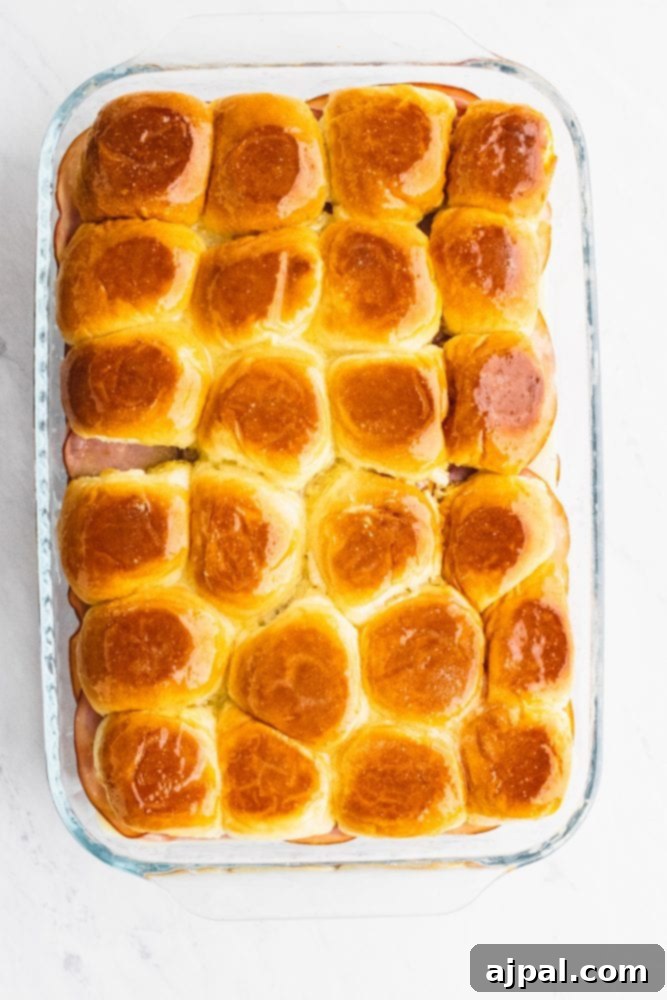
3. Prepare & Brush Butter Topping: In a small bowl, combine the melted butter and garlic powder. Mix thoroughly until the garlic powder is fully incorporated. Using a pastry brush, generously brush this savory butter mixture over the tops of the assembled sliders. Make sure to get some of the butter into the cracks between the individual rolls; this will ensure every part of the bun becomes deliciously golden and tender. For an extra touch, you can also sprinkle a pinch of poppy seeds or sesame seeds over the buttered tops before baking.
4. Bake & Enjoy: Carefully transfer the assembled sliders to a 9×13-inch casserole dish. Place the dish in the preheated oven and bake for approximately 15 minutes, or until the cheese is bubbling and completely melted, and the tops of the rolls are a beautiful golden brown. Baking time may vary slightly depending on your oven, so keep an eye on them. Once baked to perfection, remove the casserole dish from the oven, let it cool for a few minutes, then slice the individual sliders apart and serve them warm. Prepare for rave reviews!
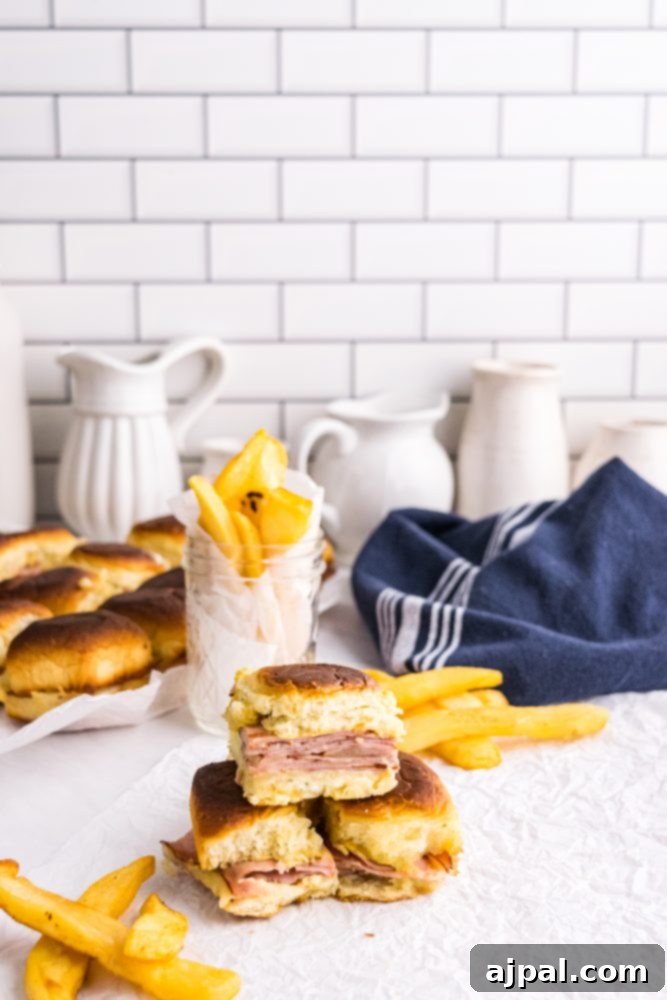
Pro Tips and Tricks for the Best Ham and Cheese Sliders
While these baked ham and cheese sliders are wonderfully easy to make, a few insider tips can elevate them from great to absolutely exceptional. Here’s how to ensure your sliders are perfect every time:
- Customize Your Bake Time: The listed 15-minute cook time is a general guideline. Feel free to adjust it to your personal preference. Some people love their rolls extra crispy with deeply golden tops and ultra-gooey, melted cheese. Others prefer a gentler toast with lightly melted cheese. Monitor your sliders during the last few minutes of baking and remove them when they reach your desired level of golden perfection.
- Experiment with Cold Cuts and Cheeses: Don’t feel limited to ham and Swiss/white cheddar! This recipe is incredibly versatile. Consider using smoked turkey, roast beef, or even pepperoni. For cheeses, provolone, gouda, Monterey Jack, or even a spicy pepper jack can add exciting new dimensions. The possibilities are truly endless, so use what you love or what you have on hand.
- Make-Ahead Magic: These ham and cheese sliders are fantastic for meal prep! You can assemble them completely, right up to the point of brushing on the butter mixture, cover them tightly with plastic wrap or foil, and refrigerate for up to 24 hours. When ready to bake, simply pull them out of the fridge about 30 minutes before baking to come to room temperature, then brush with butter and bake as directed, potentially adding a few extra minutes to the cook time if they are still very cold.
- Careful Roll Cutting: Slicing the entire block of Hawaiian rolls can be tricky if you don’t have a long serrated bread knife. If your knife isn’t quite long enough, simply cut as far as you can from one side, then flip the rolls and cut from the other side. Most standard knives will meet in the middle, creating a clean cut. A steady hand and a gentle sawing motion are key.
- Amp Up the Butter Sauce: Beyond garlic powder, you can add other seasonings to your melted butter for an extra flavor boost. A teaspoon of Worcestershire sauce adds a savory, umami depth that pairs wonderfully with ham. A sprinkle of onion powder, Italian seasoning, or a pinch of red pepper flakes for a subtle kick can also be delicious additions.
- Prevent Soggy Bottoms: The initial light toasting of the rolls helps immensely. Ensure your rolls aren’t sitting in too much liquid from the ham or cheese. Draining any excess moisture from the ham package can help. Also, make sure your butter isn’t pooling excessively in the casserole dish.
- Perfect for Packed Lunches (Leftovers): These baked ham and cheese sliders are excellent as leftovers! Once cooled, store them in an airtight container in the refrigerator. They reheat beautifully in the microwave (for a softer texture) or in a toaster oven (for a crispier bun) for a quick and satisfying packed lunch or snack.
Frequently Asked Questions About Ham and Cheese Sliders
These delicious baked sliders can be stored in the refrigerator for up to four days. Make sure to keep them in a plastic bag or an airtight container to maintain their freshness and prevent them from drying out. They are fantastic reheated!
Yes, you can absolutely use other types of dinner rolls! Hawaiian rolls are often preferred because they come in a connected block, which makes cutting and assembling the sliders incredibly easy and fast. However, any soft, slightly sweet dinner roll will work. If you use individual rolls, you’ll simply need to slice each one, spread the fillings, and then arrange them snugly in your casserole dish before applying the butter topping.
Yes, these sliders are excellent for make-ahead preparation! Assemble them completely, including the ham and cheese layers, and place them in the casserole dish. Cover tightly with plastic wrap or aluminum foil and refrigerate for up to 24 hours. When you’re ready to bake, remove them from the fridge about 30 minutes beforehand to allow them to come closer to room temperature. Then, brush with the melted butter and garlic mixture and bake as directed, possibly adding an extra 5-10 minutes to the baking time if they are still quite cold.
For ham and cheese sliders, thin-sliced deli ham is generally best. Options like honey-baked ham, black forest ham, or even simple smoked ham work wonderfully. The key is to choose a high-quality ham that isn’t too thick, ensuring it layers well and doesn’t overwhelm the rolls. Experiment with your favorite deli ham varieties to find what you like best!
While it’s generally best to enjoy these fresh, you can freeze baked sliders. Allow them to cool completely, then wrap individual sliders or sections tightly in plastic wrap, followed by aluminum foil. Store in a freezer-safe bag for up to 1-2 months. To reheat, thaw overnight in the refrigerator, then bake in a preheated oven at 350°F (175°C) until warmed through and cheese is re-melted, or microwave gently. The texture of the rolls might be slightly different after freezing and thawing, but they will still be delicious.
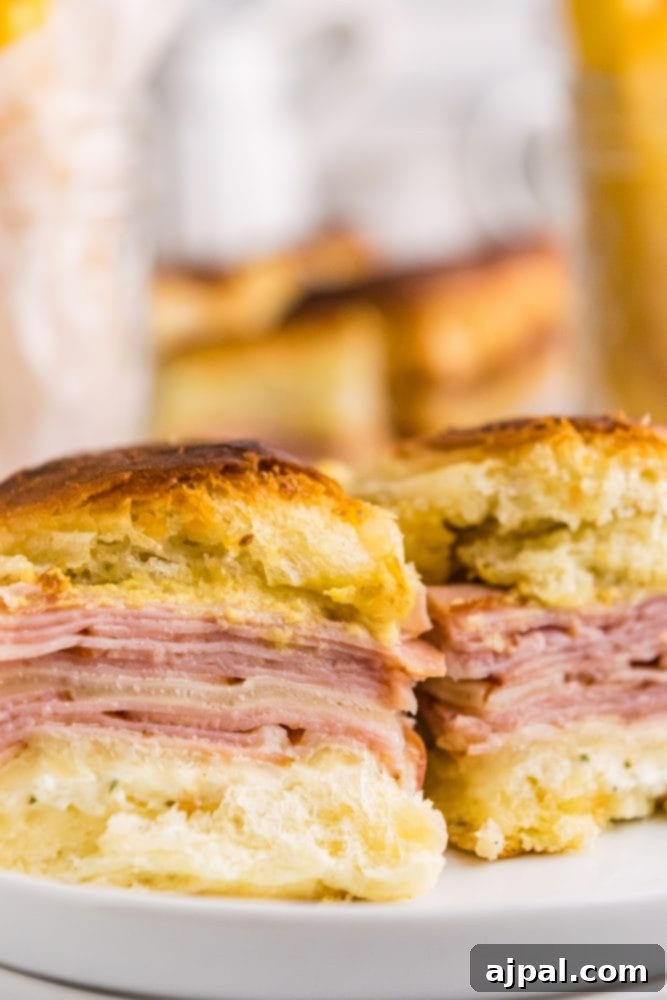
Delicious Sides to Serve with Ham and Cheese Sliders
These baked ham and cheese sliders are so packed with flavor, they can easily stand alone. However, pairing them with the right side dishes can transform them into a complete and unforgettable meal. Here are some fantastic options that perfectly complement the savory, cheesy goodness of the sliders, ensuring your family or guests will be thoroughly delighted:
Loaded Twice Baked Potatoes
Creamy, cheesy, and packed with flavor, these potatoes are a hearty and comforting side that beautifully complements the richness of the sliders.
Homemade French Fries in Air Fryer
Crispy, golden fries made easily in an air fryer are a classic pairing for any sandwich, offering a satisfying crunch and salty complement.
Creamy Garlic Butter Beans
For a lighter yet satisfying side, these tender beans in a rich garlic butter sauce offer a delightful texture and herbaceous flavor.
Best Easy Pasta Salad
A vibrant and refreshing pasta salad adds a cool, tangy contrast to the warm, rich sliders, making it perfect for potlucks.
Best Grilled Corn on the Cob
Sweet and smoky grilled corn offers a perfect balance to the rich sliders, especially for a summer barbecue feel.
The Best Easy Coleslaw – Just 4 Ingredients
A crunchy, tangy coleslaw provides a refreshing crunch and bright flavor that cuts through the richness of the sliders.
Greek Potato Salad
A fresh and zesty Greek potato salad with olives and feta brings a Mediterranean flair and a refreshing tang to the meal.
Funeral Potatoes
For ultimate comfort food, these creamy, cheesy, and crunchy potatoes are a beloved side that makes any meal feel special.
My family absolutely adores eating these sliders with a variety of delectable sides. Beyond the listed suggestions, you could also consider:
The Best Easy Air Fryer French Fries Recipe for that classic fast-food vibe,
Crunchy Baked Fries for a slightly healthier alternative,
Easy Baked Parmesan Crisps for a savory, cheesy crunch,
Garlic Parmesan Zucchini Fries as a low-carb, flavorful option,
Sweet and Spicy Guinness Snack Mix Recipe for a fun and addictive appetizer spread,
Blistered Shishito Peppers for a surprising burst of mild heat,
Raspberry Beet Smoothie for a refreshing and vibrant drink,
or Bacon Raspberry Cheese Bites for another delightful appetizer.
Click here to explore our other favorite burger and sandwich recipes!
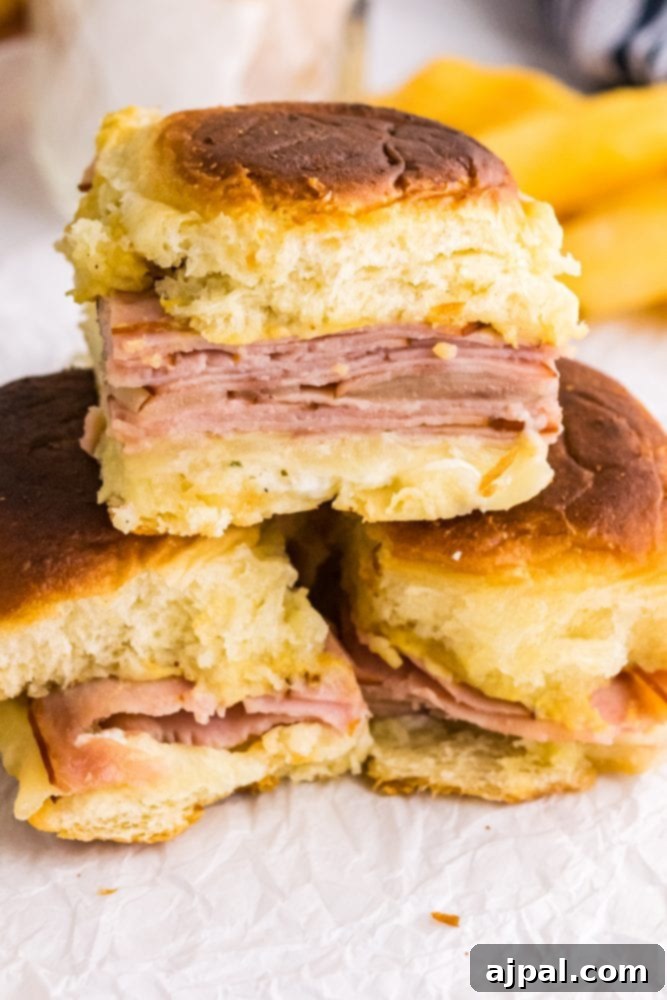
Easy Ham and Cheese Sliders Recipe
If you loved making and enjoying this easy ham and cheese slider recipe, please take a moment to give it a five-star rating by clicking the stars below and leave a comment sharing your experience! Your feedback helps other home cooks discover and enjoy these delicious sliders. Please also help us share the joy by sharing this recipe on Instagram, Facebook, and Pinterest!
Share on Facebook
Share
Pin this now to find it later
Pin It
Follow on Instagram
Follow

Only have 30 minutes to get dinner on the table? Sign up for my 30-minute dinner plans direct to your inbox!
Find and shop my favorite products in my Amazon storefront here!
To see our web story for this recipe, click here.
Easy Ham and Cheese Sliders Recipe
Courtney
O’Dell
12 sliders
10 minutes
30 minutes
40 minutes

sliders – delicious easy sliders bursting with mustard, ham, and melted cheese flavor perfect for
parties!
Equipment
-
Hiware Extra Large Bamboo Cutting Board for
Kitchen, Heavy Duty Wood Cutting Boards with Juice Groove, 100% Organic Bamboo, Pre
Oiled, 18″ x 12″ -
HENCKELS Classic Razor-Sharp 7-inch Bread
Knife, Cake Knife, German Engineered Informed by 100+ Years of Mastery -
OXO Good Grips Silicone Basting & Pastry
Brush – Small -
USA Pan Bakeware Rectangular Cake Pan, 9 x 13
inch, Nonstick & Quick Release Coating, Made in the USA from Aluminized Steel
Ingredients
- 1 Large Pack of Hawaiian Rolls, 24 pack
- ½ Cup Ranch Dip or Dressing
- ½ Cup Dijon Mustard
- ¼ Cup Melted Butter
- ½ TSP Garlic Powder
- 8 Slices Swiss Cheese
- 8 Slices White Cheddar Cheese
- 2 Pounds Sliced Ham
Instructions
-
Preheat your oven to 375°F (190°C).
-
Remove the Hawaiian rolls from the package and
carefully slice the entire block in half horizontally to create top and bottom sections
for the sandwiches. -
Place the cut sides of the rolls facing up on
baking sheets and toast in the oven until lightly golden, about 8 minutes. This helps
prevent sogginess. -
Remove the rolls from the oven. Evenly spread
Dijon mustard on the inside of the top buns and ranch dressing on the inside of the
bottom buns. -
Arrange the white cheddar cheese slices evenly
over the bottom buns. -
Top with half of the sliced ham, ensuring an
even layer. -
Place the Swiss cheese slices evenly over the
ham. -
Add the remaining ham, spaced evenly over the
Swiss cheese. -
Carefully place the top buns back onto the
assembled sandwiches. -
In a small bowl, combine the garlic powder and
melted butter and mix well. Brush this mixture generously over the top buns, making
sure to get it into the cracks between the buns for maximum flavor and golden crust. -
Place the sandwiches in a 9×13-inch casserole
dish and return to the oven for 15 minutes, or until the cheese is beautifully melted
and bubbly, and the tops are golden brown. Serve warm and enjoy!
Nutrition
Nutrition information is automatically calculated, so should only be used as an approximation.
Additional Info
Main Dishes
American
this recipe?Mention @sweetcsdesigns or
tag #sweetcsdesigns!