
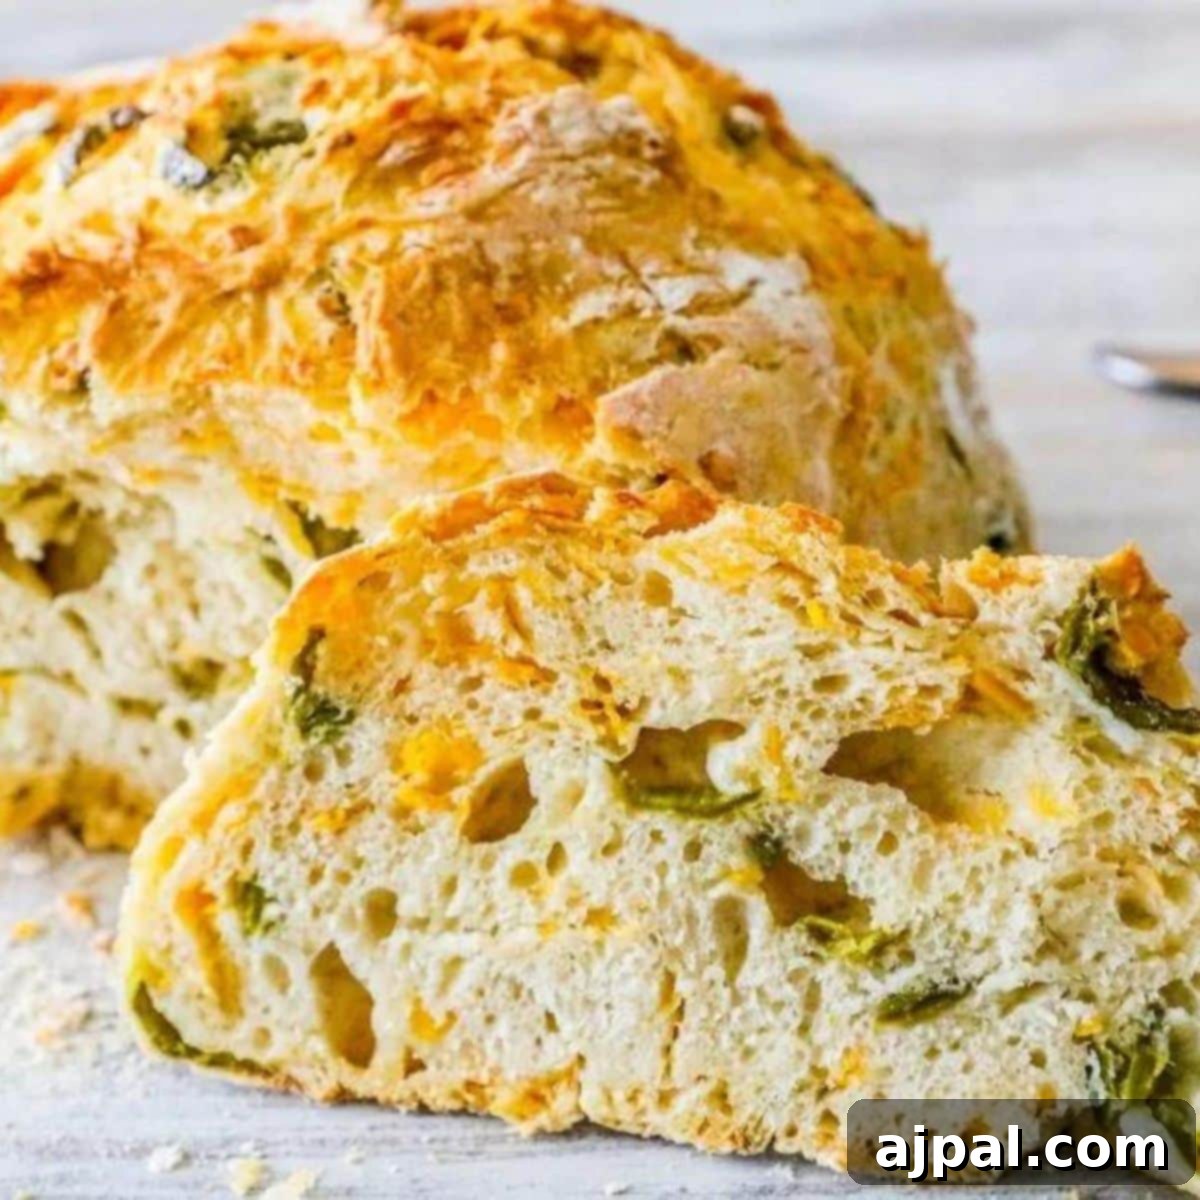
Experience the joy of baking artisanal bread at home with this incredibly simple recipe for No-Knead Jalapeño Cheddar Bread. Bursting with the perfect blend of spicy jalapeños and rich cheddar cheese, this bread offers a truly satisfying flavor and an irresistible texture – a crispy crust giving way to a soft, airy interior. Whether you’re a seasoned baker or just starting your journey into homemade bread, this recipe is designed for success, delivering bakery-quality results without the extensive effort of traditional kneading. Get ready to impress your family and friends with this spicy, cheesy delight!

Welcome to our kitchen! Here, we believe that delicious food doesn’t have to be complicated. As a home cook without formal culinary training, my aim is always to empower fellow enthusiasts with recipes that are not only easy to follow but also provide the ‘why’ behind each step. Understanding the role of ingredients and techniques builds confidence, making every baking adventure a rewarding experience. This No-Knead Jalapeño Cheddar Bread is a perfect example – simple ingredients, minimal effort, and maximum flavor, ensuring even the most beginner baker feels like a pro.
Table of Contents
- Dutch Oven Jalapeño Cheddar Bread: The Secret to Artisan Loaves
- Why Choose No-Knead Bread? Understanding the Magic
- Mastering Your Ingredients for Perfect Bread
- How To Pre-Make Jalapeño Cheddar Bread Dough
- Expert Tips for Perfect Jalapeño Cheese Bread Every Time
- Troubleshooting Common Bread Baking Issues
- What to Serve with This Jalapeño Cheese Bread Recipe
- Frequently Asked Questions About No-Knead Bread
Dutch Oven Jalapeño Cheddar Bread: The Secret to Artisan Loaves
There’s truly nothing quite like the experience of pulling a fresh, warm loaf of artisan bread from your oven. The crackle of the crust, the inviting aroma filling your home, and the first bite of a perfectly textured crumb – it’s a simple pleasure that feels like a luxury. This Easy Jalapeño Cheddar Bread captures that essence, offering a bakery-quality experience right in your own kitchen, all thanks to the magic of Dutch oven baking.
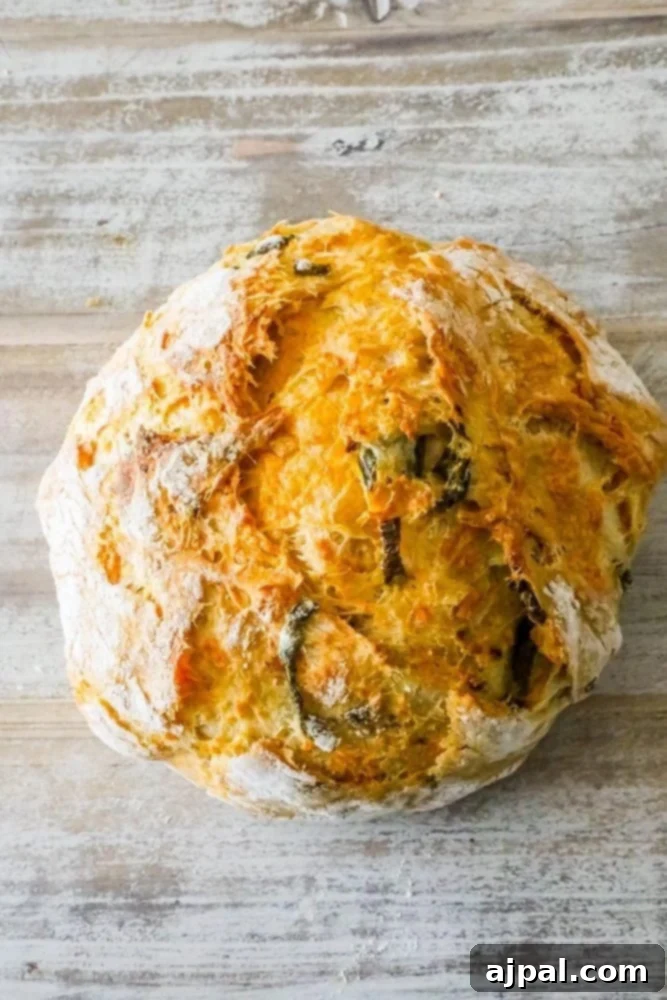
This particular recipe is a spicy, savory twist on our wildly popular No-Knead Herb Bread, which has become a favorite for its incredible simplicity and phenomenal flavor. If you loved the herb version, prepare to be captivated by the bold kick of jalapeños and the creamy richness of cheddar in this new rendition. It’s perfect for weekend baking, allowing you to prep the dough the night before for minimal effort on baking day. The Dutch oven plays a crucial role in achieving that sought-after artisan crust and a wonderfully airy interior. Its ability to trap steam creates a humid environment similar to a professional bread oven, which is essential for developing a deep, golden crust while keeping the inside beautifully moist and tender.
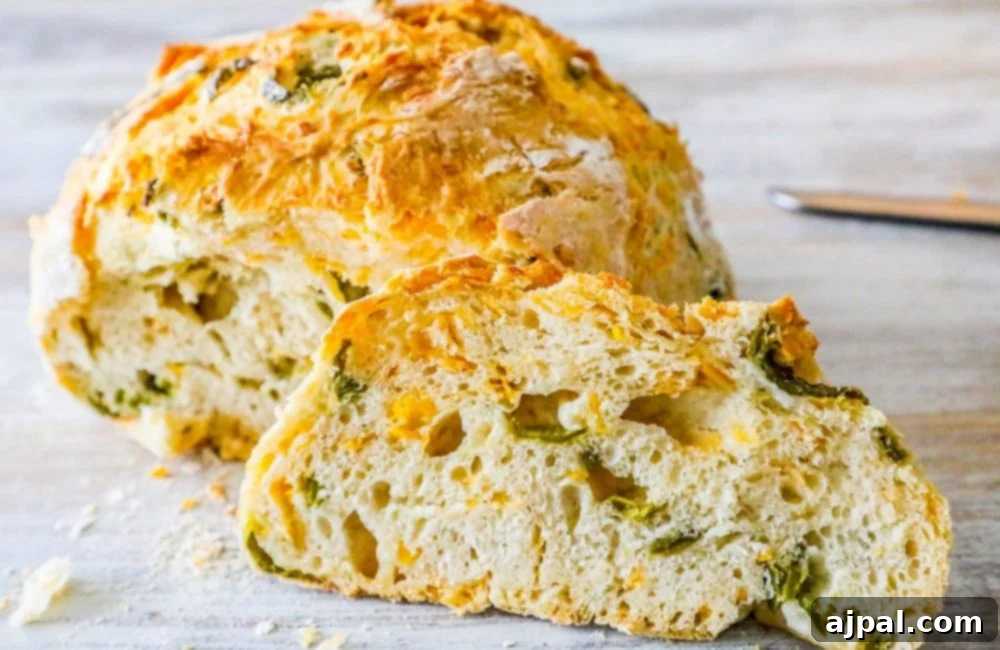
The result is a loaf with an undeniably crunchy, salty exterior and a soft, chewy interior studded with molten cheddar and pockets of spicy jalapeño. It’s a bread that stands out, whether served as a centerpiece or a humble side. We are absolutely obsessed with baking this bread, and we’re confident you and your family will fall in love with its irresistible flavors and surprising ease.
Why Choose No-Knead Bread? Understanding the Magic
The “no-knead” method has revolutionized home bread baking, making it accessible to everyone, regardless of experience. Traditional bread recipes often require extensive kneading to develop gluten, the protein network that gives bread its structure and chewiness. However, the no-knead technique achieves the same result through time, rather than manual labor.
Here’s how it works: a simple mixture of flour, water, yeast, and salt is left to ferment for an extended period, typically 12-18 hours. During this long, slow rise, enzymes naturally present in the flour break down complex carbohydrates, and the yeast slowly works its magic, producing gas and creating gluten strands without any physical manipulation. This process, known as cold fermentation when done in the refrigerator, also develops more complex flavors, leading to a richer, more nuanced bread.
The advantages are clear:
- **Minimal Effort:** No heavy lifting or sticky hands from kneading. Just mix, wait, and bake.
- **Superior Flavor:** The extended fermentation time allows for a deeper, more complex flavor profile, often with a hint of tanginess similar to sourdough.
- **Fantastic Texture:** The slow rise combined with high-heat baking (especially in a Dutch oven) results in an incredibly airy, open crumb and a wonderfully crispy crust.
- **Flexibility:** The long proofing time means you can easily fit bread baking into a busy schedule, starting the dough the night before and baking it fresh the next day.
This method makes artisan-quality bread achievable for anyone, turning what might seem like a daunting task into a simple, enjoyable process.
Mastering Your Ingredients for Perfect Bread
While no-knead bread is forgiving, understanding your ingredients can elevate your results.
- Flour: All-purpose flour works beautifully for this recipe. However, if you want a chewier texture, you could experiment with bread flour, which has a higher protein content. Always measure flour by weight (grams) for the most consistent results, as volume measurements (cups) can vary significantly. Lightly spooning flour into a measuring cup and leveling it off is the next best option if you don’t have a scale.
- Water: Lukewarm water is crucial for activating the yeast. Water that is too hot will kill the yeast, while water that is too cold will inhibit its activity. Aim for a temperature between 95-105°F (35-40°C). The exact amount of water can vary slightly depending on the humidity and your flour, so be prepared to adjust by a tablespoon or two if your dough is too sticky or too dry.
- Yeast: Active dry yeast or instant yeast can be used. If using active dry, it’s essential to “bloom” it first in warm water with a pinch of sugar (though not strictly necessary with this recipe as long as the water is warm) to ensure it’s active. Instant yeast can often be mixed directly with the dry ingredients. The amount specified in the recipe is balanced for a slow, flavorful rise.
- Salt: Salt is more than just a flavor enhancer in bread; it controls yeast activity and strengthens the gluten structure. Do not omit or significantly reduce the salt, as it impacts both the taste and texture of the final loaf. Fine sea salt or kosher salt are excellent choices.
- Jalapeños: Fresh jalapeños can be used for more heat, or pickled jalapeño rings for convenience and a milder, tangy flavor. Whichever you choose, ensure they are thoroughly drained and patted dry. Excess moisture can make your dough sticky and impact the crumb. For less heat, remove the seeds and membranes from fresh jalapeños.
- Cheddar Cheese: Sharp cheddar adds a wonderful, tangy counterpoint to the jalapeño’s heat. Shred your own cheese from a block for the best melting quality and flavor. Pre-shredded cheeses often contain anti-caking agents that can slightly inhibit smooth melting.
How To Pre-Make Jalapeño Cheddar Bread Dough
One of the many benefits of no-knead bread is its incredible flexibility, allowing you to prepare the dough in advance. This is particularly useful for busy schedules or when entertaining, as it significantly cuts down on same-day prep time and can even enhance the bread’s flavor profile through extended fermentation.
Refrigerating Bread Dough (Short-Term Storage):
If you plan to bake your bread within a day or two, refrigerating the dough after its initial rise is an excellent option. Cold fermentation slows down yeast activity, allowing for a longer, more complex flavor development.
- Preparation: After the first rise (when the dough has doubled in size), gently punch it down to release some air. Fold in your drained and patted-dry jalapeños and cheddar cheese.
- Storage: Place the dough in a lightly oiled bowl, ensuring there’s room for it to expand slightly. Cover the bowl tightly with plastic wrap or a snug-fitting lid.
- Refrigeration: Transfer the covered dough to the refrigerator immediately. It can be stored this way for up to 2-3 days.
- Baking Day: When you’re ready to bake, remove the dough from the refrigerator. Allow it to come to room temperature and complete its second rise (this could take 1-2 hours, depending on your kitchen’s temperature). Once risen, proceed with shaping and baking instructions as detailed in the main recipe.
Freezing Bread Dough (Long-Term Storage):
For longer storage, freezing the dough is a fantastic option. This allows you to make multiple batches at once, saving time and effort later.
- Preparation: After the first rise, gently punch down the dough. Incorporate the jalapeños and cheddar cheese. Divide the dough into individual portions if you plan to bake smaller loaves.
- Flash Freeze: Lightly flour each dough portion and place them on a baking sheet lined with parchment paper. Freeze for 1-2 hours until solid. This prevents them from sticking together.
- Storage: Once solid, transfer the individual dough balls to airtight freezer-safe bags or containers. Remove as much air as possible before sealing.
- Freezer Life: Frozen bread dough can be stored for up to 3-4 months.
- Thawing and Baking: When ready to bake, transfer the frozen dough from the freezer to the refrigerator the night before. Let it thaw naturally overnight.
- Second Rise: The next morning, remove the thawed dough from the refrigerator. Place it in a warm, prepared bowl and cover it with a warm, damp towel. Allow it to come to room temperature and complete its second rise. This can take longer than usual because the dough is still quite cold, so be patient.
- Baking: Once the dough has sufficiently risen and is light and airy, punch it down gently, reshape it into a ball, and proceed with the baking instructions in the recipe below.
Having pre-made dough on hand means you’re always just a few hours away from fresh, warm, homemade bread!
Expert Tips for Perfect Jalapeño Cheese Bread Every Time
Achieving a perfect loaf of No-Knead Jalapeño Cheddar Bread is remarkably easy, but a few key tips can elevate your results from good to truly exceptional.
-
The Importance of the Dutch Oven (and alternatives):
A heavy, lidded pot like a Dutch oven is the secret weapon for artisan bread. It acts like a miniature bread oven, trapping steam around the dough during the initial baking phase. This steam creates a moist environment that keeps the crust soft and pliable, allowing the loaf to expand fully (the “oven spring”). Once the lid is removed, the bread quickly develops that signature crispy, golden-brown crust. Cast iron Dutch ovens are ideal because they retain and distribute heat evenly.
- If you don’t have a Dutch oven: You can still bake this bread, though the results might vary slightly. Try a heavy pot with a tight-fitting lid that is oven-safe (ensure the lid handle can withstand high temperatures). Another option is to bake the dough on a preheated pizza stone or a heavy baking sheet, creating steam by placing a pan of hot water on the bottom rack of your oven. While these alternatives work, the Dutch oven provides the most consistent, high-quality results for crust and crumb texture.
- Preheat Your Dutch Oven Thoroughly: For that ultimate crispy crust and airy interior, it’s crucial to preheat your Dutch oven *inside* the oven along with the oven itself. This means placing the empty Dutch oven with its lid in the cold oven, then heating it to the specified temperature (450°F or 230°C) for at least 30-60 minutes. A super-hot pot creates an immediate burst of steam and intense heat transfer to the dough, maximizing oven spring and crust development.
- Bake on Parchment Paper for Ease: While not strictly necessary for non-stick Dutch ovens, baking your dough on a sheet of parchment paper is a game-changer for convenience and safety. Use a long strip of parchment to create a “sling” for the dough. This allows you to effortlessly lower the dough into the scorching hot Dutch oven without burning your fingers, and just as easily lift the baked loaf out when it’s done. It also guarantees no sticking, ever.
- Top with Extra Cheese and Jalapeños: For an even more visually appealing and flavorful loaf, consider shredding a little extra cheddar cheese and arranging a few thin slices of jalapeño (fresh or pickled) on top of the dough just before baking. This creates a beautiful, caramelized cheesy crust and highlights the delicious flavors within.
- Dust Lightly with Flour and Score: Before transferring your dough to the Dutch oven, dust the top lightly with a bit of all-purpose flour. This not only adds to the rustic, artisan bakery aesthetic but also helps the crust develop a beautiful color. For a truly professional touch, use a sharp knife or a bread lame to score the top of your loaf (making a few shallow cuts). This isn’t just for looks; it helps control where the bread expands during baking, preventing uncontrolled tearing and ensuring a more even rise.
- Proper Dough Consistency: The dough should be shaggy and sticky, but manageable. If it’s too wet, add a tablespoon of flour at a time until it’s less sticky. If it’s too dry, add a tablespoon of lukewarm water. The goal is a dough that holds its shape but is still quite hydrated.
- Monitor Your Yeast: Ensure your yeast is active by checking for a light foam after mixing it with warm water. If there’s no foam, your yeast might be old, or the water temperature was off.
- Patience with Rising: The most crucial aspect of no-knead bread is allowing sufficient time for the dough to rise. Don’t rush it. The rising time can vary based on ambient temperature. Look for visual cues: the dough should double in size and feel light and airy. The “poke test” (gently poke the dough; if the indentation slowly springs back, it’s ready) is a reliable indicator.
Troubleshooting Common Bread Baking Issues
Even with an easy recipe, sometimes things don’t go exactly as planned. Here are some common issues and how to fix them:
- Dense, Gummy Bread: This often means the dough didn’t rise enough, or it was overmixed. Ensure your yeast is active, your water temperature is correct, and you give the dough ample time to proof. Also, make sure your Dutch oven is fully preheated to create enough oven spring.
- Flat Loaf: A flat loaf can result from over-proofing (the dough rises too much and then collapses) or under-proofing (not enough gluten strength developed). It can also happen if the dough is handled too roughly after the final rise. Be gentle when transferring the dough to the hot Dutch oven.
- Tough Crust: A crust that’s too hard or thick might be due to not enough steam during baking. Ensure your Dutch oven lid creates a tight seal. If baking without a Dutch oven, increase the steam by adding a tray of hot water.
- Bland Flavor: If your bread lacks depth, it might be due to insufficient fermentation time. The long, slow rise is crucial for developing flavor. Ensure you’re using enough salt, as it’s key to flavor.
- Burnt Bottom: If the bottom of your bread burns before the top is golden, try placing a baking sheet on the rack below your Dutch oven to shield the bottom from direct heat. Alternatively, you can remove the bread from the Dutch oven for the last 10-15 minutes of baking and place it directly on the oven rack.
What to Serve with This Jalapeño Cheese Bread Recipe
The bold, savory, and slightly spicy flavors of this Jalapeño Cheddar Bread make it incredibly versatile. It’s fantastic on its own, but it truly shines when paired with other dishes. Here are some ideas to inspire your next meal:
- Soups and Stews: This bread is an absolute dream alongside hearty soups and stews. Its robust flavor and sturdy crust are perfect for dipping. Imagine it with a rich chili, a creamy potato soup, a warming tomato bisque, or a rustic lentil stew. The cheese and jalapeño add an extra layer of comfort and warmth.
- Grilled Meats and BBQ: The spicy kick of the jalapeños and the richness of the cheddar make this bread an excellent accompaniment to grilled chicken, steak, pork ribs, or pulled pork. It stands up beautifully to smoky and savory BBQ flavors.
- Sandwiches and Paninis: Transform your ordinary sandwich into something extraordinary. This bread makes phenomenal grilled cheese, BLTs, or turkey and avocado sandwiches. Its robust texture holds up well to fillings, and the built-in flavor means you need fewer condiments. Try it for a gourmet panini!
- Appetizers and Dips: Slice it thick and serve it with a variety of dips. Our Easy Bread Dip would be a perfect match, as would a warm spinach artichoke dip, or even a simple olive oil and balsamic vinegar. It’s also fantastic with Bacon Wrapped Cheddar and Garlic Jalapeno Poppers for a double dose of deliciousness.
- Breakfast or Brunch: Don’t limit this bread to dinner! Toast slices for breakfast and top with scrambled eggs, or serve it alongside a frittata or quiche for a satisfying brunch. A smear of Easy Bacon Butter Spread would also be incredible.
- Cheese Boards: Cut into smaller pieces, this bread can add a delightful spicy and savory element to any cheese or charcuterie board. It pairs wonderfully with aged cheddars, smoked goudas, and creamy goat cheeses.
However you choose to serve it, this Jalapeño Cheddar Bread is sure to be a crowd-pleaser, adding a burst of flavor and a touch of homemade warmth to any meal.
Try these bread recipes next:
Dilly Bread Recipe
Pumpkin Bread Mini Pumpkins
Easy Apple Fritter Bread Recipe
Sourdough Granola Bars
Sourdough Peach Cobbler
Sourdough Blueberry Cobbler
Frequently Asked Questions About No-Knead Bread
Here are answers to some common questions about making no-knead bread:
- Can I use fresh jalapeños instead of pickled?
- Yes, absolutely! Fresh jalapeños will provide a brighter, more vibrant heat. Be sure to seed and de-rib them for less spice, or leave some in for a fiery kick. Always pat them very dry after chopping to prevent excess moisture from making your dough too wet.
- What kind of cheese is best for this bread?
- Sharp cheddar cheese is highly recommended for its robust flavor that complements the jalapeños so well. However, you can experiment with other cheeses like Monterey Jack, pepper jack (for extra spice!), or even a blend of cheddar and mozzarella for a milder, stretchier result.
- My dough isn’t rising. What went wrong?
- This is typically due to inactive yeast or incorrect water temperature. Ensure your yeast is fresh and the water you use is lukewarm (around 95-105°F or 35-40°C). Too hot will kill the yeast, too cold won’t activate it. A cold kitchen can also slow down the rise; try placing the dough in a slightly warmer spot.
- Can I add other ingredients?
- Absolutely! No-knead bread is very adaptable. Consider adding garlic powder, onion flakes, a pinch of smoked paprika, or even a different herb blend for varied flavor profiles. Just be mindful not to add too much extra liquid or heavy ingredients that could hinder the rise.
- How do I get a really crispy crust?
- The key to a crispy crust lies in the Dutch oven and its preheating. Ensure your Dutch oven is screaming hot when the dough goes in, and keep it covered for the initial baking phase to trap steam. Removing the lid for the last 10-15 minutes allows the crust to crisp up and brown beautifully.
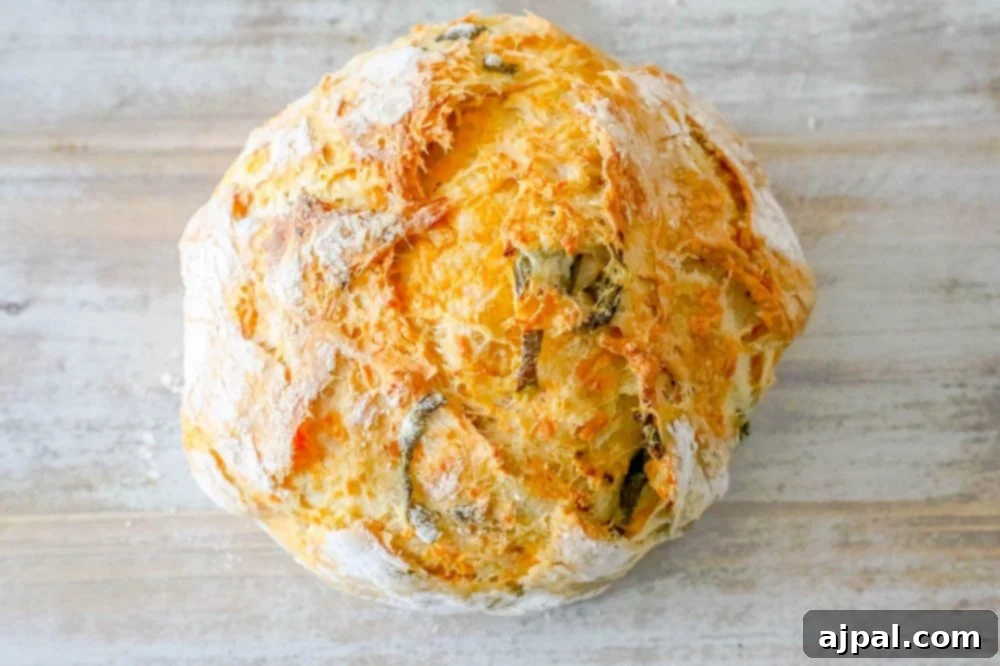
We hope this guide inspires you to create your own perfect loaf of No-Knead Jalapeño Cheddar Bread. This recipe truly offers an accessible entry into the rewarding world of artisan bread baking, proving that exceptional flavor and texture can be achieved with minimal effort. Enjoy the process, savor the aroma, and delight in the incredible taste of fresh, homemade bread.

Only have 30 minutes to get dinner on the table? Sign up for my 30 minute dinner plans direct to your inbox!
Find and shop my favorite products in my Amazon storefront here!
Easy Jalapeño Cheddar Bread
Share by Email
Print Recipe

Equipment
-
Bovado USA 4 Quart Glass Bowl for Storage, Mixing, Serving – Clear, Dishwasher, Freezer & Oven Safe Premium Quality Glass
-
TEEVEA Danish Dough Whisk Stainless Steel Dough Whisk Dutch Style Bread Dough Hand Mixer Wooden Handle Kitchen Baking Tools
-
Staub Cast Iron Dutch Oven 5-qt Tall Cocotte, Made in France
Ingredients
- 600 grams AP flour, about 4 cups, lightly packed and leveled off
- 2 cups water, 473.18mL lukewarm water
- 1½ teaspoons salt
- 1 yeast packet, 7g, about 2 1/4 teaspoons
- 2 tbsp jalapeño rings, drained of excess liquid and patted dry, chopped
- 2 cups cheddar cheese, sharp, freshly shredded for best results
Instructions
-
In a small bowl, combine the lukewarm water and yeast. Stir gently and let it sit for about 5 minutes until a light foam appears on the surface, indicating the yeast is active.
-
In a large mixing bowl, whisk together the flour and salt. Create a small well in the center of the dry ingredients.
-
Slowly pour the activated yeast mixture into the well of the dry ingredients. Mix with a sturdy spoon or your hands until a shaggy, cohesive dough forms. The dough should pull away from the sides of the bowl.
-
If the dough is too sticky to handle, add flour one tablespoon at a time until it’s just manageable. If it’s too dry, add lukewarm water one tablespoon at a time. The dough should be sticky but not wet.
-
Cover the bowl tightly with plastic wrap or a damp kitchen towel and let the dough rise at room temperature for 1.5 to 2 hours, or until it has doubled in size.
-
Gently uncover the dough and give it a few pokes with your finger. It should slowly deflate. Carefully scrape the dough from the sides of the bowl.
-
Add the drained and patted-dry chopped jalapeños and shredded cheddar cheese to the dough. Gently fold them into the dough until evenly distributed. Be careful not to overmix.
-
Return the dough to the bowl, cover it again, and let it undergo a second rise for another 1.5 to 2 hours, or until it has almost doubled in size again.
-
About 30 minutes before the end of the second rise, preheat your oven to 450°F (230°C / Gas Mark 8). Place your empty Dutch oven with its lid inside the oven to preheat thoroughly. It needs to be incredibly hot.
-
Once the dough has completed its second rise, gently punch it down.
-
Generously flour a sheet of parchment paper. Transfer the dough onto the parchment paper and, with floured hands, gently shape it into a round ball. Lightly sprinkle the top of the dough with a bit more flour. Optionally, score the top with a sharp knife for a decorative effect.
-
Carefully remove the preheated Dutch oven from the oven. Using the parchment paper as a sling, gently lower the dough into the hot Dutch oven.
-
Cover the Dutch oven with its lid and return it to the hot oven.
-
Bake the bread, covered, for 45 minutes.
-
After 45 minutes, carefully remove the lid from the Dutch oven and continue baking uncovered for another 10 to 15 minutes, or until the crust is deeply golden brown and crispy.
-
Carefully remove the Dutch oven from the oven. Using the parchment paper, lift the bread out and transfer it to a wire rack to cool slightly before slicing and serving. Enjoy!
Video
Watch a step-by-step video guide for this Easy Jalapeño Cheddar Bread recipe:
Video Placeholder: Click here to watch the recipe video!
Nutrition
Calories: 236kcal
Carbohydrates: 33g
Protein: 9g
Fat: 7g
Saturated Fat: 4g
Polyunsaturated Fat: 2g
Cholesterol: 20mg
Sodium: 931mg
Fiber: 1g
Nutrition information is automatically calculated, so should only be used as an approximation.
Additional Info
Tried this recipe?
Mention @sweetcsdesigns or tag #sweetcsdesigns!