

Bacon Crab Deviled Eggs – a truly decadent and irresistible appetizer that elevates the classic deviled egg to new culinary heights. These indulgent treats are generously loaded with succulent Maryland lump crab meat and crispy, savory bacon, offering a harmonious blend of rich flavors and delightful textures. Perfect for special occasions, holidays, or any gathering where you want to impress your guests with a gourmet twist on a beloved favorite.
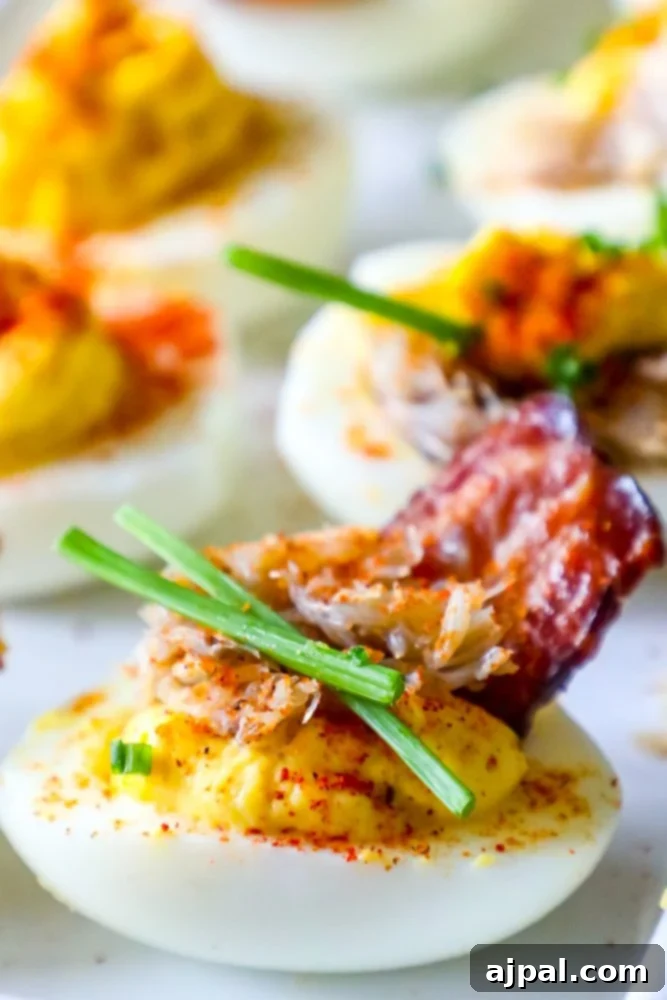
Welcome to our comprehensive guide for crafting the perfect Bacon Crab Deviled Eggs! We understand that sometimes you just want the recipe without all the extra details. For your convenience, we’ve included a “skip to recipe” button at the top left corner of this page. Additionally, you’ll find a clickable table of contents just below, designed to help you navigate through our helpful tips and tricks with ease.
Here at Sweet C’s, we believe that cooking should be an empowering and enjoyable experience for everyone, regardless of their skill level. As a home cook myself, without any formal culinary training, I’ve learned that understanding the ‘why’ behind each step and the role each ingredient plays can significantly boost confidence in the kitchen. My mission is to provide detailed insights and practical advice, ensuring that even the most beginner home cook feels fully equipped and inspired to create delicious dishes like these gourmet deviled eggs. Let’s dive in and unlock the secrets to mastering this show-stopping appetizer!
Table of contents
- The Art of Boiling Perfect Eggs for Deviled Eggs
- Mastering Egg Boiling Times for Ideal Yolk Consistency
- The Secret to Effortlessly Peeling Hard-Boiled Eggs
- How to Slice Eggs for Beautiful Deviled Eggs
- Piping Techniques for Professional-Looking Deviled Eggs
- Meal Prep Tips: Making Deviled Eggs in Advance
- Explore More Delicious Egg Recipes
- Bacon Crab Deviled Eggs Recipe
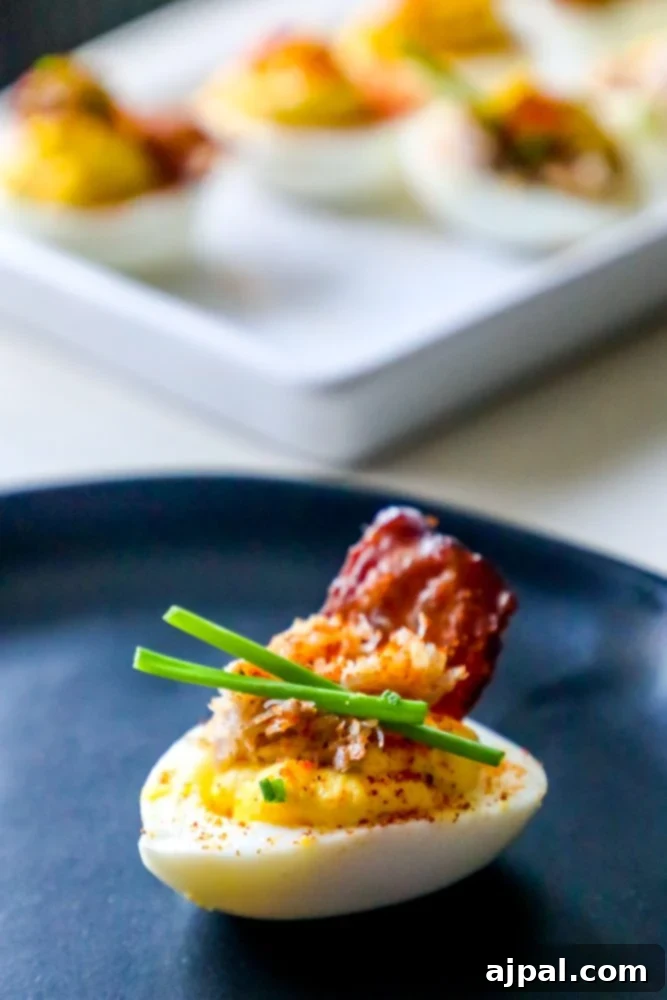
The Art of Boiling Perfect Eggs for Deviled Eggs
Achieving perfectly cooked hard-boiled eggs is the foundation of any great deviled egg recipe. While it might seem like a simple task, a few key techniques can make all the difference, ensuring your eggs are cooked just right—not undercooked, not overcooked with that undesirable green ring around the yolk, and easy to peel. Follow these straightforward steps to master the art of boiling eggs for your decadent deviled egg creations.
Begin by carefully placing your eggs in a large saucepan. It’s crucial to avoid overcrowding the pan, as this can lead to uneven cooking and increase the risk of cracking. Once the eggs are in place, gently cover them with cool water, ensuring the water level is about one inch above the eggs. This provides enough liquid for proper heat distribution.
Next, cover the pan with a tight-fitting lid and bring the water to a rolling boil over high heat. The moment the water reaches a vigorous boil, remove the pan from the heat immediately. Do not lift the lid. Let the eggs sit in the hot water, covered, for exactly 14 minutes. This method allows the eggs to cook gently and evenly using residual heat, preventing rubbery whites and green yolks.
After the resting period, promptly transfer the eggs to an ice bath—a bowl filled with ice and cold water. This sudden temperature change, known as “shocking,” halts the cooking process and helps the egg whites contract, making the shells significantly easier to peel. Allow them to cool in the ice bath for at least 10 minutes before peeling. This meticulous approach guarantees beautiful, perfectly cooked eggs every time, ready for your delicious deviled egg filling.
Mastering Egg Boiling Times for Ideal Yolk Consistency
The texture and appearance of your egg yolks are central to the appeal of deviled eggs. The cooking time directly influences the creaminess and color of the yolk, allowing you to customize your hard-boiled eggs for various culinary applications, especially for the smooth, rich filling required in deviled eggs. Achieving the desired consistency is simple once you know the precise timing.
An important tip for consistent results is to boil your eggs in a pot with a very thick, heavy base. Such a pot retains heat more effectively and distributes it evenly, preventing hot spots that can lead to unevenly cooked eggs or cracking. This small detail can make a big difference in the quality of your hard-boiled eggs.
Here’s a guide to help you achieve your preferred yolk consistency:
- **Soft-boiled eggs:** 4 minutes. Ideal for a runny, golden yolk that’s perfect for dipping toast.
- **Slightly soft-boiled eggs:** 5 minutes. The yolk will be jammy and rich, still somewhat liquid in the center.
- **Custardy yet firm soft-boiled eggs:** 6 minutes. A beautifully soft, creamy yolk with a delicate texture, excellent for salads where a richer yolk is desired.
- **Creamy hard-boiled eggs:** 7 minutes. This is often the sweet spot for deviled eggs, yielding a firm yet distinctly creamy yolk without any dryness or chalkiness. The color will be vibrant yellow.
- **Firm yet still creamy hard-boiled eggs:** 8 minutes. The yolk is fully set but maintains a smooth, rich texture, perfect for a sturdy deviled egg filling.
- **Very firm hard-boiled eggs:** 9 minutes. The yolk is completely cooked through, dense, and ideal for slicing or grating, though it might be slightly drier for deviled eggs.
For our Bacon Crab Deviled Eggs, aiming for a 7-8 minute boil (after removing from heat and covering) will give you the creamy texture necessary for a luxurious, smooth filling. Experiment to find your personal preference, keeping in mind that the perfect yolk is key to truly exceptional deviled eggs.

The Secret to Effortlessly Peeling Hard-Boiled Eggs
One of the most frustrating aspects of making deviled eggs can be the peeling process. There’s nothing worse than tearing away half the egg white along with the shell! Fortunately, there’s a simple yet highly effective trick to ensure your eggs peel cleanly every time, leaving you with smooth, perfect halves ready for filling.
The key lies in the “shock” method we discussed earlier. After your hard-boiled eggs have finished their cooking time and have been removed from the hot water, immediately plunge them into an ice bath. This drastic temperature change causes the egg white to contract rapidly, separating it from the inner membrane and the shell. Let the eggs sit in the cold water for a full 10 minutes to allow this process to work its magic.
Once adequately cooled, gently tap each egg on a hard surface to crack the shell all over. Then, place the cracked eggs back into the cold water for another few minutes before attempting to peel them. The water will seep into the cracks, further assisting in loosening the shell. You’ll find the shells almost glide off, leaving you with pristine, unblemished egg whites. For even easier peeling, some home cooks swear by allowing the cracked eggs to soak overnight in the refrigerator—this works especially well for eggs that are a few days old, as fresh eggs tend to be harder to peel due to their tighter membrane attachment. With this simple method, you can say goodbye to ragged egg whites and hello to picture-perfect deviled eggs!
How to Slice Eggs for Beautiful Deviled Eggs
The signature look of deviled eggs comes from their distinct halves, with the creamy yolk filling meticulously piped back into the hollowed-out whites. Achieving clean, uniform cuts is essential for both presentation and ease of filling. Here’s how to perfectly slice your hard-boiled eggs and prepare them for their delicious transformation.
First, ensure your hard-boiled eggs are completely cooled and peeled. Trying to cut warm eggs can result in messy yolks and fragile whites. Once cooled, place an egg on a cutting board. Using a sharp, thin-bladed knife, slice the egg in half lengthwise with a smooth, single motion. Avoid sawing back and forth, as this can create jagged edges. A clean cut allows for a stable base and an attractive presentation.
After slicing, you’ll see the vibrant yolk nestled in the center of each half. Gently scoop out the yolk using a small spoon. It should pop out easily if the egg is properly cooked and cooled. Place all the scooped-out yolks into a small mixing bowl, ready to be mashed and combined with your flavorful ingredients. The hollowed-out egg white halves should be set aside on a platter or plate.
If you’re preparing your deviled eggs ahead of time, store the egg white halves in a tightly sealed airtight container in the refrigerator. This prevents them from drying out and absorbing any unwanted odors from other foods. Keep the yolks separate in their own covered bowl. This method ensures your egg whites remain fresh and pristine, ready to be filled just before serving, allowing you to assemble your deviled eggs quickly and efficiently when guests arrive.
Piping Techniques for Professional-Looking Deviled Eggs
While a simple spoon can get the job done, piping the egg yolk filling back into your deviled eggs instantly elevates their appearance, giving them a professional and elegant finish. It’s surprisingly easy to do, and the results are well worth the minimal extra effort. Even if your piping isn’t absolutely perfect, the addition of savory toppings will make them look impeccable!
For the most dramatic and polished look, a pastry bag fitted with a star tip is your best friend. A star tip creates beautiful ridges and swirls, making each deviled egg look like a miniature work of art. To use, simply spoon your prepared yolk mixture into the pastry bag, twist the top to secure the filling, and gently squeeze to pipe the mixture into the egg white halves.
Don’t have a pastry bag or star tip? No problem! You can achieve a lovely piped effect using a regular plastic Ziploc bag. Just spoon the yolk mixture into one corner of the bag, push the filling down, and snip off a small corner with scissors. This will create a makeshift piping bag. While it might not have the intricate design of a star tip, it still creates a much neater and more appealing mound of filling than spooning.
Once the filling is piped, it’s time for the final flourish with your garnishes. Don’t worry if your piping job looks a little haphazard—topping the eggs with crispy bacon, fresh chives, and a drizzle of sriracha will magically disguise any imperfections, making every deviled egg look absolutely perfect and ready to impress. If you’re a fan of spicy food and want extra spicy deviled eggs, consider mixing a little sriracha directly into the mayonnaise and yolk mixture, then finish with an additional drizzle on top for an extra kick!
Meal Prep Tips: Making Deviled Eggs in Advance
Deviled eggs are a fantastic make-ahead appetizer, perfect for reducing stress on party day or ensuring you have a quick snack ready. With a few simple meal prep strategies, you can prepare most of the components in advance, leaving only the fun part—assembly and garnishing—for just before serving.
You can hard-boil and peel your eggs up to 1-2 days in advance. Once peeled, store them submerged in cold water in an airtight container in the refrigerator. This keeps them moist and fresh, preventing them from drying out or developing a rubbery texture. Alternatively, you can simply store the peeled egg whites in an airtight container without water if you plan to use them within 24 hours.
The egg whites can also be sliced in half, and the yolk filling can be prepped a day in advance. After scooping out the yolks, mash them with the mayonnaise, mustard, and seasonings, then store this mixture in a small, separate airtight container in the refrigerator. It’s crucial to keep the yolk filling and egg white halves separate until just before serving. This prevents the whites from becoming soggy and ensures the filling retains its vibrant color and fresh taste.
When you’re ready to serve, simply pipe the prepped yolk filling into the egg white shells. This is also the ideal time to add your fresh toppings. Sprinkle your deviled eggs generously with crispy bacon bits, a dash of Old Bay seasoning, vibrant diced chives, and a pinch of paprika for color. If desired, a touch of sriracha can be added for a spicy kick. By following these make-ahead tips, you can enjoy perfectly fresh and delicious deviled eggs without the last-minute rush, making them an effortless addition to any spread.
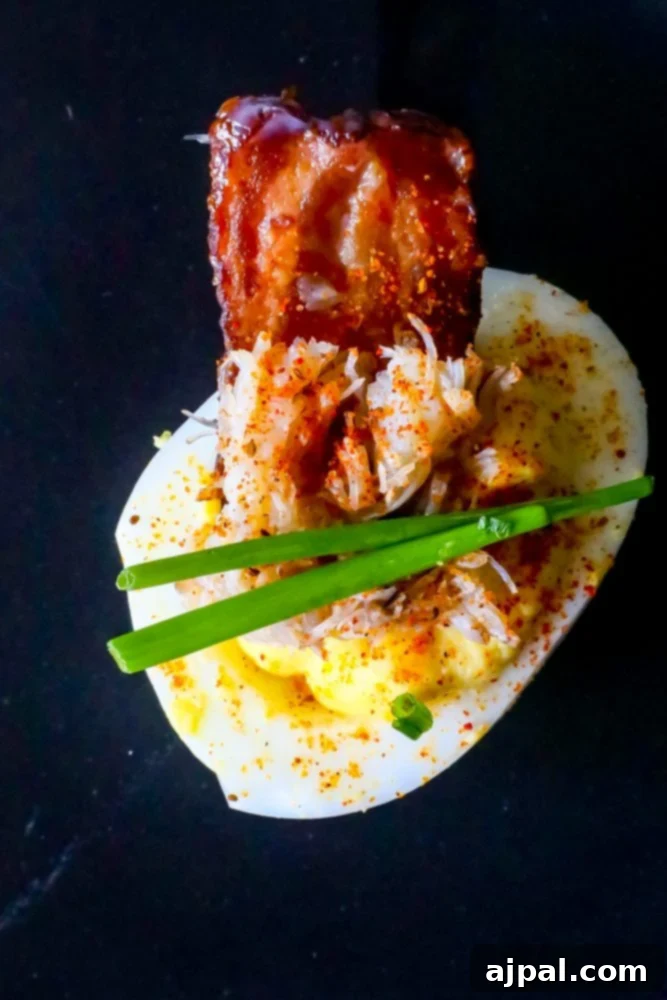
Other Delicious Egg Recipes
If you’re a devoted egg enthusiast like me, always on the lookout for innovative ways to enjoy this versatile ingredient, then you’re in for a treat! Eggs are truly a culinary marvel, capable of transforming into everything from hearty breakfast staples to elegant appetizers and rich desserts. Beyond these indulgent Bacon Crab Deviled Eggs, there’s a whole world of egg-centric recipes waiting to be discovered. Dive into some of our other cherished egg recipes that are guaranteed to delight your taste buds and expand your cooking repertoire!
More Egg-cellent Recipes!
Easy Everything Low Carb Bagel
How To Dye Easter Eggs
Simple Eggnog Recipe
Ham and Cheese Croissant Strata
Bacon Cheese Quiche
Sausage Spinach Quiche
Mushroom Quiche
Spicy Pickled Eggs
Bacon Crab Deviled Eggs Recipe
If you’ve enjoyed crafting and tasting this exceptional Bacon Crab Deviled Eggs recipe as much as we have, please show your appreciation by giving it a five-star review (just click the stars below to rate!). Your feedback helps us reach more home cooks and spread the joy of delicious homemade food. Don’t forget to share your creations and this recipe with friends and family on Facebook and Pinterest!

Only have 30 minutes to get dinner on the table? Sign up for my 30 minute dinner plans direct to your inbox!
Find and shop my favorite products in my Amazon storefront here!
Bacon Crab Deviled Eggs Recipe
Equipment
-
KitchenAid 6 Speed Hand Mixer with Flex Edge Beaters – KHM6118
-
Bovado USA 4 Quart Glass Bowl for Storage, Mixing, Serving – Clear, Dishwasher, Freezer & Oven Safe Premium Quality Glass, Easy-Clean, 4 QT
-
Kasmoire Reusable Piping Bags and Tips Set, Cake Decorating Tools with Icing Pastry Bags, Icing Bags Tips, Couplers and Frosting Bags Ties for Cookie Icing Cakes Cupcakes
Ingredients
- 6 large eggs
- 4 tablespoons mayonnaise
- 1 teaspoon yellow mustard
- ½ cup picked steamed lump crab meat, we use Phillips
- ¼ cup chives – diced or left long for a pretty presentation.
- 1 teaspoon old bay seasoning
- 4-6 strips bacon, cooked and crumbled or cut into thirds
Instructions
-
In a heavy large pot with a thick base, carefully place the eggs and cover them with cold water. Bring the water to a rolling boil over high heat.
-
Once the water reaches a full boil, immediately remove the pot from the heat. Cover the pot with a tight-fitting lid and let the eggs sit, undisturbed, for precisely 14 minutes to cook through.
-
After 14 minutes, carefully plunge the cooked eggs into a large bowl filled with ice water. Allow them to cool completely in the ice bath for at least 10 minutes; this helps with easy peeling.
-
Once cool, gently tap each egg all over with the back of a spoon to create small cracks in the shell.
-
For incredibly easy-to-peel eggs, you can let the cracked eggs sit in cold water overnight in the refrigerator.
-
When you are almost ready to assemble and serve, peel the cooled eggs under running water, which helps to wash away shell fragments.
-
Using a sharp knife, carefully cut each peeled egg in half lengthwise, ensuring a clean, even cut.
-
Gently use a small spoon to scoop out the vibrant egg yolks from each white half. Place the yolks into a separate small bowl.
-
Add the mayonnaise, yellow mustard, and Old Bay seasoning to the bowl with the egg yolks.
-
Using a fork or an electric mixer, whip the yolk mixture until it is perfectly smooth, creamy, and fluffy. Ensure there are no lumps.
-
Transfer the whipped yolk mixture to a pastry bag fitted with your desired star tip (for a decorative look), or simply use a plastic Ziploc bag with one corner snipped off.
-
Before piping, place about a teaspoon of the picked lump crab meat into the hollow of each egg white half.
-
Arrange the egg white halves on a serving platter. Pipe the creamy yolk filling generously over the crab meat in each egg white.
-
Just before serving, sprinkle the deviled eggs with the crispy crumbled bacon, a final dash of Old Bay, and the freshly diced chives for a beautiful and flavorful finish.
-
Serve immediately and enjoy these decadent Bacon Crab Deviled Eggs!
Nutrition
Nutrition information is automatically calculated, so should only be used as an approximation.
Additional Info
Tried this recipe?Mention @sweetcsdesigns or tag #sweetcsdesigns!