
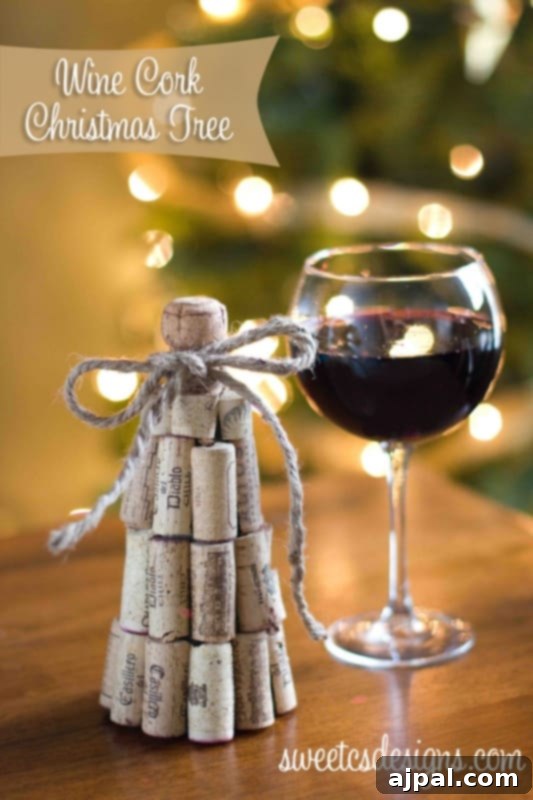
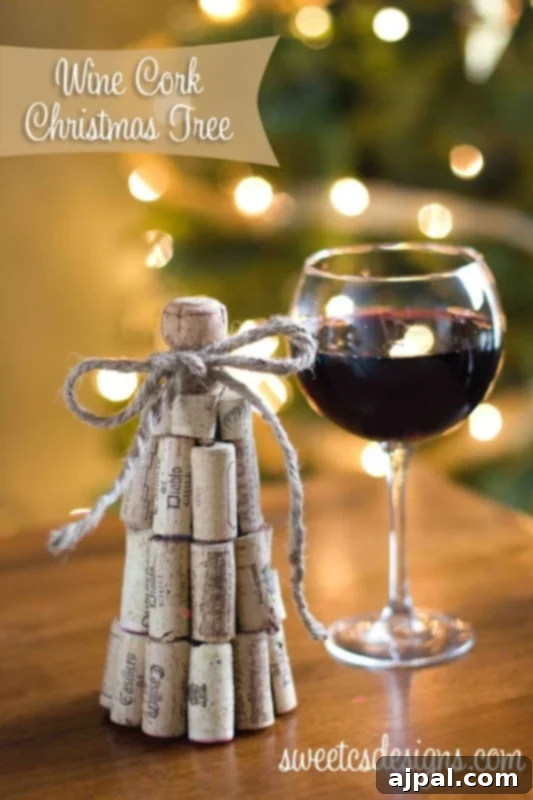
Craft Your Own Charming Wine Cork Christmas Tree: A Quick & Eco-Friendly DIY Guide
The holiday season invites us to infuse our homes with warmth, joy, and a touch of personal flair. While traditional decorations certainly have their charm, there’s a growing desire for unique, sustainable, and budget-friendly alternatives that stand out. This year, ditch the generic store-bought ornaments and embark on a delightful crafting journey to create a stunning wine cork Christmas tree – a rustic, elegant, and surprisingly simple DIY project perfect for any festive setting. It’s an ideal solution for families with curious little ones, offering a durable decoration that won’t shatter or easily succumb to playful tugs.
Imagine a festive display that not only complements your home decor but also tells a story. Each cork could represent a cherished memory, a shared bottle of wine, or simply a step towards a more sustainable celebration. This wine cork Christmas tree project is designed to be quick, rewarding, and incredibly versatile, making it a fantastic addition to a holiday tablescape, a cozy mantelpiece, or even a charming centerpiece for a winter wine tasting party. The best part? You can complete this project in under 20 minutes and for less than $5, transforming discarded corks into a cherished piece of holiday art.
Why Choose a DIY Wine Cork Christmas Tree This Holiday Season?
In a world increasingly focused on sustainability and mindful consumption, repurposing everyday items into beautiful decorations is both a joy and a statement. Here’s why a handmade wine cork Christmas tree should be at the top of your holiday craft list:
- Eco-Friendly & Sustainable: Give new life to wine corks that would otherwise end up in landfills. This project is a wonderful way to recycle and create something beautiful from waste, making your holiday decor a little greener.
- Budget-Friendly: With most of the “materials” likely already accumulated from your wine enjoyment, this craft is incredibly cost-effective. You’ll primarily need a foam cone and hot glue, keeping expenses to a minimum.
- Unique & Personalized: No two wine cork trees will ever be exactly alike. The variations in cork color, size, and branding add to its rustic charm, ensuring your decoration is truly one-of-a-kind. Plus, you can personalize it further with paint, glitter, or tiny embellishments.
- Child-Proof & Durable: Unlike delicate glass ornaments or fragile displays, a wine cork tree is remarkably sturdy. It can withstand curious hands and accidental bumps, making it a perfect, worry-free decoration for homes with young children or pets.
- Rustic Charm: The natural texture and earthy tones of wine corks lend themselves perfectly to a rustic, farmhouse, or bohemian aesthetic. It effortlessly adds warmth and character to any room, blending seamlessly with both modern and traditional decor.
- Quick & Easy: As you’ll discover, this project is surprisingly simple and can be completed in a remarkably short amount of time. It’s perfect for a spontaneous craft session or a quick decor update.
Materials You’ll Need for Your Rustic Cork Creation
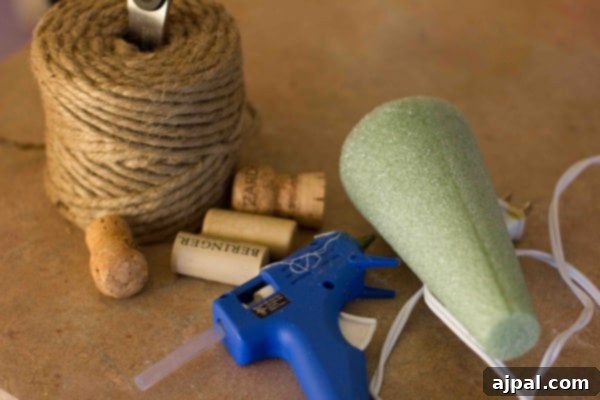
Gathering your supplies is the first step to crafting your beautiful wine cork Christmas tree. The beauty of this project lies in its simplicity and the common availability of its components. Here’s what you’ll need:
- Wine Corks: The star of our show! The number you’ll need depends on the size of your foam cone. For a 6-inch cone, approximately 15 corks (which will be cut in half) should suffice. Start collecting them well in advance, or ask friends and family to save theirs. Champagne corks are also useful for the topper.
- Foam Cone Tree: Available at any craft store, these cones come in various sizes. Choose one that fits your desired tree height and display space. Polystyrene or Styrofoam cones work best.
- Jute Ribbon or Twine: This adds a lovely rustic touch and can be used for hanging or as a decorative accent around the base or top. Jute is inexpensive and readily found in the craft store’s ribbon or jewelry-making section.
- Hot Glue Gun and Glue Sticks: Essential for securely attaching the corks to the cone. Ensure your glue gun is heated and ready to go before you begin.
- Very Sharp Knife: A utility knife, craft knife, or a sharp kitchen knife (like a serrated bread knife) will be necessary for cutting the corks. **Safety first!** Always exercise extreme caution when handling sharp objects.
- A Cutting Surface: Protect your work surface with a cutting mat or a sturdy piece of cardboard.
Step-by-Step Guide: Crafting Your Rustic Cork Tree
Creating your wine cork Christmas tree is a straightforward and enjoyable process. Follow these steps for a quick and successful DIY project:
Step 1: Estimate Your Cork Needs and Prepare Your Workspace
Before you start cutting, get a rough idea of how many corks you’ll need. For a 6-inch foam cone, around 15 standard wine corks (which will yield 30 halves) are usually enough. Lay out all your materials on a clean, protected surface. Ensure your hot glue gun is plugged in and heating up.
Step 2: Preparing Your Wine Corks for Application
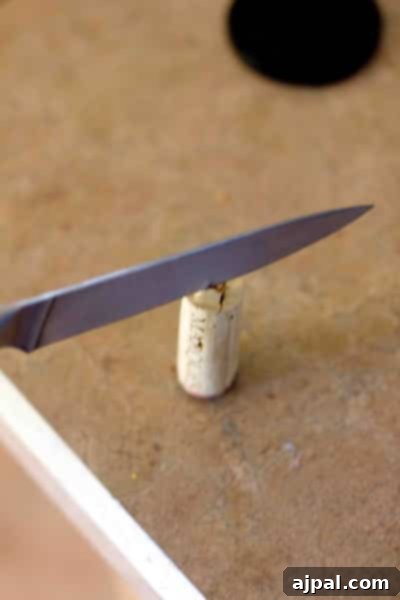
This is arguably the trickiest part, but with the right technique, it becomes surprisingly easy. You need to cut each wine cork in half lengthwise to create a flat surface for gluing. This ensures they sit flush against the foam cone and display better. Safety is paramount here!
To cut the corks efficiently and safely:
- Stand the cork upright on one end on your protected cutting surface.
- Firmly hold the top of the cork with one hand, ensuring your fingers are completely out of the blade’s path.
- With your other hand, position the very sharp knife on top of the cork, aiming for the center.
- Apply strong, consistent downward pressure while making a sweeping motion towards you. Think of it as pushing the knife down and through the cork, rather than a back-and-forth sawing motion. This method is much faster and less tiring than sawing, reducing the risk of the knife slipping.
- Repeat this process for all your corks, creating a pile of neatly cut halves.
Step 3: Building the Base Layers – Gluing Your Cork Halves
Now for the fun part – assembling your tree! Start at the base of your foam cone and work your way up.
- Apply a line of hot glue to the flat side of a cork half.
- Press the cork firmly onto the foam cone. Start at the very bottom edge, ensuring the cork sits vertically (not tilted).
- Continue gluing cork halves side-by-side around the entire circumference of the cone, forming your first layer. Don’t worry if there are tiny gaps between corks or if the cone isn’t entirely covered at this stage; we’ll address that later.
- Once the first layer is complete, begin the next layer directly above it, staggering the corks slightly to create a more natural, tree-like pattern.
- As you move up the cone, especially around its curves, you might find that the corks don’t perfectly meet. This is normal. Maintain the upright position of each cork half.
Step 4: Shaping, Filling Gaps, and Adding the Top Layer
As you continue gluing layers, you’ll inevitably reach the top where full cork halves might be too large. Here’s how to finish your tree beautifully:
- Top Layer Adjustment: If your cone isn’t tall enough for another full layer of cork halves, simply take some of your remaining flat corks and cut them in half lengthwise again. This will create smaller, quarter-sized cork pieces perfect for the narrower top sections. Glue these small pieces horizontally or vertically as needed to cover the tip of the cone.
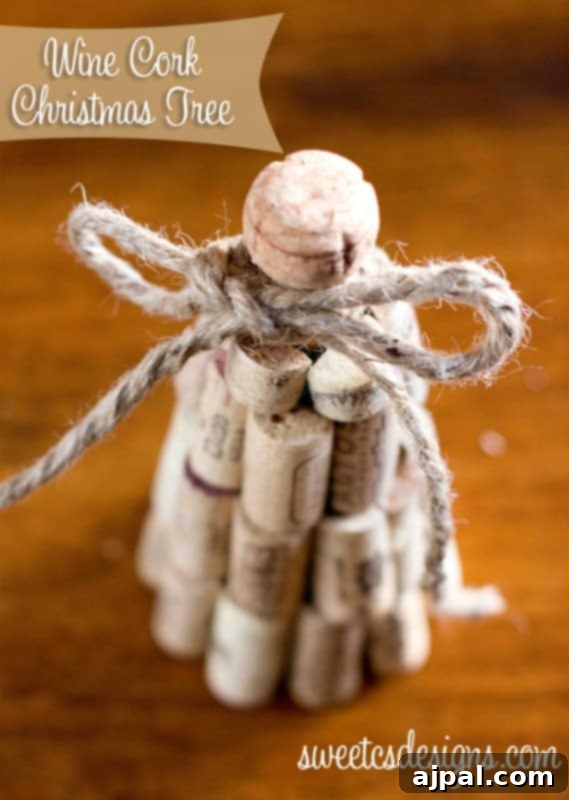
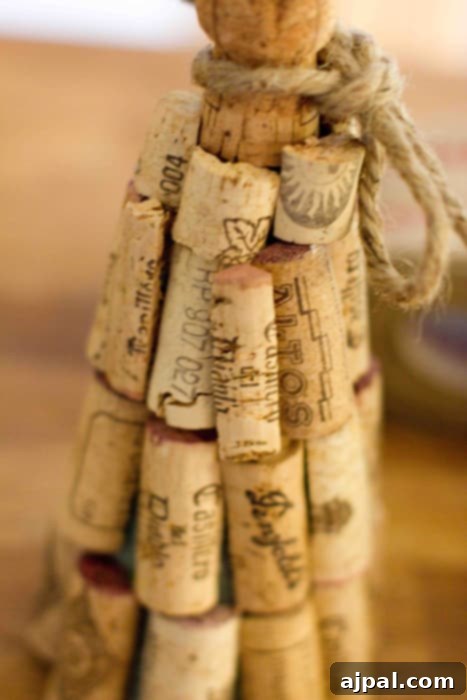
- The Star Topper: For a unique and fitting topper, take a whole champagne cork and glue it securely to the very center of the cone’s top. Its distinctive shape makes it an instant crown for your rustic tree.
- Filling Bare Spots: Once the main cork layers are complete, inspect your tree for any noticeable bare spots where the foam cone is still visible. Take any remaining cork halves or leftover quarter-sized pieces and slice them into even smaller slivers. Use these tiny cork fragments to carefully fill in these gaps, giving your tree a fuller, more polished appearance. For smaller cones, you might only need 4-5 such slivers.
Step 5: Adding the Festive Final Touches
With all your corks securely glued, your wine cork Christmas tree is almost complete! Now it’s time for the finishing touches that bring it all together:
Once all areas are covered and the glue has dried, take a length of jute ribbon or twine. Tie it elegantly around the champagne cork topper, creating a small loop for hanging (if desired) or simply a decorative bow. You can also wrap it spirally around the tree for added texture. Your beautiful, handmade wine cork Christmas tree is now ready to be proudly displayed as a part of your festive tablescape, mantelpiece, or anywhere you need a touch of holiday cheer! Keep an eye out for how I incorporate mine into my winter wine tasting party display!
Tips for Success and Beyond
To ensure your wine cork Christmas tree project goes smoothly and yields the best results, consider these additional tips:
- Safety First: Always prioritize safety when using a hot glue gun and a sharp knife. Keep fingers clear and work slowly and deliberately. If children are involved, handle all cutting and gluing yourself.
- Cork Collection: Start collecting corks early! If you don’t drink much wine, ask friends, family, or even local restaurants and wineries if they save corks. Many are happy to pass them along.
- Variations in Corks: Embrace the imperfections and variety in your corks. Different brands, ages, and even wine stains add character and authenticity to your rustic tree.
- Drying Time: While hot glue sets quickly, allow your tree to sit for a few minutes after all corks are attached to ensure everything is firmly secured before handling extensively.
- Experiment with Sizes: Create a charming forest of wine cork trees by using foam cones of varying heights. A collection of small, medium, and large trees makes an impressive display.
- Alternative Toppers: If a champagne cork isn’t your preference, consider a small star ornament, a miniature bow, or even a tiny decorative bead as a topper.
Variations and Personalization Ideas
While the natural rustic look is appealing, there are countless ways to personalize your wine cork Christmas tree to match your specific holiday theme or personal style:
- Paint It: Spray paint your entire tree (once the glue is dry) white for a snowy look, silver or gold for a glamorous touch, or even a vibrant holiday color like red or green.
- Add Glitter: For a sparkling effect, apply a thin layer of craft glue to the corks (or directly to the foam cone before gluing corks) and sprinkle with glitter.
- Mini Embellishments: Attach tiny beads, miniature jingle bells, small faux berries, or even tiny ribbon bows between the corks for added detail and festive cheer.
- LED Lights: Gently wrap a string of battery-operated fairy lights around your finished tree for a magical glow, perfect for evening displays.
- Base Decoration: Place your tree on a small wooden disc, a mini sled, or surround its base with faux snow, pinecones, or small ornaments.
- Themed Trees: If you have corks from specific wines or regions, arrange them to create a themed tree that reflects your favorite vino!
Displaying Your Masterpiece
Once your charming wine cork Christmas tree is complete, the possibilities for display are endless. Here are a few ideas to showcase your handmade holiday decor:
- Centerpiece: Place it at the heart of your dining table, surrounded by flickering candles, pine boughs, and other festive elements for a truly memorable tablescape.
- Mantelpiece Decor: Line your mantel with a series of varying-sized cork trees, perhaps intertwined with garland and stockings, creating a warm and inviting focal point.
- Entryway Accent: Greet guests with a touch of handmade charm by placing your tree on a console table in your foyer.
- Kitchen or Bar Area: Given its origins, a wine cork tree is a perfect fit for a kitchen counter, bar cart, or wine cellar display, especially during holiday gatherings.
- Gift Giving: A handmade wine cork Christmas tree makes a thoughtful and unique gift for wine lovers, hosts, or anyone who appreciates handcrafted decor.
Beyond Christmas: Other Creative Cork Craft Ideas
If you’ve enjoyed crafting your wine cork Christmas tree, you’ll be happy to know that wine corks are a versatile material for many other DIY projects. Don’t stop at just one tree! Consider these ideas for year-round crafting:
- Wine Cork Trivets or Coasters: Cut corks into discs or half-corks and glue them together to create heat-resistant surfaces for hot dishes or drink coasters.
- Wine Cork Wreaths: Similar to the tree, glue corks onto a foam wreath form for a beautiful door decoration.
- Cork Keychains: Attach a keyring to a decorated cork for a unique and buoyant keychain.
- Picture Frames: Embellish an old picture frame with cork slices for a rustic border.
- Bath Mats: Glue hundreds of corks together to create a naturally absorbent and soft bath mat.
- Planter Drainage: Use whole corks at the bottom of plant pots for excellent drainage, preventing root rot.
Creating your own wine cork Christmas tree is more than just a craft project; it’s an opportunity to infuse your home with personal charm, celebrate sustainability, and create lasting memories. It’s a simple, affordable, and incredibly rewarding way to decorate for the holidays, offering a unique piece that is both beautiful and robust. So gather your corks, unleash your creativity, and enjoy the process of crafting a truly special holiday decoration that will be admired for years to come. Happy crafting!