
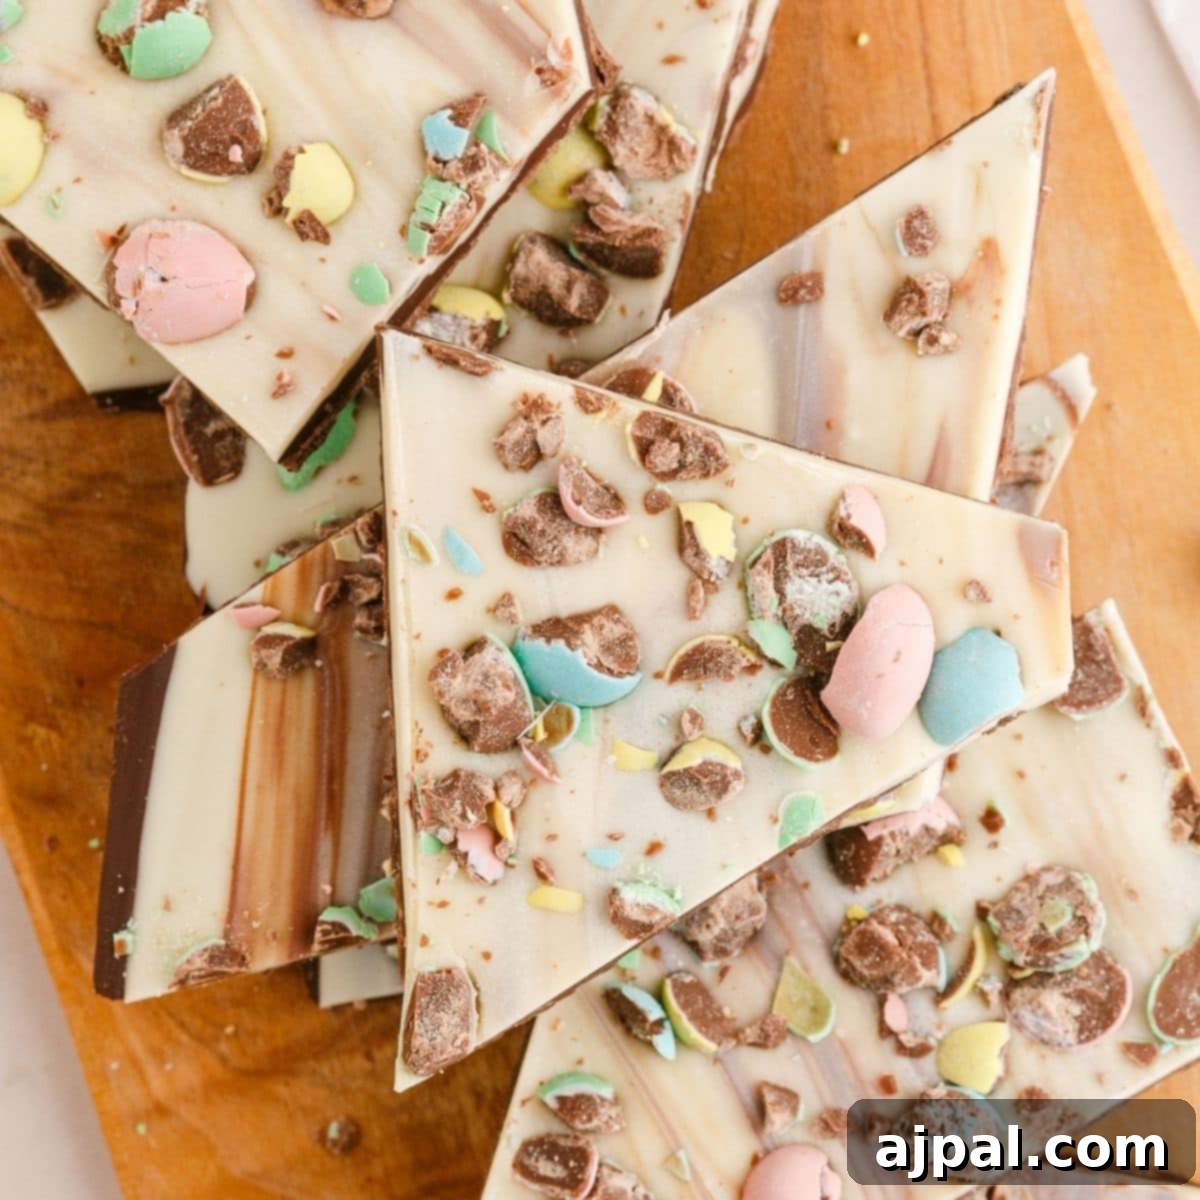
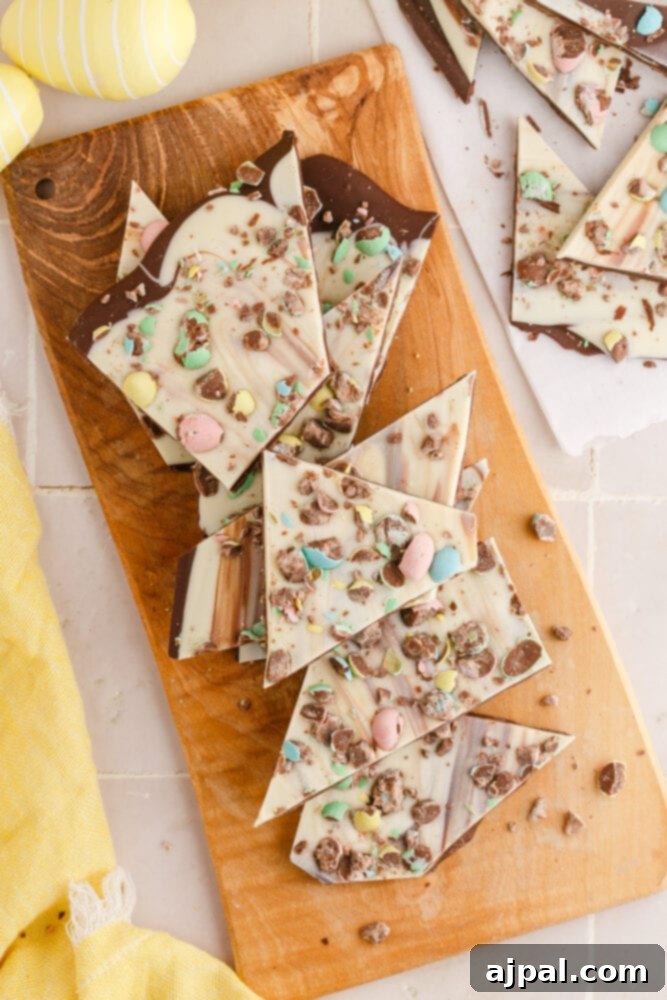
Get ready to create a truly irresistible treat that’s as simple to make as it is delightful to devour! This **Easy Easter Bark** recipe combines the creamy richness of white chocolate with the festive crunch of Cadbury eggs, making it the perfect sweet indulgence for your spring celebrations. Whether you’re looking for a quick last-minute dessert, a fun activity with the kids, or a charming homemade gift, this chocolate bark delivers on all fronts.
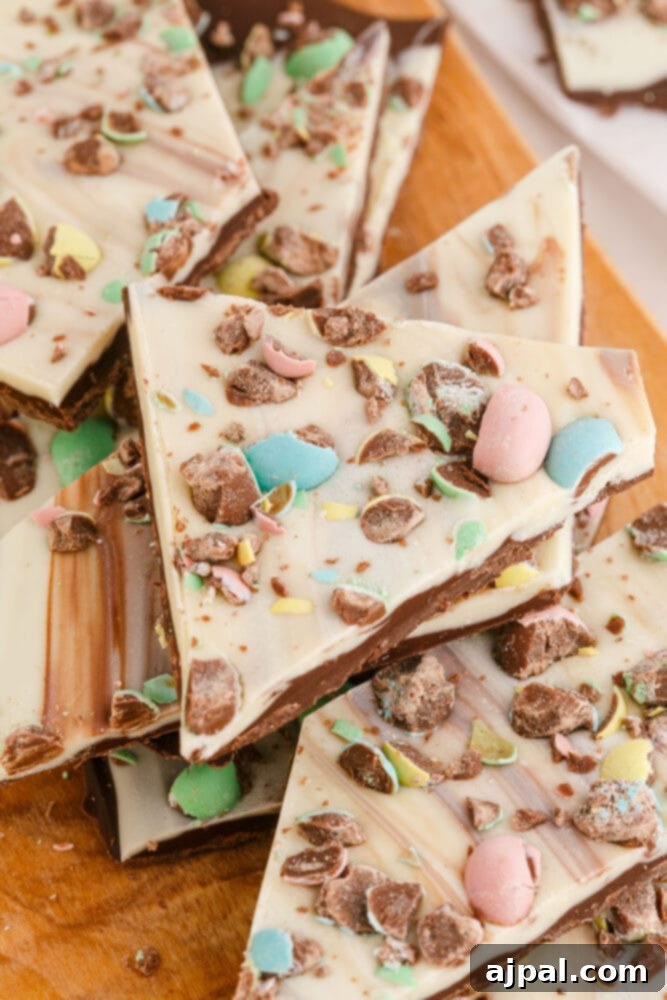
Navigating through recipes can sometimes be a challenge, especially when you’re eager to get straight to the cooking! For your convenience, we’ve included a handy table of contents just below. Feel free to jump directly to the sections that interest you most, or follow along for detailed tips and insights.
As a passionate home cook without formal culinary training, my aim is to empower every beginner in the kitchen. I believe understanding *why* a recipe works and the role each ingredient plays can boost confidence and lead to more delicious results. This guide is packed with helpful hints to ensure your Easter Bark turns out perfectly every time.
Table of contents
- Easy White Chocolate Easter Bark: Your Go-To Holiday Treat
- The Magic Behind Chocolate Bark: Why It’s So Popular
- Essential Ingredients for Your Easter Bark
- Step-by-Step Guide: How to Make Easter Bark
- Tips and Tricks for Perfect Easter Bark and FAQs
- FAQs
- Customize Your Easter Bark: Endless Variations
- Gifting and Storing Your Homemade Easter Bark
- More Easter Recipes You’ll Love
- Easy Easter Bark Recipe: Full Details
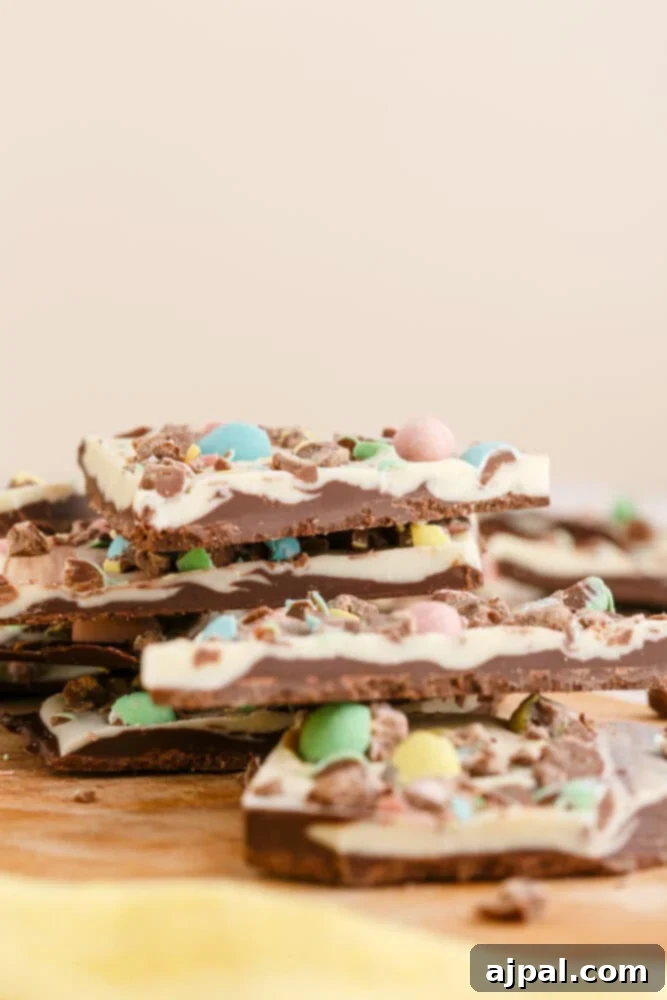
Easy White Chocolate Easter Bark: Your Go-To Holiday Treat
The anticipation for Easter is building, and while special occasions often call for elaborate meals and desserts, that doesn’t mean you have to be stuck in the kitchen all day. If you’ve never ventured into making chocolate bark for your holiday spread, prepare to be amazed! This delightful **White Chocolate Easter Bark** isn’t just incredibly tasty; it’s also wonderfully convenient, making it a stellar choice for busy hosts and home bakers alike. Let’s dive into why this recipe is about to become your new Easter favorite:
- Effortlessly Simple: This Easter bark recipe is truly foolproof. Forget complicated techniques, lengthy ingredient lists, or advanced baking skills. It’s designed for simplicity, ensuring even novice cooks can achieve stunning results.
- The Ultimate Last-Minute Solution: Did you forget to plan an Easter dessert? No problem! This bark is your culinary savior. You can whip up a batch from start to finish in as little as 30 minutes, including chilling time. It’s the perfect treat when time is of the essence.
- Minimal Ingredients, Maximum Flavor: You only need three core ingredients to create this dangerously delicious bark. Despite its simplicity, the combination of rich chocolate and vibrant Cadbury eggs creates a flavor profile that’s both satisfying and festive. Less fuss, more flavor – what could be better?
- Versatile and Customizable: While we highlight Cadbury eggs, the beauty of bark lies in its adaptability. Easily swap or add other toppings to suit your taste or what you have on hand. From sprinkles to nuts, the possibilities are endless for creating a unique holiday masterpiece.
- Perfect for Gifting: Homemade Easter Bark makes for a thoughtful and beautiful gift. Package it in clear bags with a ribbon, and you have instant gifts for friends, family, or teachers, showing you care without spending hours in the kitchen.
Embrace the joy of hassle-free holiday baking with this spectacular Easter bark. It’s a delightful addition to any Easter basket, dessert table, or simply a sweet treat to enjoy with a cup of coffee.
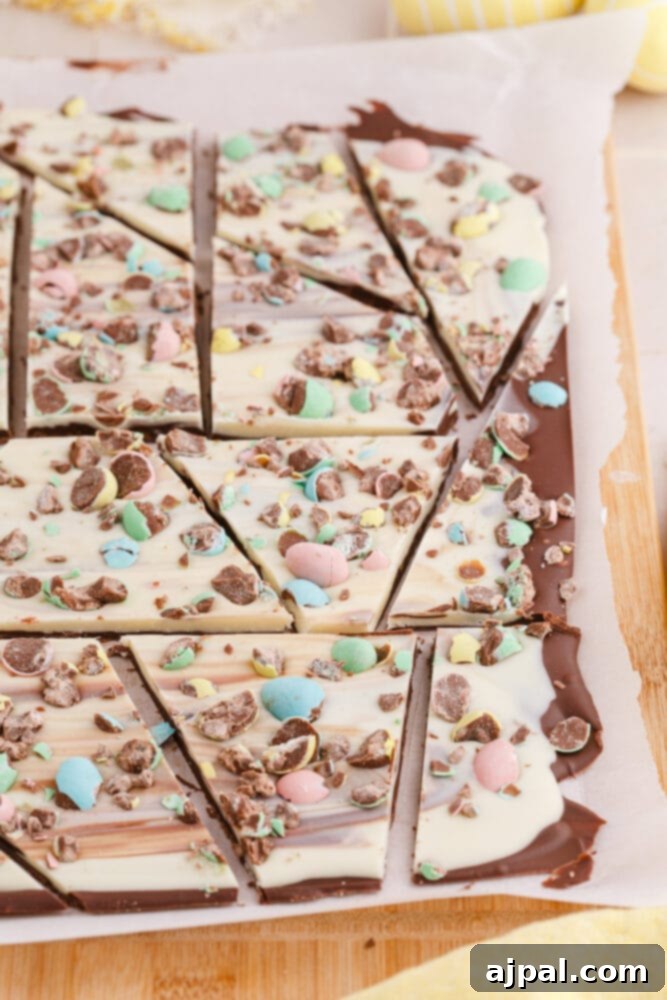
The Magic Behind Chocolate Bark: Why It’s So Popular
Chocolate bark has long been a favorite for its elegant appearance and incredible ease of preparation. But what exactly makes it so captivating? At its core, chocolate bark is simply melted chocolate spread thinly and adorned with various toppings before being allowed to set and then broken into irregular pieces. This method not only results in beautiful, rustic-looking shards but also offers a wonderful textural contrast between the smooth chocolate and crunchy or chewy additions.
The beauty of making bark, especially for holidays like Easter, is that it allows for immense creativity. You can play with different types of chocolate – dark, milk, or a combination – and a seemingly infinite array of toppings. The key to a truly successful bark lies in the quality of your chocolate and the care taken during the melting process. While tempering chocolate (a precise method of heating and cooling to achieve a stable crystalline structure) yields the most professional, snap-able, and resistant-to-melting bark, a simpler microwave method works perfectly for home cooks and delivers delicious results.
For this Easter Bark, we focus on a vibrant, contrasting look using both semi-sweet and white chocolate, adorned with colorful Cadbury eggs. This not only makes the bark visually appealing but also adds layers of flavor that are sure to please any palate. It’s a versatile canvas for your culinary imagination!
Essential Ingredients for Your Easter Bark
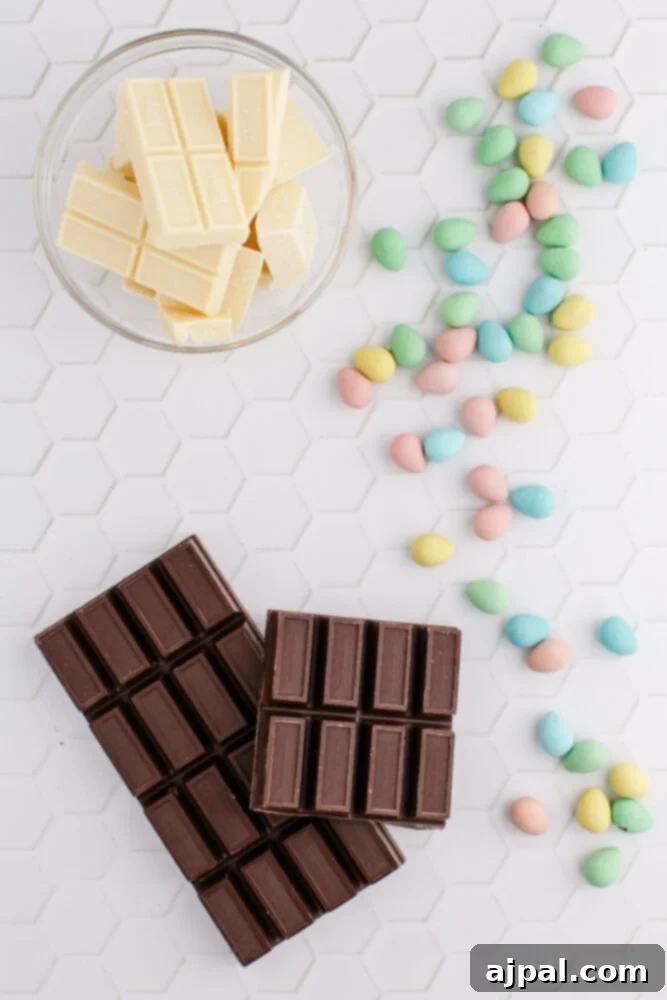
One of the many charms of this Easter Bark recipe is its minimalist ingredient list. You won’t need to embark on an epic grocery store hunt to gather exotic items. With just a few staple ingredients, you’ll be well on your way to creating these delightful treats. Here’s a closer look at what you’ll need:
- Semi-Sweet Chocolate: For the base layer, I recommend using a high-quality semi-sweet chocolate baking bar. Chopping it into small, uniform pieces ensures even melting. While semi-sweet provides a classic chocolate flavor that perfectly complements the white chocolate, feel free to experiment with your preferred melting chocolate. Dark chocolate will offer a more intense, less sweet contrast, while milk chocolate will create a creamier, sweeter profile. Always opt for good quality chocolate, as it makes a noticeable difference in the final taste and texture.
- White Baking Chocolate: The vibrant white layer comes from white baking chocolate. Like the semi-sweet chocolate, using a baking bar and chopping it into small pieces is ideal for smooth melting. It’s important to distinguish between real white chocolate (which contains cocoa butter) and “white confectionery coating” or “candy melts,” which often contain vegetable fats and behave differently when melted. While candy melts can work for their vibrant color and ease of use, real white chocolate offers superior flavor and texture.
- Cadbury Eggs: These iconic, festive candies are the star topping of our Easter Bark. Their colorful shell and creamy chocolate interior are synonymous with Easter. Be sure to chop them into smaller pieces so they distribute well and are easier to bite into. The amount you use can be adjusted to your preference – more eggs mean more festive crunch!
- Optional Toppings: While Cadbury eggs are fantastic on their own, bark is inherently versatile. Consider having other toppings on hand to customize your creation. Think colorful sprinkles, mini M&Ms, crushed pretzels for a salty crunch, or even a drizzle of contrasting colored chocolate.
With these simple ingredients, you’re all set to create a stunning and delicious Easter Bark that will be the highlight of your holiday!
Once you’ve gathered your few simple ingredients, you’ll be amazed at how quickly this delightful recipe comes together. With just a minimal time investment, you’ll have a gorgeous and delicious Easter treat ready for sharing or indulging. Follow these straightforward steps for a perfect Easter Day delight!
Step-by-Step Guide: How to Make Easter Bark
Making homemade chocolate bark is incredibly simple, and this recipe is designed to be as straightforward as possible. Here’s a detailed, step-by-step guide to ensure your Easter Bark turns out perfectly:
- Prepare Your Baking Surface: Begin by lining a small baking sheet (approximately 7″ x 10″) with a sheet of parchment paper. This crucial step prevents the chocolate from sticking and makes for easy removal and cleanup. If you don’t have parchment paper, wax paper can be a substitute, but parchment is highly recommended for its non-stick properties.
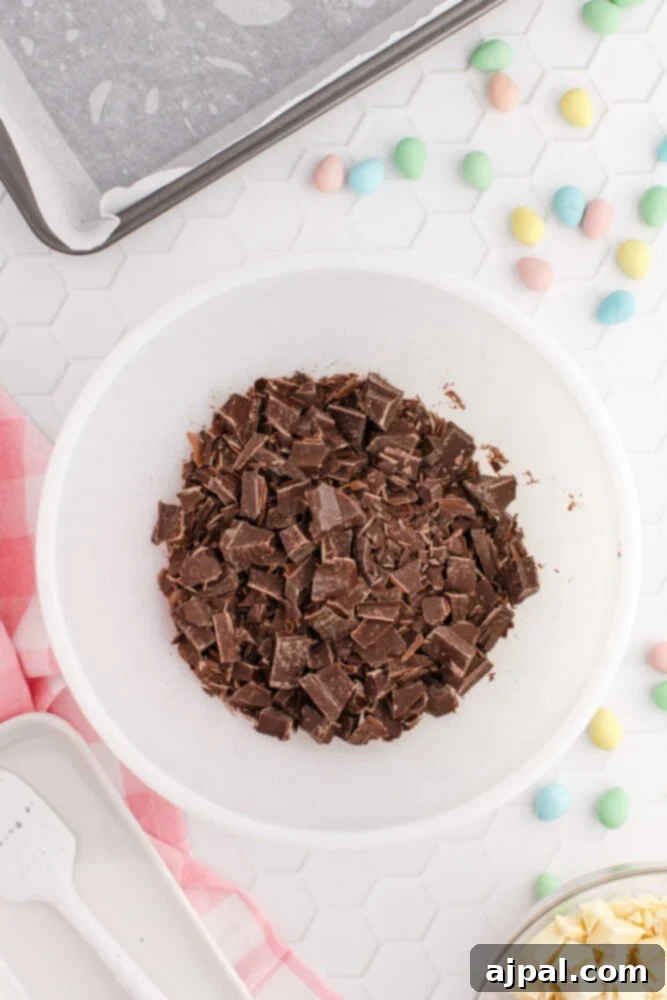
- Chop the Semi-Sweet Chocolate: Take your semi-sweet chocolate baking bar and carefully chop it into small, uniform pieces. Smaller pieces will melt more evenly and quickly, preventing overheating. Place the chopped chocolate into a microwave-safe bowl.
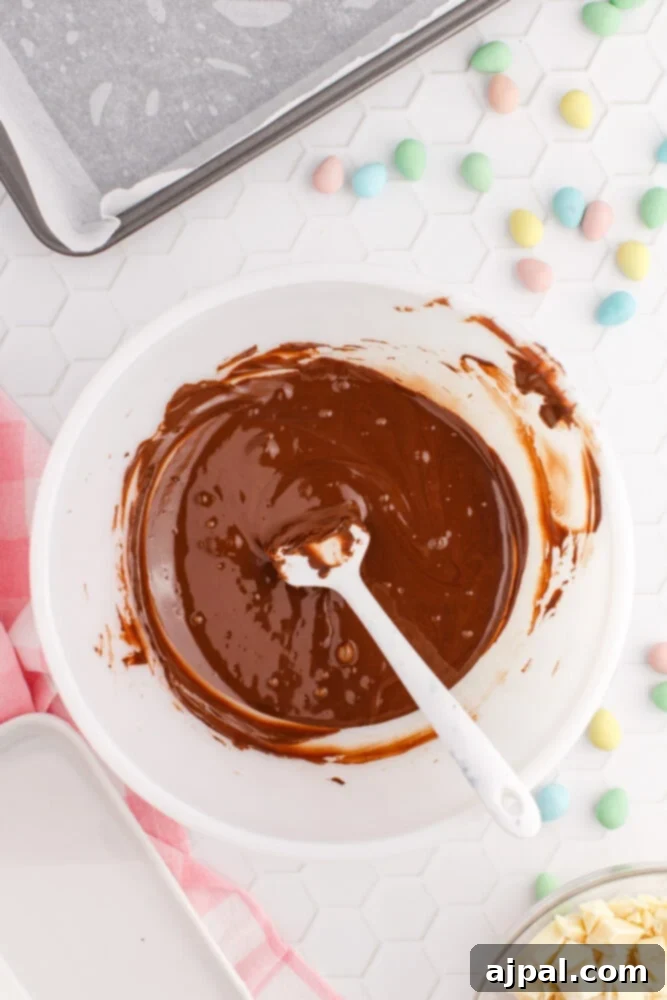
- Melt the Semi-Sweet Chocolate: Microwave the chocolate in short, 30-second intervals. After each interval, remove the bowl and stir the chocolate thoroughly. This even distribution of heat prevents scorching and helps the chocolate melt smoothly. Continue this process until the chocolate is fully melted and beautifully smooth. Alternatively, you can use the double boiler method for a gentler melt (see FAQs for details).
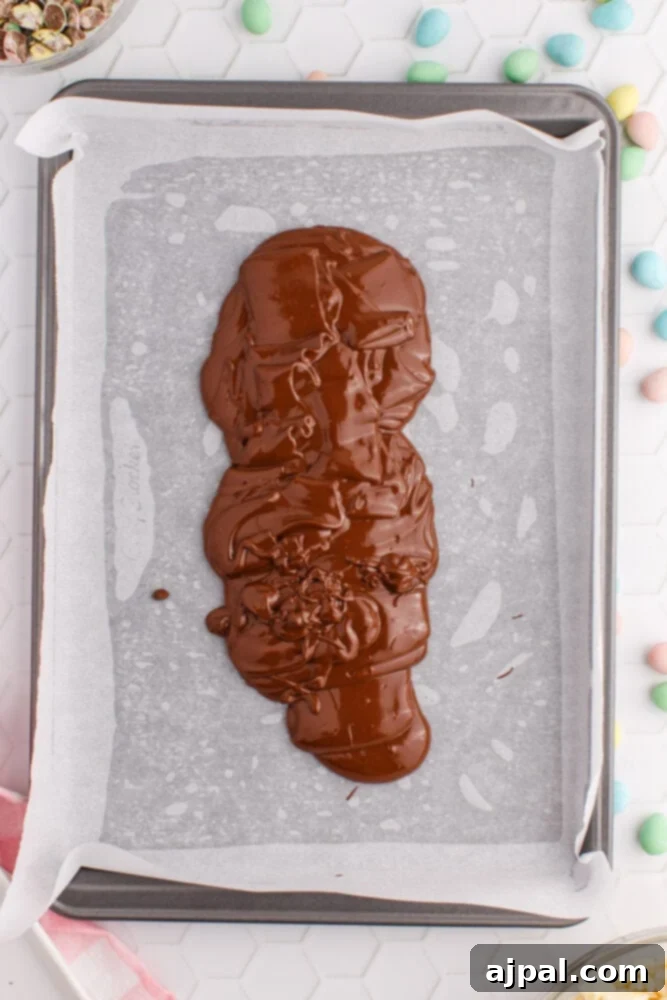
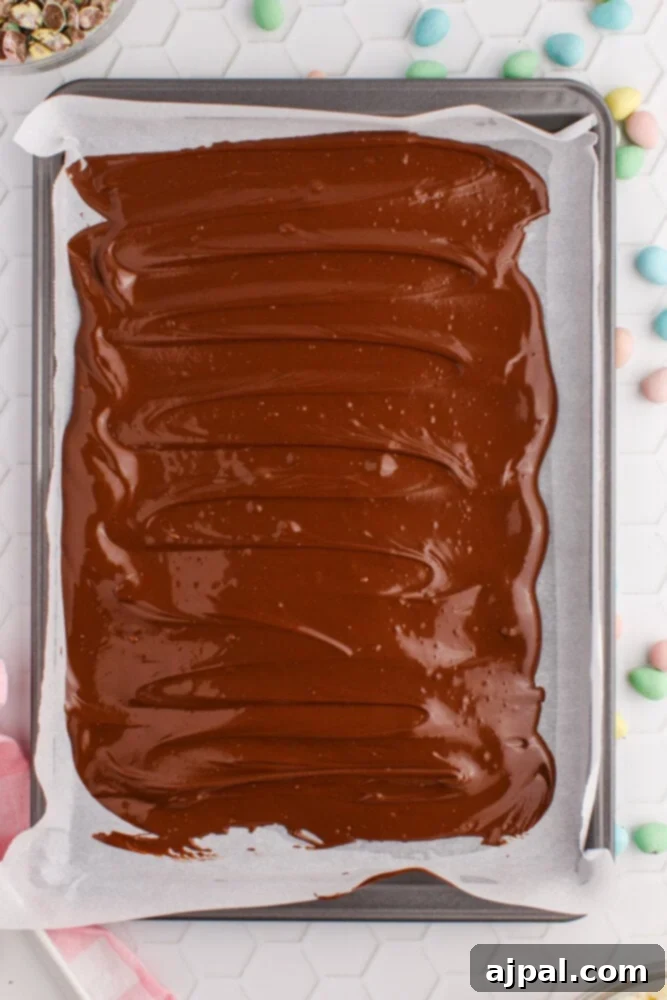
- Spread the First Layer: Once the semi-sweet chocolate is melted, pour it onto the prepared parchment-lined baking sheet. Using an offset spatula or the back of a spoon, gently spread the chocolate into an even layer. Don’t worry if it doesn’t reach the very edges of the baking sheet; the goal is an even thickness across the area you cover.
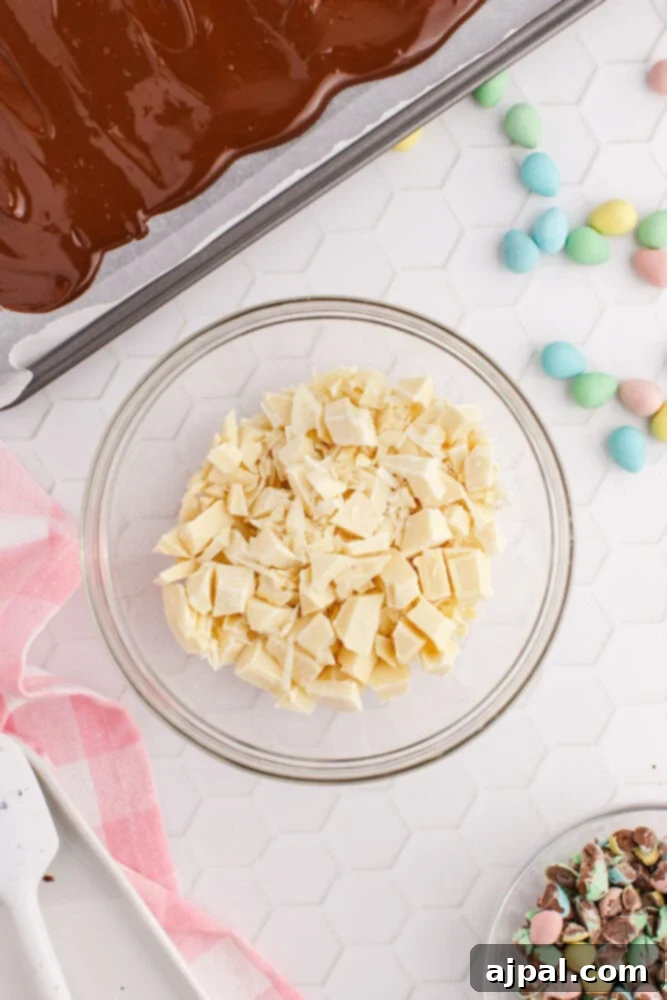
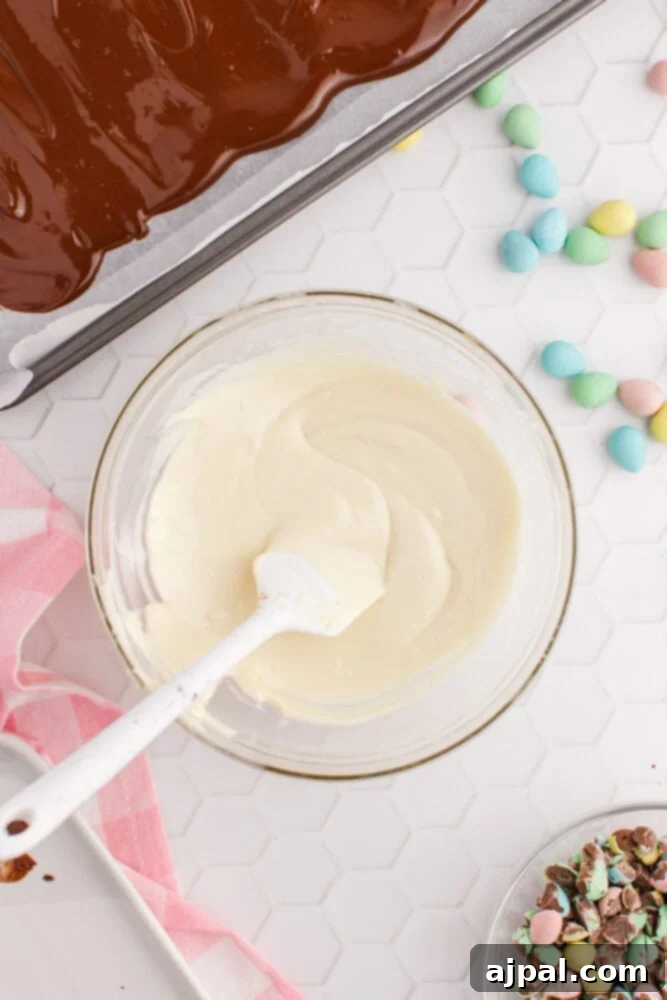
- Prepare the White Chocolate: Now, repeat the chopping and melting process with your white baking chocolate. Place the chopped white chocolate in a separate microwave-safe bowl and melt it in 30-second intervals, stirring well after each, until smooth and creamy.
PRO TIP: If you desire distinct, separate layers of chocolate without any blending or swirling of colors, allow your semi-sweet chocolate layer to cool and firm up slightly in the refrigerator for about 5-10 minutes before adding the white chocolate. This quick chill will create a barrier that keeps the colors defined.
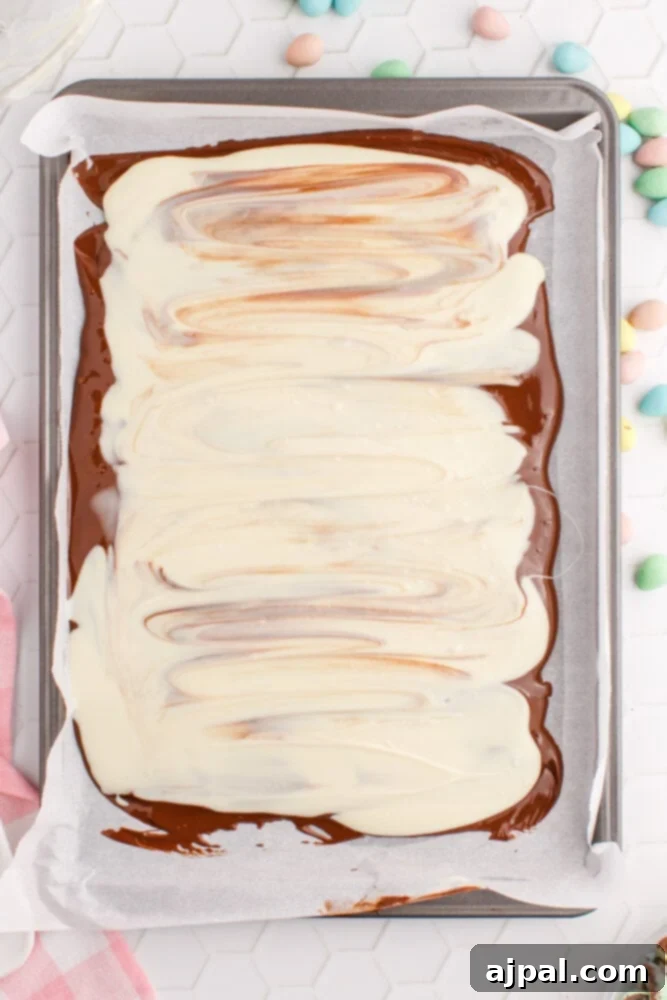
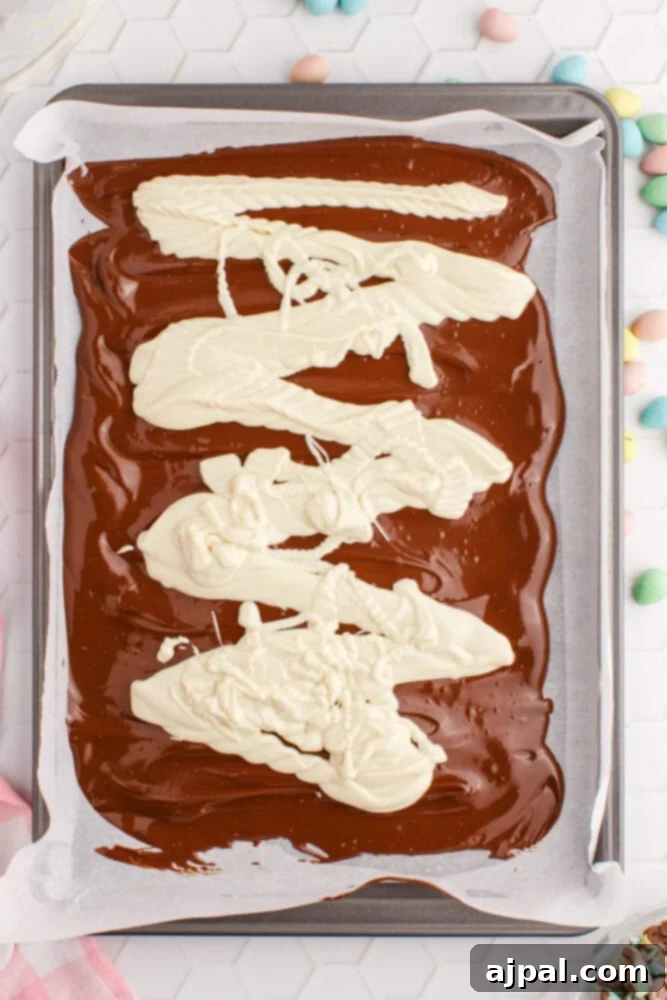
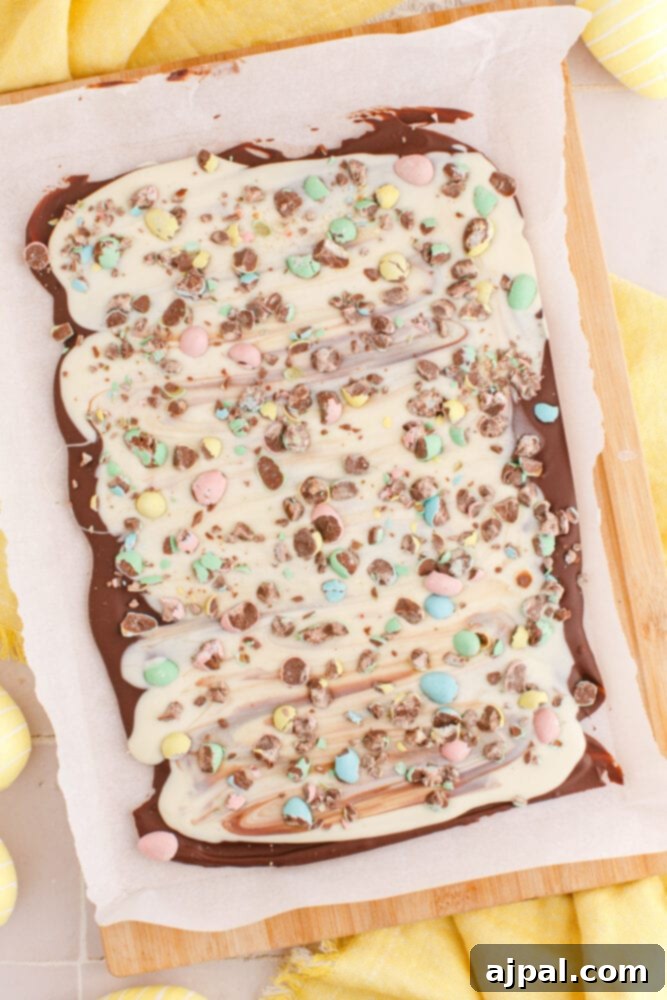
- Add the White Chocolate Layer: Carefully pour the melted white chocolate over the now slightly set or still-warm semi-sweet chocolate layer. Gently spread it out using your spatula, ensuring it covers the first layer as evenly as possible. You can create a smooth surface or a gently swirled effect if you apply the white chocolate while the dark chocolate is still soft.
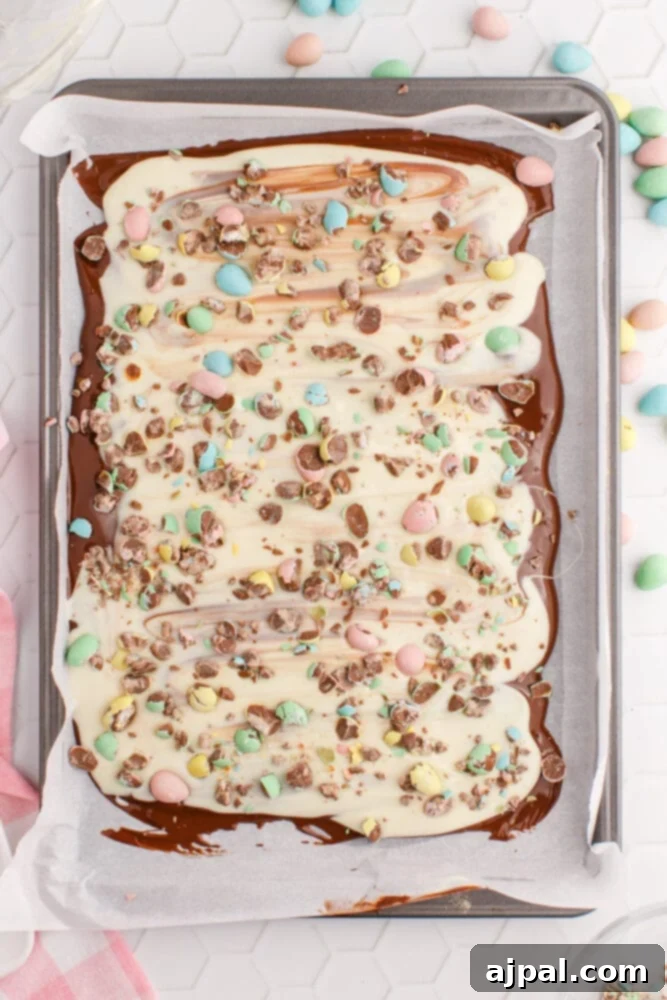
- Decorate with Toppings: This is the fun part! Immediately after spreading the white chocolate, sprinkle your chopped Cadbury eggs generously over the surface. If you’re using other toppings like sprinkles or mini M&Ms, add them now too. Gently press the toppings down into the melted chocolate to ensure they adhere properly as the bark sets.
- Chill to Set: Transfer the entire baking sheet to the refrigerator and chill for approximately 25 minutes, or until the chocolate is completely firm and set. This cooling time is crucial for achieving that characteristic “snap” of bark.
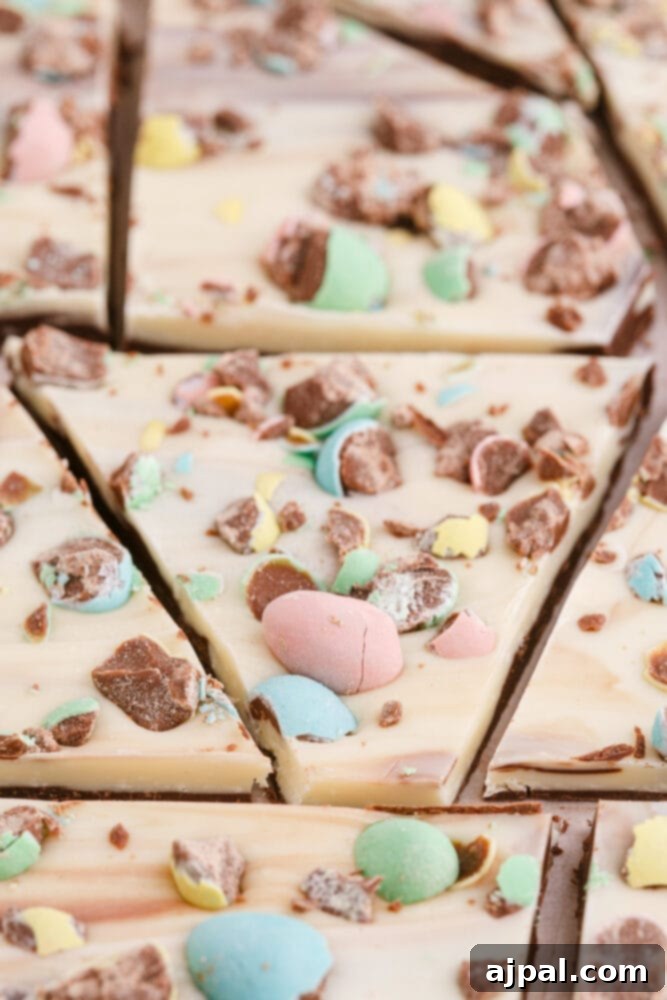
- Break into Pieces: Once the chocolate is fully set, remove the baking sheet from the fridge. Carefully lift the parchment paper with the bark onto a cutting board. Using a sharp knife, or simply your hands, break or chop the bark into your desired sizes and shapes. Irregular pieces are part of the charm!
- Serve and Enjoy!: Your beautiful, homemade Easter Bark is now ready to be served! Arrange it on a platter, package it for gifts, or simply enjoy a piece (or two!) yourself.
Tips and Tricks for Perfect Easter Bark and FAQs
Achieving perfect chocolate bark is simpler than you might think, especially with a few insider tips and tricks. Here’s how to ensure your Easter Bark is a resounding success, along with answers to some frequently asked questions:
- Choose Quality Chocolate: The foundation of excellent bark is good chocolate. Opt for decent quality baking bars rather than chocolate chips, especially for the white chocolate. Baking bars typically contain cocoa butter, which melts more smoothly and sets with a better snap than chips, which often contain stabilizers to hold their shape. However, in a pinch, chocolate chips will certainly work.
- Don’t Rush the Melt: Whether using a microwave or a double boiler, melt your chocolate slowly and gently. Overheating chocolate can cause it to seize or become grainy. Low and slow is the key to a silky-smooth finish.
- Even Spreading is Key: Use an offset spatula or the back of a sturdy spoon to spread the melted chocolate evenly onto your parchment-lined baking sheet. An even layer ensures consistent texture and easy breaking once set. Aim for about ¼ inch thickness.
- Prevent Color Blending: As mentioned in our pro tip, if you desire clearly defined layers, chill your first chocolate layer (the semi-sweet) in the fridge for 5-10 minutes until it’s just firm to the touch before pouring on the second (white chocolate) layer. This prevents the colors from mixing too much, resulting in a beautiful, crisp separation.
- Toppings Adherence: Add your Cadbury eggs and other desired toppings immediately after spreading the final layer of melted chocolate. Gently press them down so they embed slightly into the chocolate. This ensures they don’t fall off once the bark is set and broken.
- Creative Swirls: If you *do* want a marbled effect, pour the second chocolate layer over the first while both are still quite warm. Then, use a skewer or a thin knife to gently swirl the chocolates together before adding toppings.
- No Need for Perfection: Remember, the rustic, irregular edges of bark are part of its charm! Don’t stress about making perfect edges or a perfectly rectangular slab. It’s meant to look homemade and inviting.
FAQs
When using a microwave, you don’t set a specific temperature; you simply heat in short bursts. Most microwaves reach about 210°F (99°C) very quickly. The key is to melt in 30-second intervals, stirring thoroughly between each, to prevent overheating. If you opt for the double boiler method, aim for medium-low heat, just enough to create a gentle simmer in the water below, allowing the steam to indirectly heat the chocolate to a melting point, typically around 105-115°F (40-46°C) for most chocolates, without scorching.
This is one of the quickest homemade treats! Melting the chocolate layers typically takes only about 5 minutes using the microwave method. The bulk of the time is spent chilling the bark in the refrigerator, which requires around 25 minutes for it to fully set. This means you can have delicious, ready-to-eat Easter Bark in as little as 30 minutes from start to finish!
Proper storage is essential to keep your bark fresh and prevent melting. You can store any leftover Easter bark in an airtight container or a Ziploc bag at room temperature for up to 10 days, provided your room is no warmer than 70°F (21°C). For longer storage, place it in the refrigerator, where it will keep well for 2-3 weeks. For extended freshness, Easter bark freezes beautifully and can last for several months in an airtight freezer-safe container.
Absolutely! In fact, many professional chocolatiers consider the double boiler method the superior way to melt chocolate, as it provides a more controlled and gentle heat. You don’t need a special double boiler; simply fill a larger pot with about 2 inches of water, then place a smaller, heat-safe bowl on top of it, ensuring the bottom of the bowl doesn’t touch the water. Bring the water to a gentle simmer, and the steam will evenly heat and melt the chocolate in the top bowl. Stir frequently until smooth.
Chocolate bark is incredibly versatile, making it perfect for endless customization! Beyond Cadbury eggs, here are some popular additions to inspire your creativity:
- Other Candies: M&Ms, chopped candy bars (like Snickers or Kit Kat), gummy bears, mini marshmallows, Peeps (placed immediately after pouring chocolate).
- Nuts: Chopped almonds, pecans, walnuts, pistachios for a crunchy texture and rich flavor.
- Dried Fruits: Cranberries, raisins, chopped apricots, or candied orange peel add a chewy, tart contrast.
- Salty Crunch: Pretzels (crushed or whole mini pretzels), potato chips, or sea salt for a delightful sweet and salty combination.
- Coconut: Toasted or shredded coconut adds a tropical flair.
- Sprinkles: Festive sprinkles in various colors and shapes are always a hit, especially for holiday-themed bark.
- Extracts: A few drops of peppermint, almond, or orange extract stirred into the melted chocolate can completely change the flavor profile.
Customize Your Easter Bark: Endless Variations
While our classic white and semi-sweet chocolate bark with Cadbury eggs is undoubtedly delicious, the real fun of making chocolate bark lies in its incredible versatility. Consider your bark a blank canvas, ready for your artistic touch! Here are some ideas to inspire your next batch:
- Chocolate Choices:
- All White Chocolate: For a pure, creamy base, use only white chocolate and focus on colorful toppings.
- Milk Chocolate Base: A layer of milk chocolate provides a sweeter, creamier foundation.
- Dark Chocolate Intensity: Opt for a dark chocolate base (70% cocoa or higher) for a more sophisticated, less sweet profile that pairs wonderfully with tangy dried fruits.
- Triple Chocolate: Create three distinct layers using dark, milk, and white chocolate for a dramatic effect.
- Topping Extravaganza:
- Nutty Crunch: Sprinkle toasted almonds, pistachios, pecans, or walnuts for added texture and flavor.
- Fruity & Bright: Dried cranberries, cherries, apricots, or candied citrus peel add a chewy, tart contrast.
- Sweet & Salty: Crushed pretzels, sea salt flakes, or even crispy bacon bits create an addictively complex flavor.
- Candy Galore: Beyond Cadbury eggs, try chopped mini chocolate bars, M&Ms, gummy candies, or even crushed Oreos.
- Holiday Themed: For Easter, think pastel sprinkles, mini marshmallows, or even Peeps (added right after the chocolate is spread).
- Flavor Infusions:
- Stir in a few drops of food-grade essential oils or extracts like peppermint, orange, almond, or even a hint of espresso powder for an extra flavor kick.
- Decorative Drizzles: After your main toppings are in place, you can melt a contrasting chocolate (e.g., dark chocolate over white bark) and drizzle it artfully over the top for an extra touch of elegance.
Don’t be afraid to experiment! Half the fun is discovering new flavor combinations that become your personal favorites. Let your imagination run wild and create a bark that truly reflects your taste and holiday spirit.
Gifting and Storing Your Homemade Easter Bark
Once your beautiful Easter Bark is made and broken into tempting pieces, you might be wondering about the best way to present it as a gift or keep it fresh for longer. Homemade chocolate bark is an incredibly thoughtful and well-received present, and with a little care, it can be stored to maintain its deliciousness for weeks.
Perfect for Gifting:
- Clear Cellophane Bags: Simply place several pieces of bark into clear cellophane bags, tie them with a festive ribbon (think pastels for Easter!), and perhaps add a small homemade tag. This allows the vibrant colors and appealing textures of the bark to shine through.
- Decorative Boxes: Small, sturdy gift boxes lined with parchment or tissue paper are another excellent option. This provides more protection for the bark and can be dressed up with a bow or other embellishments.
- Mini Tins: For a more substantial gift, consider layering pieces of bark in a decorative metal tin. These make lovely keepsakes even after the treat is gone.
- Easter Baskets: Don’t forget to include a bag or box of homemade Easter Bark in your Easter baskets alongside other candies and treats. It adds a personal touch that will surely be appreciated.
Storage Tips:
- Room Temperature: If your home is cool (below 70°F or 21°C), you can store the bark in an airtight container on the counter for up to 10 days. Ensure it’s away from direct sunlight or heat sources, which can cause it to melt or bloom (develop white streaks, though still edible).
- Refrigerator: For longer freshness, especially in warmer climates, store the bark in an airtight container in the refrigerator for 2-3 weeks. Allow it to come to room temperature for a few minutes before serving for the best texture and flavor release.
- Freezer: Chocolate bark freezes exceptionally well. Wrap individual portions tightly in plastic wrap, then place them in a freezer-safe airtight container or heavy-duty freezer bag. It will last for several months in the freezer. Thaw in the refrigerator overnight or at room temperature for about 30 minutes before enjoying.
No matter how you choose to share or savor your Easter Bark, its homemade charm and delightful taste are sure to bring smiles.
More Easter Recipes You’ll Love
With Easter just around the corner, you might be looking to expand your holiday menu beyond just delicious bark. If you, like me, appreciate tasty recipes that don’t demand hours in the kitchen, you’ll adore these other easy and festive Easter ideas. They’re perfect for adding more sweet and savory delights to your celebration!
Reverse Seared Leg of Lamb
Peeps Cupcakes
Funeral Potatoes
Loaded Green Bean Casserole
For even more delightful Easter recipes, click here to explore our full collection of holiday favorites!
Easy Easter Bark Recipe: Full Details
We hope you love this incredibly easy and delicious Easter Bark recipe! If you enjoyed making it, please consider giving it a five-star rating by clicking the stars below and leaving a comment. Your feedback is greatly appreciated! Also, help us spread the word by sharing your creations on Instagram, Facebook, and Pinterest – we love seeing what you make!
Share on Facebook
Share
Pin this now to find it later
Pin It
Follow on Instagram
Follow
Only have 30 minutes to get dinner on the table? Sign up for my 30-minute dinner plans direct to your inbox!
Find and shop my favorite products in my Amazon storefront here!
Easter Bark
Email Recipe
Print Recipe
Ingredients
- 12 ounces semi-sweet chocolate, chopped into small bits
- 8 ounces white baking chocolate, chopped into small bits
- 4 ounces Cadbury mini eggs, chopped
- Optional Other Toppings: Peeps, M&Ms, and Sprinkles
Instructions
- Line a small baking sheet with parchment paper (about a 7”x10”).
- Melt semi-sweet chocolate in a microwave safe bowl or using a double boiler. If using a microwave, melt for 30 second increments, mix well and repeat. Pour onto the baking sheet and spread as evenly as you can; you do not have to go edge to edge.
- Melt the white chocolate the same way as the semi-sweet. Pour on the baking sheet and spread it out covering most or all the semi-sweet chocolate. TIP: Allow it to cool in the fridge for about 5-10 minutes, before starting with the white chocolate if you do not want the chocolate colors to blend.
- Immediately add any toppings and lightly press down when needed.
- Chill in the fridge for about 25 minutes until set.
- Place paper on a cutting board and chop into desired sizes and shapes.
- Store, well-sealed, for a week to 10 days on the counter in a room no more than 70ºF, in the fridge for a few weeks, or freezer for a few months.
Nutrition
Calories: 439kcal
Carbohydrates: 44g
Protein: 6g
Fat: 30g
Saturated Fat: 18g
Polyunsaturated Fat: 11g
Cholesterol: 1mg
Sodium: 16mg
Fiber: 7g
Sugar: 31g
Nutrition information is automatically calculated, so should only be used as an approximation.
Additional Info
Tried this recipe?
Mention @sweetcsdesigns or tag #sweetcsdesigns!