
Perfectly Salt-Baked Sweet Potatoes: Crispy Outside, Fluffy Inside
Imagine a sweet potato with an irresistibly crispy, lightly seasoned skin and an interior so moist, tender, and fluffy it practically melts in your mouth. This isn’t just a dream – it’s the reality of Salt-Baked Sweet Potatoes. This remarkably simple yet incredibly flavorful side dish is easy to prepare and guarantees a rich, savory-sweet experience that will elevate any meal. Forget soggy, bland baked potatoes; the salt-baking method locks in moisture and infuses a subtle savory note, making these sweet potatoes an absolute game-changer.



Navigating through recipes should be a breeze. To help you find exactly what you’re looking for, we’ve organized this page with a clear table of contents below.
As a home cook with a passion for creating delicious meals, I believe understanding the ‘why’ behind each step and ingredient makes all the difference. My goal is to empower every home cook, from novice to experienced, to feel confident and capable in the kitchen. This guide will walk you through the process of making the best salt-baked sweet potatoes, explaining how each element contributes to the dish’s incredible flavor and texture.
Table of contents
- The Magic of Salt-Baking Sweet Potatoes
- Essential Ingredients for Flawless Results
- Step-by-Step Guide to Perfection
- Expert Tips and Tricks for Your Best Salt-Baked Sweet Potatoes
- Frequently Asked Questions
- Serving Suggestions: What to Pair With Salt-Baked Sweet Potatoes
The Magic of Salt-Baking Sweet Potatoes
Salt baking is an ancient culinary technique that involves encasing food, often whole fish or vegetables, in a thick crust of coarse salt before baking. This method creates a miniature oven around the food, allowing it to cook incredibly evenly and gently. For sweet potatoes, this translates into a truly transformative experience. The salt crust draws out excess moisture from the potato’s surface, creating a delicate, crisp skin, while simultaneously preventing the interior from drying out. The result is a sweet potato that’s impossibly tender, naturally sweet, and imbued with a subtle, perfectly balanced saltiness.
Unlike traditional baking where potatoes can sometimes dry out or cook unevenly, the salt crust ensures consistent heat distribution and superior moisture retention. This means a consistently fluffy and moist interior every single time, without the need for foil or frequent turning. Plus, the minimal effort involved makes it an ideal choice for busy weeknights or impressive holiday gatherings.
Essential Ingredients for Flawless Results
To embark on this delightful culinary journey, you’ll need just a few simple ingredients, each playing a crucial role in achieving the perfect salt-baked sweet potato:
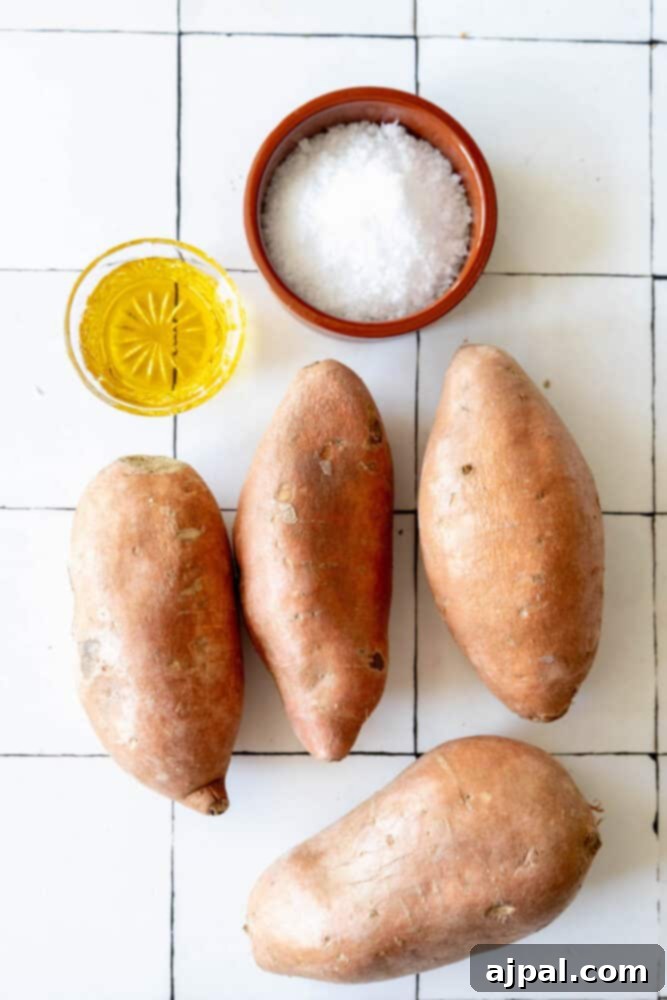
- Sweet Potatoes (4 medium-sized): These vibrant root vegetables are the heart of our dish. Rich in natural sugars, they caramelize beautifully during the baking process, developing a deep, complex sweetness. Their creamy texture and slightly nutty flavor are what make them so beloved. Opt for uniformly sized sweet potatoes to ensure even cooking and don’t hesitate to explore different varieties like Beauregard (most common orange), Japanese (purple skin, white flesh), or Hannah (tan skin, white flesh) for subtle flavor variations.
- Kosher Salt (or Coarse Sea Salt, 4 cups): This is the hero ingredient that makes the magic happen. The coarse grains of kosher or sea salt are ideal for creating a stable and effective baking crust. Its functions are multifaceted:
- Even Cooking: The salt crust acts as an insulator, surrounding the sweet potatoes and distributing heat uniformly. This prevents hot spots and ensures that every part of the potato cooks at the same rate.
- Flavor Infusion: While not meant to be eaten, the salt crust subtly seasons the sweet potatoes, enhancing their natural sweetness with a pleasant, earthy saltiness without making them overly salty.
- Moisture Control: The salt draws out surface moisture from the sweet potatoes, which contributes to the crispy skin. Simultaneously, it traps the internal moisture, resulting in an incredibly tender and fluffy interior that’s never dry.
- Steaming Effect: The sealed environment created by the salt crust also produces a gentle steaming effect, further contributing to the potato’s moist and tender texture.
- Olive Oil (2-3 tablespoons): A drizzle of high-quality olive oil after baking is the perfect finishing touch. Its role extends beyond simple lubrication:
- Flavor Enhancement: Olive oil adds a rich, sometimes peppery or fruity, flavor that complements the sweet potatoes’ natural sweetness beautifully.
- Added Moisture and Texture: It provides a touch of healthy fat and a luxurious mouthfeel, balancing the slight dryness that can occur on the very outer layer of the potato after the salt crust is removed.
- Freshly Ground Black Pepper (to taste): A sprinkle of freshly ground black pepper introduces a subtle warmth and a hint of spiciness, adding depth and complexity to the overall flavor profile. It creates a wonderful contrast with the inherent sweetness of the potatoes.
Step-by-Step Guide to Perfection
- Preheat Your Oven: Begin by preheating your oven to a steady 400°F (200°C). This ensures the oven is at the correct temperature when the potatoes go in, promoting even cooking.
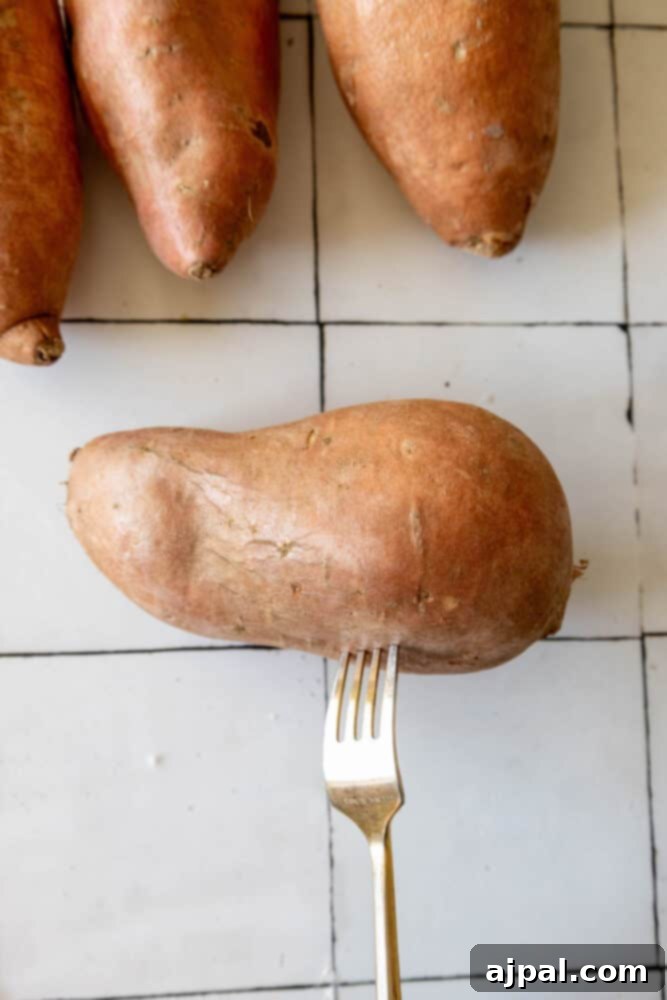
- Prepare the Sweet Potatoes: Thoroughly wash and scrub your sweet potatoes to remove any dirt or impurities from the skin. Pat them completely dry with a kitchen towel. Next, generously pierce them all over with a fork. This allows steam to escape during baking, preventing them from bursting. Finally, lightly drizzle the potatoes with a tablespoon of olive oil and gently rub it into the skin, then sprinkle with a pinch of salt and pepper. This initial seasoning helps build flavor.
- Create a Salt Bed: In a large mixing bowl, combine the kosher salt (or coarse sea salt) with about 2-3 tablespoons of water. Mix until the salt achieves a consistency similar to wet sand – it should be moist enough to hold its shape but not overly wet.
- Salt-Bake the Sweet Potatoes: Spread a thin, even layer of the moistened salt mixture across the bottom of a baking dish or a sturdy baking sheet. This creates a foundational bed for your sweet potatoes. Carefully place the prepared sweet potatoes on top of this salt bed, ensuring they are not touching each other too much. The salt will work its magic, evenly cooking the potatoes and drawing out moisture while subtly infusing them with flavor.
- Bake to Perfection: Place the baking dish with the sweet potatoes into your preheated oven. Bake for approximately 45 minutes to 1 hour. The exact time will depend on the size and thickness of your sweet potatoes. You’ll know they are perfectly done when a fork can be easily inserted into the very center of the potato, indicating a tender and soft interior.
- Remove from Oven: Once cooked, carefully remove the sweet potatoes from the oven. The salt crust surrounding them should appear firm, dry, and perhaps slightly browned.
- Crack Open the Crust: Using a sturdy knife or the back of a spoon, gently crack open the hardened salt crust on each sweet potato. Exercise caution, as a burst of hot steam may be released from within. Once the crust is broken, carefully brush off any excess salt from the potato’s skin – remember, the crust is not intended for consumption.
- Season and Serve: Drizzle each beautifully baked sweet potato with a generous amount of fresh olive oil. Then, sprinkle with freshly ground black pepper to taste. This is also the perfect moment to add your favorite toppings. Classic choices include a dollop of sour cream, a scattering of chopped chives, crispy crumbled bacon bits, or a sprinkle of grated cheese.
- Enjoy Immediately: Serve your salt-baked sweet potatoes right away while they are still warm. The contrast between the wonderfully soft, sweet interior and the subtly salty, slightly crisp skin is best enjoyed fresh from the oven.
Expert Tips and Tricks for Your Best Salt-Baked Sweet Potatoes
Achieving consistently perfect salt-baked sweet potatoes is easy when you follow these simple yet effective tips:
- Select Uniformly Sized Sweet Potatoes: For optimal results and synchronized cooking times, always choose sweet potatoes that are similar in size and shape. This ensures they all finish baking around the same time, preventing some from being undercooked or overcooked.
- Thoroughly Scrub and Dry: Since the sweet potato skin will remain on during baking and becomes part of the delicious experience, it’s crucial to wash and scrub them meticulously to remove all dirt and debris. Patting them completely dry ensures the initial olive oil and salt adhere properly.
- Use Coarse Salt for Best Results: Kosher salt or coarse sea salt is highly recommended for the crust. Their larger grain size creates a more effective insulating barrier, distributes heat more evenly, and results in that desirable subtle seasoning. Fine table salt can create a hard, impenetrable crust that’s difficult to crack and may over-salt the potatoes.
- Reusing the Salt Crust: Don’t throw away the used salt! After it cools completely, you can break it apart and store it in an airtight container. This salt can be reused for future salt-baked dishes, making this an economical and sustainable cooking method. While it may absorb a subtle sweet potato aroma, its effectiveness remains intact.
- Always Preheat Your Oven: A properly preheated oven is fundamental for any baking. Consistent heat from the start ensures the salt crust forms correctly and the potatoes begin cooking immediately and evenly.
- Monitor Cooking Time Carefully: While a general time frame is provided, cooking times are always approximate. Factors like potato size, oven calibration, and specific potato variety can influence how long they need. Start checking for tenderness around the 45-minute mark by gently piercing with a fork.
- Avoid Puncturing Before Baking (Except for Vents): Other than a few deliberate fork pricks to allow steam to escape, avoid unnecessary punctures in the sweet potato skin before baking. The skin acts as a natural barrier, locking in moisture.
- High-Quality Olive Oil for Finishing: The type of olive oil you use for drizzling after baking can significantly impact the final flavor. A good quality extra virgin olive oil will add a wonderful depth and richness.
- Season Liberally to Taste: Don’t underestimate the power of freshly ground black pepper. It provides a delightful counterpoint to the sweet potato’s sweetness. Feel free to add a little more salt if desired after cracking the crust, but remember the potatoes will have absorbed some saltiness from the crust already.
- Customize Your Toppings: This is where you can truly make the dish your own! While classic toppings like sour cream and chives are fantastic, consider experimenting with butter, a sprinkle of smoked paprika, crumbled feta, a drizzle of maple syrup, or even a dollop of chili-lime crema for an exciting twist.
- Serve Immediately for Peak Flavor: Salt-baked sweet potatoes are at their absolute best when served hot, straight from the oven. The warm, soft interior and fragrant steam are truly a treat.
- Experiment with Varieties: Don’t limit yourself to just one type of sweet potato. Orange-fleshed varieties tend to be sweeter, while white or purple-fleshed ones offer a more earthy, less sweet profile. Each brings its own unique character to the dish.
Frequently Asked Questions
No, the salt crust is not intended for consumption. Its primary purpose is to create an ideal baking environment for the sweet potatoes, helping them cook evenly and infusing a subtle flavor. After baking, gently crack open the crust and discard it before serving the potatoes.
Absolutely! After the salt crust has cooled completely, you can break it up and store it in an airtight container. It can be reused multiple times for future salt-baked dishes. While it might take on a faint sweet potato aroma, its effectiveness as a baking medium remains high.
It is strongly recommended to use coarse kosher salt or coarse sea salt for the best results. Table salt has much finer grains, which can lead to a crust that is too hard and difficult to crack. It also tends to be saltier by volume, potentially over-seasoning your potatoes. Coarser salts provide better insulation and a more even cooking environment.
The sweet potatoes are done when they are fork-tender. This means you can easily insert a fork or a small knife into the thickest part of the potato with little resistance. Depending on their size and your oven, this typically takes between 45 minutes to 1 hour.
Yes, you can certainly get creative! While optional, adding dried herbs like rosemary or thyme, a touch of smoked paprika, or even garlic powder to the salt mixture can infuse additional aromatic flavors into the sweet potatoes as they bake. Just be mindful of how strong the flavors are, as they will concentrate.
For the freshest flavor and best texture, salt-baked sweet potatoes are best enjoyed immediately after baking. However, if you need to prepare them in advance, you can reheat them in a 350°F (175°C) oven for about 15-20 minutes, or until warmed through. Be aware that the skin might lose some of its crispiness upon reheating.
Absolutely! The salt-baking method works wonderfully for other types of potatoes, such as Russet or Yukon Gold. The principle remains the same, producing a fluffy interior and tender texture. You can find our salt-baked potato recipe here for classic potatoes with a delicious herbed butter finish.
Salt-baked sweet potatoes are a fantastic healthy side dish. They are naturally rich in vitamins, minerals, and fiber. The baking method itself requires minimal added oil, especially compared to frying, and helps retain more of their natural nutrients by avoiding excessive water exposure. The salt crust ensures delicious flavor without unhealthy fats.
The beauty of salt-baked sweet potatoes is their versatility! Popular toppings include classic butter, sour cream, chopped chives, crumbled bacon, or grated cheese. For a sweeter touch, consider a drizzle of maple syrup, honey, or a sprinkle of cinnamon. For a savory twist, try a dollop of Greek yogurt with fresh herbs, or a spicy chili-lime seasoning.
Serving Suggestions: What to Pair With Salt-Baked Sweet Potatoes
Salt-baked sweet potatoes are incredibly versatile, making them a perfect accompaniment to a wide array of main courses. Their savory-sweet flavor profile and delightful texture complement both rich and lean proteins. Here are some fantastic pairing ideas to inspire your next meal:
Delicious Main Dishes to Serve with Sweet Potatoes
Honey Soy Slow Cooker or Dutch Oven Asian Country Ribs
One Pot Cheesy Chicken and Green Chile Skillet
The Best Baked Pork Tenderloin Recipe
Lemon Caper Butter Chilean Seabass
If you loved this easy and flavorful recipe, please consider leaving a five-star rating and a comment below! Your feedback helps us share more delicious dishes. Don’t forget to share your creations on Instagram, Facebook, and Pinterest – we love seeing what you cook!
Share on Facebook
Share
Pin this now to find it later
Pin It
Follow on Instagram
Follow
Click here to view the web story for this recipe!
Only have 30 minutes to get dinner on the table? Sign up for my 30 minute dinner plans direct to your inbox!
Find and shop my favorite products in my Amazon storefront here!
Salt Baked Sweet Potatoes

Equipment
-
Viva Doria Pure Sea Salt, Coarse Grain, 2 lb | Ideal For Salt Grinders
-
USA Pan Bakeware Half Sheet Pan, Warp Resistant Nonstick Baking Pan, Made in the USA from Aluminized Steel 17 1/4 x12 1/4 x1
Ingredients
- 4 medium-sized sweet potatoes
- 2-3 tablespoons olive oil
- 4 cups kosher salt, or coarse sea salt
- Freshly ground black pepper, to taste
Instructions
-
Begin by preheating your oven to 400°F (200°C).
-
Wash and scrub the sweet potatoes thoroughly to remove any dirt. Pat them completely dry with a kitchen towel, then poke them all over with a fork to create vents for steam. Lightly coat each potato with a drizzle of olive oil, then sprinkle with a little salt and pepper.
-
In a bowl, mix the 4 cups of kosher salt (or coarse sea salt) with about 2-3 tablespoons of water until it resembles wet sand. Spread a thin, even layer of this moistened salt mixture in the bottom of a baking dish or on a baking sheet to create a sturdy bed. Place the prepared sweet potatoes on top of the salt bed, ensuring they have a little space between them. This salt will ensure even cooking, draw out surface moisture for a crispier skin, and subtly infuse them with a delicious salty flavor.
-
Place the sweet potatoes in the preheated oven and bake for approximately 45 minutes to 1 hour. The cooking time will vary based on the size of your sweet potatoes. They are ready when you can easily insert a fork into the center, and they feel tender and soft throughout.
-
Carefully remove the sweet potatoes from the oven. The salt crust should be firm, dry, and possibly slightly discolored.
-
Using a knife or the back of a spoon, gently crack open the hardened salt crust on each sweet potato. Be cautious, as hot steam may be released. Carefully brush off any excess salt from the potatoes; the crust is not meant to be eaten.
-
Drizzle each sweet potato generously with olive oil and sprinkle with freshly ground black pepper. Now is also the time to add your favorite toppings, such as sour cream, chopped chives, crumbled bacon, or grated cheese.
-
Serve the salt-baked sweet potatoes immediately while they are hot. Enjoy the wonderfully soft, sweet interior complemented by a subtle hint of saltiness from the crust and the richness of the toppings.
Nutrition
Nutrition information is automatically calculated, so should only be used as an approximation.
Additional Info