
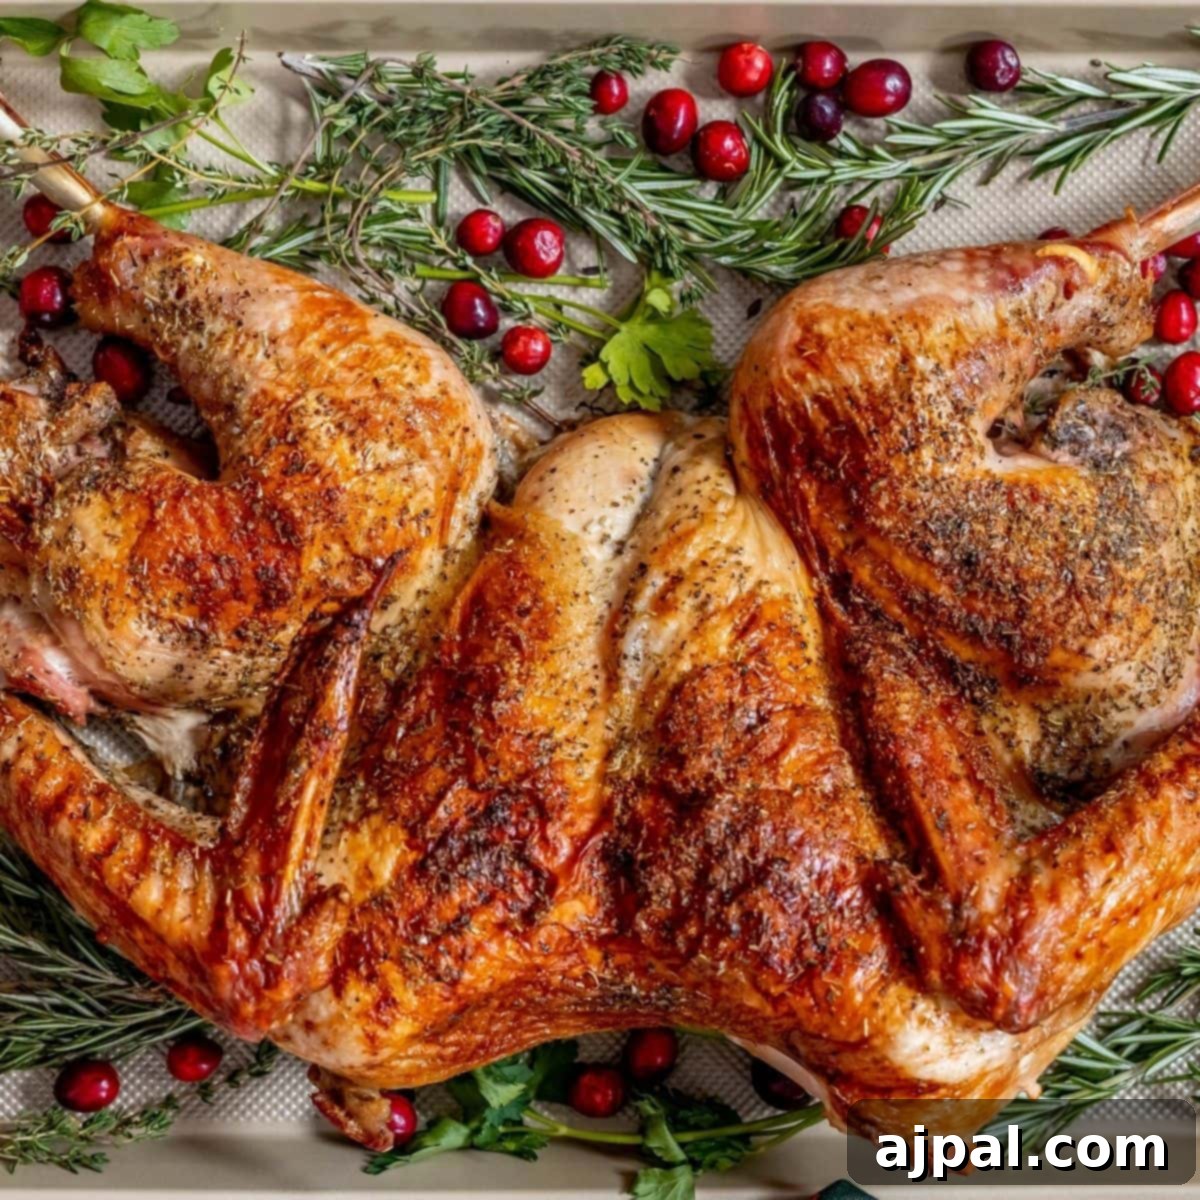
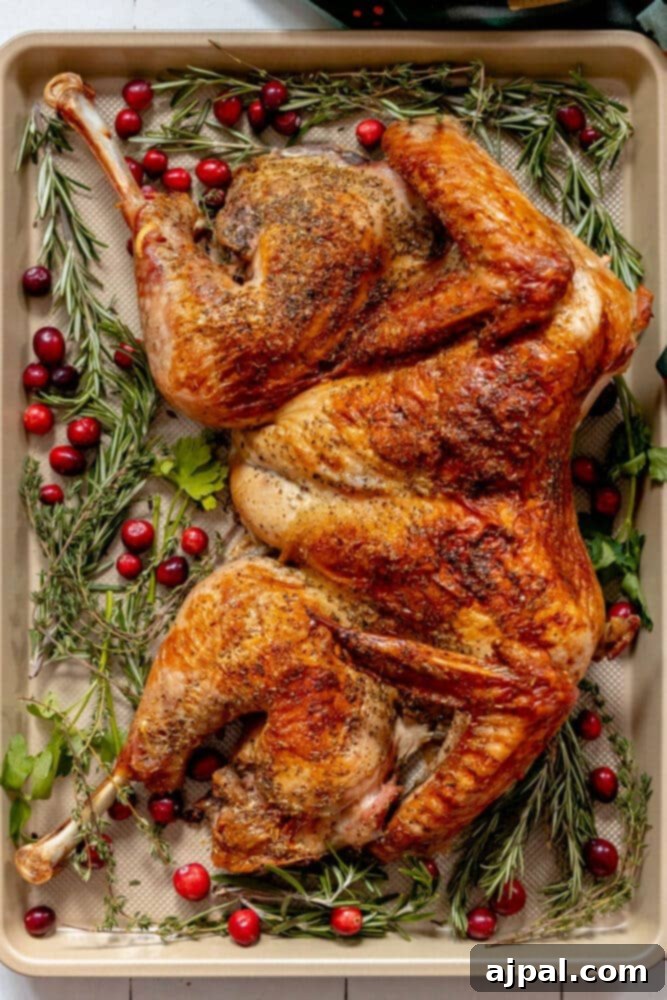
Transform your holiday feast with the ultimate method for preparing a turkey that boasts irresistibly crispy, golden-brown skin and incredibly tender, juicy meat every single time. Forget the dry, unevenly cooked birds of the past – mastering the art of the spatchcocked turkey will revolutionize your approach to poultry roasting, making it an essential technique for Thanksgiving, Christmas, or any grand family gathering.
The term “spatchcock” might sound intimidating, but it simply refers to butterflying a chicken or turkey by removing its backbone, allowing it to lie flat. This seemingly minor adjustment unlocks a world of benefits, from significantly reducing cooking time to ensuring a perfectly even cook. If you’re seeking a consistently delicious and effortlessly impressive roasted turkey, this comprehensive guide to spatchcocking is precisely what you need. Prepare to bid farewell to traditional roasting methods forever!
Looking for specific information or eager to jump straight to the recipe? We’ve included a handy table of contents just below to help you navigate this page with ease. Our goal at Sweet C’s is to empower every home cook, regardless of their experience level. Having cooked without formal training, I understand the value of knowing the ‘why’ behind each step and ingredient. This article is packed with practical tips and insights to ensure you feel confident and capable in your kitchen.
Table of Contents
- Why Spatchcock a Turkey?
- How To Spatchcock a Turkey: The Ultimate Guide
- Essential Tools for Spatchcocking a Turkey
- How To Brine a Turkey for Maximum Flavor
- The Butterflying Process: Spatchcocking Step-by-Step
- Roasting Your Spatchcock Turkey to Perfection
- Carving a Spatchcock Turkey with Ease
- Tips for Perfect Spatchcock Turkey and FAQs
- Other Holiday Dishes You’ll Love
- Perfect Spatchcock Turkey Recipe
Why Spatchcock a Turkey?
If you’ve ever wrestled with a traditional whole roasted turkey, you’re familiar with the common challenges: dried-out breast meat, undercooked dark meat, and an oven monopolized for hours on end. Spatchcocking solves all these issues and more, making it the superior method for succulent turkey every time. Here’s why this technique is a game-changer:
- Significantly Reduced Cooking Time: By flattening the turkey, you expose more surface area to the heat, allowing for faster and more efficient cooking. This can cut your roasting time by nearly half compared to a traditional whole bird, freeing up your oven and your day.
- Achieve Perfectly Even Cooking: A common dilemma with whole turkeys is that the breast meat, being thinner, cooks faster than the thicker thighs and drumsticks. Spatchcocking flattens the bird into a more uniform thickness, ensuring that all parts cook at roughly the same rate. This means no more dry breast meat sacrificed for fully cooked dark meat.
- Unbelievably Crispy Skin: With the turkey laid flat, the skin is fully exposed to the oven’s radiant heat, resulting in an all-over crispy, golden-brown skin that is utterly delectable. Say goodbye to soggy turkey skin!
- Easier Temperature Monitoring: The flattened shape allows for effortless access to the thickest part of the thigh, making it simple to insert your instant-read thermometer and ensure your turkey reaches the safe internal temperature of 165°F (74°C) without guesswork.
- Maximized Oven Space: A flattened turkey takes up less vertical space in your oven, leaving more room for essential side dishes, especially crucial during bustling holiday preparations. This means you can bake more delicious accompaniments simultaneously.
- Impressive Presentation: A beautifully spatchcocked bird, golden and glistening, makes a stunning centerpiece for any holiday table, inviting oohs and aahs from your guests. It’s a sophisticated twist on a beloved tradition.
Embracing the spatchcock method is a simple yet effective way to elevate your holiday turkey, ensuring a stress-free cooking experience and a truly unforgettable meal that will have everyone asking for your secret.
How To Spatchcock a Turkey: The Ultimate Guide
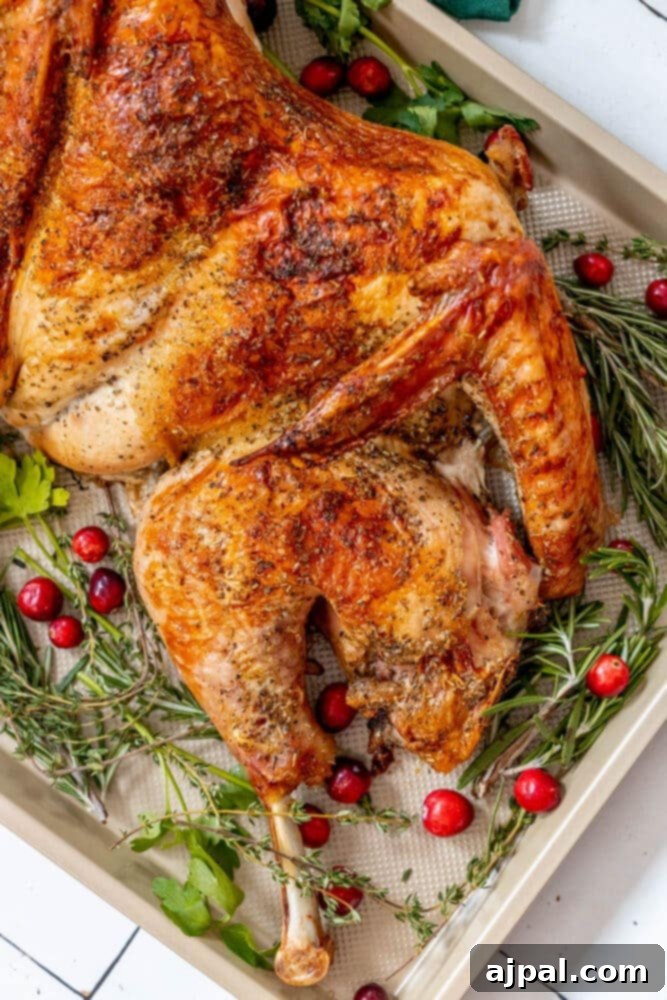
While “spatchcocking” might sound like a chef-level technique, it’s surprisingly straightforward and easily achievable for any home cook. The key is to butterfly the turkey by removing its backbone, allowing the bird to lay flat for optimal roasting. Follow these detailed steps to prepare your perfect spatchcocked turkey.
Essential Tools for Spatchcocking a Turkey
Before you begin, gather these essential kitchen tools to ensure a smooth and safe spatchcocking process:
- A Quality Turkey: Choose a turkey that fits your needs. While this method works for most sizes, smaller to medium-sized birds (10-16 lbs) are generally easier to handle and fit better on standard baking sheets. For best results, consider brining your turkey a day or two before roasting.
- Sharp Kitchen Shears: While a sharp chef’s knife can technically work, heavy-duty kitchen shears are vastly superior for cutting through the turkey’s backbone. Look for shears with comfortable handles and strong blades that can handle poultry bones. This tool will make the process much quicker and safer.
- Large Cutting Board: You’ll need a spacious, sturdy cutting board that can accommodate the entire turkey when laid flat. This ensures stability and hygiene during the butterflying process.
- Rimmed Baking Sheet with a Wire Rack: A large, rimmed baking sheet is crucial to catch any drippings and prevent spills in your oven. A wire rack placed inside the baking sheet is highly recommended, as it elevates the turkey, allowing hot air to circulate all around the bird for even cooking and extra crispy skin.
- Instant-Read Meat Thermometer: Absolutely essential for poultry! An instant-read thermometer ensures your turkey reaches the safe internal temperature of 165°F (74°C) in the thickest part of the thigh without overcooking. This is your best defense against dry turkey.
- Basting Brush: A silicone basting brush is ideal for evenly coating your turkey with melted butter or oil, ensuring a beautiful golden-brown crust and infusing flavor.
- Paper Towels: Keep plenty on hand for drying the turkey thoroughly before seasoning and roasting. A dry surface is key to achieving that coveted crispy skin.
How To Brine a Turkey for Maximum Flavor
Brining is a fantastic step for adding moisture and flavor to your turkey, resulting in a noticeably juicier bird. It’s highly recommended, especially when spatchcocking. If your turkey is frozen, it can often thaw directly in the brine, saving you a step.
- Prepare the Brine Base: In a large stockpot (capable of holding your turkey), bring 3-5 gallons of water to a boil. The exact amount depends on the size of your turkey and container.
- Dissolve Flavorings: Stir in your chosen brine ingredients – whether it’s a pre-mixed packet or your homemade blend of kosher salt, light brown sugar, vegetable stock, black peppercorns, allspice berries, juniper berries (optional), rosemary, and savory. Continue to boil and stir for about 5 minutes, ensuring all salt and sugar are completely dissolved.
- Cool Completely: Remove the stockpot from the heat and allow the brine to cool down entirely. This step is critical; never add a turkey to hot brine, as it can partially cook the meat. You can add a gallon of ice cubes to speed up the cooling process once the brine has cooled significantly.
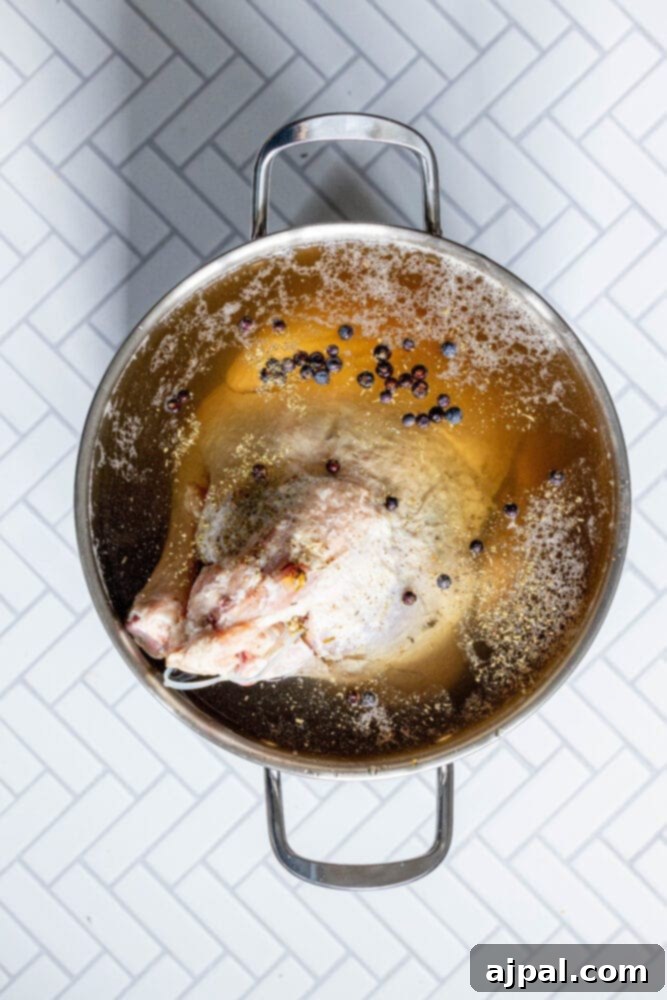
- Submerge the Turkey: Once the brine is completely chilled, carefully place your turkey into the large stockpot, ensuring it is fully submerged. If needed, weigh it down with a plate or a clean, heavy object.
- Refrigerate: Transfer the stockpot with the turkey and brine to the refrigerator. Brine the turkey for 1-2 days. If you don’t have enough refrigerator space, you can keep the turkey on ice in a cooler, ensuring it remains below 40°F (4°C).
The Butterflying Process: Spatchcocking Step-by-Step
Once your turkey is brined (if you chose to brine) and ready, it’s time to spatchcock it. This process is simpler than it sounds, and with good kitchen shears, it’s a breeze.
- Prepare the Turkey: Remove the turkey from its brine (if applicable) and pat it thoroughly dry with paper towels. Ensure all giblets and the neck are removed from the cavity. A dry surface is crucial for crispy skin. Place the turkey breast-side down on your large cutting board.
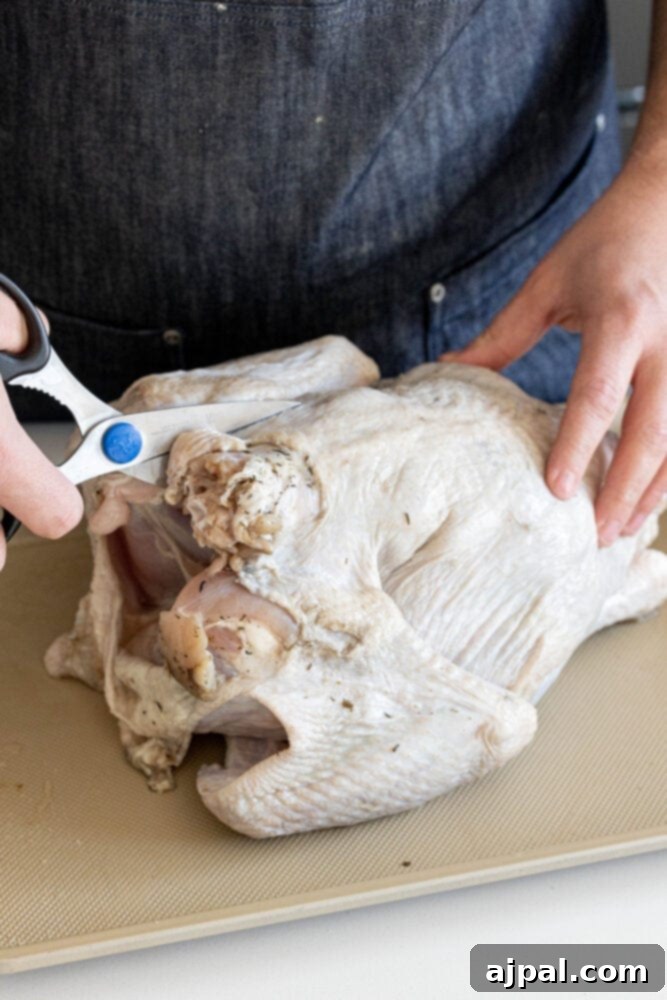
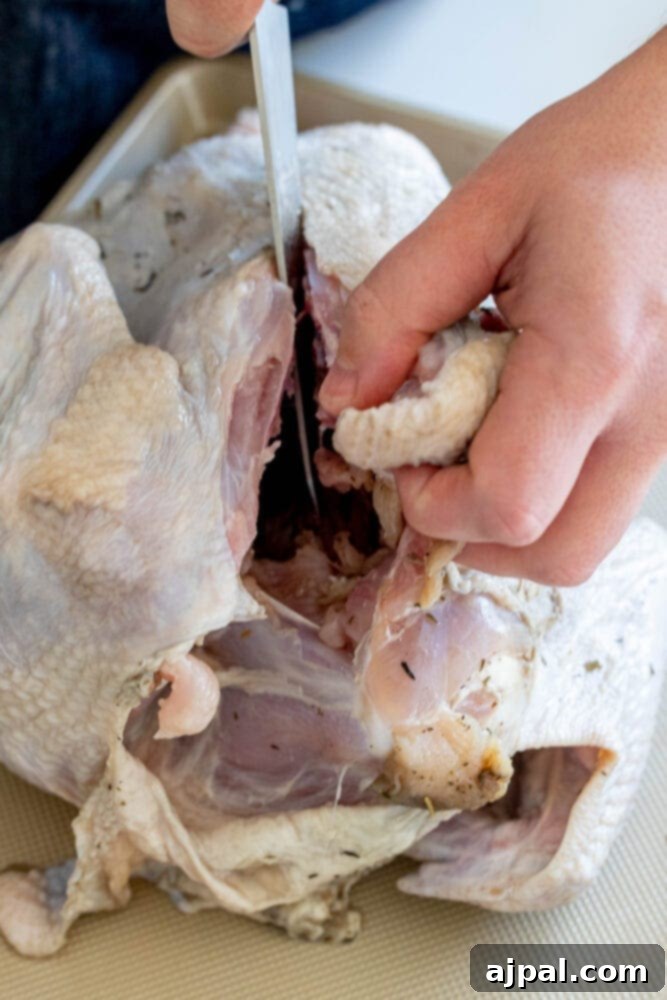
- Remove the Backbone: Using your heavy-duty kitchen shears, cut along each side of the backbone, starting from the tail end and working your way up to the neck. Apply firm, steady pressure. You may need to press down hard, especially around the rib cage. Once both cuts are made, remove the entire backbone. Don’t discard it! The backbone, along with the giblets, makes an excellent base for homemade turkey stock or gravy.
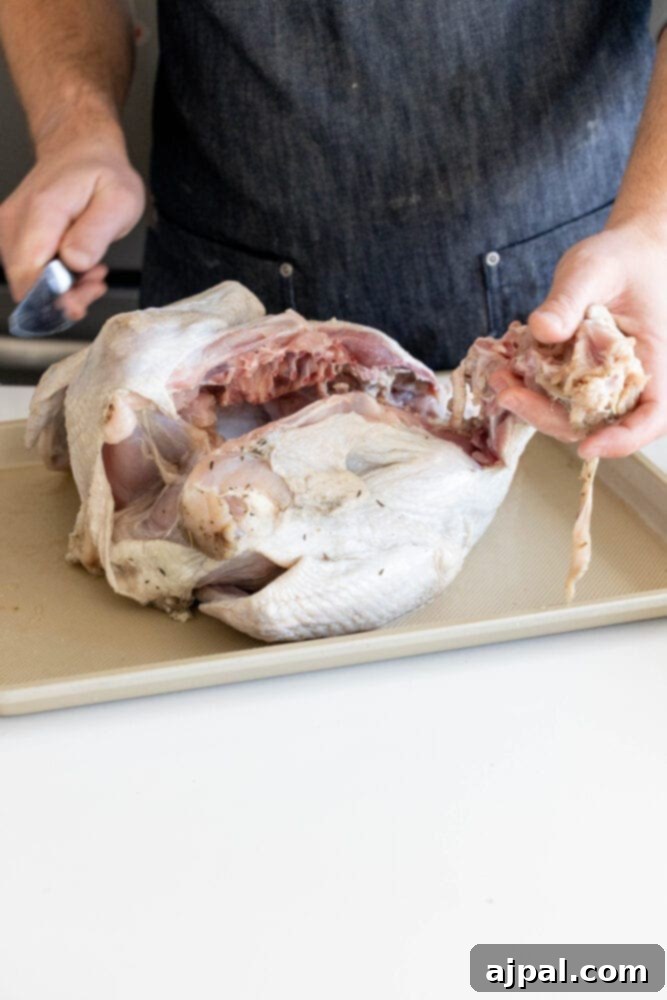
- Open and Flatten: With the backbone removed, grip the cut portions of the turkey with both hands and pull them apart, opening the turkey cavity. You’ll essentially be butterflying the bird.
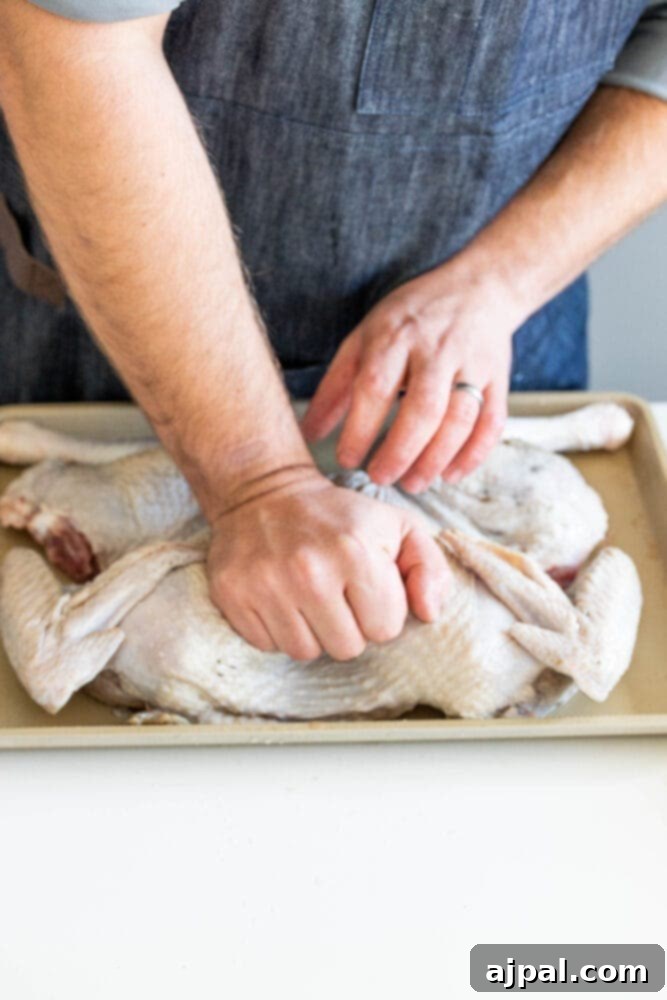
- Crack the Breastbone: Flip the turkey over so it’s breast-side up. Using the heel of your hands, press down firmly on the middle of the breastbone. You should hear a distinct cracking sound as the breastbone breaks and the turkey flattens out. This action ensures the bird lies completely flat, allowing for even cooking.
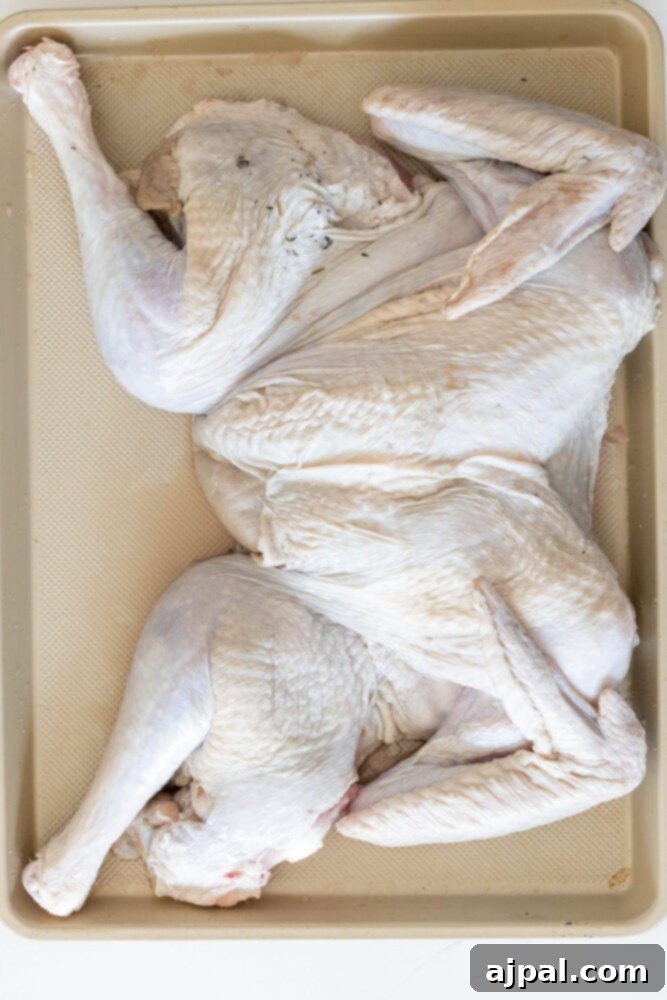
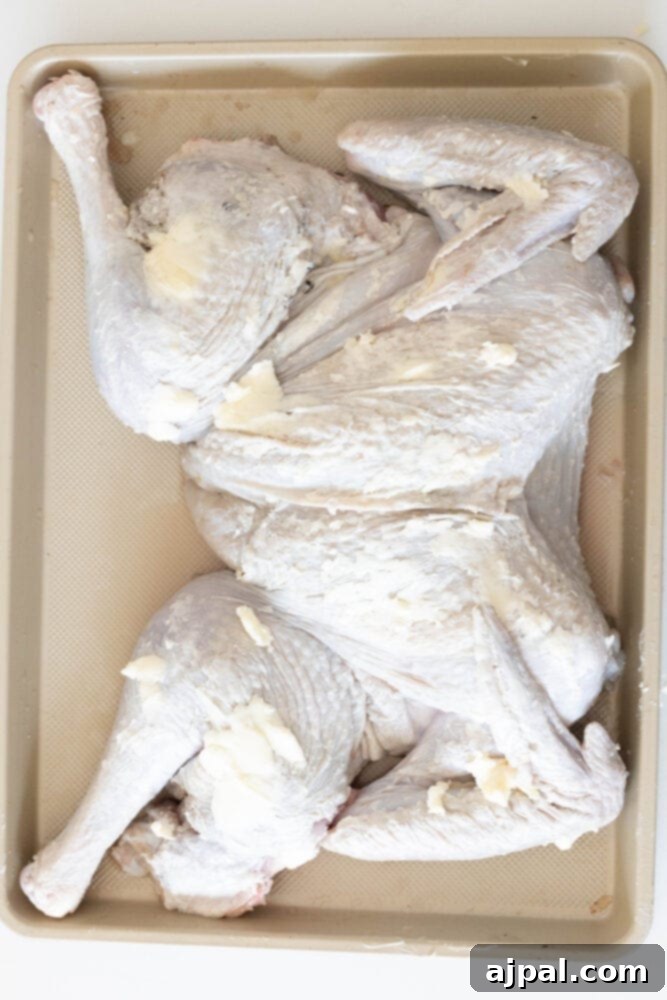
- Further Flattening: Gently pull the thighs and wings out to the sides to further flatten and splay the turkey. Arrange it neatly on your wire rack-lined baking sheet.
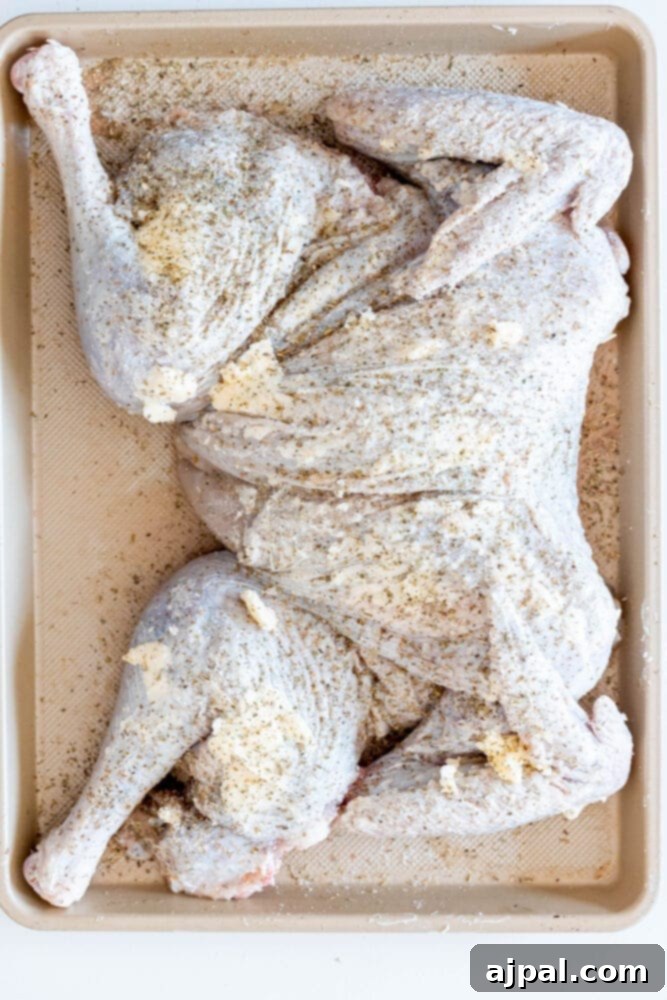
- Seasoning and Buttering: Using a basting brush or your hands, thoroughly coat the entire turkey with softened butter. Don’t be shy – get some butter under the skin for maximum flavor and moisture. Generously season the turkey with your preferred spice blend (Italian herbs, Cajun seasoning, etc.), along with Celtic sea salt and freshly cracked pepper. The butter and seasoning are key for developing that beautiful, crispy, flavorful skin.
Roasting Your Spatchcock Turkey to Perfection
With your turkey beautifully spatchcocked and seasoned, it’s ready for the oven. Remember, this method significantly reduces cooking time, so keep a close eye and your thermometer handy!
- Preheat Oven: Preheat your oven to 350°F (175°C) before you even start butterflying your turkey, ensuring it’s at the correct temperature when the turkey is ready.
- Initial Roast and Basting: Place your turkey on the wire rack-lined baking sheet in the preheated oven. For a 10-12 pound turkey, bake for approximately 1 hour and 30 minutes. Every 30 minutes, rotate your baking sheet for even browning and baste the turkey generously with melted butter. Basting helps keep the skin moist and promotes that beautiful golden color.
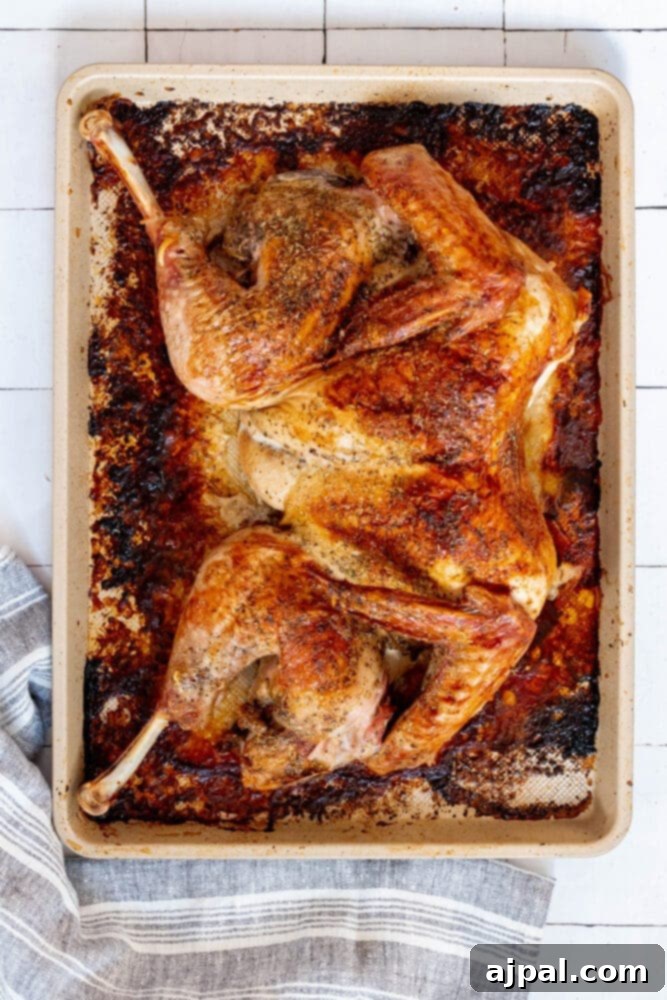
- Crisp the Skin: For the final 30 minutes of cooking, increase the oven temperature to 400°F (200°C). This higher heat blast will help crisp up the skin to an irresistible golden-brown perfection. Keep a watchful eye to prevent burning.
- Check for Doneness: The most crucial step! Insert your instant-read thermometer into the thickest part of the turkey thigh, avoiding the bone. The internal temperature should read 165°F (74°C). If it hasn’t reached this temperature, continue roasting in 10-15 minute increments until it does.
- Rest the Turkey: Once your turkey reaches the target temperature, remove it from the oven. Tent it loosely with aluminum foil and allow it to rest for at least 20-30 minutes before carving. This resting period is vital; it allows the juices to redistribute throughout the meat, resulting in an incredibly tender and juicy turkey. Skipping this step will result in juices running out onto your cutting board, leaving you with a drier bird.
Carving a Spatchcock Turkey with Ease
Carving a spatchcocked turkey is significantly easier than carving a traditional whole bird, thanks to its flat presentation. Here’s a simple guide to get perfect slices every time:
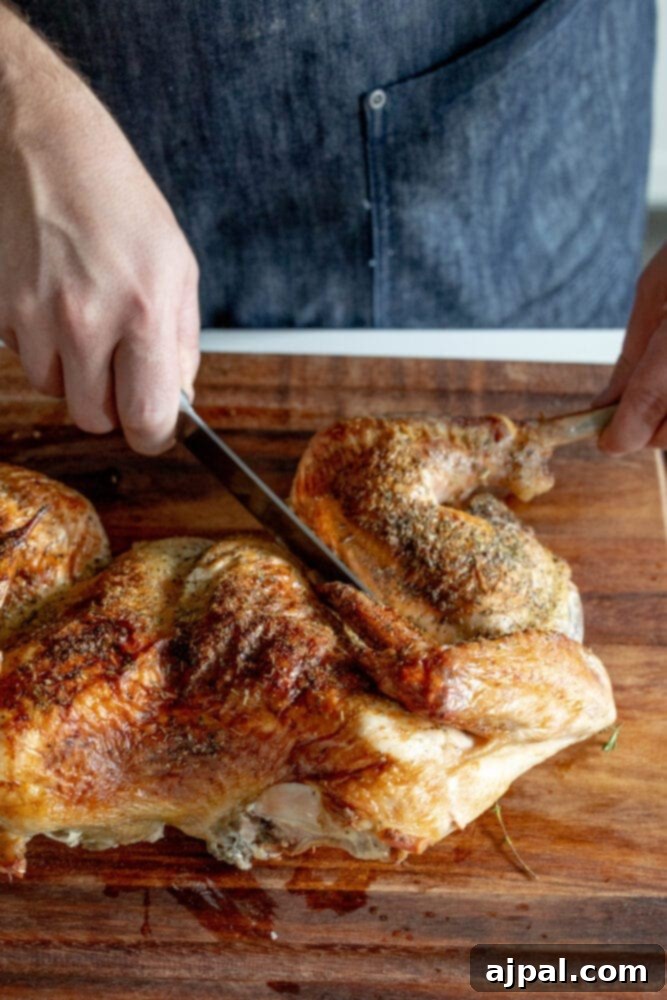
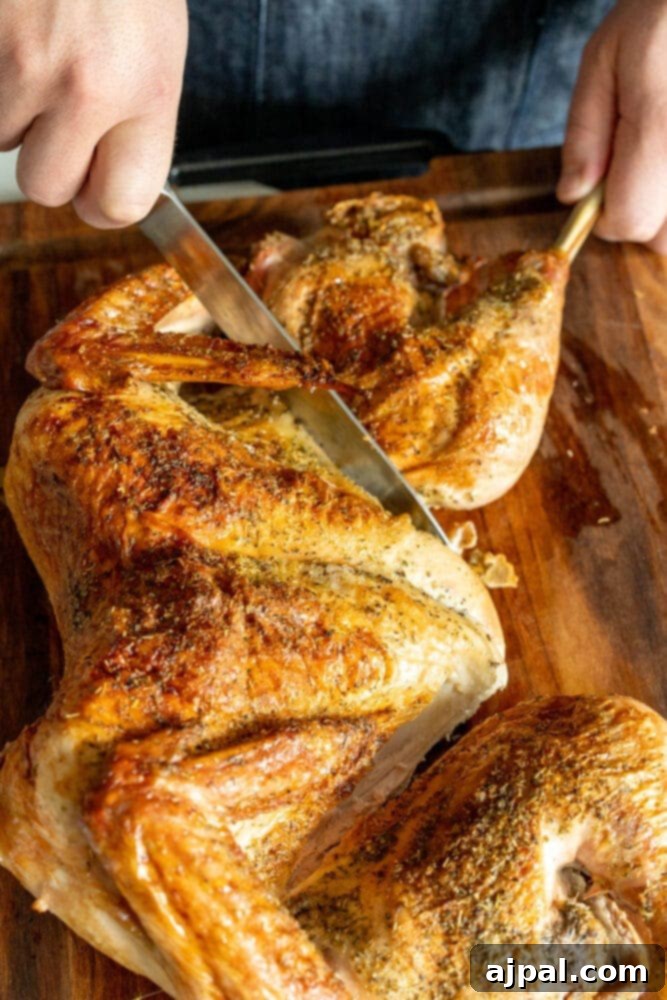
- Separate the Leg and Thigh: Begin by using a sharp carving knife to cut through the skin and joint, separating the entire leg and thigh section from the turkey body. Repeat on the other side.
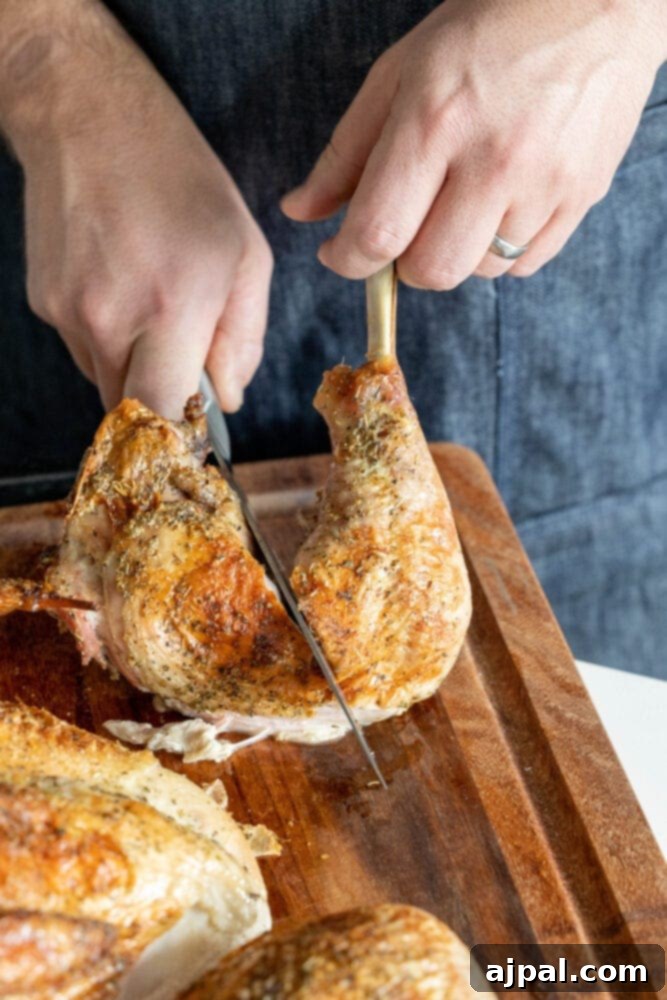
- Divide Leg and Thigh: Find the joint where the thigh meets the drumstick and cut through it to separate them. You can serve drumsticks whole and slice the thigh meat, or remove the thigh bone and slice the meat.
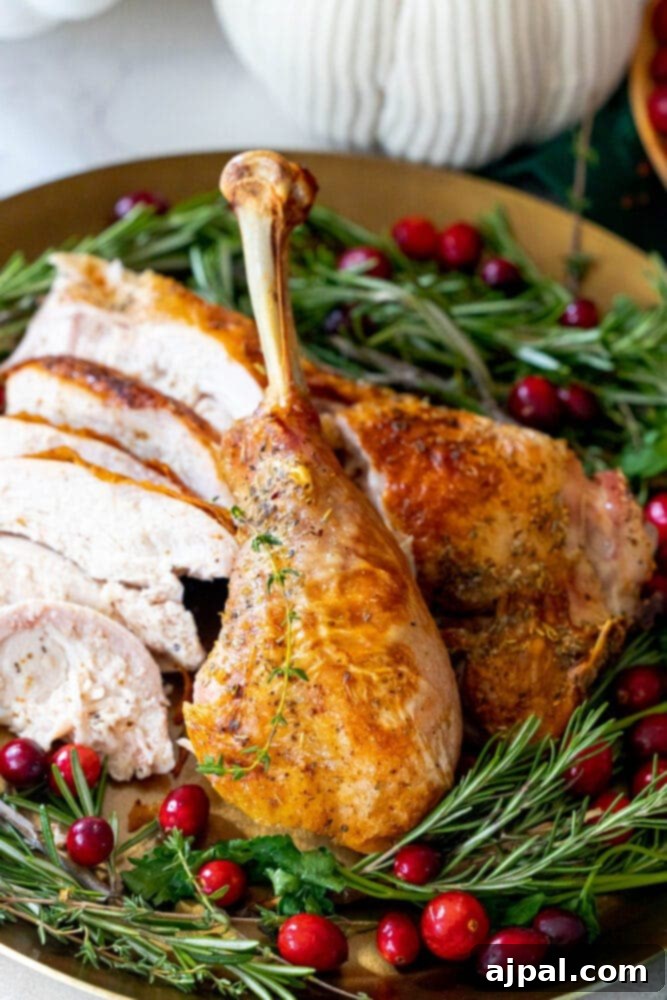
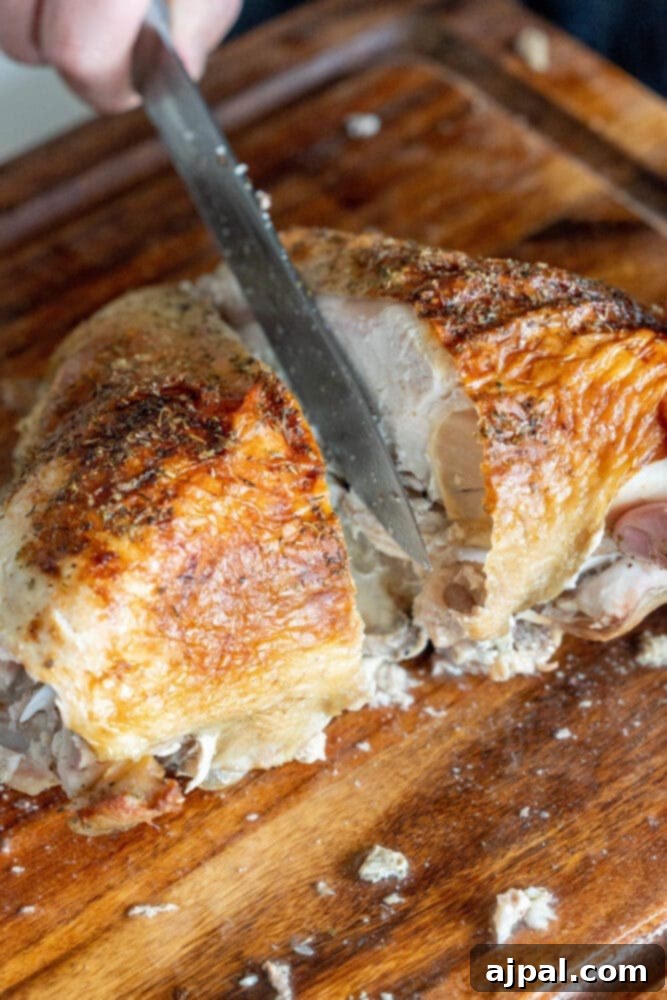
- Carve the Breast: Make a single, long cut along each side of the breastbone. Similar to how you removed the backbone, this will allow you to lift off each breast half in one large piece. The breast meat should be wonderfully moist and tender.
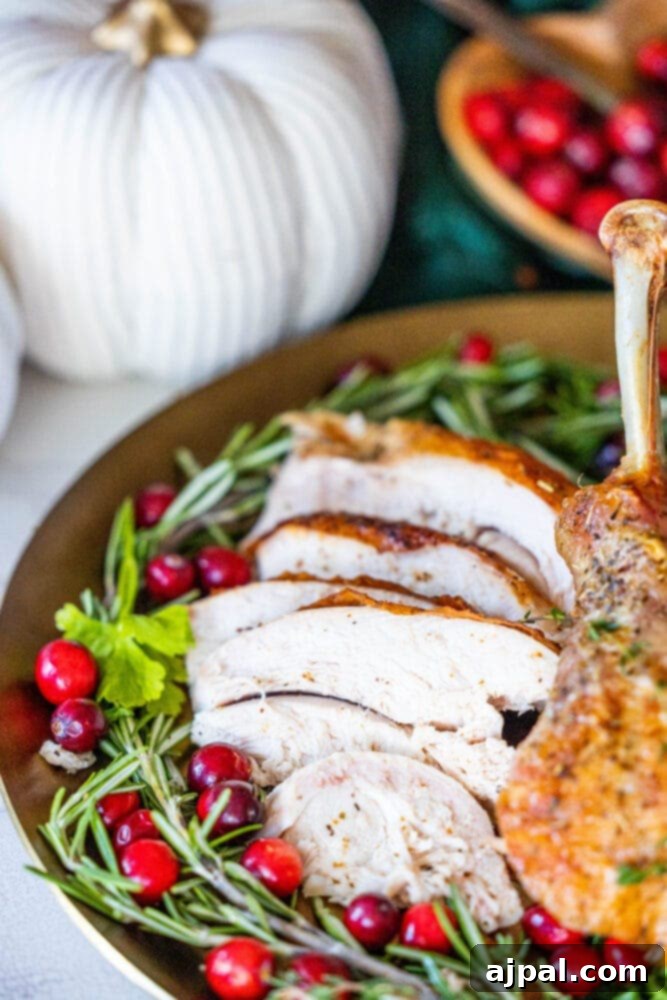
- Slice the Breast: Place each breast half on your cutting board. Slice the breast meat across the grain into thin, uniform pieces. Cutting across the grain ensures maximum tenderness in every bite.
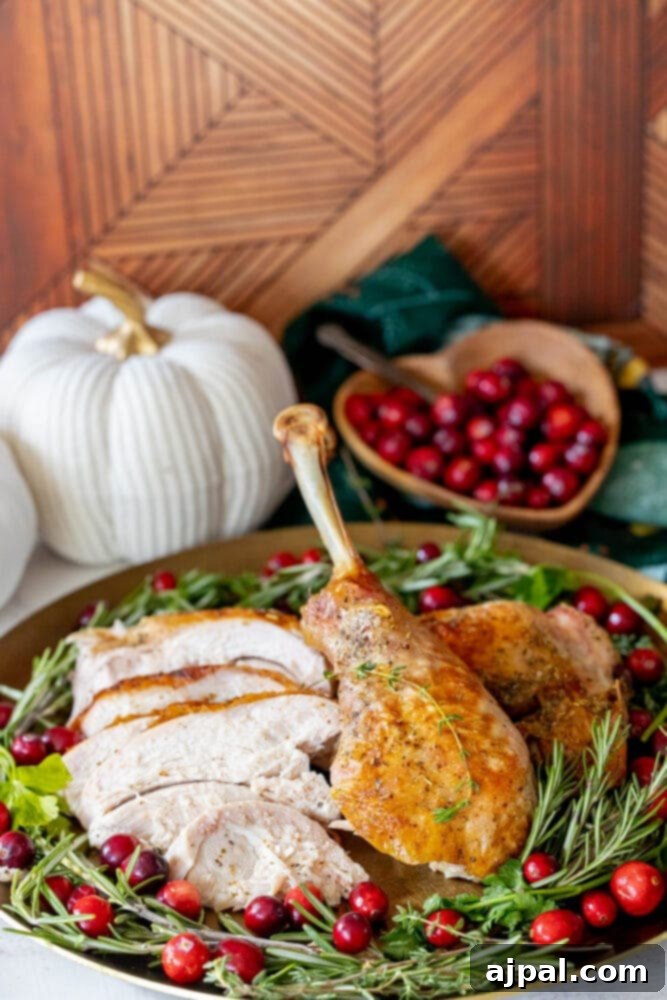
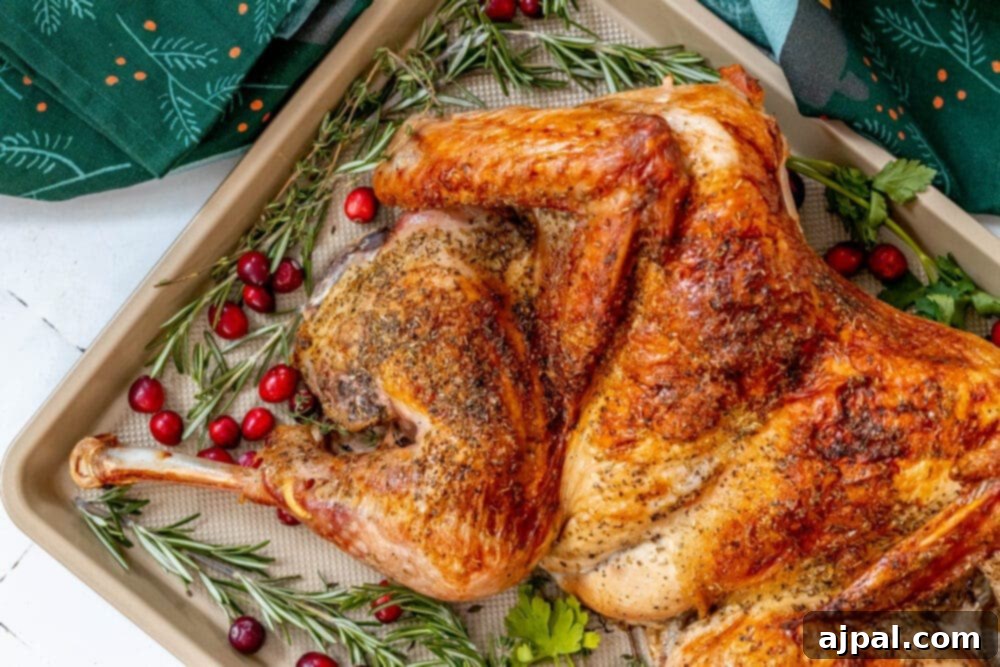
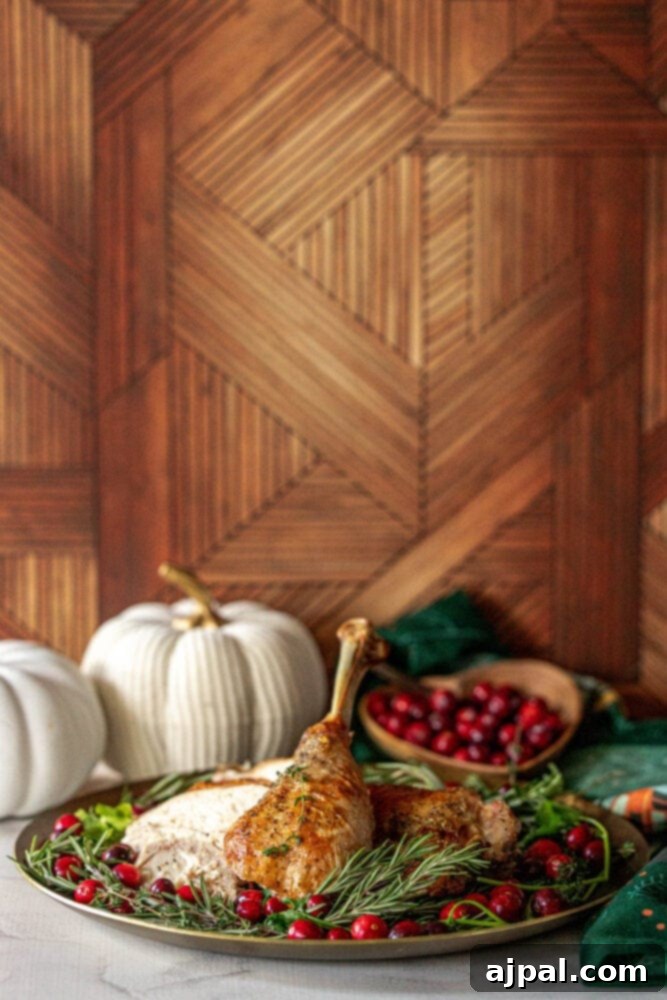
- Arrange and Serve: Arrange your carved turkey on a beautiful platter, mixing white and dark meat, and garnish with fresh herbs like rosemary and cranberries for a festive touch.
Tips for Perfect Spatchcock Turkey and FAQs
Achieving a truly perfect spatchcocked turkey involves a few key details and common questions. Here are some extra tips and answers to help you along the way:
- Don’t Skip the Rest! Once removed from the oven, resist the urge to carve immediately. Cover your turkey loosely with aluminum foil and allow it to rest for a minimum of 20-30 minutes (for larger birds, even longer). This crucial step allows the meat fibers to relax and reabsorb the juices, ensuring a tender, moist turkey. If you cut it too soon, all those delicious juices will run out onto your cutting board.
- Customize Your Fat and Herbs: While melted butter is fantastic for browning and flavor, you can certainly substitute it with olive oil, avocado oil, or even a blend of both. Similarly, feel free to experiment with fresh herbs instead of dried ones for a more vibrant aroma and flavor profile. Rosemary, thyme, sage, and oregano all work beautifully. Consider making a compound butter with fresh herbs for an extra layer of flavor under the skin.
- Pat Dry, Pat Dry, Pat Dry: This cannot be emphasized enough. A thoroughly dry turkey skin is the secret to achieving that coveted crispy texture. After brining and before seasoning, pat the turkey down with paper towels until there’s absolutely no moisture left on the skin.
- Season Liberally: Don’t be shy with your seasoning! The large surface area of a spatchcocked turkey means there’s ample room for a generous coating of herbs, salt, and pepper. This builds flavor and contributes to a delicious crust.
FAQs
Let’s address some common questions about spatchcocking and serving turkey:
Do I need to use a quick-read thermometer? Absolutely! A quick-read thermometer is indispensable when cooking poultry, especially a turkey. Ovens can vary in temperature, and it’s vital to ensure the turkey reaches a safe internal temperature of 165°F (74°C) in the thickest part of the thigh. This prevents both undercooking and overcooking, guaranteeing food safety and a perfectly juicy result.
What do I do with the stuffing since the bird is flat? With a spatchcocked turkey, you generally don’t stuff the bird’s cavity. Instead, I highly recommend preparing your stuffing (or dressing) in a separate baking dish. After carving the turkey, you can generously drizzle the pan drippings over the stuffing. This method ensures both your turkey is cooked perfectly and your stuffing absorbs all that incredible turkey flavor, without compromising either. For a fantastic recipe, try our Garlic Butter Sausage and Mushroom Stuffing.
If I can’t stuff the turkey, how do I make gravy? The drippings from a spatchcocked turkey roasted on a wire rack are perfect for making a rich, flavorful gravy! Simply collect the drippings from the bottom of your rimmed baking sheet, deglaze the pan, and follow a classic gravy recipe. You can find our top recommendation with The Best Easy Turkey Gravy recipe.
How long do turkey leftovers last? Cooked turkey can be safely stored in an airtight container in the refrigerator for up to four days. For longer storage, freeze your turkey leftovers for up to four months. Proper storage ensures you can enjoy your delicious turkey well beyond the holiday meal.
How big of a turkey should I get? A good rule of thumb is to plan for about 1 to 1.5 pounds of turkey per person. If you want plenty of leftovers, err on the side of 1.5 pounds per person. So, for 8 people, aim for a 12-pound turkey; for 10 people, a 15-pound turkey, and so on.
When should I start to defrost and brine my turkey? Defrosting a turkey in the refrigerator is the safest and most recommended method. Generally, allow 24 hours for every 5 pounds of turkey. So, for a 10-pound turkey, plan for two full days to defrost. If you plan to brine, add an additional 24 hours to this timeline, as the turkey can thaw while brining. For example, a 10-pound turkey would need 2 days to defrost + 1 day to brine = 3 days total preparation time before roasting.
Other Holiday Dishes You’ll Love
A show-stopping spatchcocked turkey deserves equally impressive side dishes. We have a fantastic collection of recipes that pair perfectly with your succulent bird, guaranteed to complete your knockout holiday dinner. Explore these favorites to round out your festive feast:
- Baked Scalloped Corn
- Brown Butter Bacon Baked Brussels Sprouts
- Mini Sweet Potato Pies
- Perfect Creamy Mashed Potatoes
- The Best Easy Whole Roasted Cauliflower
- The Best Easy Creamed Spinach
- The Best Easy Buttery Soft Dinner Rolls
- The Best Easy No Knead Bread
Find some of our recent favorites below:
More Holiday Recipes
Cranberry Chutney
Bacon Rye Stuffing
Brussels Sprouts Hash
Roasted Brussels Sprouts and Onions
Loaded Twice Baked Potatoes
Twice Baked Potatoes
Roasted Brussels, Parsnips, and Squash
Loaded Green Bean Casserole
You can find our complete side dish recipe index here.
Perfect Spatchcock Turkey Recipe
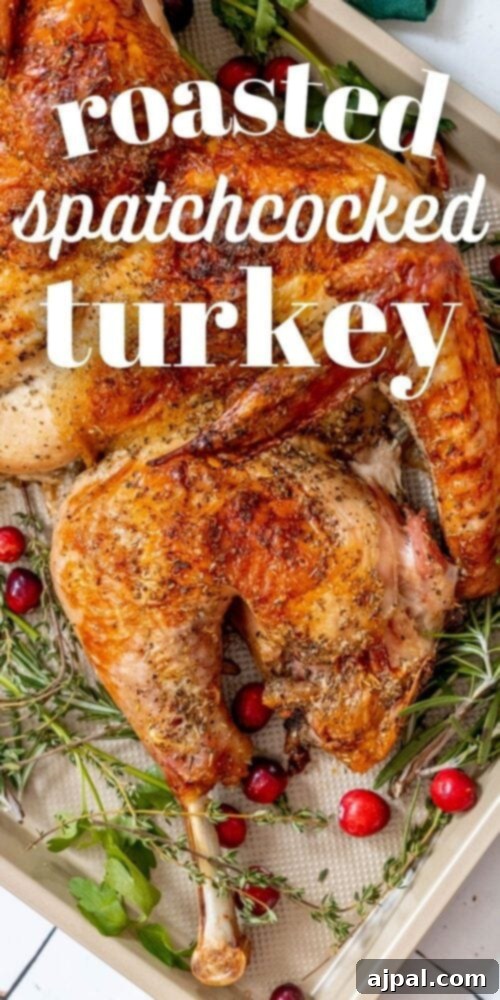
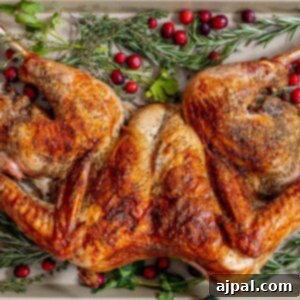
This perfect spatchcocked turkey recipe guarantees crispy, crunchy skin and wonderfully tender, juicy meat every time!
Share on Facebook
Share
Pin this now to find it later
Pin It
Follow on Instagram
Follow
Only have 30 minutes to get dinner on the table? Sign up for my 30 minute dinner plans direct to your inbox!
Find and shop my favorite products in my Amazon storefront here!
Perfect Spatchcocked Turkey
Email Recipe
Print Recipe
Ingredients
For the Turkey Brine:
- 1 cup kosher salt
- ½ cup light brown sugar
- 1 gallon vegetable stock
- 2 tablespoon black peppercorns
- 1 ½ teaspoons allspice berries
- 1 tablespoon juniper berries, optional
- 1 ½ teaspoons rosemary
- 2 teaspoons savory
- 1 gallon iced cubes
- Or use a packet of pre-mixed turkey brine
For the Turkey:
- 1 turkey, 12-14lb
- 4 oz butter, softened
- 4 oz butter, melted
- 2 tablespoons Italian herbs, Cajun seasoning, or other spice blend you prefer
- Celtic sea salt and fresh cracked pepper, to taste
Instructions
- Boil 2 gallons water in a stock pot.
- Stir in package of brine mix, or your own turkey brine.
- Boil for 5 minutes, stirring, until salt and sugar has dissolved.
- Remove from heat and let completely cool.
- Add turkey to large stockpot and cover with brine.
- Refrigerate (or keep on ice) for 1-2 days to brine turkey.
- Turkey can thaw in brine.
- Preheat oven to 350 degrees prior to butterflying your turkey. When ready, remove turkey from brine and make sure all giblets are removed.
- Pat with paper towels to be sure it is completely dry.
- Place the turkey breast-side down on a cutting board. Using your kitchen shears, cut parallel along each side of the backbone, then remove it. Removing the backbone allows you to flatten the bird.
- Using both hands, grip the cut portions of the turkey and pull apart, opening the turkey cavity. Grip on either side of where the backbone and flatten.
- If you need, blot the turkey with a paper towel as you go to keep turkey dry.
- Flip the turkey over, press the middle of the breast downward like you’re performing CPR on the turkey until you hear a cracking sound in the breast bones to flatten the turkey.
- Pull the thighs and wings out to the side to further flatten the turkey.
- Coat the turkey with softened butter, getting some under skin. Season well with seasoning, salt, and pepper.
- Bake 10-12 pound turkey for 1 hour and 30 minutes, rotating your baking sheet and basting with the melted butter every 30 minutes.
- For your final 30 minutes, increase the oven temperature to 400 degrees to crisp the skin. Check to make sure it’s golden brown.
- Your instant-read thermometer should read 165 degrees in the thickest part of the thigh.
- Remove turkey and let rest at least 20 minutes before carving.
- First, using a carving knife, cut off the thighs and wings.
- Separate the thighs from the drumsticks.
- Next, carve a single cut along the breastbone on each side, similarly to the way you cut each side of the backbone, to separate the breast into two large pieces. The breast meat should be moist.
- Slice the breast across the grain in parallel cuts, creating thin and delicious slices.
- Serve and enjoy!
Nutrition
Calories: 353kcal
Carbohydrates: 21g
Protein: 11g
Fat: 26g
Saturated Fat: 15g
Polyunsaturated Fat: 9g
Trans Fat: 1g
Cholesterol: 96mg
Sodium: 9593mg
Fiber: 2g
Sugar: 15g
Nutrition information is automatically calculated, so should only be used as an approximation.
Additional Info
Find our web story for this recipe here.