
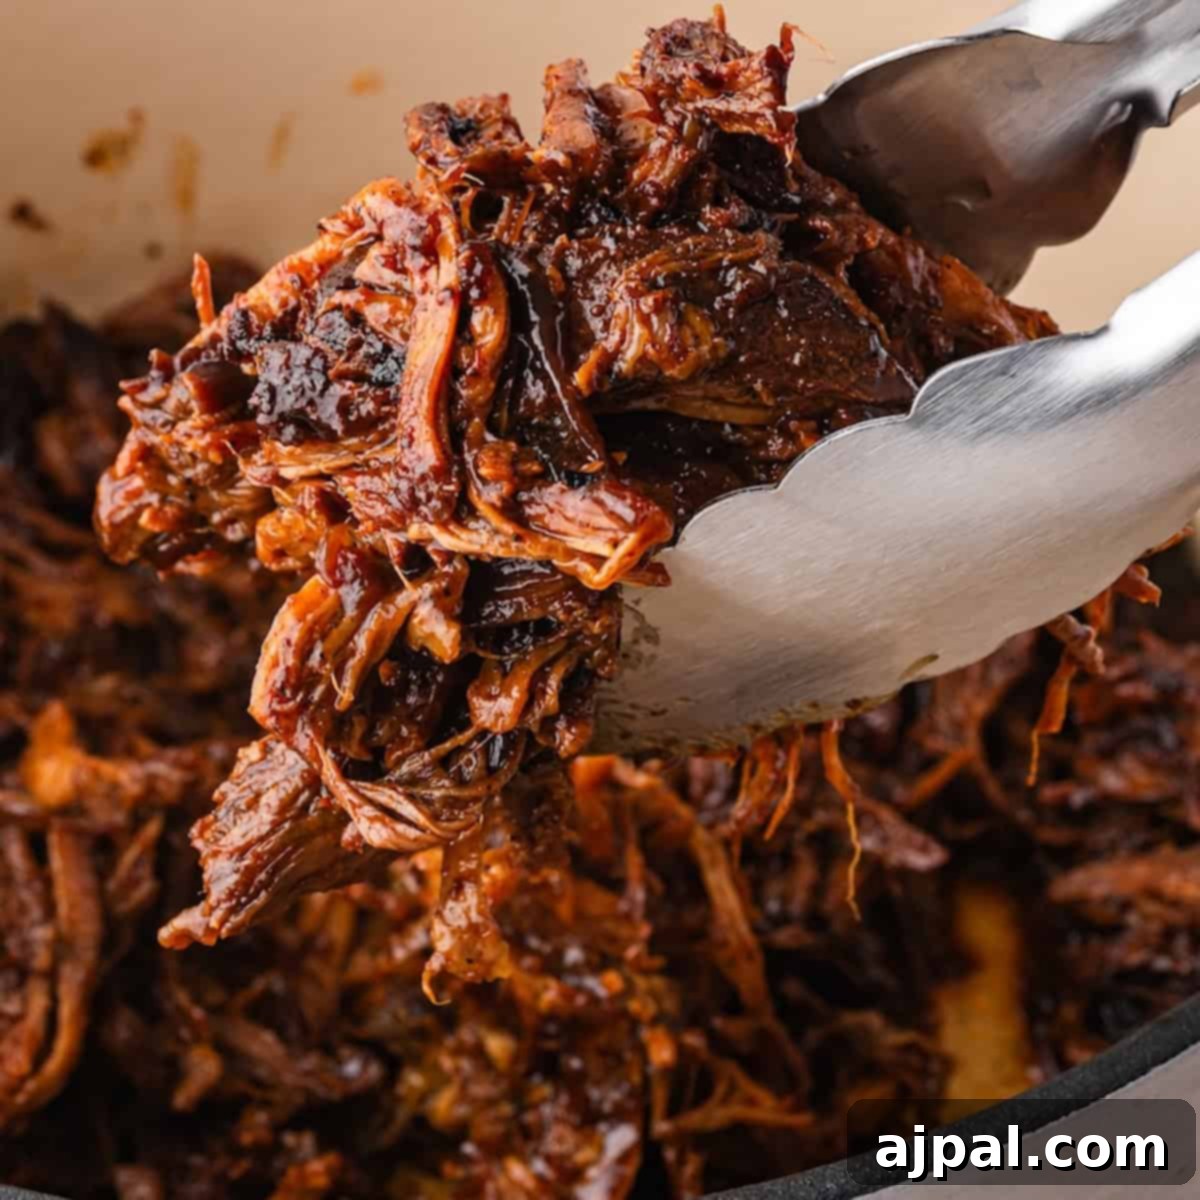
The Ultimate Dutch Oven Pulled Pork: Effortlessly Tender & Flavorful BBQ
Craving the rich, smoky flavors of perfectly slow-cooked pulled pork but don’t have a smoker or endless hours to dedicate? You’re in luck! This revolutionary Dutch Oven Pulled Pork recipe brings all the succulence and deep BBQ taste you desire, right to your kitchen. Forget the long, intricate smoking process; our method simplifies this classic dish, making it achievable in less time with minimal fuss, using just your trusty Dutch oven.
This guide is designed to empower every home cook, from novice to seasoned chef, to create unbelievably tender pulled pork that rivals any backyard BBQ. We’ll delve into the secrets of achieving that coveted fall-apart texture and a rich, complex flavor profile, proving that a smoker isn’t necessary for an exceptional pulled pork experience.

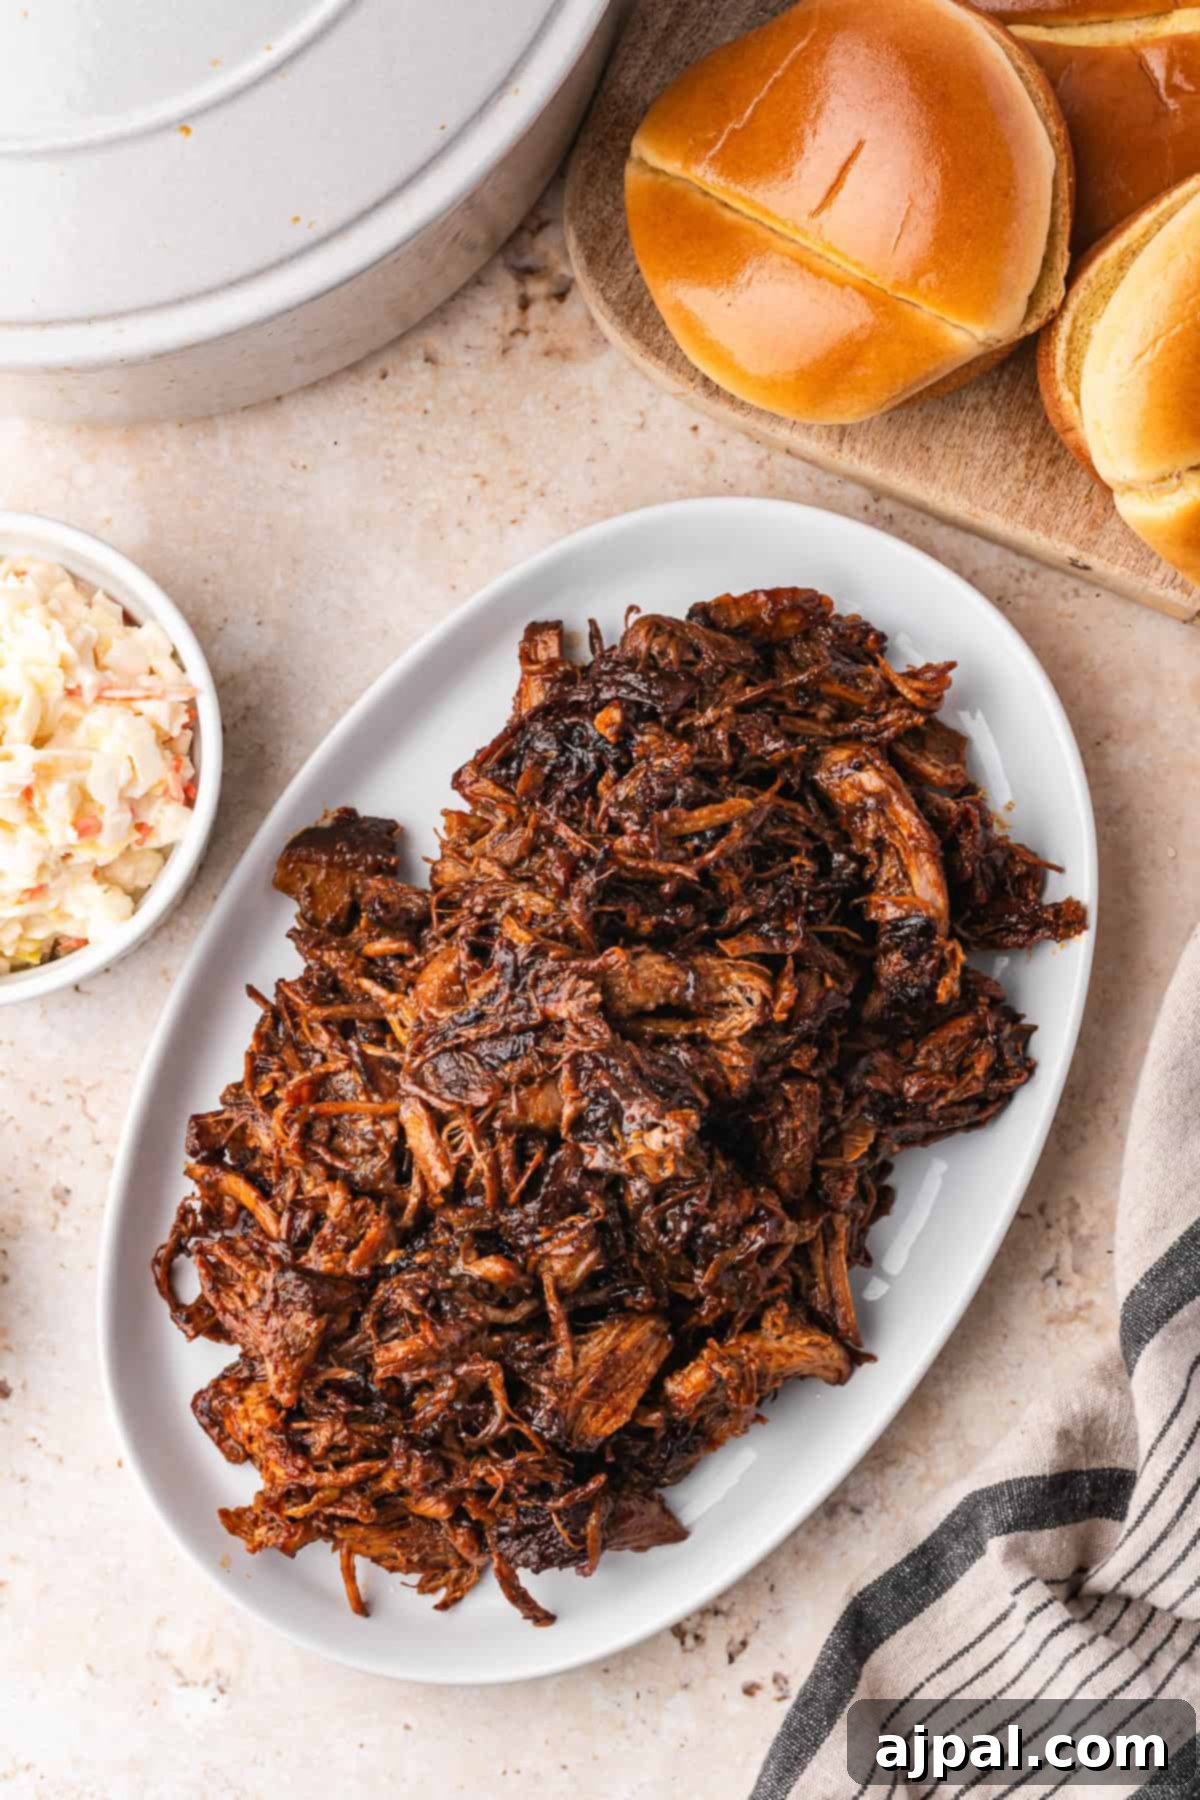

To ensure you get the most out of this detailed recipe, we offer a convenient skip-to-recipe button at the top of the page. Additionally, a clickable table of contents is provided just below, allowing for effortless navigation through the tips, tricks, and step-by-step instructions.
As a passionate home cook with no formal culinary training, my goal is to demystify cooking and build confidence in the kitchen. I believe understanding *why* a recipe works and the role each ingredient plays is key to truly mastering any dish. That’s why I load all my recipes with comprehensive tips, ensuring even the most beginner cook feels empowered to create delicious meals.
Table of Contents
- How to Make Pulled Pork in a Dutch Oven
- Expert Tips for Perfect Dutch Oven Pulled Pork
- What to Serve With Pulled Pork
- Dutch Oven Pulled Pork Recipe Card
Mastering Pulled Pork in Your Dutch Oven
Creating exceptional pulled pork in a Dutch oven is a straightforward process that yields incredible results. The magic lies in a few key steps that build layers of flavor and ensure unparalleled tenderness.
- **Flavorful Crust:** We start by creating a robust spice rub and searing the pork shoulder to develop a rich, caramelized crust. This initial step locks in juices and adds a depth of flavor that a smoker typically provides.
- **Slow Braising Perfection:** The pork then undergoes a slow braise in a luscious, tangy-sweet sauce. This extended cooking time at a low temperature is crucial for breaking down tough connective tissues, transforming the meat into something incredibly fork-tender and moist.
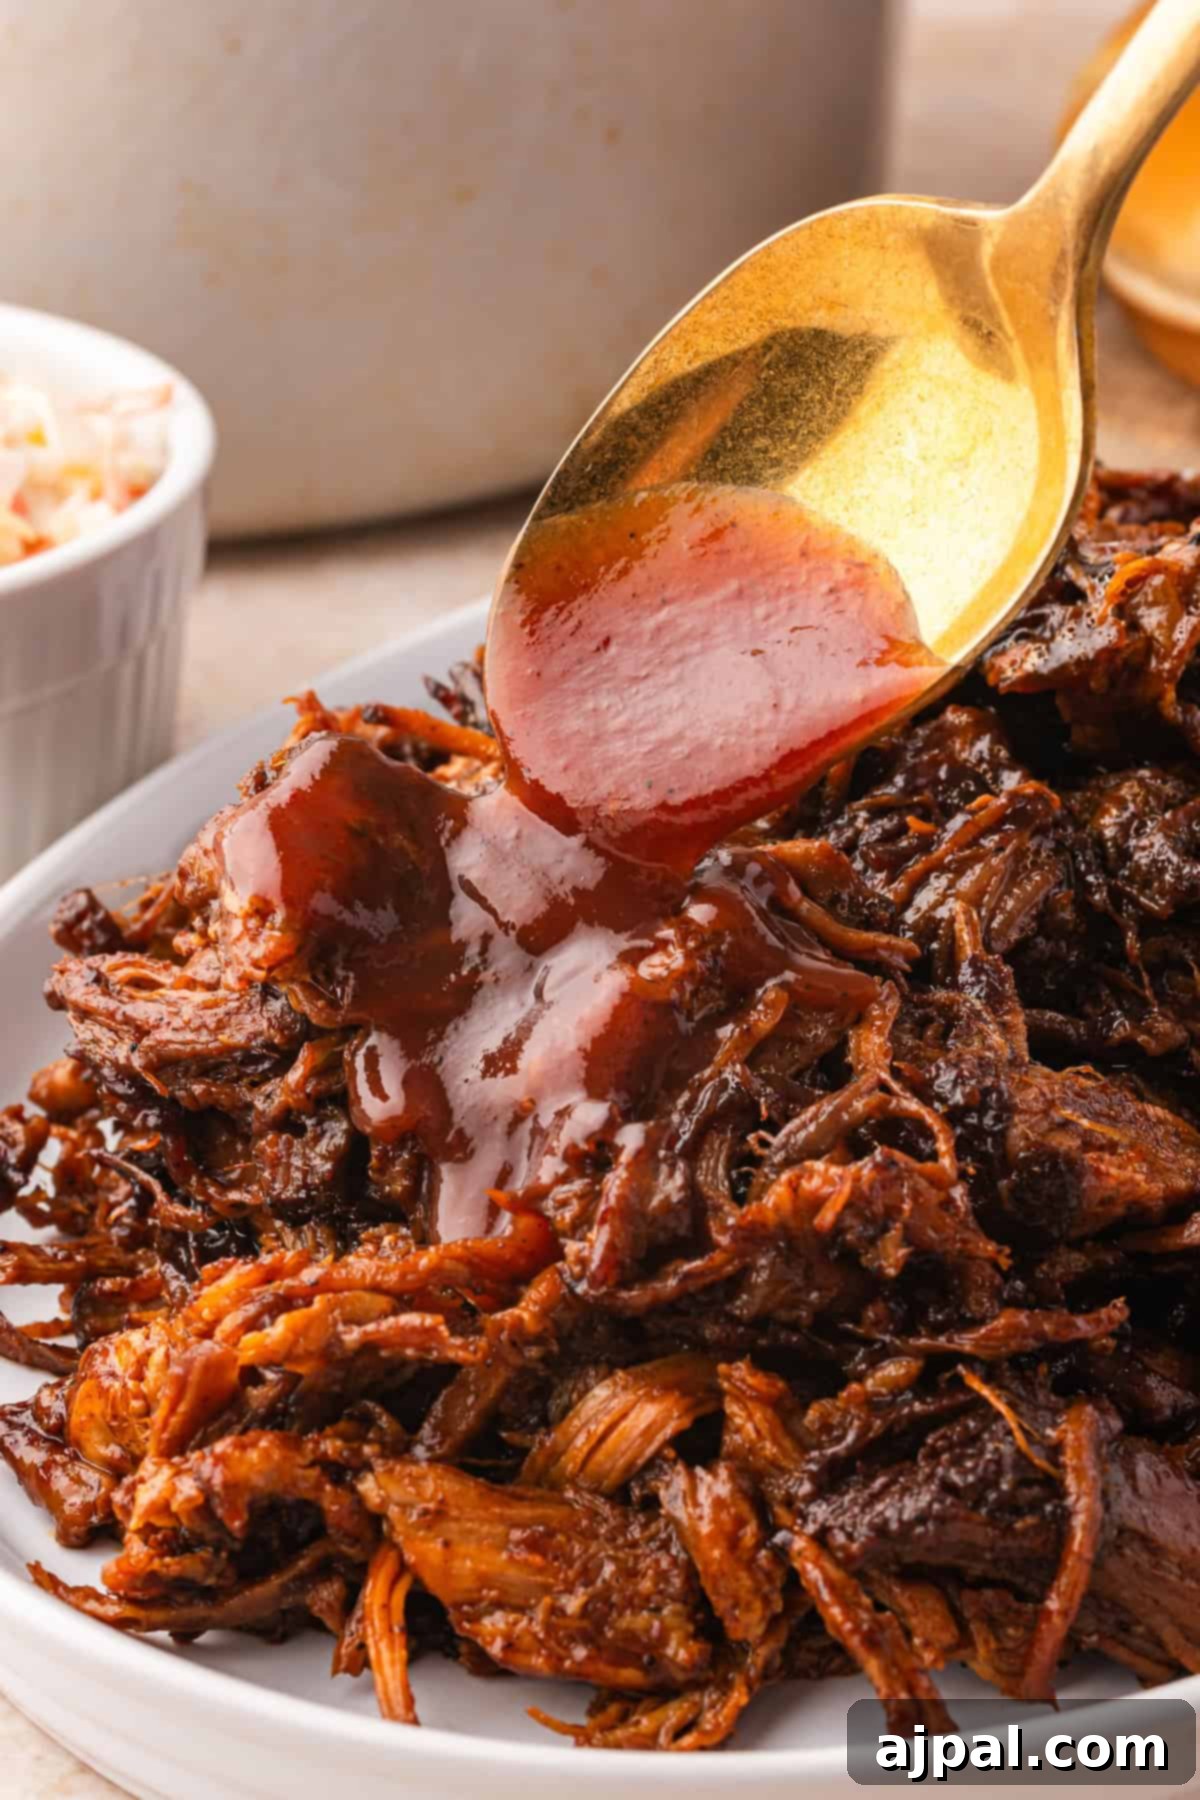
- **Sticky, Irresistible Coating:** As the pork slowly simmers, the BBQ sauce thickens, creating a gloriously sticky and intensely flavorful coating for every strand of shredded pork.
- **Versatile & Delicious:** This stovetop and oven method consistently delivers tender, juicy, and flavor-packed BBQ pulled pork – an absolute dream for classic sandwiches, vibrant tacos, comforting rice bowls, or even topping baked potatoes.
Essential Ingredients for Dutch Oven Pulled Pork
To embark on this culinary journey, gather these high-quality ingredients. Each plays a vital role in achieving the perfect balance of flavor and texture:
For the Pork & Seasoning:
- 3-4 pound Pork Shoulder (Bone-In): Often called Boston butt, this cut is paramount for pulled pork. Its generous marbling (internal fat) melts during slow cooking, infusing the meat with moisture and rich flavor, preventing it from drying out. The bone further contributes to a deeper, more complex flavor profile.
- 2 tablespoons Olive Oil, divided: Used primarily for searing the pork. Searing creates a delicious, golden-brown crust, adding crucial caramelized notes and enhancing the overall flavor of the final dish.
- 1 tablespoon Smoked Paprika: A cornerstone spice, smoked paprika imparts a deep, authentic smoky flavor, mimicking the essence of traditional slow-smoked BBQ.
- 1 tablespoon Brown Sugar: Adds a touch of sweetness that perfectly balances the savory spices and acidity in the sauce. It also aids in caramelization during the searing process, contributing to that beautiful crust.
- 2 teaspoons Garlic Powder: Delivers a consistent, savory depth that permeates the pork, complementing the fresh garlic in the braising liquid.
- 1 teaspoon Onion Powder: Enhances the savory base with a slightly sweet and robust onion flavor, building on the fresh onions used later.
- 1 teaspoon Cumin: Introduces a warm, earthy undertone that pairs exceptionally well with the smoky and sweet BBQ profile.
- 1 teaspoon Chili Powder: Provides a mild, pleasant heat and an additional layer of smoky spice, elevating the BBQ flavor without overwhelming it.
- Salt and Pepper, to taste: Fundamental for seasoning. These essential ingredients draw out the natural flavors of the pork and spices, bringing everything into delicious harmony.
For the Onions & Cooking Liquid:
- 1 Onion, sliced: As it slowly cooks down, the sliced onion contributes natural sweetness and a foundational depth of flavor to the braising liquid.
- 4 cloves Garlic, smashed: Smashed garlic releases its potent, aromatic compounds into the cooking liquid, infusing the pork with an intense savoriness.
- 1 ½ cups BBQ Sauce: This is the heart of your BBQ flavor, providing a bold, sweet, tangy, and smoky character. It will beautifully coat the shredded pork for a rich, sticky finish.
- ½ cup Apple Cider Vinegar: More than just adding tang, apple cider vinegar plays a crucial role in tenderizing the pork, helping to break down fibers while offering a bright contrast to the richness of the meat and BBQ sauce.
- 2 cups Chicken Broth: Forms the flavorful base for braising, ensuring the pork stays incredibly juicy and moist throughout the long cooking process, preventing any dryness.
- 1 tablespoon Worcestershire Sauce: A secret weapon for umami. Worcestershire sauce deepens the savory notes, adding a complex, tangy richness that greatly enhances the overall taste profile.
Step-by-Step Dutch Oven Pulled Pork Process
Once your ingredients are meticulously gathered, follow these steps to create your masterpiece:
1. Prepare Your Pork
Begin by preheating your oven to 300°F (150°C). While the oven heats, take your pork shoulder and thoroughly pat it dry with paper towels. This crucial step helps create a superior crust during searing.
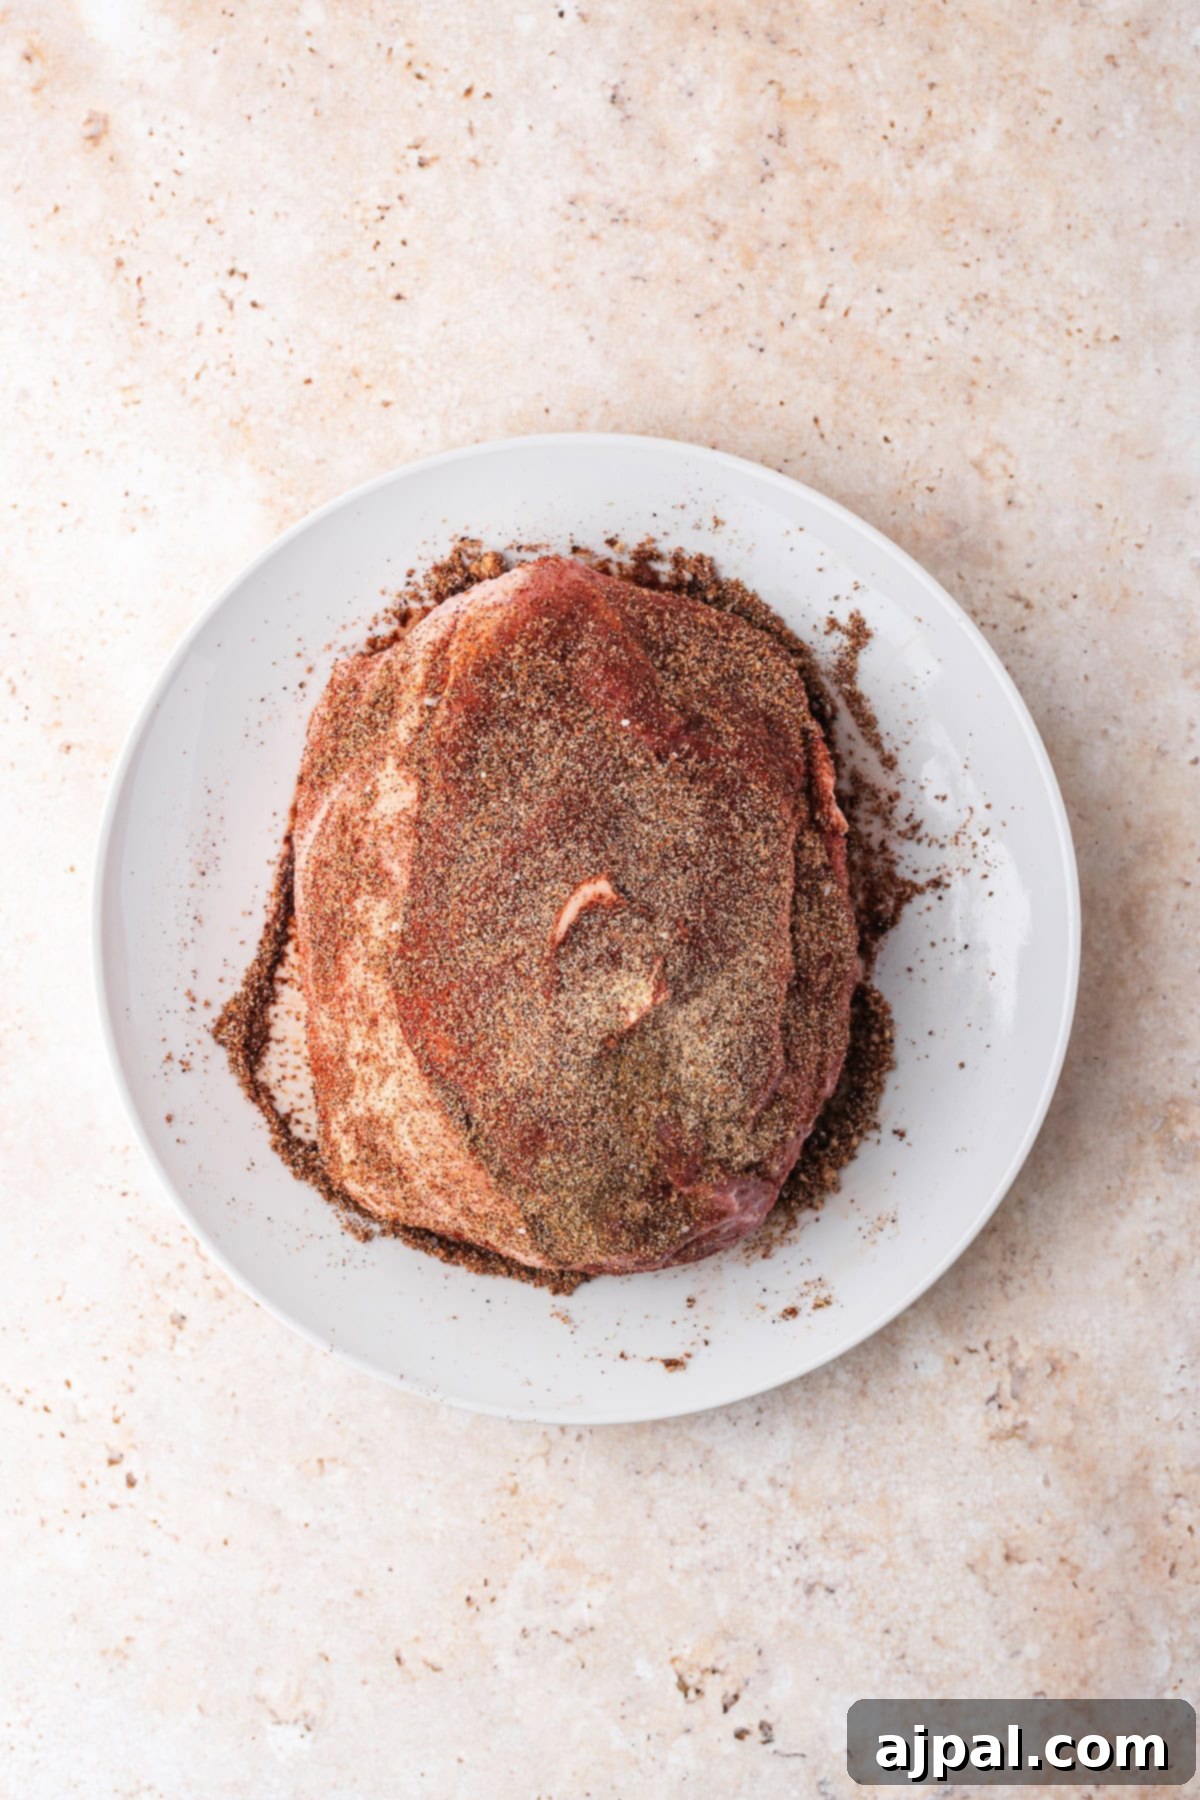
2. Apply the Spice Rub
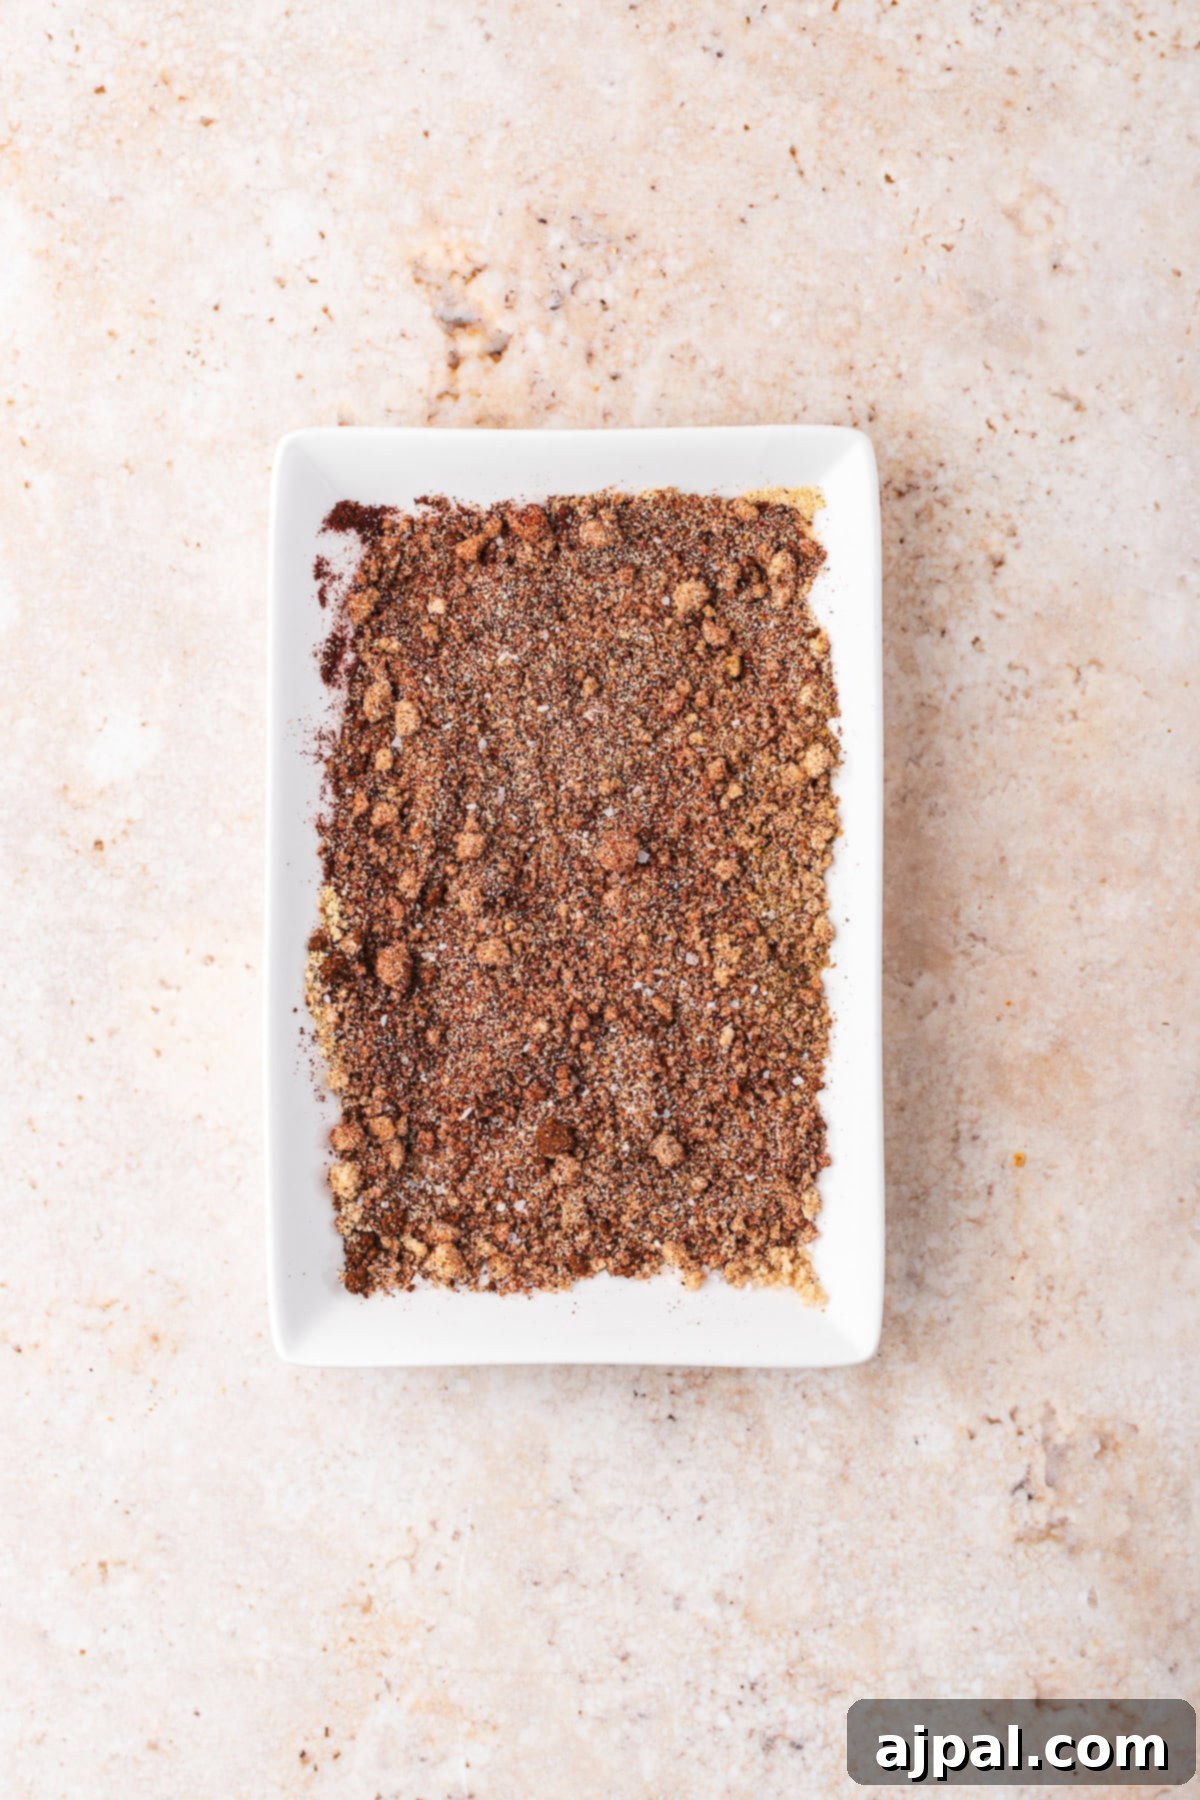
In a small bowl, combine the smoked paprika, brown sugar, garlic powder, onion powder, cumin, chili powder, salt, and pepper to create your aromatic spice rub. Generously pat this mixture all over the entire surface of the pork shoulder, ensuring a thorough coating for maximum flavor penetration.

3. Sear the Pork
Heat half of the olive oil in your Dutch oven over medium-high heat until shimmering. Carefully place the seasoned pork shoulder into the hot Dutch oven and sear all sides for about 3-4 minutes per side, until a beautiful golden-brown crust develops. Once seared, remove the pork and set it aside on a plate.

4. Sauté Aromatics
Add the remaining olive oil to the Dutch oven. Introduce the sliced onion and smashed garlic, stirring occasionally. Sauté for approximately 3-4 minutes, or until the onions have softened and become translucent, releasing their fragrant aromas.
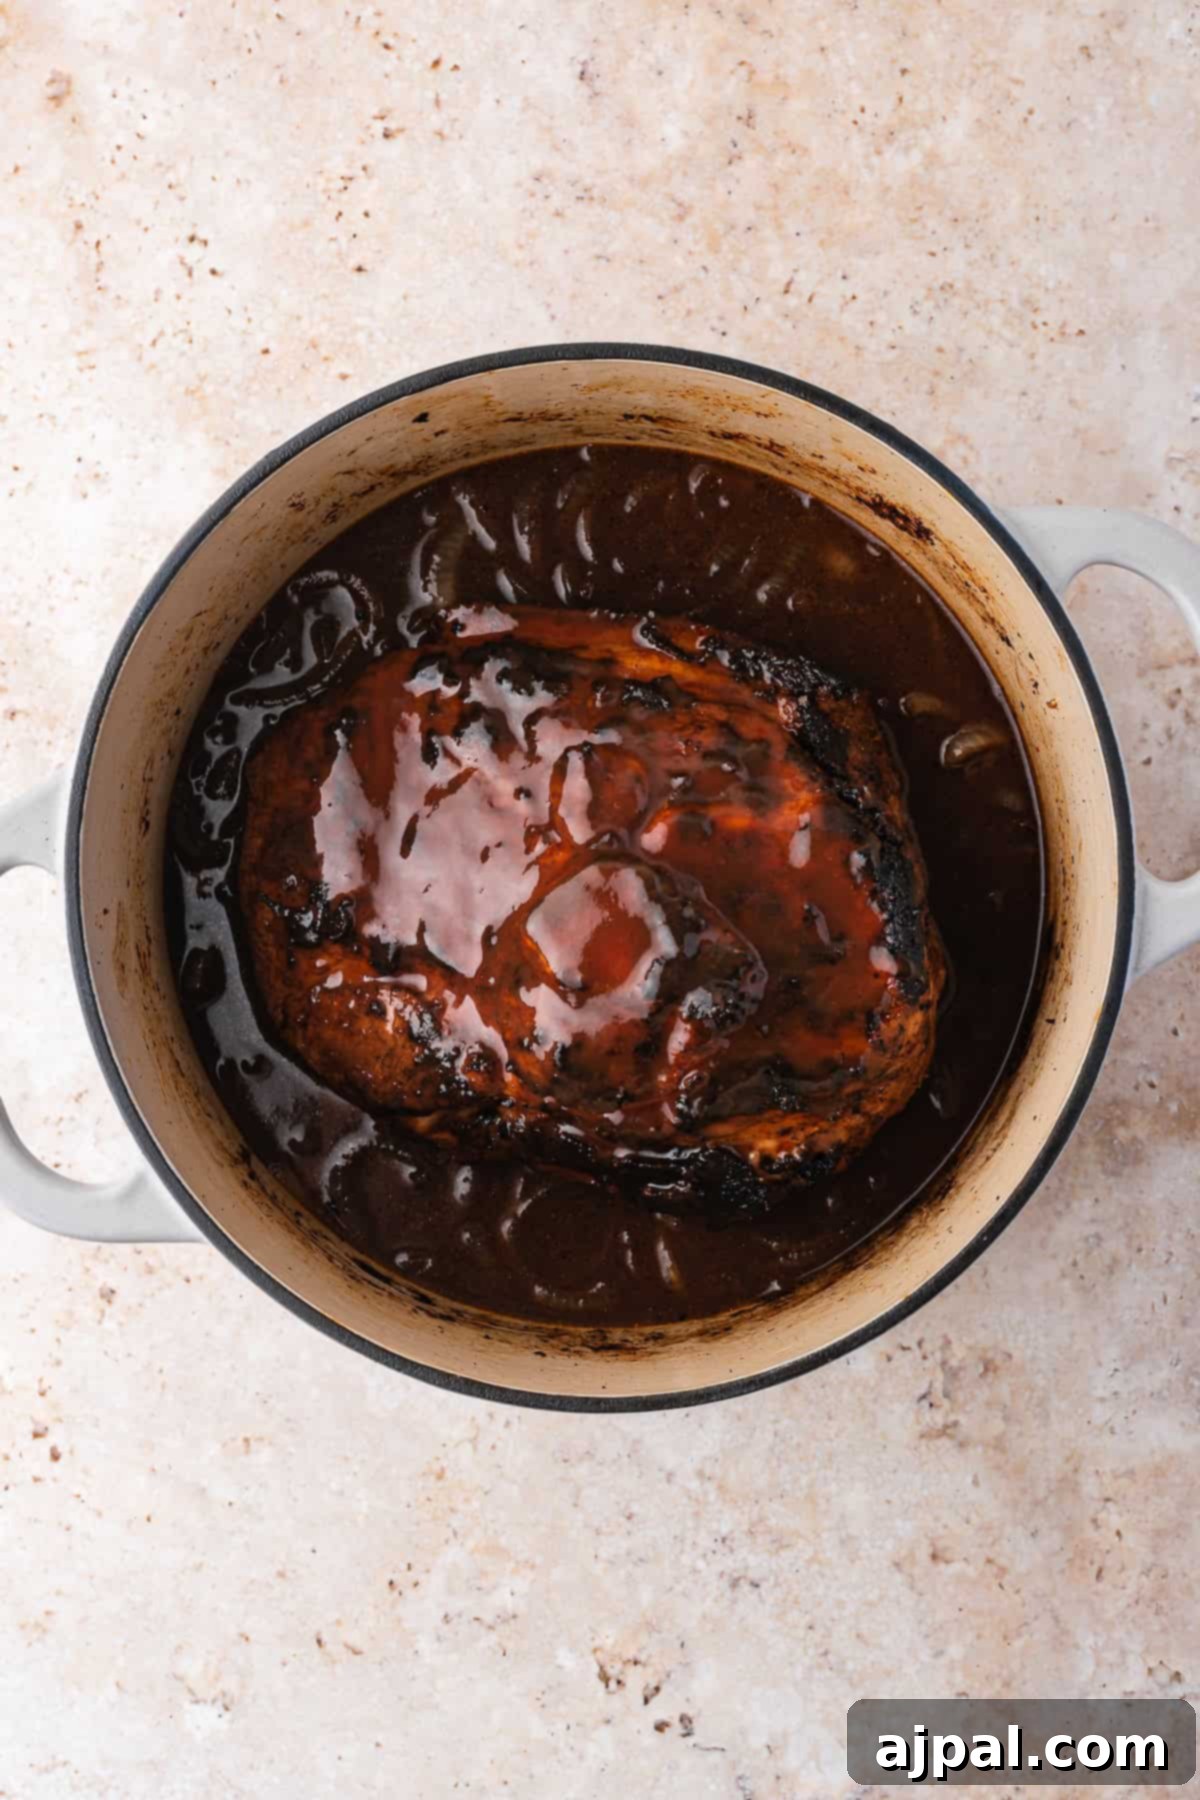
5. Braise to Perfection
Pour in the apple cider vinegar to deglaze the pot, scraping up any delicious browned bits from the bottom – these add immense flavor. Return the seared pork shoulder to the Dutch oven. In a separate bowl, whisk together the chicken broth, BBQ sauce, and Worcestershire sauce until well combined. Pour this flavorful liquid over the pork, ensuring it partially submerges the meat. Cover the Dutch oven tightly with its lid and transfer it to the preheated oven. Cook for 3.5 to 4 hours, or until the pork is incredibly tender and literally falls apart at the touch of a fork.
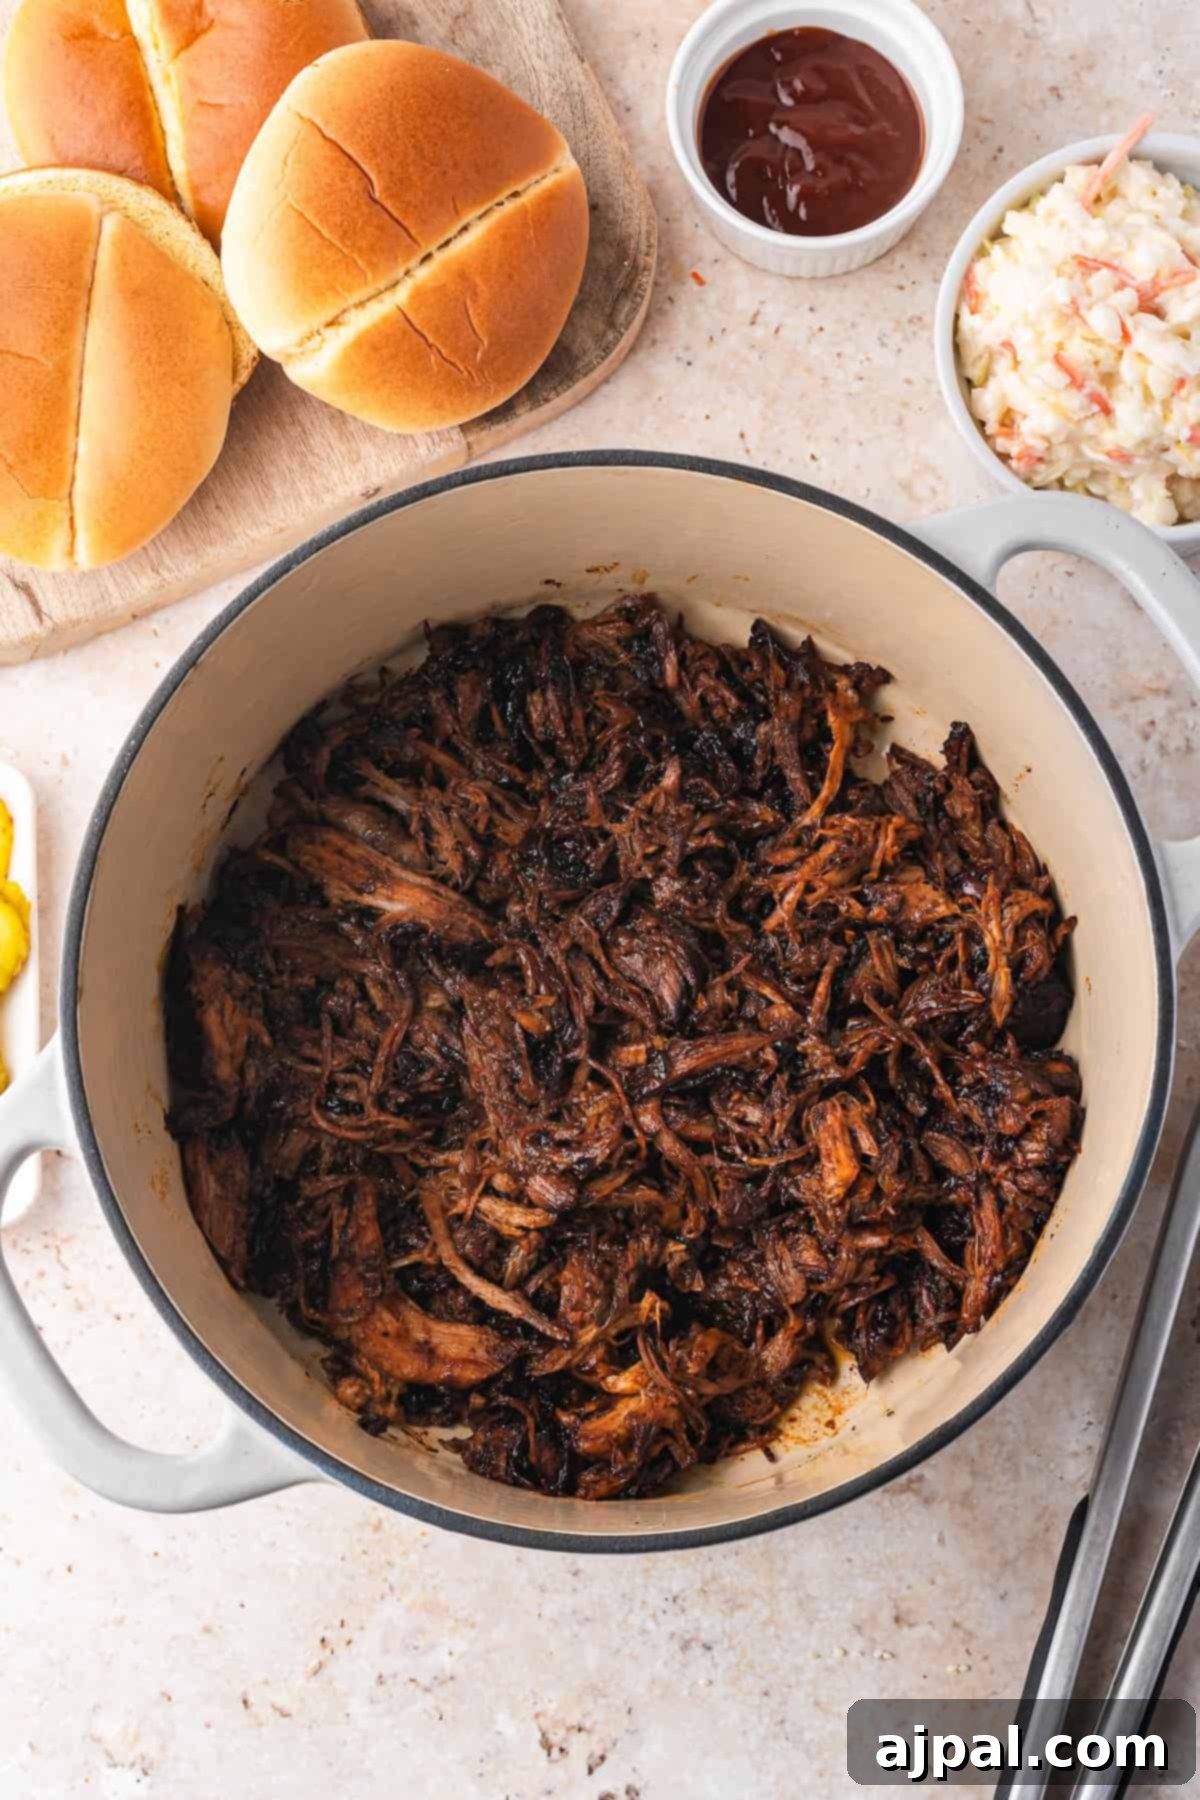
6. Shred and Combine
Carefully remove the Dutch oven from the oven. Transfer the cooked pork to a large cutting board or a shallow dish. Using two forks, shred the pork, discarding the bone and any large pieces of excess fat. The meat should be so tender that it easily pulls apart.
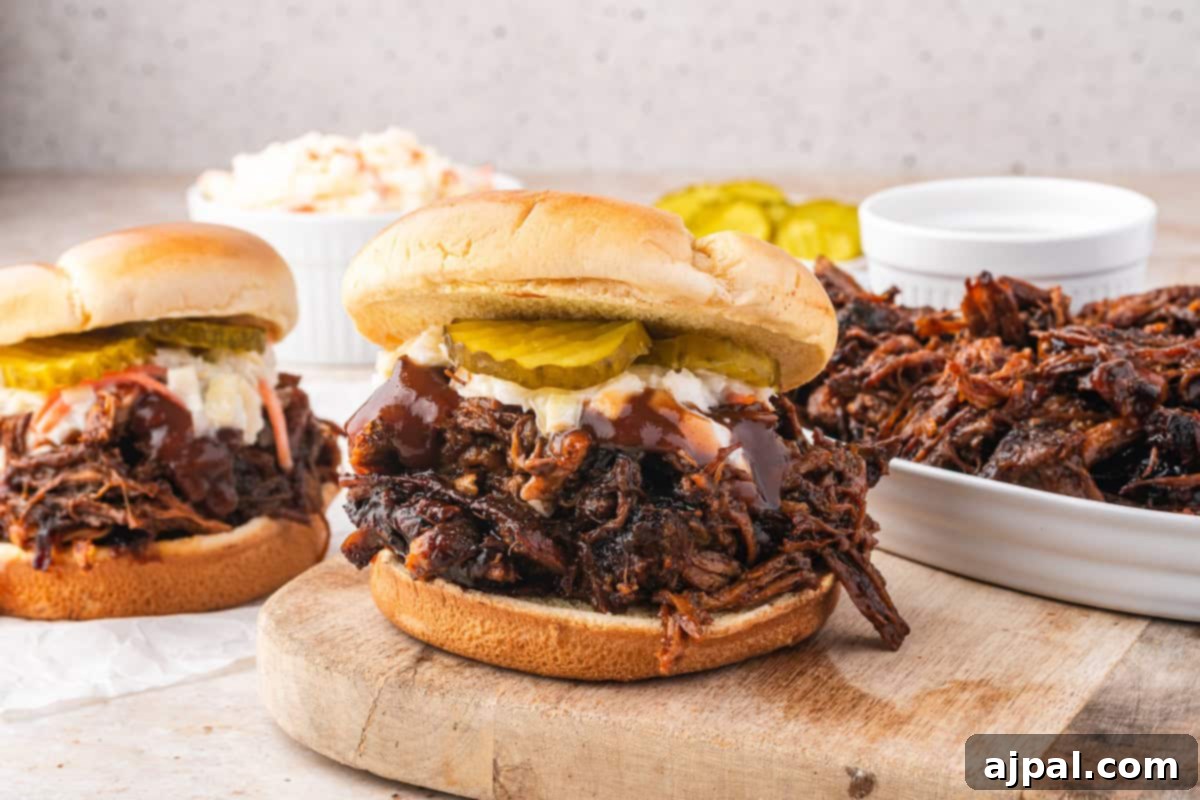
7. Thicken & Serve
Allow the remaining sauce in the Dutch oven to sit for 5-7 minutes. This short rest allows the sauce to naturally thicken to a perfect consistency. Return the shredded pork to the pot and stir it thoroughly with the rich sauce, ensuring every piece is coated. If the sauce becomes too thick, you can add a splash more chicken broth or BBQ sauce to reach your desired consistency. Serve immediately as a stand-alone main dish or piled high on your favorite buns for classic pulled pork sandwiches. Garnish with fresh parsley if desired for a touch of freshness and color.
Expert Tips for Perfect Dutch Oven Pulled Pork
Achieving truly exceptional pulled pork requires a few simple insights. These tips will elevate your Dutch oven creation from good to unforgettable:
- Selecting the Ideal Pork Cut: The foundation of great pulled pork begins with the right cut.
- Pork shoulder (Boston butt) is unequivocally the best choice due to its high fat content and marbling. These render down during prolonged cooking, keeping the meat incredibly moist and tender.
- Bone-in vs. Boneless: While both work, bone-in pork shoulder tends to retain more flavor and moisture. However, boneless is undeniably easier to shred once cooked and might reduce the overall cooking time slightly.
- Generous Seasoning is Key: Don’t be shy with your spice rub! A well-balanced blend of sweet, smoky, and savory spices (like brown sugar, smoked paprika, garlic powder, cumin, and chili powder) is crucial for building a deep flavor profile. Ensure the pork is thoroughly coated.
- The Power of Resting with Rub: For maximum flavor infusion, allow the pork to rest with the spice rub for at least 30 minutes, or ideally, overnight in the refrigerator. This dry brine process helps the spices penetrate deep into the meat.
- Searing for Enhanced Flavor: This step is non-negotiable for incredible pulled pork. Heating a small amount of oil in your Dutch oven and searing the pork on all sides creates a beautiful, caramelized crust. This Maillard reaction adds a profound layer of rich flavor that permeates the entire dish.
- Mastering the Braising Liquid: The liquid you braise the pork in is vital. A strategic combination of chicken broth, apple cider vinegar, Worcestershire sauce, and BBQ sauce not only tenderizes the pork but also infuses it with complex flavors. Remember, you only need enough liquid to cover about one-third of the pork, as the meat will release its own juices as it cooks. Too much liquid can dilute the flavors.
- The “Low and Slow” Philosophy: Patience is a virtue here. Baking your pork at a consistent 300°F (150°C) for approximately 3-4 hours is ideal. The pork is done when it’s fall-apart tender and reaches an internal temperature of 195-205°F (90-96°C). Turning the pork occasionally during cooking ensures even cooking and optimal flavor absorption.
- Maintaining Moisture: If you notice the liquid reducing too much during cooking, don’t hesitate to add a splash more broth. For extra moisture and to prevent dryness, you can place a piece of aluminum foil directly over the pork before putting the lid on the Dutch oven. Additionally, allowing the pork to rest in its juices for 20-30 minutes after cooking dramatically improves juiciness by allowing the meat to reabsorb moisture.
- The Art of Shredding: Once tender, transfer the pork to a large bowl or cutting board. Use two forks, specialized shredding claws, or even a stand mixer with the paddle attachment for quick and efficient shredding. While shredding, remove any large pieces of fat or the bone, but keep some of the rendered fat and juices to maintain richness and moisture.
- Post-Shredding Flavor Boost: Don’t stop at shredding! Toss the pulled pork generously with some of the luscious cooking juices to ensure every strand is coated and bursting with flavor. For an extra kick, consider stirring in a bit more BBQ sauce, a dash of hot sauce, or a splash of apple cider vinegar for an added tangy brightness.
- Achieving Crispy Bits (Optional but Recommended): For those who love a textural contrast, spread the shredded pork on a baking sheet and broil it for 5-7 minutes. This creates delightful crispy edges. Toss these crispy bits back into the juicy pork for a perfect combination of tender and crunchy textures.
- Proper Serving & Storage: Serve your Dutch oven pulled pork on soft brioche buns, in warm tortillas for tacos, over fluffy rice, creamy mashed potatoes, or even baked sweet potatoes. For leftovers, store the pulled pork in an airtight container with some of its cooking juices to keep it moist for up to 4 days in the refrigerator. Pulled pork also freezes exceptionally well for up to 3 months; simply reheat with a bit of broth or extra BBQ sauce to restore its moisture.
Reheating Pulled Pork for Easy Meal Prep
Dutch oven pulled pork is a fantastic candidate for meal preparation, offering delicious and convenient meals for days to come. Here’s how to store and reheat it perfectly:
- Refrigeration: Store leftover pulled pork in an airtight container, ensuring some of the cooking juices are included to maintain moisture. It will stay fresh and flavorful for up to 4 days in the refrigerator.
- Freezing: For longer storage, freeze the pulled pork in portioned bags or containers. It can be safely frozen for up to 3 months. Thaw overnight in the refrigerator before reheating.
- Reheating Methods:
- Stovetop: Gently warm in a skillet over medium-low heat, adding a splash of chicken broth or extra BBQ sauce to prevent drying.
- Oven: For larger quantities or to prevent sticking, cover with foil and reheat in the oven at 300°F (150°C) until thoroughly warmed through.
Bonus Pro Tips for Customization:
- Infusing Smoky Flavor (No Smoker Needed): If you desire an even deeper smoky note without a smoker, add a teaspoon of liquid smoke to your braising liquid. This provides an instant, authentic BBQ aroma.
- Amping Up the Heat: For those who prefer a spicier pulled pork, feel free to increase the amount of cayenne pepper or chili powder in the rub. Alternatively, stir in your favorite hot sauce after shredding the pork for an adjustable kick.
- Accelerated Cooking (with Caution): While slow and low is ideal, you can slightly speed up the process by cooking at 325°F (160°C) for approximately 3 hours. However, be vigilant and check frequently to ensure the pork doesn’t dry out.
Creative Ways to Serve Your Dutch Oven Pulled Pork
The versatility of pulled pork is one of its greatest assets. Beyond the classic sandwich, there are countless delicious ways to enjoy this tender meat:
- Classic Pulled Pork Sandwiches: Serve on soft brioche buns with a generous dollop of creamy coleslaw and crunchy pickles for a timeless delight.
- Tacos or Burritos: Transform your pulled pork into vibrant tacos or hearty burritos. Pair with fresh salsa, avocado, shredded lettuce, and a squeeze of lime.
- Comforting Bowls: Ladle over fluffy white rice, creamy mashed potatoes, or a baked sweet potato for a satisfying and wholesome meal.
- BBQ Pulled Pork Mac and Cheese: Stir the shredded pork into your favorite homemade mac and cheese recipe for an unbelievably rich and comforting dish.
- Loaded Nachos or Fries: Pile the pulled pork onto crispy nachos or golden french fries, then top with melted cheese, jalapeños, sour cream, and a drizzle of extra BBQ sauce for an epic snack or appetizer.
- Salad Topping: Add a savory protein boost to a crisp green salad, perhaps with a tangy vinaigrette to complement the rich pork.
Frequently Asked Questions (FAQs) About Dutch Oven Pulled Pork
Both bone-in and boneless pork shoulder cuts work well for pulled pork. However, bone-in pork shoulder is generally preferred as the bone adds more flavor to the braising liquid and helps the meat stay exceptionally juicy. Boneless is a good option for easier shredding and a slightly faster cooking time.
Yes, searing the pork shoulder is highly recommended! This step creates a delicious, caramelized crust through the Maillard reaction, which significantly enhances the overall depth of flavor of your pulled pork. While you can technically skip it if you’re very short on time, it makes a noticeable difference.
For the best results, use a combination of liquids that provide both moisture and complex flavors. Our recipe calls for chicken broth, apple cider vinegar, Worcestershire sauce, and BBQ sauce. This blend offers a perfect balance of savory, sweet, and tangy notes that help tenderize the meat and infuse it with rich flavor.
You only need enough liquid to cover about one-third to half of the pork shoulder. The pork will release its own natural juices as it cooks, adding to the braising liquid. Using too much liquid can dilute the flavors and make the meat overly soft rather than tender.
For optimal fall-apart tenderness, cook your pulled pork in the oven at a steady 300°F (150°C) for 3-4 hours. The internal temperature of the pork should reach between 195-205°F (90-96°C). This higher temperature range (above the standard safe eating temperature of 145°F) is necessary to break down the connective tissues.
The pork is truly done when it reaches the target internal temperature of 195-205°F (90-96°C) AND shreds easily with two forks. If the meat feels tough or resistant to shredding, it simply needs more time to cook and break down its connective tissues.
At 300°F (150°C), it generally takes about 3-4 hours for a 3-4 pound pork shoulder. If you choose to cook at a slightly higher temperature like 325°F (160°C), it might shorten the time to around 3 hours. For the most incredibly tender and flavorful results, some prefer a very slow cook at 275°F (135°C) for up to 5 hours, allowing maximum connective tissue breakdown.
Always cook the pork with the lid on your Dutch oven. This traps moisture, creating a steamy environment that tenderizes the meat and prevents it from drying out. If you find there’s too much liquid towards the end of cooking, you can remove the lid for the final 30 minutes to allow some of the sauce to reduce and thicken.
If your pulled pork is tough, it means it hasn’t cooked long enough. Toughness indicates that the connective tissues haven’t fully broken down into gelatin. Simply return the Dutch oven to the oven, covered, and continue cooking, checking for tenderness every 30 minutes until it easily shreds.
Refrigerate: Store in an airtight container with some of its cooking juices for up to 4 days. The juices help keep it moist.
Freeze: Freeze in portioned bags or containers for up to 3 months. Thaw in the refrigerator before reheating.
Reheat: Warm gently in a skillet with a splash of broth or BBQ sauce, or cover with foil and reheat in the oven at 300°F (150°C) until hot.
Yes, definitely! Allowing the pork to rest in its juices for 20-30 minutes after cooking is crucial. This resting period allows the muscle fibers to relax and reabsorb moisture, resulting in significantly juicier and more flavorful pulled pork.
The most common methods include using two forks to pull the meat apart, using specialized shredding claws for efficiency, or even a stand mixer with a paddle attachment for quick, hands-free shredding. Remember to remove any large pieces of fat or the bone while shredding, but keep some of the rendered fat for moisture.
For delightful crispy bits, spread the shredded pork in a single layer on a baking sheet after cooking. Place it under the broiler for 5-7 minutes, watching carefully to prevent burning, until some edges are caramelized and crisp. Toss these crispy pieces back in with the juicy pork and sauce before serving for a wonderful textural contrast.
Pork shoulder, also widely known as Boston butt, is considered the absolute best cut for pulled pork. Its high fat content and ample connective tissue are perfect for slow cooking, yielding incredibly moist, tender, and flavorful results. Picnic shoulder is another suitable alternative.
Delicious Pairings for Your Dutch Oven Pulled Pork
Pulled pork is incredibly versatile and pairs beautifully with a wide array of side dishes. Explore these family favorites and other delightful options to complete your meal:
Homemade French Fries in Air Fryer
Crispy, golden, and utterly irresistible – these air fryer French fries are the perfect crunchy complement to tender pulled pork sandwiches. Quick to make and a guaranteed crowd-pleaser.
Air Fryer Potato Chips
For a lighter, yet equally satisfying crunch, these homemade air fryer potato chips are a fantastic alternative. Season them with your favorite spices for a personalized side that pairs wonderfully with rich pulled pork.
The Best Easy Coleslaw – Just 4 Ingredients
A classic pairing for a reason! The crisp, tangy, and creamy texture of coleslaw provides a refreshing contrast to the savory richness of pulled pork, especially on a sandwich.
Bacon Wrapped Cheddar and Garlic Jalapeno Poppers
For a more adventurous and flavorful side, these cheesy, spicy, and smoky poppers offer a fantastic kick that complements the deep flavors of the pulled pork beautifully.
Easy Baked Chicken Tacos
While not a side, consider these delicious baked chicken tacos as an alternative main dish, or swap out the chicken for your Dutch Oven Pulled Pork for a twist!
Crispy Roasted Pork Belly
If you’re a fan of rich pork dishes, this crispy roasted pork belly is another excellent recipe to explore after mastering your pulled pork in the Dutch oven.
Irresistible Honey Garlic Wings
For a finger-licking appetizer or a fun addition to your BBQ spread, these sweet and savory honey garlic wings are always a hit alongside any main course.

If you enjoyed crafting this easy Dutch Oven Pulled Pork recipe, please show your appreciation by clicking the stars below to leave a five-star rating and share your thoughts in the comments! Your feedback helps other home cooks discover and confidently try this dish. Also, help spread the word by sharing this recipe on Instagram, Facebook, and Pinterest!
Share on Facebook
Share
Pin this now to find it later
Pin It
Follow on Instagram
Follow
Dutch Oven Pulled Pork
Courtney ODell
8 people
5 mins
4 hrs 15 mins
Share by Email
Print Recipe

This Dutch oven pulled pork, enriched with caramelized onions, is incredibly tender, juicy, and infused with a rich, sweet-savory flavor from onions that melt into the succulent meat during slow cooking.
Equipment
- Lodge 6 Quart Enameled Cast Iron Dutch Oven with Lid
- Food Grade Stainless Steel Kitchen Tongs
Ingredients
- 3-4 pound pork shoulder, bone-in
- 2 tablespoons olive oil, divided
- 1 tablespoon smoked paprika
- 1 tablespoon brown sugar
- 2 teaspoons garlic powder
- 1 teaspoon onion powder
- 1 teaspoon cumin
- 1 teaspoon chili powder
- Salt and pepper, to taste
- 1 onion, sliced
- 4 cloves garlic, smashed
- 1 ½ cups BBQ sauce
- ½ cup apple cider vinegar
- 2 cups chicken broth
- 1 tablespoon Worcestershire sauce
Instructions
- Set your oven to 300°F (150°C). Pat the pork shoulder thoroughly dry with paper towels.
- Combine the smoked paprika, brown sugar, garlic powder, onion powder, cumin, chili powder, salt, and pepper to create a rub. Generously pat this rub all over the pork shoulder.
- Heat half of the olive oil in the Dutch oven over medium heat. Sear all sides of the pork shoulder for about 3-4 minutes per side until a golden-brown crust forms. Remove the pork and set it aside.
- Pour the remaining olive oil into the Dutch oven. Add the sliced onion and smashed garlic, cooking for about 3-4 minutes until softened and fragrant.
- Pour in the apple cider vinegar to deglaze the pot, scraping up any browned bits from the bottom to build additional flavor. Return the pork shoulder to the Dutch oven.
- In a bowl, combine the chicken broth, BBQ sauce, and Worcestershire sauce, mixing well. Pour this liquid over the pork and cover the Dutch oven tightly. Cook in the preheated oven for 3.5-4 hours, or until the pork is incredibly tender and easily falls apart.
- Remove the pork from the pot and transfer it to a large cutting board or dish. Shred the pork using two forks, discarding the bone and any large pieces of fat.
- Allow the remaining sauce in the Dutch oven to sit for 5-7 minutes; this will allow it to thicken naturally.
- Return the shredded pork to the pot and stir it into the thickened sauce, ensuring it is well coated. If the sauce is too thick, add a splash more chicken broth or BBQ sauce to reach your desired consistency.
- Serve immediately, either as a standalone main dish or piled high on sandwiches.
Nutrition
Calories:
306
kcal
Carbohydrates:
27
g
Protein:
22
g
Fat:
12
g
Saturated Fat:
3
g
Polyunsaturated Fat:
1
g
Monounsaturated Fat:
6
g
Cholesterol:
71
mg
Sodium:
885
mg
Potassium:
586
mg
Fiber:
1
g
Sugar:
21
g
Vitamin A:
638
IU
Vitamin C:
3
mg
Calcium:
52
mg
Iron:
2
mg
Nutrition information is automatically calculated, so should only be used as an approximation.
Additional Info
Main Course, Pork
American, BBQ
Tried this recipe?
Mention @sweetcsdesigns or tag #sweetcsdesigns!