
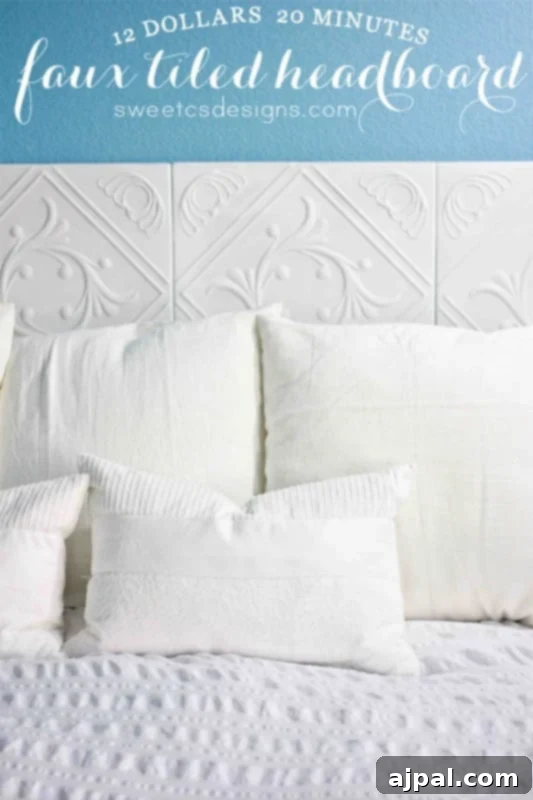
Transforming a master bedroom from a chaotic collection of random items into a serene, comfortable, and truly personal sanctuary can feel like an overwhelming task, especially when faced with a shoestring budget. My own journey began with a clear vision: to create a peaceful retreat, a space where relaxation is paramount, all while adhering to a budget so tight it had virtually no room for error. This pursuit led me to discover an ingenious, incredibly simple, and lightning-fast solution for adding significant style without breaking the bank: a faux tiled headboard.
This DIY headboard project is not just for the experienced crafter; it’s so straightforward that even someone with absolutely no prior DIY skills can achieve stunning results in minutes. It’s the ultimate hack for anyone seeking a stylish, mounted-look headboard that delivers maximum impact with minimal effort and expense. Whether you’re decorating a dorm room, enhancing a rental property where permanent changes aren’t allowed, or simply looking for a quick and impactful bedroom refresh, this faux tiled headboard is your perfect answer.
The Secret Weapon: Affordable Faux Tiles for Instant Style
The secret to this incredibly easy and stylish headboard lies in a remarkable product: lightweight foam faux tiles. These innovative tiles are a game-changer for budget-conscious decorators. Available online for anywhere between $1 to $5 each, they often qualify for free shipping, making them an exceptionally cost-effective choice. I personally stumbled upon a sale, acquiring 12 tiles for just $12, a deal that truly underscored their affordability. Even at their typical price point of around $2 per tile plus a standard shipping fee, the total cost for a full headboard remains remarkably low, proving that sophisticated design doesn’t have to come with a hefty price tag.
Beyond the tiles, the other essential component is a reliable adhesive. I opted for Scotch Mounting Tape – a massive roll of which will serve you for many projects, or you can use individual Scotch mounting squares. I happened to have a $5 roll on hand, left over from a previous project, which provided more than enough adhesive for eight tiles. This reusability is another excellent way to keep your project costs down, leveraging materials you might already possess.
Prepping Your Faux Tiles for Perfection
Once you have your tiles, a crucial preparatory step is painting them. I used some leftover Killz primer, and I cannot stress enough how vital this step is. The foam tiles, by nature, can be slightly translucent, and without a protective coat of paint, the lines of your adhesive strips will be visibly apparent, detracting from the seamless faux tile look you’re aiming for. A good primer creates an opaque barrier, ensuring a clean and professional finish.
One of the most appealing aspects of these foam tiles is their incredibly forgiving texture. You don’t need to be an expert painter. A quick, even coat applied with a broad brush is all it takes. I was genuinely surprised by how beautifully just one five-minute application of paint transformed the tiles, making them look instantly more substantial and high-end. The texture cleverly disguises any minor imperfections in your brushstrokes, making the process effortless and enjoyable.
Unlocking Creative Finishes for Your Headboard
The beauty of this project lies in its incredible versatility. While a simple coat of primer creates a clean, classic look, you can easily customize the finish to match any aesthetic. For a sophisticated faux metal appearance, consider spray painting the tiles with a hammered metal effect. This type of paint adheres beautifully to the foam, creating a rich, textured finish that truly mimics the look of real metal. Alternatively, Martha Stewart’s metallic paints offer another fantastic option for a shimmering effect, though achieving perfectly even brushstrokes might require a bit more time and care.
After painting, allow your tiles to dry completely. This usually takes a few hours, depending on the humidity and temperature of your climate. Patience here ensures a durable and flawless finish.
The Simple Installation Process: Achieving a Mounted Look Effortlessly
Installing your faux tiled headboard is surprisingly straightforward. The key to a balanced look is starting from the center of your wall. I began by measuring the midpoint of the wall where our bed is positioned, then worked outwards, hanging the tiles symmetrically. For each tile, I applied a strip of mounting tape to both the top and bottom edges. My chosen layout involved four tiles across and two tiles high, creating a compact yet impactful headboard.
Our bed is nestled in a cozy, somewhat unusually shaped nook – a detail you’ll discover more about as I reveal additional elements of our master bedroom decor. Given this smaller space, keeping the headboard to two tiles high felt just right, preventing the area from looking too busy or cluttered. However, if your bed is against a larger, more expansive wall, don’t hesitate to extend the height and width to mimic the grandeur of a more traditional headboard. The modular nature of these tiles allows for endless customization to suit your specific space and design preferences.
The entire active installation process, from painting to final placement, clocked in at an astonishing 25 minutes. This project truly embodies efficiency without compromising on style. Looking ahead, I’ve considered an enhancement for future iterations: mounting the tiles onto a large painted board, or even several foam boards joined together. This would create a single, portable unit that could be easily moved or re-positioned, an excellent option for those who frequently redecorate or move homes. But for now, this direct-to-wall application serves beautifully, providing a much-needed transitional headboard until we have the time and budget for a more permanent, custom-built solution, or until I discover “the one” within our budget.
Important Tips for a Flawless Installation
A word of caution based on my experience: these foam tiles are incredibly thin. During installation, I had one instance where I needed to reposition a tile, and due to its delicate nature, it unfortunately tore. If you’re not mounting these tiles onto a more rigid surface, be aware that they can be fragile. Thankfully, at roughly $2 a tile, purchasing a few extras is a perfectly viable and recommended strategy. Having spares meant this minor mishap caused no issues, and I was able to quickly replace the damaged tile without delay.
When it came to removing the mounting strip from the wall, I was relieved to find that it came off cleanly, leaving no damage. However, it is always, *always* advisable to perform a spot test on an inconspicuous area of your wall first. This is especially crucial for renters, as wall damage can lead to lost security deposits. A small, hidden test area will confirm the adhesive’s compatibility with your specific wall paint and surface.
Another benefit of using Killz primer, beyond opacity, is its odor-sealing properties. While the foam tiles didn’t have a strong odor initially, I am particularly sensitive to the smell of styrofoam. Since your head will be quite close to the headboard, ensuring there was absolutely no lingering scent was important to me. Killz did a fabulous job neutralizing any potential odor. If you opt for something like gilding or other metallic finishes, I would recommend allowing the tiles to air out for an extended period, and possibly even sealing them, which reinforces my belief that spray paint might be a more practical and less time-consuming option for a metallic look.
The Ultimate Dorm Room Solution
Imagine this stylish, customizable headboard enhancing a dorm room! It’s truly a game-changer for students. Most dormitories permit the use of Command strips and similar Scotch/3M adhesive products, meaning you wouldn’t be violating any housing rules. Furthermore, if your dorm walls are made of brick, like many often are, this method of hanging is incredibly easy and secure. It offers a fantastic way to personalize a temporary living space, adding a touch of home and sophistication without any permanent alterations or significant investment. It’s truly the ideal solution for making a bland dorm room feel like a cozy, personalized haven.
The Master Bedroom Transformation Continues
With the headboard complete, the room is truly taking shape. Our master bedroom is becoming the comfortable and serene space I envisioned, a testament to the fact that thoughtful design doesn’t require a large budget. The next item on our list, however, is a new mattress. You can probably spot the slight sagging on the sides in the photos – a clear sign it’s time for an upgrade. I’ve learned the hard way that euro top mattresses, while initially plush, tend not to last. This is our second mattress in just over four years, and the significant cost of a quality mattress is precisely why our decor budget remains so constrained. These things can feel like another mortgage payment, and finding one we truly love has been a persistent challenge. But I digress – every step, even the financial hurdles, is part of building our perfect space.
Despite the mattress saga, I absolutely adore the direction our room is heading. The blend of textures and colors creates such a calming and inviting atmosphere. Our seersucker duvet, a delightful find from Target, adds a layer of relaxed sophistication. The large and small decorative pillows from IKEA are purely for show, contributing to the plush, layered look of the bed. The stunning lamp, also an IKEA discovery, was an instant love affair – I literally stumbled upon it in the store and had to have it, though I couldn’t find it online later. At around $50, it was an affordable statement piece that adds warmth and elegance.
The walls are painted in Betsey Ross Blue by Valspar, purchased at Lowes. This color brings such a vibrant yet relaxing energy to the room; it truly makes me smile every time I walk in. It’s a perfect example of how the right paint color can transform an entire space, infusing it with personality and tranquility.
Coming soon, I’ll be sharing a fabulous tutorial for the sidetable cover. This simple sewing project has been a lifesaver, helping us neatly conceal all our bedside books, charging cables, and miscellaneous clutter, contributing to a much tidier and more serene environment. Plus, it ingeniously keeps little hands from exploring our personal items! It’s incredibly easy to make, requiring just a few simple seams. Be sure to check back soon to discover how you can create one for your own bedroom!
Ready to Transform Your Space? Get Your Tiles Here!
Inspired to create your own stunning, budget-friendly headboard? Don’t wait! This project offers a fantastic way to elevate your bedroom’s aesthetic with minimal effort and cost. If you’re ready to dive in and transform your space, you can find the amazing foam faux tiles right here.