

Welcome to a world of delicious, nutritious, and incredibly easy breakfast solutions! Imagine starting your day with a vibrant, protein-packed meal that’s ready in minutes, whether you’re rushing out the door or savoring a leisurely weekend brunch. Our Baked Pepper Egg Cups recipe offers exactly that – a delightful dish that’s as versatile as it is satisfying. This culinary gem transforms humble bell peppers and eggs into a portable, customizable, and remarkably flavorful breakfast option that caters to busy schedules and diverse tastes.
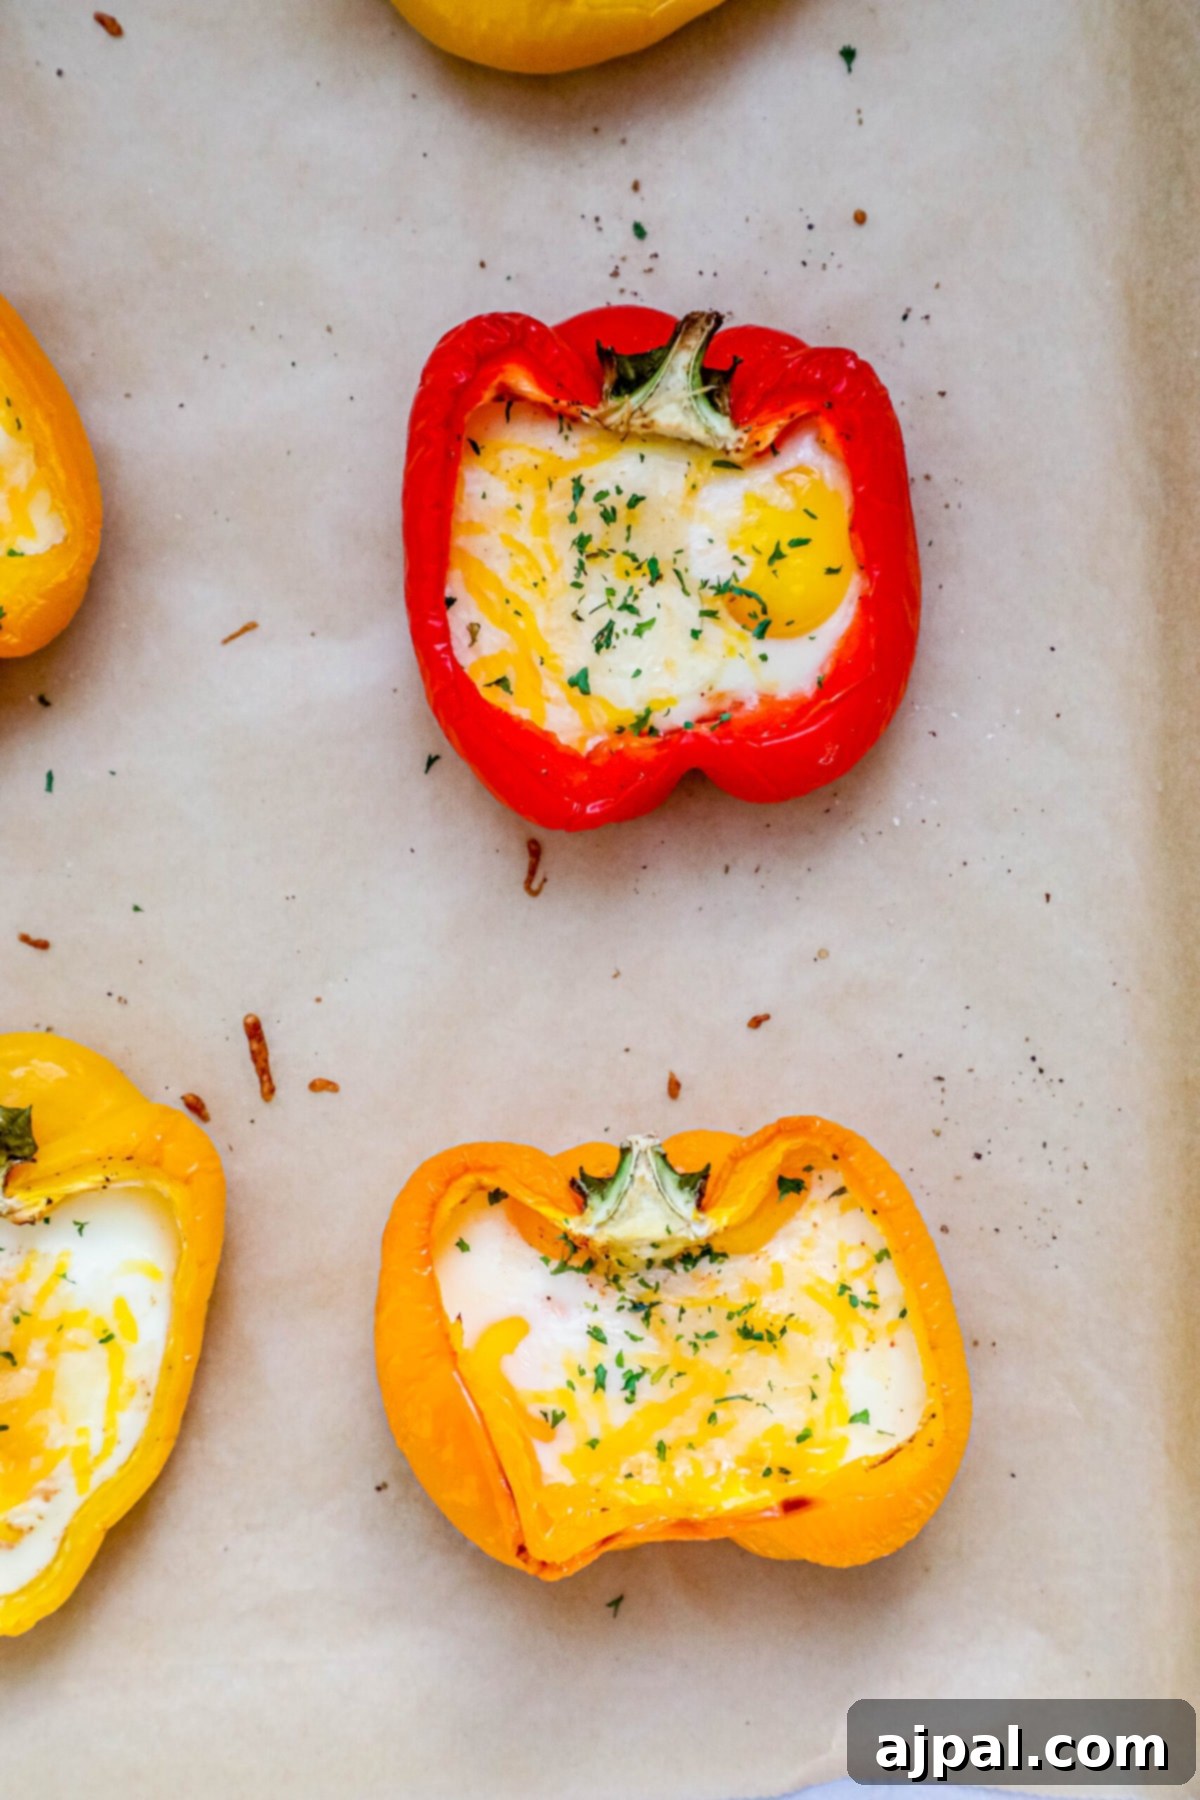
As a home cook, my passion is to empower fellow kitchen enthusiasts, regardless of their experience level. I believe that understanding the ‘why’ behind each ingredient and technique can turn a simple recipe into a confident culinary adventure. This article is crafted to provide not just a recipe, but a comprehensive guide, filled with practical tips and insights to ensure your Baked Pepper Egg Cups turn out perfectly every time. Get ready to elevate your breakfast game!
Table of Contents
- The Delight of Baked Egg Peppers
- Why You’ll Love These Egg Cups
- Essential Ingredients for Your Egg Cups
- Step-by-Step Guide to Making Baked Pepper Egg Cups
- Tips and Tricks for Perfect Baked Pepper Cups
- Frequently Asked Questions
- What to Serve With Baked Pepper Egg Cups
- Baked Pepper Egg Cups Recipe Card
The Delight of Baked Egg Peppers
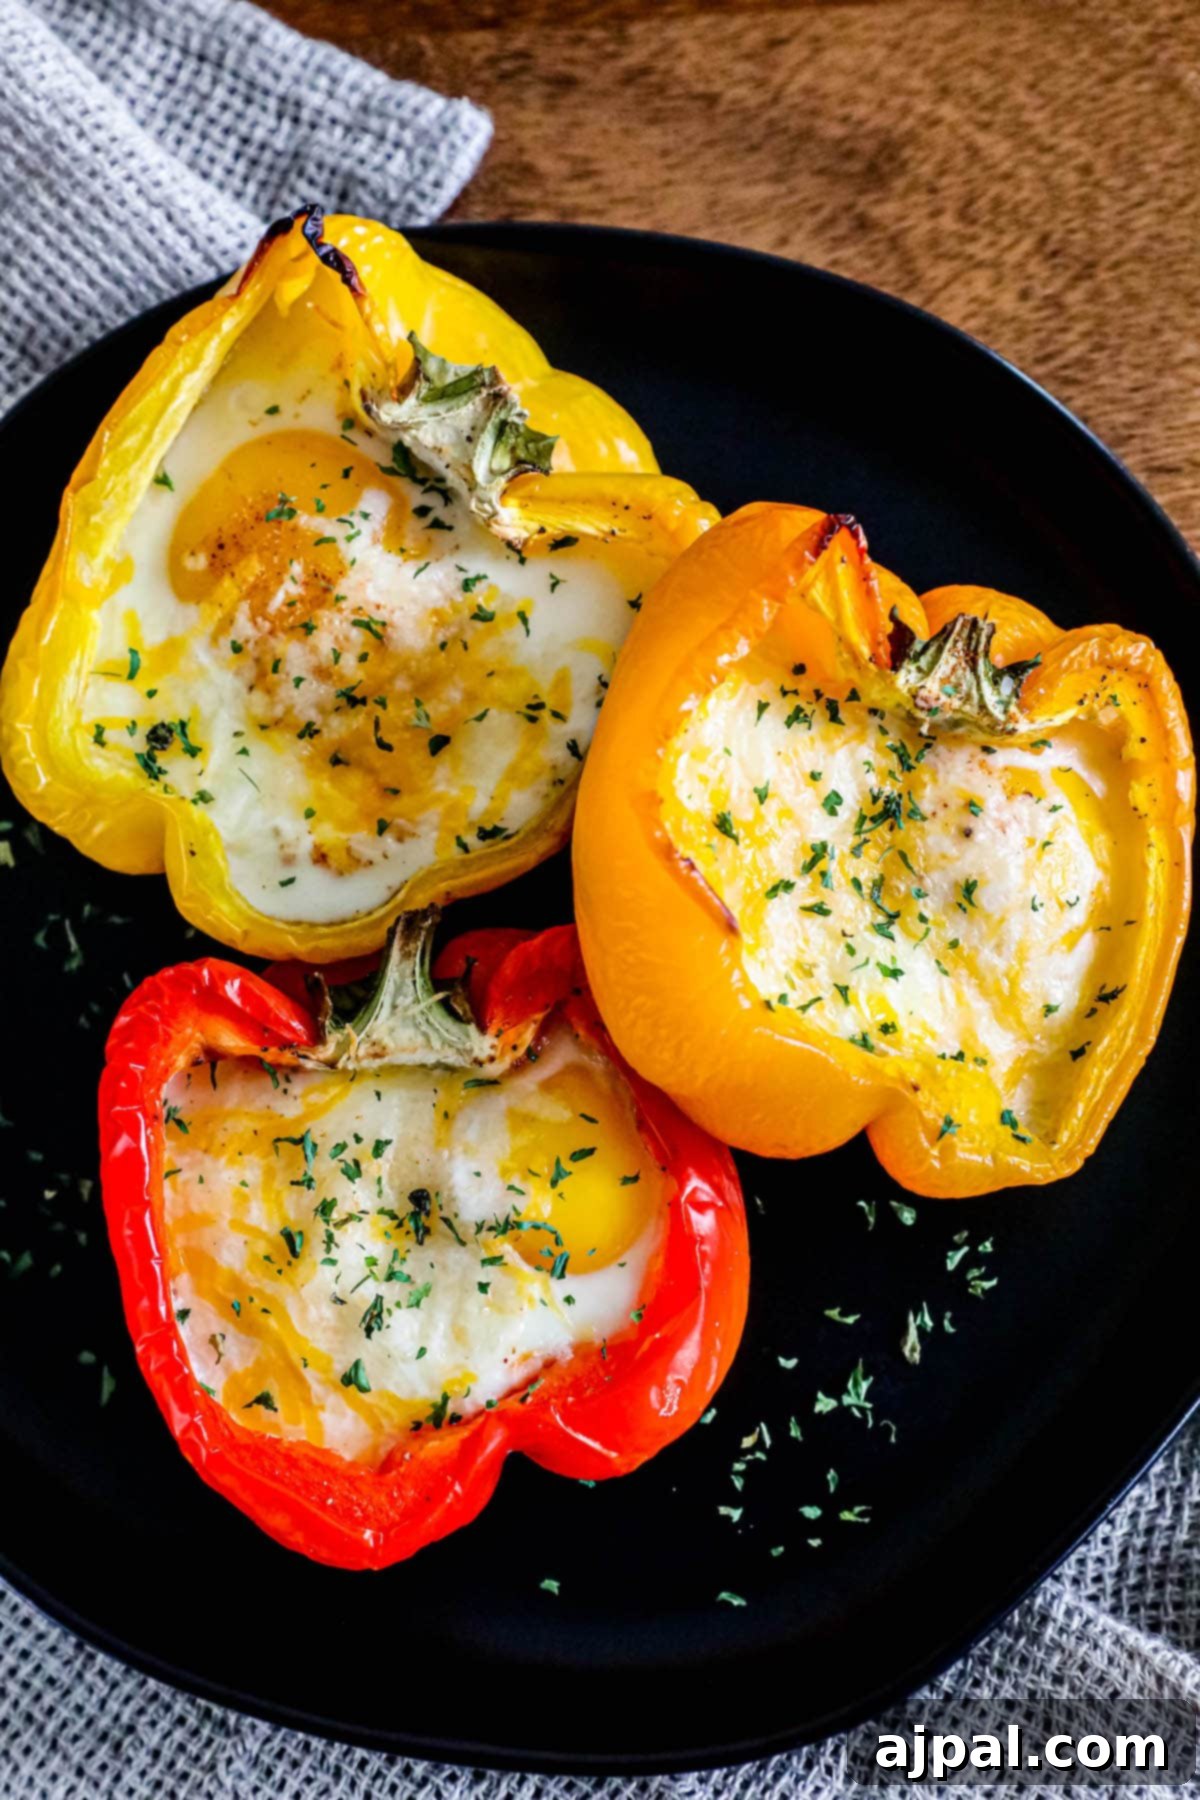
Baked Pepper Egg Cups are a true breakfast marvel, combining the rich creaminess of eggs with the sweet, crisp notes of bell peppers, all enhanced by savory cheese and aromatic herbs. This dish is not only incredibly flavorful but also remarkably healthy, offering a fantastic balance of protein, vitamins, and minerals with a naturally low carbohydrate count. It’s an ideal choice for anyone seeking a wholesome, satisfying start to their day, especially those following a keto or vegetarian lifestyle.
The beauty of these egg cups lies in their simplicity and versatility. By using halved bell peppers as natural edible “cups,” you eliminate the need for extra clean-up and add an extra layer of deliciousness and nutrition. Each pepper half becomes a personalized breakfast vessel, holding a perfectly baked egg, a generous sprinkle of your favorite cheese, and a dash of seasoning. The result is a hearty, grab-and-go meal that’s perfect for busy mornings, a quick office lunch, or a delightful component of a larger brunch spread. They’re effortlessly customizable, allowing you to incorporate various fillings and toppings to suit your palate and dietary needs.
Beyond their immediate appeal, Baked Pepper Egg Cups are also champions of meal preparation. You can bake a batch at the beginning of the week and store them in the refrigerator, ready to be reheated for a quick and easy breakfast throughout your busiest days. This makes them an excellent option for maintaining a healthy diet without sacrificing precious time. Whether you’re aiming for a high-protein diet, reducing carb intake, or simply want a delicious and wholesome meal, these egg cups are a fantastic addition to your culinary repertoire.
Why You’ll Love These Egg Cups
There are countless reasons to fall in love with Baked Pepper Egg Cups, making them a staple in your breakfast rotation. Here’s why this recipe stands out:
- Effortless Preparation: This recipe is designed for maximum flavor with minimal effort. With simple steps and common ingredients, even beginner cooks can achieve professional-looking and tasting results.
- Nutritional Powerhouse: Packed with protein from the eggs and a wealth of vitamins and antioxidants from the bell peppers, these cups are a fantastic way to fuel your body. They are naturally low in carbohydrates, making them ideal for keto and low-carb diets.
- Ultimate Customization: The base recipe is just the beginning! Feel free to experiment with different cheeses, herbs, spices, and even cooked meats or vegetables to create endless variations tailored to your preferences.
- Perfect for Meal Prep: Save time during busy weekdays by preparing a batch of these egg cups in advance. They store beautifully in the refrigerator and reheat wonderfully, offering a convenient and healthy breakfast solution.
- Kid-Friendly & Crowd-Pleasing: Their vibrant colors and delicious taste make them a hit with both children and adults. They are also an excellent option for entertaining guests during brunch.
- Portable and Convenient: Whether you’re heading to work, school, or a picnic, these individual egg cups are easy to pack and enjoy on the go, providing a mess-free and satisfying meal.
- Vegetarian Friendly: The core recipe is naturally vegetarian, offering a rich and satisfying meat-free option for those who prefer plant-based meals.
Essential Ingredients for Your Egg Cups
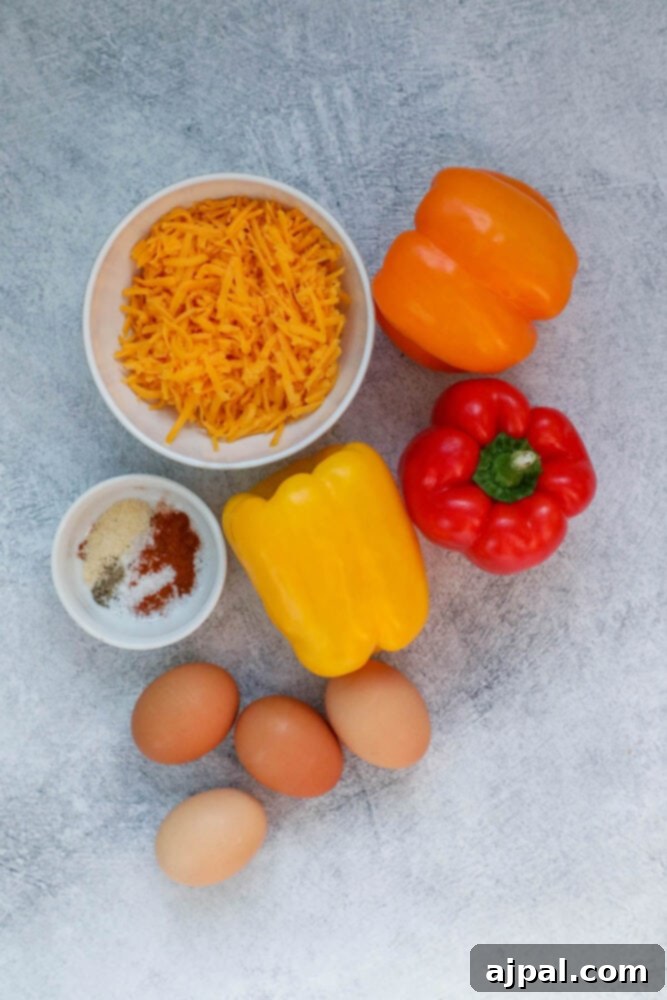
Creating these delightful Baked Pepper Egg Cups requires just a few key ingredients, each playing a crucial role in the overall flavor and texture of the dish. Here’s a closer look at what you’ll need and why:
- Eggs: The star of the show, eggs provide a rich, creamy base and are an excellent source of high-quality protein, essential vitamins (like B12 and D), and minerals. They offer a savory depth that pairs perfectly with the other ingredients, and their versatility allows for different levels of doneness, from a runny yolk to a firm, fully cooked center. Choose large, fresh eggs for the best results.
- Bell Peppers: These colorful vegetables are not just containers; they bring a natural sweetness, a slight crunch, and a vibrant aesthetic to the dish. Bell peppers are rich in Vitamin C and various antioxidants, adding a healthy boost. You can use any color bell pepper – red, yellow, orange, or green – each offering a slightly different flavor profile. Red and yellow tend to be sweeter, while green offers a more traditional, slightly bitter pepper taste.
- Cheese: Cheese adds a wonderful savory, creamy, and sometimes tangy element that melts beautifully over the eggs and peppers. It enhances the richness of the dish and provides a comforting, gooey texture. A Mexican-blend shredded cheese is suggested for a flavorful kick, but you can easily substitute with cheddar, Monterey Jack, mozzarella, or a combination of your favorites.
- Herbs, Salt, and Pepper: These basic seasonings are fundamental to unlocking and balancing the flavors of all the ingredients. Salt enhances the natural taste, while pepper adds a subtle warmth. Fresh herbs like cilantro (as suggested), chives, parsley, or even a dash of dried Italian seasoning can elevate the aroma and flavor, adding a fresh, vibrant finish. Don’t underestimate the power of good seasoning to transform a simple dish into something extraordinary.


Step-by-Step Guide to Making Baked Pepper Egg Cups
Crafting these delicious Baked Pepper Egg Cups is a straightforward process. Follow these simple steps for a perfect breakfast every time:
- Prepare Your Oven and Pan: Begin by preheating your oven to a steady 400°F (200°C). This ensures even cooking and perfectly baked peppers. Line a baking pan with parchment paper or coat it generously with cooking spray. While bell peppers don’t usually stick excessively, parchment paper provides an extra layer of non-stick protection, especially crucial if your peppers might tear slightly during handling, preventing any precious egg or cheese from spilling.
- Ready the Bell Peppers: Take your medium bell peppers and carefully cut them in half lengthwise, right through the stem end. Gently remove the ribs and all seeds from the interior of each pepper half. You want a clean, hollow cup for your egg. Place the prepared pepper halves cut-side up on your baking pan. Sprinkle each pepper cup with about 1/8 teaspoon of salt and pepper. This initial seasoning helps to flavor the peppers themselves and allows them to soften beautifully during the first bake.
- Initial Bake for Peppers: Place the baking pan with the seasoned pepper halves into the preheated oven. Bake for approximately 15 minutes. This step is key to softening the peppers slightly, making them more tender and ensuring they are cooked through when the eggs are ready. After 15 minutes, carefully remove the pan from the oven.
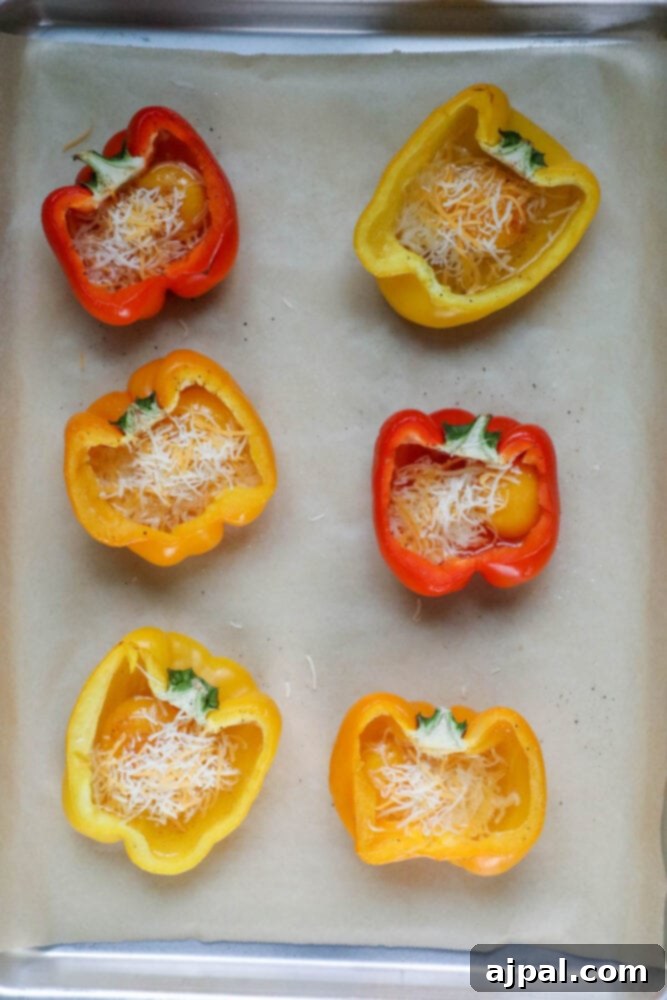
- Add Eggs and Final Seasoning: Now for the eggs! Gently crack one large egg into each pre-baked bell pepper cup. Be mindful not to overfill, as the egg will expand slightly while baking. Season the raw eggs with the remaining 1/4 teaspoon of salt and pepper, distributing it evenly among the cups. Finally, top each egg with approximately 1 tablespoon of your shredded Mexican-blend cheese or cheese of choice.
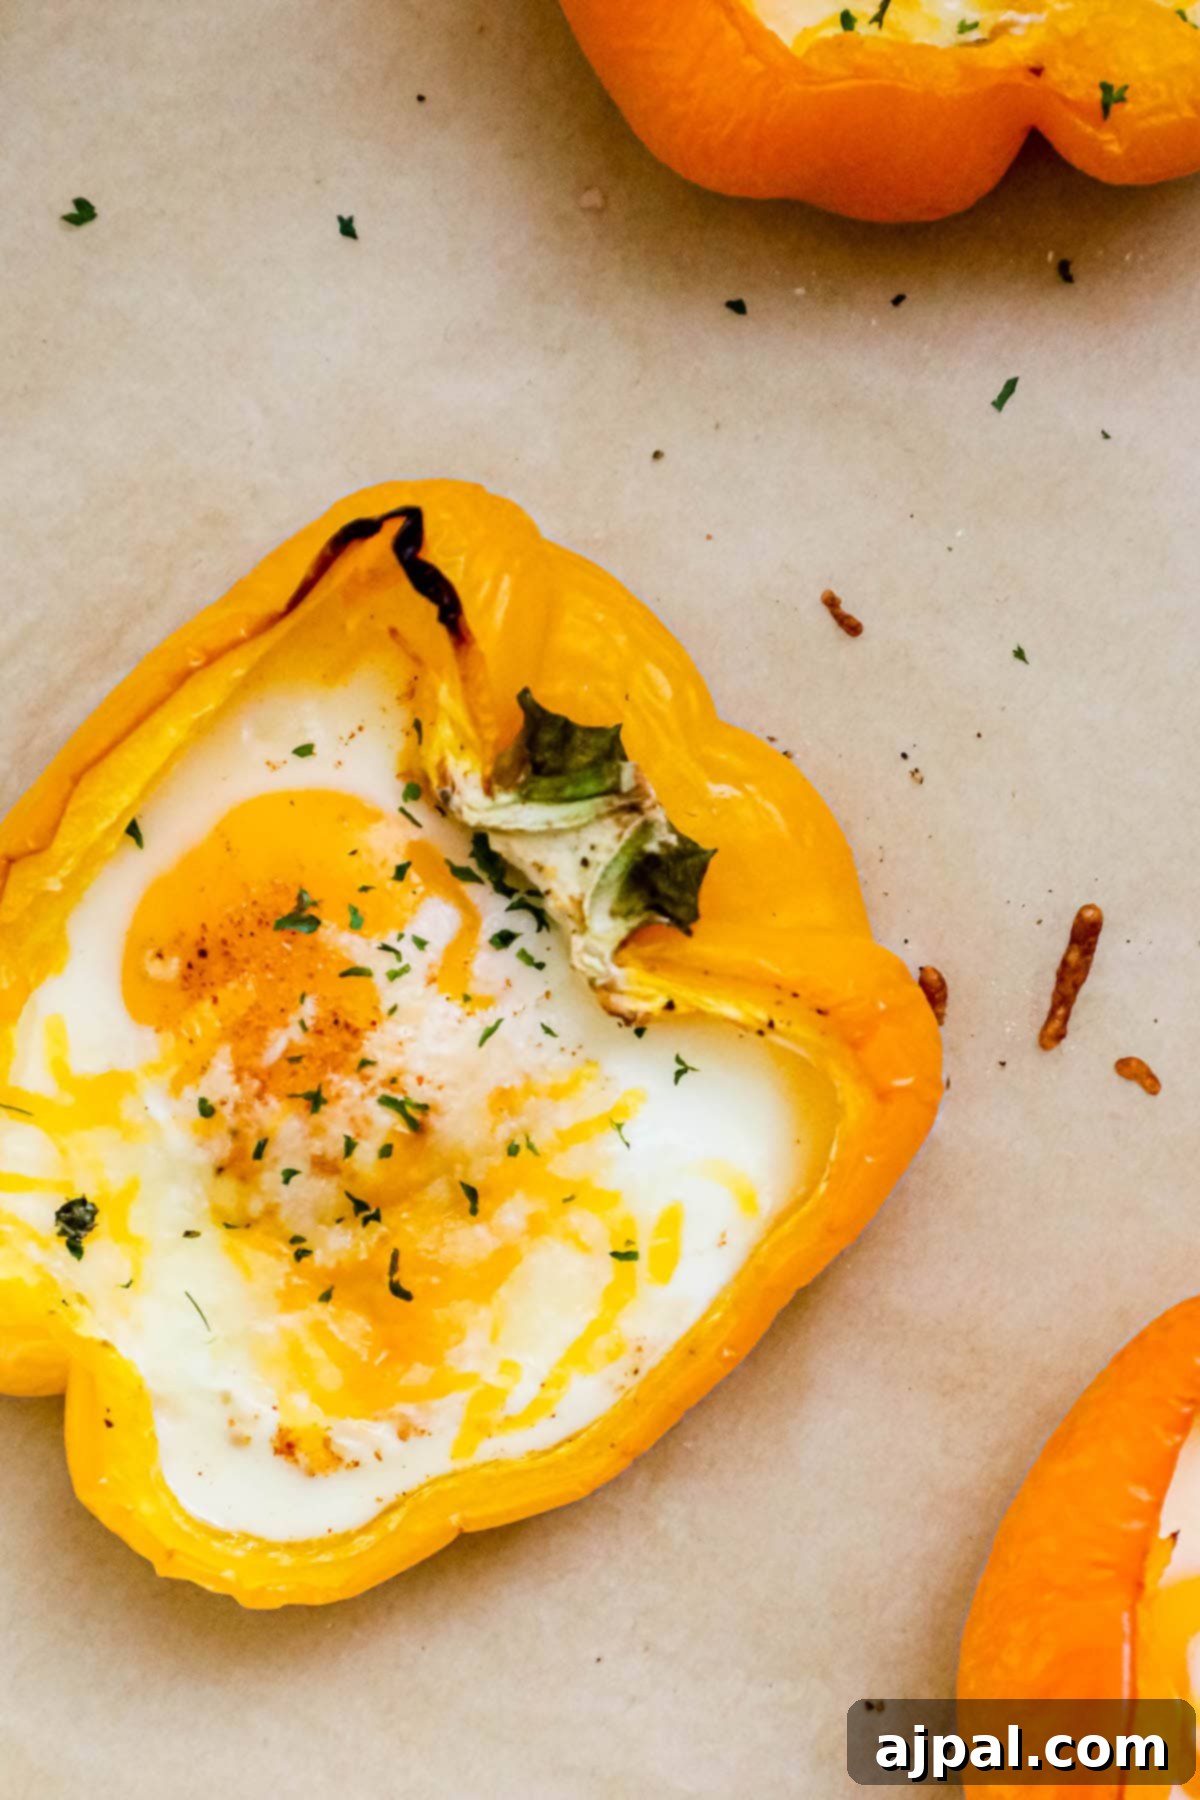
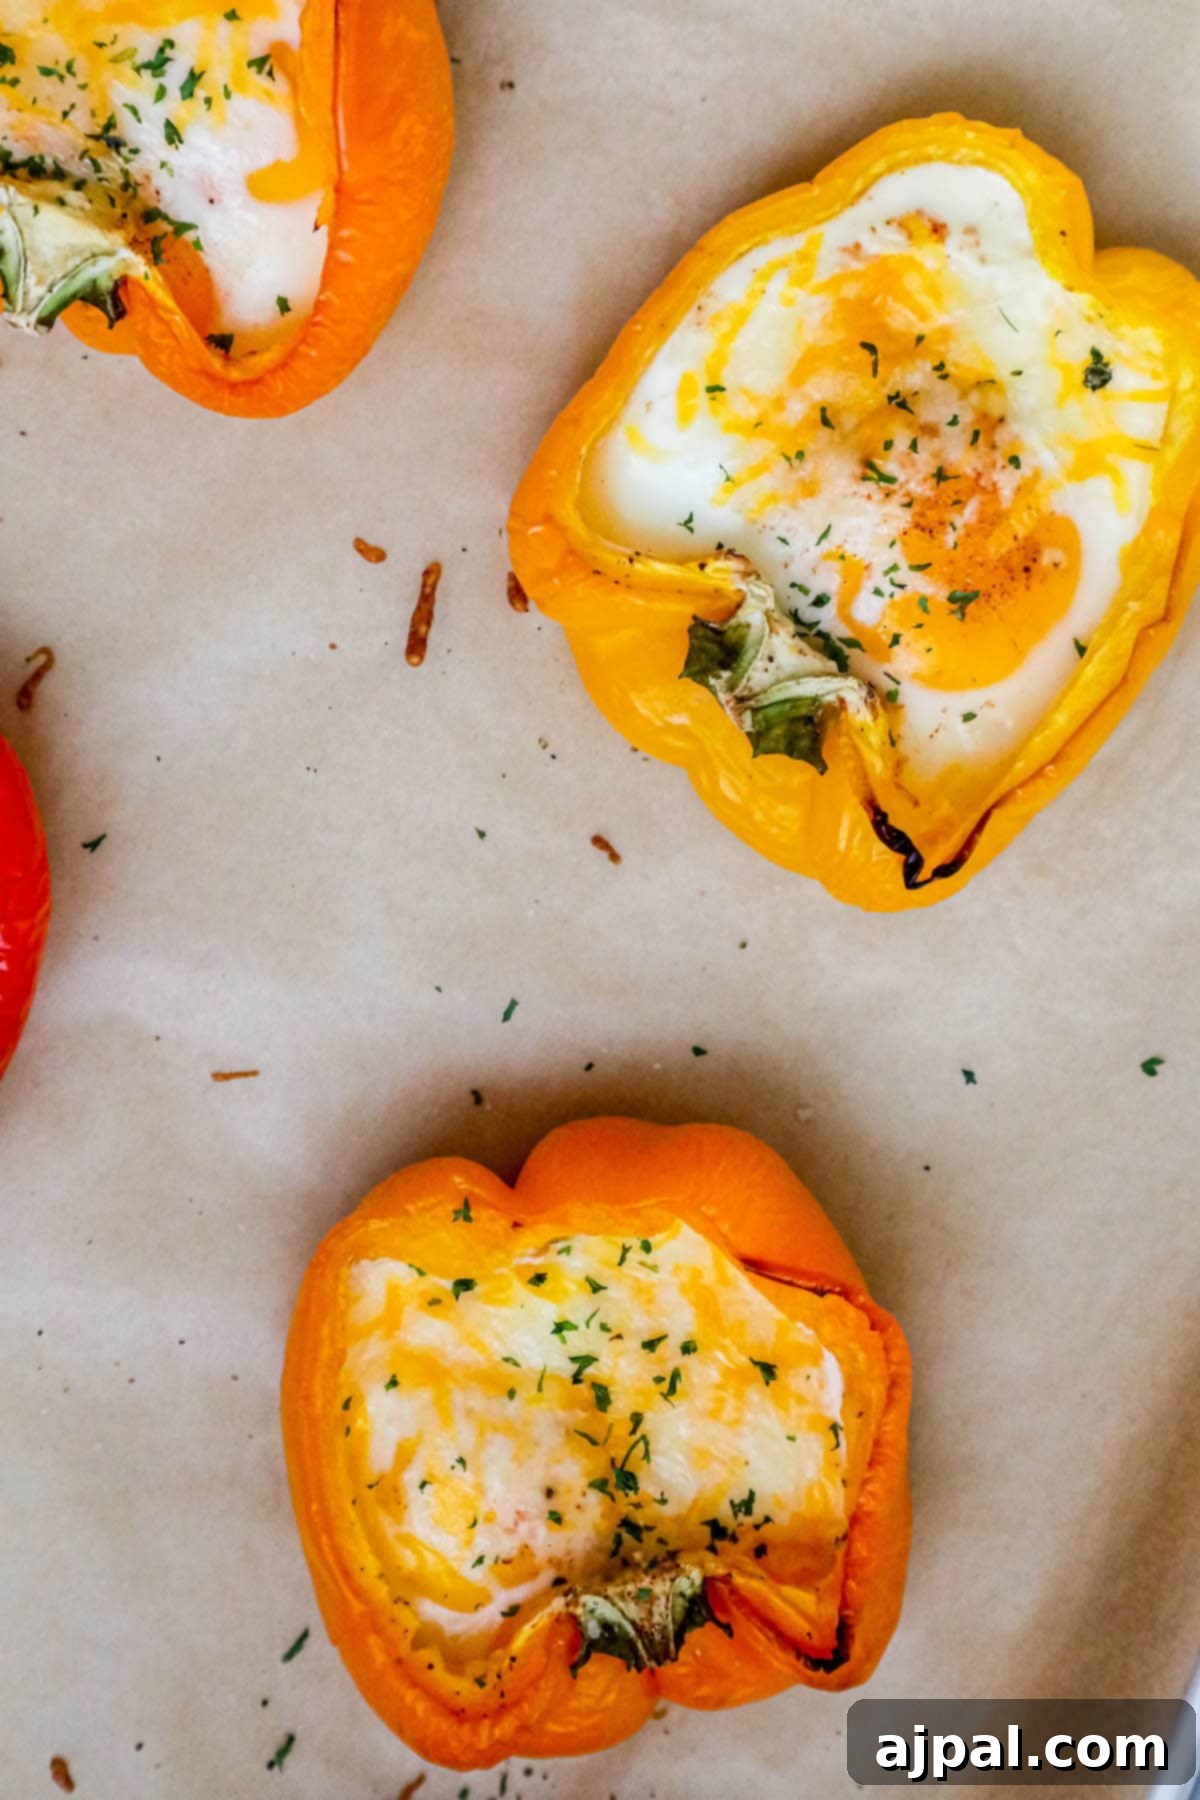
- Final Bake and Serve: Return the baking pan to the oven. Continue to bake for another 15 to 20 minutes, or until the egg whites are fully set and the yolks have reached your desired level of doneness (see tips below for achieving different yolk consistencies). The cheese should be melted, bubbly, and slightly golden. Once baked, remove the pan from the oven. For an extra touch of freshness and flavor, sprinkle with fresh cilantro, if desired, before serving. Enjoy your warm, flavorful Baked Pepper Egg Cups immediately!
Tips and Tricks for Perfect Baked Pepper Cups
While Baked Pepper Egg Cups are inherently simple, a few expert tips can elevate your results from good to absolutely perfect. Whether you’re a seasoned chef or a novice home cook, these insights will help you master this delicious breakfast dish:
Optimal Bell Pepper Selection and Preparation:
- Choose the Right Peppers: Opt for firm, fresh bell peppers of any color. Red, yellow, and orange peppers offer a sweeter flavor profile, while green peppers provide a slightly more robust, earthy taste. Ensure they are large enough to comfortably hold an egg.
- Pre-Bake for Texture: Don’t skip the initial pre-bake of the peppers. This step is crucial for softening them to a tender-crisp consistency. If you prefer very soft peppers, you can extend the initial baking time by an extra 5-10 minutes before adding the eggs.
- Parchment Paper is Your Friend: While peppers don’t always stick, lining your baking sheet with parchment paper is a foolproof way to prevent any sticking or tearing of the pepper “cups,” which could cause your precious egg and cheese to leak out.
Achieving Your Ideal Egg Doneness:
- Runny Yolks (Over Easy): For a gloriously runny yolk, reduce the total baking time after adding the eggs to 10-12 minutes. The whites should be set, but the yolk still liquid. If you want softer peppers with a runny yolk, pre-bake the peppers for a full 20 minutes before adding the eggs, then bake for the shorter egg time.
- Firm Yolks (Medium): Bake for 15-18 minutes after adding the eggs. The yolks will be jammy and slightly set in the center.
- Hard Yolks (Well Done): For fully cooked, firm yolks, bake for 18-20 minutes or slightly longer.
- Visual Cues: Always rely on visual cues. The egg whites should be opaque and firm. The yolk’s appearance will tell you its doneness. Remember that carryover cooking will continue for a minute or two after removing from the oven.
Flavorful Additions and Variations:
- Proteins: Boost the heartiness with crumbled cooked bacon, savory cooked chorizo, diced ham, or chicken sausage crumbles. Ensure any meat additions are fully cooked before adding them to the egg cups.
- Vegetables: Increase the nutrient content with finely chopped spinach, diced mushrooms, cherry tomato halves, or finely minced onions. Sauté tougher vegetables like mushrooms and onions lightly before adding them to ensure they cook through.
- Cheeses: Experiment with different cheeses! Feta for a salty tang, goat cheese for creaminess, or a spicy pepper jack for a kick.
- Spices & Herbs: Besides salt and pepper, consider a pinch of smoked paprika, garlic powder, onion powder, or a sprinkle of dried Italian herbs. Fresh herbs like chives, dill, or basil can also add a delightful finish.
- Spice it Up: A dash of hot sauce, a sprinkle of red pepper flakes, or finely diced jalapeños can add a fiery element.
Meal Prep & Storage Excellence:
- Make Ahead: These egg cups are fantastic for meal prepping. Bake a batch on Sunday and store them in an airtight container in the refrigerator for up to 4 days.
- Reheating: To reheat, simply pop them in the microwave for 30-60 seconds, or in a toaster oven at 350°F (175°C) for 5-10 minutes until warmed through. The toaster oven method will help restore a slightly crisper pepper texture.
- Freezing (Optional): While best fresh or refrigerated, you can freeze baked egg cups for up to a month. Wrap them individually in plastic wrap, then place in a freezer-safe bag. Reheat from frozen in the oven at 350°F (175°C) for 15-20 minutes, or until thoroughly heated.
Frequently Asked Questions
Baked egg cups can be prepared in advance and stored in an airtight container or wrapped individually in foil in the refrigerator for up to four days. This makes them perfect for quick breakfasts throughout the week.
To achieve eggs with a runny yolk (over easy), reduce the baking time to 10-12 minutes after adding the eggs to the pre-baked peppers. The whites should be fully set, but the yolk should remain liquid. For soft peppers with over easy eggs, consider pre-baking the peppers for 5-10 minutes longer than specified before adding the eggs, so the peppers are tender without overcooking the yolks.
The baking time for eggs can vary based on oven temperature, egg size, and desired doneness. Here are general guidelines for baking eggs in a 375°F (190°C) oven:
- Soft-cooked (runny yolk): 8-10 minutes
- Medium-cooked (jammy yolk): 12-15 minutes
- Hard-cooked (firm yolk): 18-20 minutes
Please note that these are estimates. Smaller eggs will cook faster than larger eggs, and ovens can vary. Always check for your preferred doneness.

What to Serve With Baked Pepper Egg Cups
Baked Pepper Egg Cups are a versatile and satisfying dish that can stand alone as a quick breakfast or be part of a lavish brunch spread. Their balanced flavors make them pair well with a wide array of sides and beverages. Here are some ideas to complete your meal:
Complementary Sides:
- Fresh Fruit Salad: A colorful medley of seasonal fruits like berries, melon, and grapes provides a refreshing contrast to the savory egg cups. Our Dragon Fruit Salad would be a beautiful and exotic choice.
- Crispy Potatoes: Hash browns, roasted potato wedges, or even a simple side of home fries add a comforting, starchy element.
- Avocado Slices: Creamy avocado adds healthy fats and a smooth texture that complements the eggs and peppers beautifully. A sprinkle of Everything Bagel seasoning on top is a great touch.
- Toast or Muffins: Serve with a slice of whole-grain toast, an English muffin, or one of The Best Blueberry Muffins for a more substantial meal.
- Greens: A simple side salad with a light vinaigrette can add freshness and cut through the richness of the cheese.
Heartier Pairings:
- Breakfast Meats: Crispy bacon, sausage links, or a side of Canadian bacon are classic breakfast companions that add extra protein. For a British twist, try our Easy British Sausage Rolls or Keto Air Fried Scotch Eggs.
- Pancakes or Waffles: For a complete brunch experience, serve alongside a stack of fluffy pancakes or waffles. Our Sheet Pan Pancakes make this pairing incredibly easy.
- Breakfast Casseroles: If you’re hosting a large brunch, these egg cups are a great individual portion addition to a larger dish like our Slow Cooker Breakfast Casserole.
Beverage Pairings:
- Coffee: A classic choice. Enjoy with your favorite brew, perhaps a Keto Dalgona Coffee or a fragrant Israeli Cardamom Coffee.
- Tea: A warm cup of black or herbal tea is always a comforting option.
- Fresh Juice: Orange juice, grapefruit juice, or a mixed berry smoothie offers a refreshing start to the day.
Additional Toppings:
- Hot Sauce: A dash of your favorite hot sauce for those who like a little kick.
- Salsa: A spoonful of fresh salsa adds a zesty, vibrant flavor.
- Guacamole or Sliced Avocado: For extra creaminess and healthy fats.
- Fresh Herbs: Extra chopped cilantro, chives, or parsley for garnish and fresh flavor.
No matter how you choose to serve them, these Baked Pepper Egg Cups are sure to be a hit!
For more of our favorite breakfast recipes, explore these recent delights:
The Best Blueberry Muffins
Easy Apple Fritter Bread Recipe
Easy Everything Low Carb Bagel
Cinnamon Apple Dutch Baby
Slow Cooker Breakfast Casserole
Baked Ham and Cheese Croissants
How To Dye Easter Eggs
Sourdough English Muffins
Baked Pepper Egg Cups Recipe
If you’ve enjoyed this easy recipe, we’d love for you to rate it and leave a comment below! Your feedback helps us grow. Please also consider sharing your creations on Instagram, Facebook, and Pinterest – don’t forget to tag us!
Share on Facebook
Share
Pin this now to find it later
Pin It
Follow on Instagram
Follow
Baked Pepper Egg Cups

Ingredients
- 4 medium bell peppers, any color
- ½ teaspoon salt, divided
- ¼ teaspoon ground pepper, divided
- 8 large eggs
- ⅓ cup Mexican-blend shredded cheese
Instructions
- Preheat oven to 400°F (200°C). Coat a baking pan with cooking spray or line with parchment paper to ensure the peppers do not stick to the pan.
- Cut bell peppers in half lengthwise through the stem end. Remove ribs and seeds. Place the peppers in the pan cut-side up and sprinkle with 1/8 teaspoon each salt and pepper.
- Bake the peppers for 15 minutes. Remove the pan from the oven and crack 1 egg into each pepper cup. Season with the remaining 1/4 teaspoon each salt and pepper, then top each with about 1 tablespoon cheese.
- Bake until the egg whites are set and yolks reach desired doneness, approximately 15 to 20 minutes. Sprinkle with cilantro, if desired, before serving. Enjoy!
Nutrition
Calories: 106kcal
Carbohydrates: 4g
Protein: 8g
Fat: 6g
Saturated Fat: 2g
Polyunsaturated Fat: 3g
Cholesterol: 191mg
Sodium: 235mg
Fiber: 1g
Sugar: 2g
Nutrition information is automatically calculated, so should only be used as an approximation.
Additional Info
Tried this recipe?
Mention @sweetcsdesigns or tag #sweetcsdesigns!

Only have 30 minutes to get dinner on the table? Sign up for my 30 minute dinner plans direct to your inbox!
Find and shop my favorite products in my Amazon storefront here!
Want to save this recipe?
Just enter your email and get it sent to your inbox! Plus you’ll get new recipes from us every week – and be sure to tag @sweetcsdesigns on social media – I love to see your creations!
(Email subscription form placeholder – sign up for updates!)