
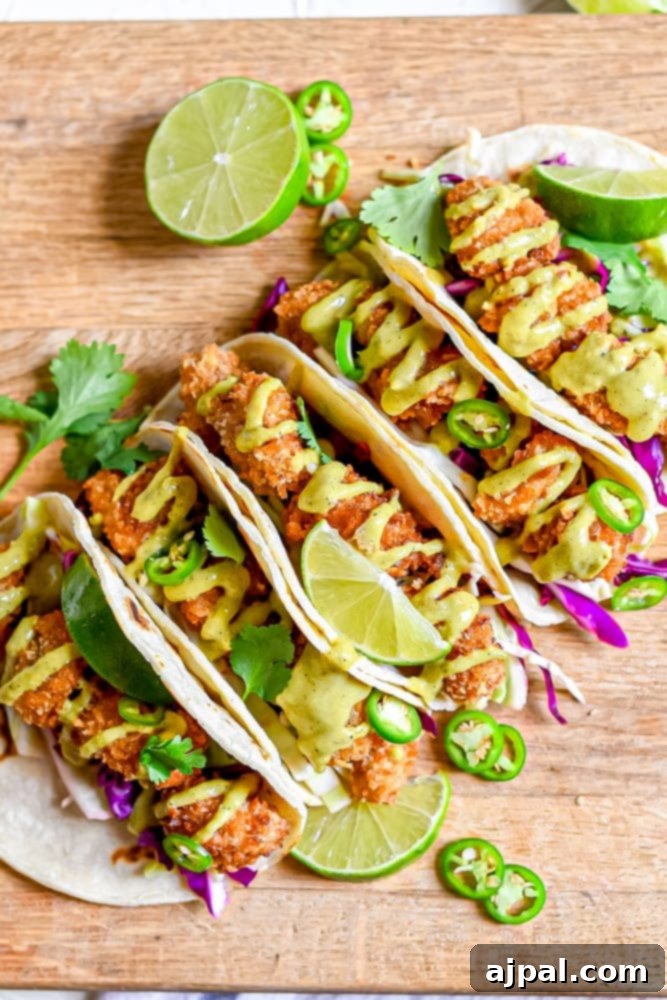
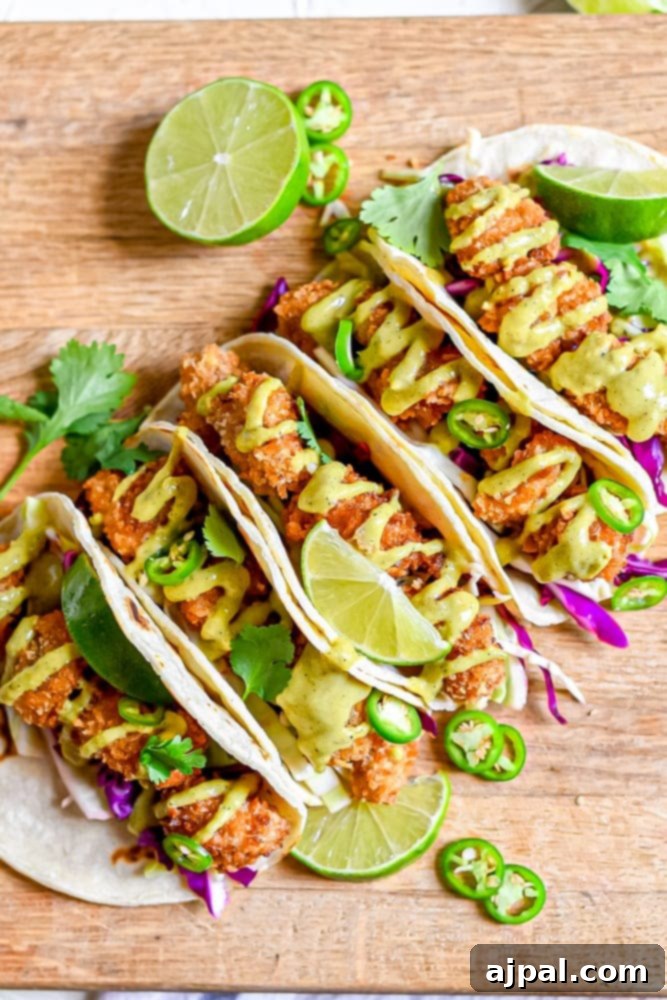
Prepare to create the **ultimate fried chicken tacos** – a delectable fusion of crispy, golden-fried chicken and a vibrant, cooling tomatillo avocado salsa! This recipe transforms a classic comfort food into an exciting taco experience, perfect for weeknights, entertaining, or even convenient meal prep. With our detailed guidance, you’ll master the art of crispy fried chicken and assemble tacos that are bursting with flavor and satisfying textures.
Here at our kitchen, we’re dedicated to making delicious cooking accessible to everyone. We believe that understanding the ‘why’ behind each culinary step empowers you to cook with confidence and creativity. As home cooks without formal training, we’ve found that knowing how ingredients interact and what each technique accomplishes makes a world of difference. Our goal is to equip every beginner with the knowledge and tips needed to feel completely at ease and empowered in their own kitchen, crafting memorable meals like these incredible fried chicken tacos.
Table of Contents
- Irresistible Panko Fried Chicken Tacos
- Mastering Your Fried Chicken Taco Ingredients & Tools
- How To Create The Perfect Fried Chicken Tacos
- The Secret to Crispy Dredging: The Right Order
- Perfect Pairings: What to Serve with These Fried Chicken Tacos
- Meal Prep Made Easy: Storing Breaded Chicken Tacos
- Fried Chicken Tacos Recipe Card
- Frequently Asked Questions About Fried Chicken Tacos
Irresistible Panko Fried Chicken Tacos
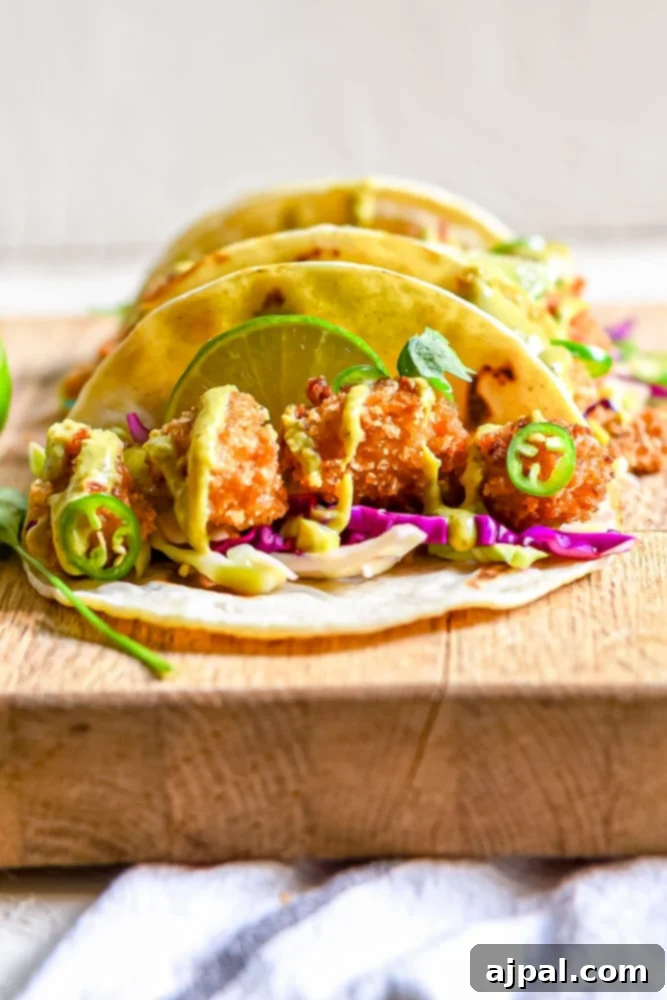
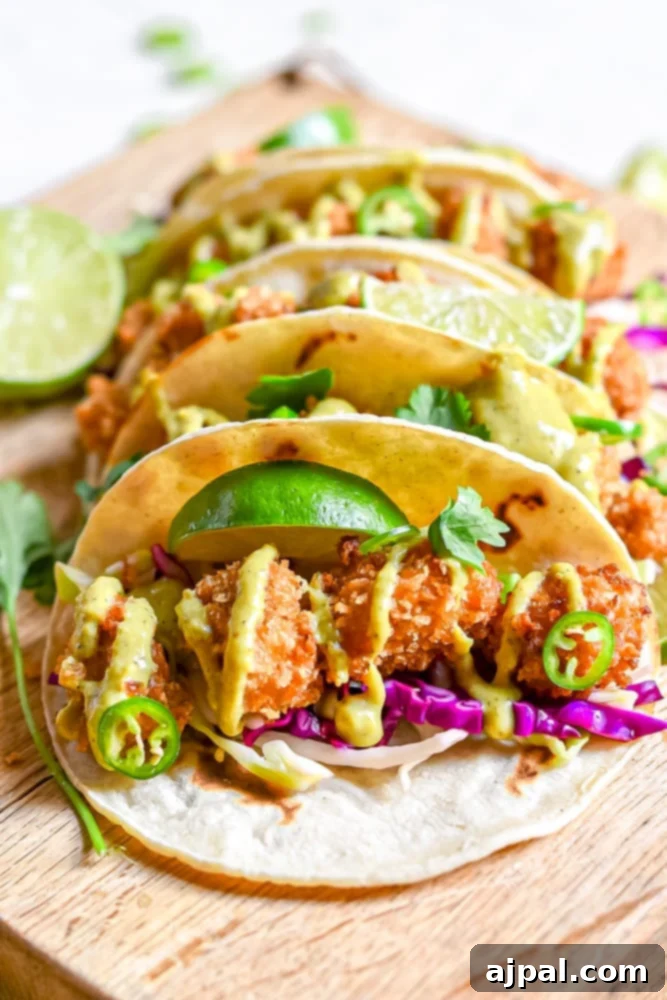
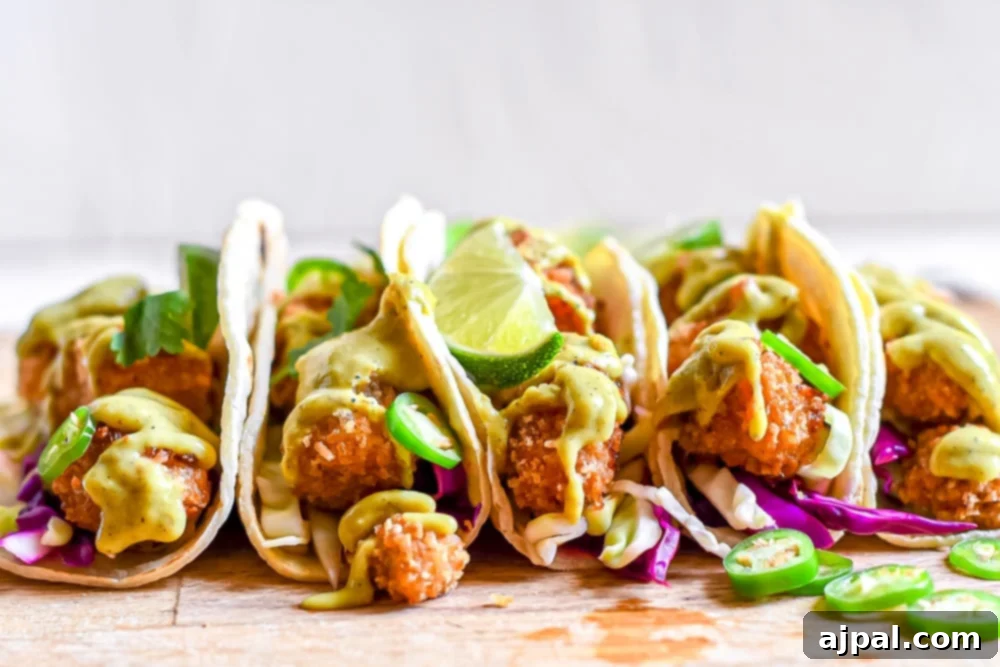
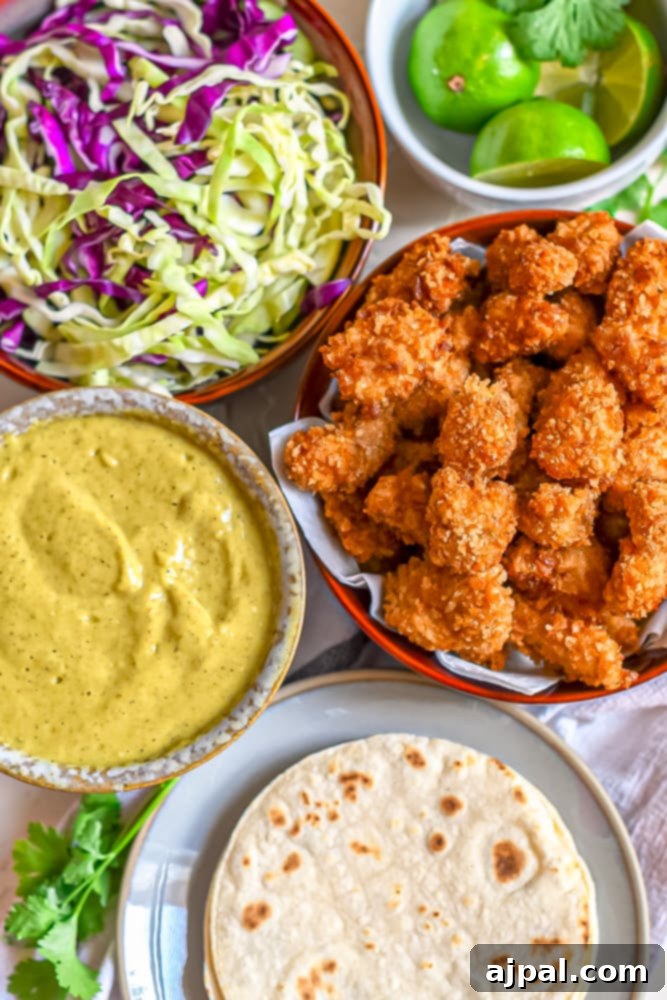
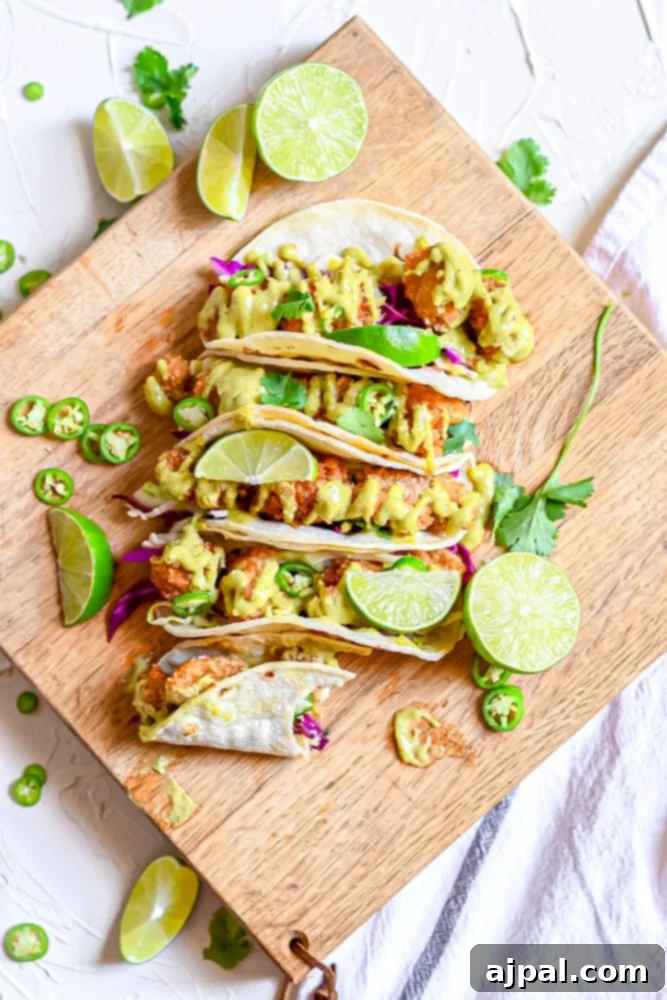
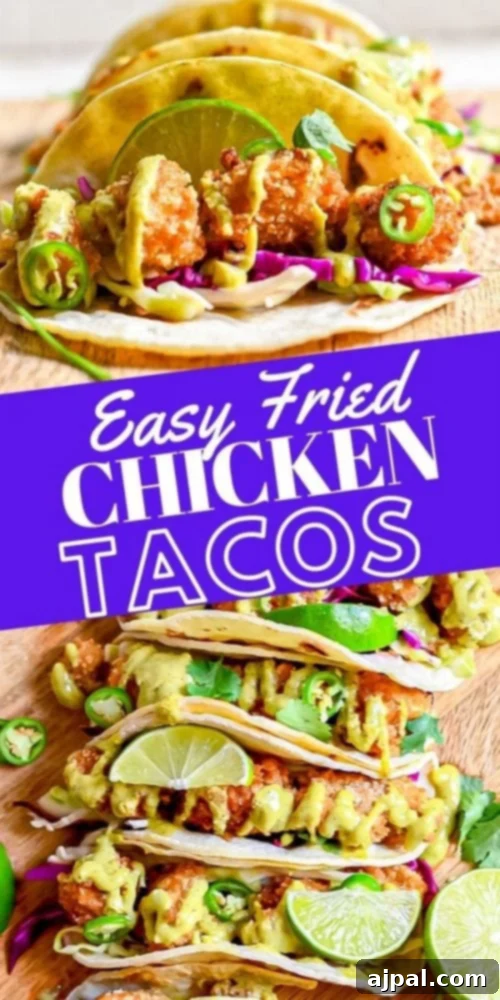
Imagine succulent chicken pieces, carefully breaded in crisp panko breadcrumbs and pan-fried to a stunning golden perfection. Now, picture these irresistible bites nestled into warm tortillas, generously topped with a bright and cooling avocado tomatillo salsa, crunchy shredded cabbage, fiery jalapeños, and a refreshing squeeze of lime. This is the sensory experience of our Panko Fried Chicken Tacos – a delightful explosion of textures and flavors that will tantalize your taste buds.
These tacos are not only incredibly delicious but also surprisingly versatile. They are straightforward enough to be a fantastic option for a quick and satisfying weeknight dinner. Yet, their impressive presentation and gourmet flavor make them a sophisticated choice for entertaining guests at a dinner party. Furthermore, they are excellent for meal prepping, allowing you to enjoy delicious, homemade lunches throughout a busy week with minimal effort.
For those following a keto-friendly diet, this recipe is easily adaptable without sacrificing flavor. You can opt for a plain pan-fried chicken breast, skipping the breading entirely, and serve it in almond flour tortillas. The rich, savory marinade ensures the chicken remains flavorful, making these easy tacos a fantastic keto-approved option.
If your family appreciates vibrant, Tex-Mex-inspired meals, we have many more recipes we think you’ll love. Be sure to explore our Easy Green Chile Sauce Recipe, the addictively crispy Easy Fried Tortilla Chips and Cheesy Green Chile and Pepper Dip, and our hearty Cheesy Chicken Taquito and Bean Casserole Recipe for more exciting flavors.
The Magic of Our Avocado Tomatillo Salsa
No fried chicken taco would be complete without the perfect topping, and our homemade Avocado Tomatillo Salsa is precisely that. This salsa is a burst of tangy, bright, and wonderfully cooling flavors that perfectly complement the rich, crispy chicken. It’s crafted with roasted tomatillos and onions, which impart a deep, complex smoky sweetness, balanced beautifully by the creamy, luscious texture of fresh avocado. The best part? It’s incredibly easy to make, requiring just a baking sheet for roasting the vegetables and a blender to achieve a silky-smooth consistency. For an even more profound flavor, we highly recommend preparing this salsa a day in advance, allowing all the ingredients to fully meld and deepen.
Craving a different flavor profile? For a sweeter and spicier twist, consider pairing your fried chicken tacos with our vibrant Spicy Pineapple Mango Salsa! Its bright, colorful, and tropical fruit notes provide an exciting contrast that pairs exceptionally well with the savory chicken, adding an unexpected kick to every bite.
Mastering Your Fried Chicken Taco Ingredients & Tools
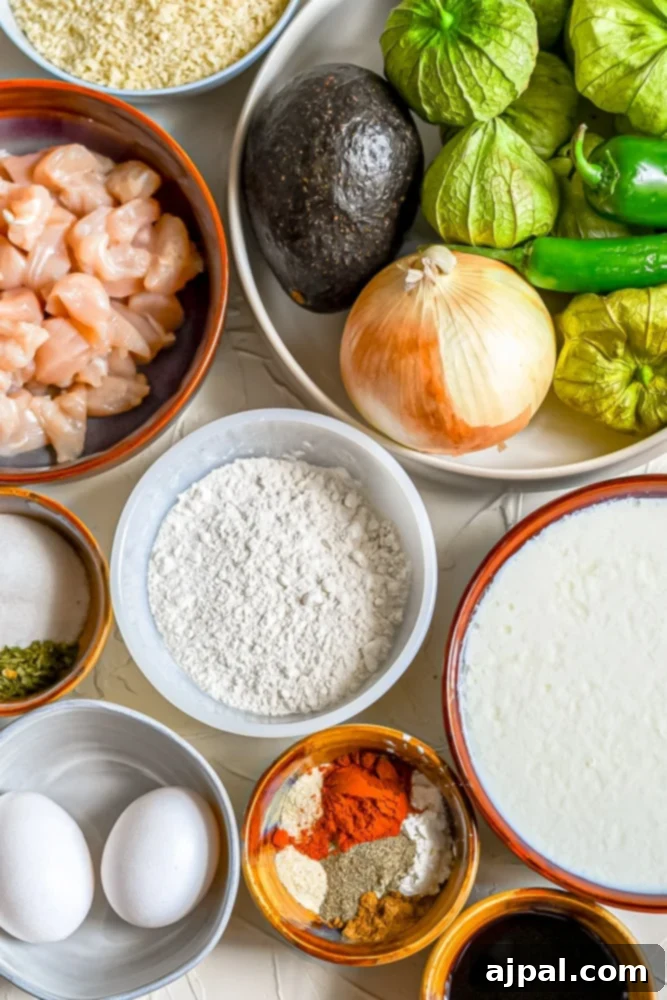
Creating these outstanding fried chicken tacos doesn’t require a professional chef’s arsenal, but having the right tools and a well-organized workspace, often referred to as a “dredging station,” will significantly streamline your cooking process. Here’s a detailed look at what you’ll need to ensure success:
Essential Kitchen Tools:
- 2 Large Bowls: These are primarily for marinating your chicken and holding your main flour or breadcrumb mixture for dredging. Their size is important for easy handling and coating of the chicken pieces.
- 5-6 Small Bowls: These bowls are absolutely crucial for setting up an efficient dredging station. Each will hold a distinct component of your breading mixture (like seasoned flour, egg wash, and panko) or separate spice blends. Good organization here means less mess and a smoother breading process.
- Large Pan, preferably with deep sides: An indispensable item for safe and effective pan-frying. Pans with deep sides are ideal as they help contain oil splatters, minimize mess, and allow for a consistent oil depth, which is essential for even and consistent cooking of your chicken. A sturdy cast iron skillet or a heavy-bottomed non-stick pan are excellent choices.
- Cooking Thermometer: This tool is vital for ensuring your frying oil maintains the perfect temperature, typically between 350-375°F (175-190°C). If the oil is too cold, your chicken will absorb too much oil and become greasy. If it’s too hot, the breading will burn before the chicken has a chance to cook through, resulting in an uncooked interior.
- Tongs or Frying Spider: These utensils are necessary for safely handling, flipping, and removing the chicken pieces from the hot oil. A frying spider, with its mesh basket, is particularly effective at quickly draining excess oil from the cooked chicken.
- Plate Lined with Paper Towels or a Wire Rack: After frying, placing your chicken on a paper towel-lined plate or a wire rack set over a baking sheet is essential. This step helps to absorb any residual oil, ensuring your fried chicken remains delightfully crispy and prevents it from becoming soggy.
Key Ingredients for Flavorful Fried Chicken:
Beyond the tools, the selection and preparation of your ingredients are paramount to achieving deeply flavorful and juicy fried chicken for your tacos. You’ll need:
- Chicken Breast Tenders or Boneless, Skinless Chicken Breasts: Cut these into uniform, bite-sized pieces. This ensures that each piece cooks quickly and evenly, and provides ample surface area for the delicious breading.
- Buttermilk: This is a secret weapon for tender, incredibly juicy chicken. The lactic acid in buttermilk helps to break down the chicken fibers, resulting in a more tender bite, and it also creates an ideal tacky surface for the breading to adhere.
- All-Purpose Flour (or almond flour for keto): This forms the foundational dry coating, helping to create a barrier and providing initial texture.
- Panko Breadcrumbs (or crushed pork rinds for keto): The star of the show for texture! Panko breadcrumbs are Japanese-style breadcrumbs known for their larger, flakier texture, which yields a much lighter, airier, and significantly crisper coating than traditional breadcrumbs when pan-fried. For keto, finely crushed pork rinds offer a surprisingly similar crispy effect.
- Eggs: Essential for the dredging process, eggs act as a crucial binding agent, creating a sticky layer that ensures the panko breadcrumbs firmly attach to the flour-coated chicken.
- Oil for Frying: A neutral-flavored oil with a high smoke point is best. Avocado oil or good quality vegetable oil are excellent choices. For keto versions, avocado oil is preferred due to its healthy fat profile.
- Robust Seasoning Blend: A carefully crafted mixture of salt, a touch of sugar (which should be omitted for keto recipes), soy sauce (or coconut aminos for a keto-friendly alternative), dried parsley, ground black pepper, cayenne pepper powder (for a delightful kick), onion powder, garlic powder, and cumin powder. This harmonious blend infuses the chicken with a complex, savory, and slightly spicy flavor that elevates the entire taco experience.
How To Create The Perfect Fried Chicken Tacos
Crafting these exceptional fried chicken tacos is a two-part process that focuses on maximizing both flavor and texture: first, a strategic marinade, and second, precise dredging and pan-frying. While the idea of pan-frying might seem a little intimidating at first glance, it’s actually quite simple to master with a few key techniques, leading to incredibly satisfying results.
Marinating for Unforgettable Flavor and Tenderness
The journey to incredibly flavorful fried chicken begins with our signature marinade. This step is not just about adding flavor to the surface; it ensures that every single bite of chicken is juicy, tender, and seasoned deep within. The buttermilk plays a crucial role here, its gentle acidity working to tenderize the chicken proteins, resulting in a remarkably succulent texture. Combined with a robust blend of spices, the savory umami of soy sauce (or coconut aminos for keto), and a hint of sugar (for non-keto versions to enhance browning and flavor), this marinade permeates the chicken, building a foundational layer of complex taste. Allow your chicken to marinate for at least 30 minutes to experience these benefits, or for up to two hours for an even more profound depth of flavor. This patience will be richly rewarded.
Demystifying the Pan-Frying Process
Pan-frying is a fantastic method for achieving that coveted golden-brown, crispy crust without the hassle and large oil volume of deep-frying. The critical factor for success is maintaining a consistent oil temperature. Too low, and your breading will absorb too much oil, becoming greasy and heavy. Too high, and the exterior will burn before the chicken has a chance to cook through to a safe internal temperature. This is where a reliable cooking thermometer becomes your best friend, allowing you to monitor and adjust the heat as needed, ensuring your oil stays within the ideal range of 350-375°F (175-190°C). Additionally, it’s vital to work in small batches, frying only 5-6 pieces at a time. Overcrowding the pan will drastically drop the oil temperature, leading to less crispy and potentially soggy results. We’ll guide you through the precise dredging sequence to guarantee that your crispy coating adheres perfectly every time.
The Secret to Crispy Dredging: The Right Order
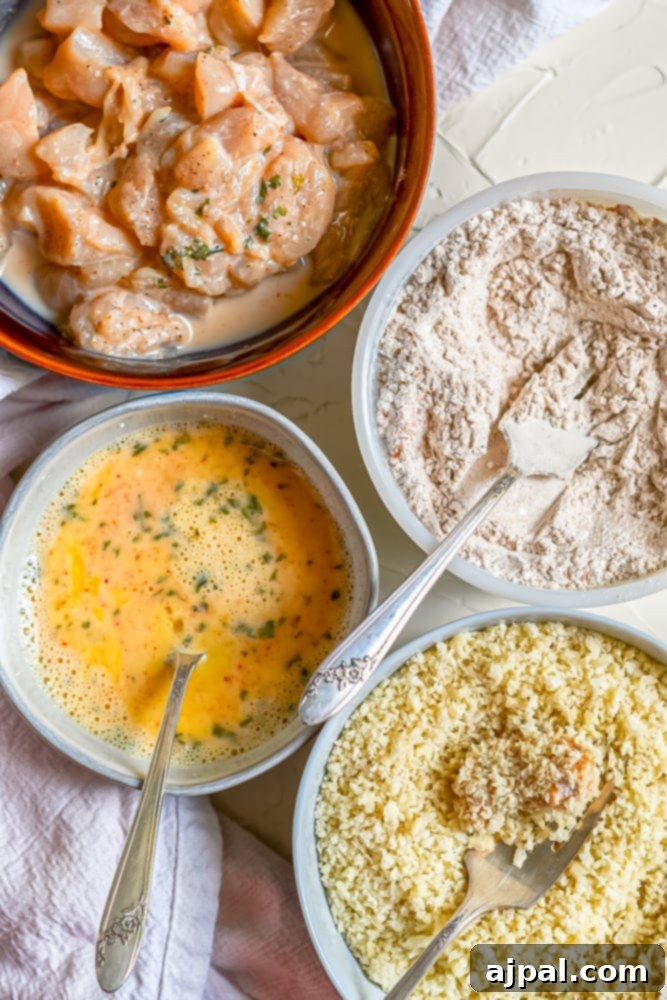
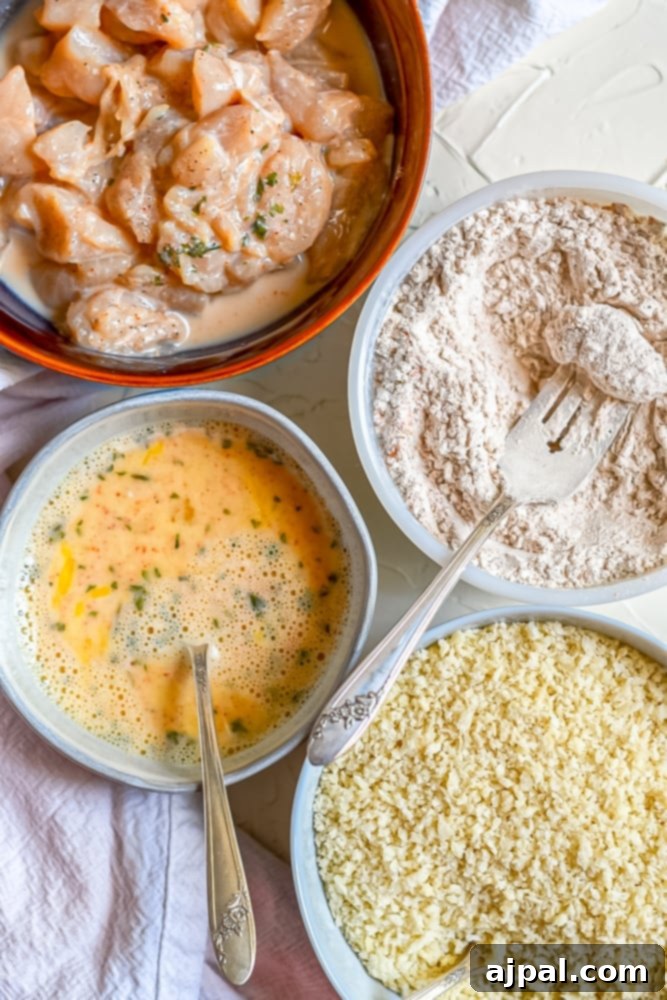
Dredging chicken is a fundamental technique in culinary arts, specifically designed to ensure that breading adheres flawlessly and achieves an exquisite crispy crunch when fried. The key to successful dredging lies in following a precise sequence, which maximizes adhesion and creates multiple layers of texture. Here’s a breakdown of the correct order for your dredging station, ensuring an ultra-crispy result:
- Buttermilk (The First Wet Layer): Begin by thoroughly dipping each chicken piece into your prepared buttermilk marinade. The buttermilk serves a dual purpose: its mild acidity helps to further tenderize the chicken, and crucially, it provides a moist, tacky surface that is essential for the initial dry coating to stick. Ensure the chicken is fully coated, but allow any excess buttermilk to drip off before proceeding.
- Seasoned Flour (The First Dry Layer): Next, transfer the buttermilk-coated chicken directly into your seasoned flour mixture. Generously coat the entire piece, gently pressing the flour onto the chicken to ensure full coverage. Tap off any excess flour – you want a thin, even coat, not a thick, clumpy one. This initial layer of flour acts as a primer, absorbing residual moisture from the buttermilk and creating a consistent, textured base for the subsequent layers.
- Egg Wash (The Sticky Binding Layer): After the flour, dip the chicken into the whisked egg bath. The eggs are the primary adhesive in the dredging process; their natural stickiness is what allows the breadcrumbs to truly cling to the chicken. Ensure the chicken is fully submerged and coated in the egg, then lift it, letting any excess egg drip back into the bowl. This prevents too much moisture from transferring to the breadcrumbs.
- Panko Breadcrumbs (The Final Crispy Layer): Finally, roll the egg-washed chicken piece in the panko breadcrumbs. Gently press the panko onto all sides of the chicken to ensure maximum adhesion. Panko breadcrumbs are specifically celebrated for their unique light, airy, and flaky texture, which results in a superior, extra-crispy crunch compared to regular breadcrumbs once fried. Give the chicken a final gentle shake to dislodge any unattached crumbs before carefully placing it into your preheated oil. This meticulous layered approach guarantees a robust, delicious, and incredibly crispy coating every single time.
A helpful tip for efficient dredging: designate one hand as your “wet hand” for handling the buttermilk and egg, and the other as your “dry hand” for the flour and breadcrumbs. This technique keeps your hands cleaner and prevents the breading from clumping prematurely.
Perfect Pairings: What to Serve with These Fried Chicken Tacos
These crispy fried chicken tacos are undoubtedly the star of the show, but a well-rounded meal is made even better with thoughtful accompaniments. Whether you’re celebrating a festive “Taco Night” or simply enjoying a casual dinner, these pairings will elevate your culinary experience. Here’s a selection of fantastic Tex-Mex and other side dishes to complement your flavorful tacos:
Classic Tex-Mex Accompaniments:
- Creamy Refried Beans or Hearty Black Beans: Offering a comforting and traditional contrast, these bean dishes provide a rich, earthy balance to the crispy chicken.
- Fluffy Mexican Rice: A vibrant and seasoned rice pilaf is always a welcome addition, providing a satisfying and flavorful base for your meal.
- Fresh Guacamole & Zesty Pico de Gallo: Essential for a true taco experience! Homemade guacamole, made with ripe avocados, alongside a lively pico de gallo (a fresh chunky salsa of tomatoes, onions, cilantro, and jalapeños) adds crucial freshness, creaminess, and a tangy kick.
- Sweet Corn Salad or Salsa: A refreshing corn salad, perhaps studded with bell peppers, red onion, and fresh cilantro, introduces a delightful sweetness and an additional layer of texture.
- Grilled Mexican Street Corn (Elote): An irresistible side dish featuring grilled corn on the cob, slathered in a creamy, tangy, and cheesy sauce, often with a sprinkle of chili powder. Its bold flavors perfectly harmonize with the tacos.
- Bright Cilantro Lime Rice: For a lighter and more zesty alternative to traditional Mexican rice, cilantro lime rice offers a refreshing counterpoint to the richer fried chicken.
Keto-Friendly Side Options:
If you’re opting for the keto version of these delicious tacos, you don’t have to miss out on fantastic sides. Here are some low-carb suggestions that pair wonderfully:
- Best Ever Cauliflower Rice: This is an excellent grain-free substitute for traditional rice, easily seasoned to mimic Mexican rice flavors.
- Easy Keto Tortilla Chips: Enjoy the satisfying crunch of chips with your salsa, completely free of added carbs.
- Simple Green Salad: A crisp mixed green salad with a light, zesty vinaigrette provides a refreshing and low-carb option.
- Roasted Fajita Vegetables: Sautéed or roasted bell peppers and onions, or even grilled zucchini and asparagus, offer vibrant flavors and essential nutrients.
Refreshing Drink Pairings:
To complete your fried chicken taco feast, consider these cooling and celebratory beverage options:
- Traditional Agua Frescas: Refreshing fruit-infused waters like horchata (rice milk drink), jamaica (hibiscus flower tea), or agua de sandía (watermelon water) offer sweet, natural hydration.
- Classic Margaritas: Whether served on the rocks or frozen, a well-made margarita is a quintessential pairing for tacos.
- Crisp Mexican Beer: Light lagers such as Corona, Modelo, or Pacifico provide a refreshing balance, especially with the subtle heat of the tacos.
- Iced Tea: A simple, unsweetened iced tea can be wonderfully cooling and palate-cleansing.
More Tex-Mex Recipes You’ll Love
Chicken Posole Verde
Spicy One Pot Taco Rice
Spicy Jalapeño Beef Stew
Rojo Pozole
Cheesy Beef Taco Skillet
Tomatillo Chicken Stew
Easy Smoked Al Pastor
Slow Cooker Carnitas
Meal Prep Made Easy: Storing Breaded Chicken Tacos
These crispy fried chicken tacos are not only a delicious meal but also fantastic for meal prepping and enjoying as leftovers. The key to preserving their freshness and coveted crispy texture is smart storage. To prevent sogginess and ensure an optimal eating experience, it’s always best practice to store the fried chicken, tortillas, and any wet toppings (such as the salsa and cabbage mix) separately.
Storing Cooked Fried Chicken:
- Refrigeration: Once the fried chicken pieces have completely cooled to room temperature, transfer them to an airtight container or a heavy-duty resealable plastic bag. When stored correctly, they will remain fresh and delicious in the refrigerator for up to four days.
- Freezing: For longer-term storage, arrange the cooled chicken pieces in a single layer on a baking sheet and flash-freeze them until they are solid. This prevents them from sticking together. Once frozen, transfer the chicken to a freezer-safe bag or container, removing as much air as possible. They can be safely frozen for up to four months without a significant decline in quality.
- Reheating from Refrigerator: To bring back that satisfying crispiness, we highly recommend reheating refrigerated chicken in a preheated oven set to 375°F (190°C) for about 10-15 minutes, or until they are heated through and the coating is crisp again. An air fryer is an even quicker and more effective option, typically requiring just 5-8 minutes at 375°F (190°C). Avoid using a microwave for reheating if you want to preserve the crispy texture.
- Reheating from Frozen: You can bake the frozen chicken directly without thawing. Preheat your oven to 400°F (200°C) and bake for 20-30 minutes, or until the chicken is piping hot throughout and beautifully crispy. Similarly, an air fryer at 375-400°F (190-200°C) for 10-15 minutes will work wonders.
Storing Tortillas and Toppings:
- Tortillas: Store corn tortillas at room temperature in their original packaging, or in an airtight container to prevent them from drying out and becoming brittle. They can also be frozen for extended periods, wrapped well to prevent freezer burn.
- Salsa and Cabbage Mix: Keep your creamy tomatillo avocado salsa and the seasoned shredded cabbage mix in separate airtight containers in the refrigerator. The salsa will maintain its freshness for 3-4 days, while the cabbage mix is best enjoyed within 1-2 days to retain its crispness.
When you’re ready to enjoy your meal, simply reheat the chicken, warm your tortillas, and assemble your fresh, flavorful tacos with all your favorite toppings!
We are confident that you will adore this easy fried chicken taco recipe as much as we do! If you give it a try, please consider leaving a five-star review and sharing your delicious creations on Facebook and Pinterest. We love seeing what you cook, so don’t forget to tag us!
Only have 30 minutes to get dinner on the table? Sign up for our 30-minute dinner plans delivered direct to your inbox!
Find and shop our favorite kitchen products and essential ingredients in our Amazon storefront here!
Fried Chicken Tacos Recipe Card
Fried Chicken Tacos Recipe
By: Courtney O’Dell
Servings: 15 tacos
Prep Time: 45 mins
Cook Time: 20 mins
Total Time: 1 hr 5 mins
Fried chicken tacos meld the crispy, seasoned crunch of the chicken with the soft embrace of tortillas, creating a flavor-packed contrast in every bite.
Equipment
- Easy-to-Clean Bamboo Wood Cutting Board Set
- HexClad 10 Inch Hybrid Nonstick Frying Pan
Ingredients
- 4 chicken breast tenders or 2 chicken breasts (cut into bite-sized pieces)
- 2 cups of buttermilk
- 1 tablespoon of salt + 1 ½ teaspoon of salt (divided)
- 2 teaspoons of sugar (omit for keto recipe)
- ¼ cup of soy sauce (keto recipe: use 1/4 cup coconut aminos)
- 1 teaspoon of dried parsley
- ½ teaspoon of ground black pepper
- 2 teaspoon of cayenne pepper powder (divided)
- 1 teaspoon of onion powder
- 1 teaspoon of garlic powder
- 1 teaspoon of cumin powder
- 1 tablespoon of cornstarch (omit for keto recipe)
- ½ cup of flour (omit for keto recipe)
- 1 cup of panko breadcrumbs (keto recipe: swap for 4 oz crushed pork rinds)
- 2 eggs
- 48-ounce avocado oil or vegetable oil (keto: use avocado oil)
- 12-15 white corn tortillas
- ¾ cup of purple cabbage, shredded
- ¾ cup of green cabbage, shredded
- 1 lime, juiced
Instructions
- Start by washing, drying, and cutting the chicken into uniform bite-sized pieces for even cooking.
- In a small bowl, combine 1 tablespoon of salt, sugar (if using for non-keto), soy sauce (or coconut aminos for keto), dried parsley, black pepper, and 1 teaspoon of cayenne pepper powder. Mix these spices thoroughly.
- Pour this spice mixture into the buttermilk and stir well to combine. Add the chicken pieces to the seasoned buttermilk, ensuring every piece is fully coated.
- Transfer the chicken and buttermilk mixture to a large Ziploc bag or an airtight container and place it in the refrigerator to marinate for at least 30 minutes, or up to 2 hours, for maximum flavor and tenderness.
- Once marinated, remove the chicken from the fridge. Pour about ½ cup of the buttermilk marinade into a small separate bowl and whisk in the two eggs until smooth and fully combined. Set this egg wash aside.
- In another separate bowl, combine the flour (if using for non-keto), the remaining 1 ½ teaspoon of salt, the remaining 1 teaspoon of cayenne pepper powder, onion powder, garlic powder, cumin powder, and cornstarch (if using for non-keto). Whisk these dry ingredients until thoroughly combined and set this seasoned flour mixture aside.
- Place the panko breadcrumbs (or crushed pork rinds for keto) into a third separate bowl, ready for the final coating.
- Heat a large frying pan with deep sides over medium-low heat and add the frying oil. To accurately check if the oil has reached the ideal temperature (approximately 350-375°F or 175-190°C), dip the end of a wooden spoon or a chopstick into the oil. If small bubbles immediately form around the wood and gently rise to the surface after a second or two, the oil is ready. If not, allow it a few more minutes to heat before rechecking.
- Begin the dredging process: Using a fork, take one chicken piece from the buttermilk marinade, allowing any excess liquid to drain off briefly. Dip it into the seasoned flour mixture, ensuring it’s completely coated, then gently tap off any excess flour. Next, transfer the flour-coated chicken to the egg mixture, covering it entirely, and again, let any excess egg drip off. Finally, thoroughly coat the chicken piece in the panko breadcrumbs, gently pressing the crumbs onto all sides to ensure good adhesion. Give the chicken a final shake to remove any loose breadcrumbs, then carefully place it into the hot oil.
- Continue this dredging and frying process in small batches, adding about 5-6 pieces of chicken to the pan at one time. This prevents overcrowding, which can lower the oil temperature and lead to soggy chicken.
- Fry the chicken pieces until the bottom side turns a beautiful golden-brown color. Then, flip them over with tongs and cook for another minute or so until both sides are golden and the chicken is cooked through to an internal temperature of 165°F (74°C).
- Once cooked, carefully remove the crispy chicken pieces from the pan and place them on a plate lined with paper towels or on a wire rack set over a baking sheet to drain off any excess oil. This step is crucial for maintaining crispiness.
- Repeat the entire process with the remaining chicken, dredging and frying in batches until all pieces are perfectly cooked.
- To warm your tortillas and make them pliable, you have several options: You can wrap a stack of tortillas in aluminum foil and heat them in a preheated 250°F (120°C) oven for 10-15 minutes, microwave a few for a few seconds wrapped in a damp paper towel, or quickly heat them individually in a dry pan over medium heat until soft and pliable.
- In a medium bowl, combine the shredded purple cabbage, green cabbage, the fresh lime juice, and the remaining 1 ½ teaspoon of salt. Toss everything together thoroughly and let it sit for a few minutes. This allows the lime juice to slightly soften the cabbage and meld the flavors.
- To assemble your delicious tacos, spoon a generous portion of the seasoned cabbage mix into a warm tortilla. Add 3-4 pieces of the crispy fried chicken, and finally, top with a few generous spoonfuls of your favorite salsa, such as our vibrant Avocado Tomatillo Salsa.
- Serve your homemade crispy fried chicken tacos immediately and enjoy the incredible blend of flavors and textures!
Nutrition
Nutrition information is automatically calculated and should only be used as an approximation.
- Serving: 1 taco
- Calories: 420 kcal
- Carbohydrates: 15g
- Protein: 6g
- Fat: 20g
- Saturated Fat: 6g
- Polyunsaturated Fat: 42g
- Cholesterol: 22mg
- Sodium: 345mg
- Fiber: 2g
- Sugar: 3g
Additional Info
Course: Chicken
Cuisine: Southwestern
Frequently Asked Questions About Fried Chicken Tacos
Q: Can I use chicken thighs instead of breast tenders for this recipe?
A: Absolutely! Chicken thighs are an excellent alternative to breast tenders for fried chicken tacos. They are generally more forgiving, staying incredibly juicy and flavorful even if slightly overcooked, thanks to their higher fat content. Just ensure they are cut into uniform, bite-sized pieces so they cook evenly and fit comfortably into your tortillas. The marinating and dredging process described in the recipe will remain the same and yield fantastic results with chicken thighs.
Q: How can I make these fried chicken tacos spicier?
A: If you love a fiery kick, there are several ways to amp up the heat in your fried chicken tacos! You can increase the amount of cayenne pepper powder in both the chicken marinade and the seasoned flour mixture. For an extra layer of spice, consider adding a pinch of smoked paprika or chili powder to your breading. When assembling, include thinly sliced fresh jalapeños or serrano peppers, or even a drizzle of your favorite hot sauce directly onto the finished tacos. For a more subtle, smoky heat, you could carefully infuse your frying oil with a few dried chilies (like arbol or cascabel) for a few minutes before adding the chicken, just be careful not to burn them.
Q: What’s the best way to get the corn tortillas warm and pliable without breaking?
A: Warming your corn tortillas is crucial for making them soft, pliable, and less prone to breaking, significantly enhancing your taco experience. Here are a few effective methods:
- Oven Method: Wrap a stack of about 8-12 tortillas tightly in aluminum foil. Place the foil packet in a preheated oven at 250°F (120°C) for 10-15 minutes, or until they are steaming and flexible. Keep them wrapped until ready to serve.
- Microwave Method: For a quick option, wrap 5-6 tortillas in a damp paper towel. Microwave them on high for 30-60 seconds, or until they are warm and pliable.
- Dry Skillet Method: Heat a dry cast iron or non-stick skillet over medium-high heat. Place one tortilla at a time in the hot pan and cook for about 15-20 seconds per side, flipping with tongs, until soft, heated through, and lightly toasted in spots. Stack them in a tortilla warmer or wrapped in a clean kitchen towel to keep them warm.
- Gas Flame Method: If you have a gas stove, you can carefully toast tortillas directly over a low gas flame for a few seconds per side, flipping constantly with tongs, until they are lightly charred and pliable. Watch them very closely to prevent burning.
Q: Can I use store-bought fried chicken for this recipe if I’m short on time?
A: While making your own crispy fried chicken from scratch offers the best control over flavor, seasoning, and texture, you can certainly use good quality store-bought fried chicken in a pinch. Opt for plain or lightly seasoned fried chicken, then cut it into taco-sized pieces. Before assembling your tacos, reheat the store-bought chicken in an oven or air fryer to restore its crispiness – this is key to getting that fresh-fried texture back. Then, proceed with the recipe’s assembly instructions and your homemade salsa and toppings.
Q: What if I don’t have buttermilk for the marinade? Can I make a substitute?
A: Yes, you can easily make a homemade buttermilk substitute! For every cup of milk required in the recipe (you’ll need 2 cups for this recipe), simply add one tablespoon of white vinegar or lemon juice. Stir it gently and let the mixture sit for about 5-10 minutes at room temperature. You’ll notice the milk will start to slightly curdle and thicken. This acidified milk will function very similarly to buttermilk in tenderizing the chicken and helping the breading adhere. Whole milk works best for this substitution due to its fat content.