

Unlock the secret to crafting the most delicious, golden-brown, and incredibly crispy baked French fries, right in your own kitchen! Forget the deep fryer and messy oil; this recipe delivers restaurant-quality crunch and flavor, making it an instant family favorite. If you crave that perfect fry experience without the guilt or hassle of traditional frying, you’ve come to the right place. We’re about to transform humble potatoes into a truly spectacular side dish that’s healthier, easier, and just as satisfying.

For those eager to dive straight into the cooking, feel free to skip ahead using our clickable table of contents below or scroll down to find the complete recipe card. However, for home cooks of all skill levels, especially beginners, we highly recommend exploring the comprehensive tips, tricks, and explanations woven throughout this post. As a passionate home cook with no formal training, I’ve learned that understanding *why* a recipe works and *what* each ingredient contributes is key to building confidence in the kitchen. My goal is to empower you to create amazing dishes with ease and flair!
Table of Contents
- Baked Fries: The Crispy, Healthy Alternative
- The Science Behind Perfect Crispy Baked Fries
- Ingredients for Restaurant-Quality Baked Fries
- Step-by-Step Guide to Baking Crispy Fries
- Essential Tips for Flawless Baked French Fries
- Creative Seasoning Ideas for Your Baked Fries
- Serving Suggestions & Pairing Baked Fries
- Storing & Reheating Baked Fries
Baked Fries: The Crispy, Healthy Alternative
There’s an undeniable love for fries in our house – whether they’re classic potato fries, sweet potato fries, fried, or breaded, we adore them all! However, we’re also conscious that traditional high-fat fried foods aren’t always the best choice for our health. This is precisely where our recipe for Crunchy Baked Fries shines. It offers that irresistible crispy, crunchy texture you’d expect from deep-fried versions, but with a lighter touch, using just a dash of heart-healthy olive oil and a sprinkle of sea salt.
By baking these fries at a high temperature, we effectively cut down on the excess fat found in conventionally fried fries, creating a delightful, guilt-free indulgence. You’ll be amazed at how incredibly good they taste – so good, in fact, you might not even realize they haven’t been fried! While they’re a special treat rather than an everyday staple, when we do make them, they vanish in minutes. The best part? They are surprisingly easy to prepare, requiring minimal fuss for maximum flavor and crunch. This recipe proves that you don’t need a deep fryer to achieve perfectly crisp and delicious fries.
Our method prioritizes both flavor and wellness, making these baked fries a fantastic alternative for anyone looking to enjoy their favorite side dish with a healthier twist. The careful balance of simple ingredients and a specific baking technique ensures a superior result every time. Get ready to impress your family and friends with a batch of homemade baked fries that are both nutritious and unbelievably tasty!
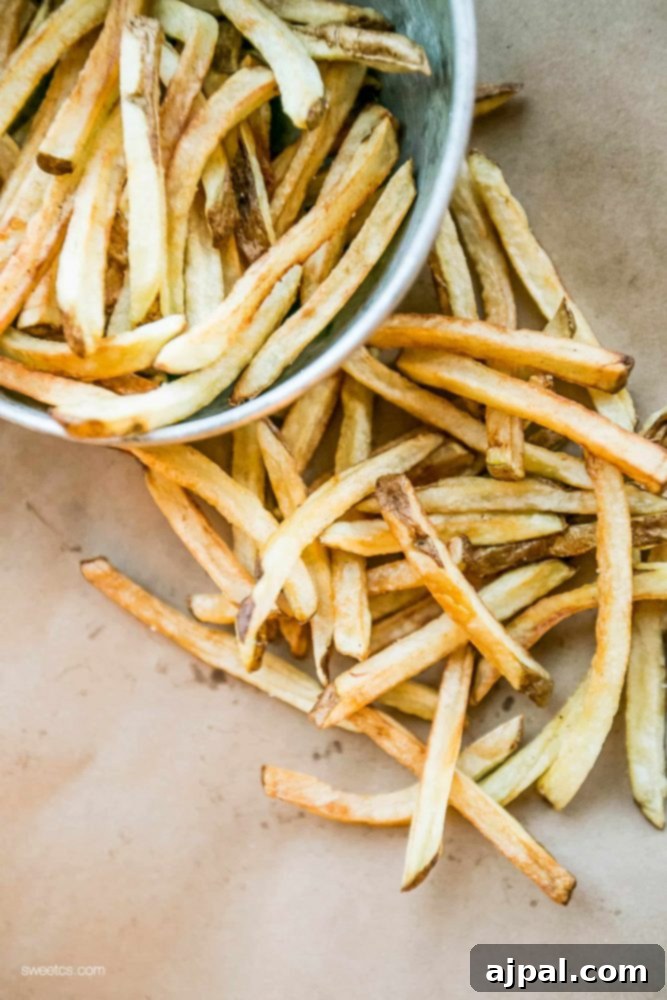
The Science Behind Perfect Crispy Baked Fries
Achieving truly crispy baked fries isn’t magic; it’s a careful combination of technique and understanding the science of starch and moisture. The key steps in this recipe are designed to maximize surface area, reduce moisture, and promote a golden, crunchy exterior:
- Starch Removal: Potatoes contain a significant amount of starch. When heated, this starch can make fries gummy or prevent them from crisping. Soaking the cut potatoes in cold water is a critical step that draws out excess surface starch. This process primes the potatoes for a crunchier texture, as there’s less starch to turn pasty during baking. For best results, a soak of at least one hour, possibly with a water change, is recommended.
- Thorough Drying: After soaking, it’s paramount to thoroughly dry the potatoes. Any residual moisture will steam rather than crisp in the oven, leading to soggy fries. Patting them vigorously with paper towels or a clean kitchen towel ensures that the oil can properly coat the potato surface and facilitate browning and crisping.
- Optimal Oil Distribution: A light coating of olive oil is essential. Oil conducts heat efficiently and helps create that desirable golden-brown crust. Too much oil can make them greasy, while too little won’t allow for even crisping. Tossing them well ensures every fry is lightly coated.
- High-Temperature Baking (Two-Phase Approach): Our recipe uses a two-phase baking approach. Starting at 400°F (200°C) allows the potatoes to cook through and become tender without burning the exterior. Once they’re tender, cranking the oven up to 450°F (230°C) provides the intense heat needed to rapidly crisp up the seasoned, oil-coated surfaces. This finishing high-heat blast, sometimes complemented by a quick broiler finish, is what gives them their signature crunch.
- Even Spacing: Overcrowding the baking sheet is a common mistake. When fries are too close together, they release steam, which gets trapped and prevents moisture evaporation, resulting in soft, steamed fries instead of crispy ones. Spreading them in a single, uncrowded layer on a well-greased sheet is crucial for air circulation and direct heat exposure.
By following these principles, you’re not just baking fries; you’re orchestrating a culinary process that guarantees perfectly crunchy, irresistibly delicious results every time.
Ingredients for Restaurant-Quality Baked Fries
To embark on your journey to homemade crispy baked fries, you’ll need just a few simple, high-quality ingredients:
- Russet Potatoes: The star of our show! Russet potatoes are ideal for fries due to their high starch content and fluffy texture when cooked. This high starch-to-moisture ratio helps them achieve that coveted crispy exterior and soft, tender interior. For best results, choose firm, unblemished potatoes.
- Olive Oil: A touch of heart-healthy olive oil is all it takes to coat the fries, promoting even browning and crisping without excessive fat. Extra virgin olive oil adds a lovely flavor, but regular olive oil works perfectly too.
- Sea Salt and Pepper, to taste: Simple seasonings are often the best. Sea salt brings out the natural flavor of the potatoes and adds a pleasant texture, while freshly ground black pepper complements it beautifully. Adjust quantities to your preference.
That’s it! With these foundational ingredients, you’re well on your way to creating an incredibly satisfying side dish. Remember, the quality of your ingredients, even simple ones like potatoes and salt, makes a noticeable difference in the final taste.
Step-by-Step Guide to Baking Crispy Fries
Once you’ve gathered your ingredients and understand the principles, follow these detailed steps for perfect crunchy baked fries:
- Step 1: Prep Your Potatoes. Begin by thoroughly washing your russet potatoes. Using a mandoline slicer, carefully slice the potatoes into uniform fry shapes. While perfection isn’t necessary, striving for similar sizes helps ensure even cooking. Some thicker, some thinner? That’s perfectly fine and adds character! Immediately after slicing, transfer your potato sticks into a large bowl filled with cool water, ensuring they are completely submerged.
- Step 2: The Starch Soak. Allow the sliced fries to soak in the cool water for at least one hour. This crucial step helps draw out excess starch from the potatoes, which is key to achieving a truly crispy texture in the oven. For an even better crisp, consider changing the water once after 30 minutes with fresh, cold water.
- Step 3: Dry Them Thoroughly. After the hour-long soak, drain the water completely. Spread the fries out onto a clean kitchen towel or several layers of paper towels. Pat them vigorously and thoroughly dry. This step cannot be stressed enough: any remaining moisture will prevent the fries from crisping up and instead lead to a soggy result.
- Step 4: Season and Coat. Transfer the dried potato sticks to a large bowl. Drizzle with 2-3 tablespoons of olive oil, then season generously with sea salt and freshly ground black pepper. Toss everything together vigorously until every single fry is lightly and evenly coated with oil and seasoning.
- Step 5: Prepare for Baking. Preheat your oven to 400°F (200°C). Lightly grease one or two large baking sheets with cooking spray or a thin layer of olive oil. It’s often beneficial to place the baking sheet in the oven for a few minutes while it preheats to ensure a hot surface for the fries, promoting an immediate crisp. Spread the seasoned fries onto the prepared baking sheet(s) in a single layer, ensuring they are not overcrowded. If your sheet is too packed, divide the fries between two sheets to allow for proper air circulation.
- Step 6: Initial Bake. Bake the fries at 400°F (200°C) for approximately 30 minutes, or until they begin to soften and just start to turn golden at the edges. Around the 15-20 minute mark, use a spatula to stir and flip the fries. This prevents them from sticking to the sheet and promotes even cooking on all sides.
- Step 7: Achieve Maximum Crispness. Increase the oven temperature to 450°F (230°C). Continue baking for another 20-30 minutes, keeping a close eye on them. The fries should become beautifully golden brown and intensely crispy. For an extra burst of crunch and color, you can briefly turn on your oven’s broiler for the last 3-5 minutes. If using the broiler, stay vigilant and toss the fries frequently to prevent burning, ensuring all sides get that perfect finish.
- Step 8: Serve Immediately. Once golden and crispy, remove the fries from the oven. Serve them hot and fresh with your favorite dipping sauces. Enjoy the reward of your perfectly baked, crunchy fries!
Essential Tips for Flawless Baked French Fries
To guarantee crispy perfection with every batch of baked fries, keep these expert tips and tricks in mind:
- Consistent Slicing is Key: While not strictly mandatory, using a mandoline slicer or a dedicated potato fry cutter helps create uniform sticks. Evenly sized fries cook more consistently, preventing some from burning while others remain undercooked. Aim for a thickness of about 1/4 to 1/3 inch for optimal crispness.
- Don’t Skimp on the Soak: The soaking step is non-negotiable! Allowing your fries to sit in cold water for at least an hour (or even up to two hours, with a water change) is vital for drawing out excess starch. This is the secret to preventing a gummy texture and achieving that coveted crisp exterior.
- Dry, Dry, Dry: After their water bath, the potatoes must be as dry as possible. Use a clean kitchen towel or multiple layers of paper towels to pat them thoroughly. Any moisture left on the surface will steam in the oven, leading to soggy rather than crispy fries. Think of it as a pre-drying ritual for ultimate crunch.
- Preheat Your Baking Sheet: For an immediate crisp upon contact, place your empty, greased baking sheet in the oven while it preheats. This thermal shock helps to seal the outside of the fries quickly, contributing significantly to their crispiness.
- Oil and Seasoning Love: Don’t be shy with the olive oil (within reason!) and seasonings. A good coating of oil ensures even heat distribution and browning. Toss the fries thoroughly in a large bowl to make sure every surface is lightly coated.
- Give Them Room to Breathe: Overcrowding a baking sheet is the enemy of crispy fries. Arrange them in a single layer with plenty of space between each fry. If your batch is too large for one sheet, use two. This allows air to circulate freely around each piece, promoting evaporation and crisping rather than steaming.
- Adjust to Your Oven: Every oven behaves differently. Factors like calibration, hot spots, and even ambient humidity can affect cooking times. Watch your fries closely, especially during the higher-temperature crisping phase. Don’t be afraid to stir them more frequently or adjust the cooking time slightly based on their appearance.
- Broiler for the Win (with Caution!): If your fries are tender but need a final boost of crispness, the broiler is your friend. Use it for a few minutes at the very end, but never walk away! Broilers are intense and can burn fries quickly. Flip them frequently to ensure even browning.
- Serve Immediately: Baked fries, like their fried counterparts, are best enjoyed hot and fresh from the oven. Their crispness will diminish over time as they cool. Have your dipping sauces ready!
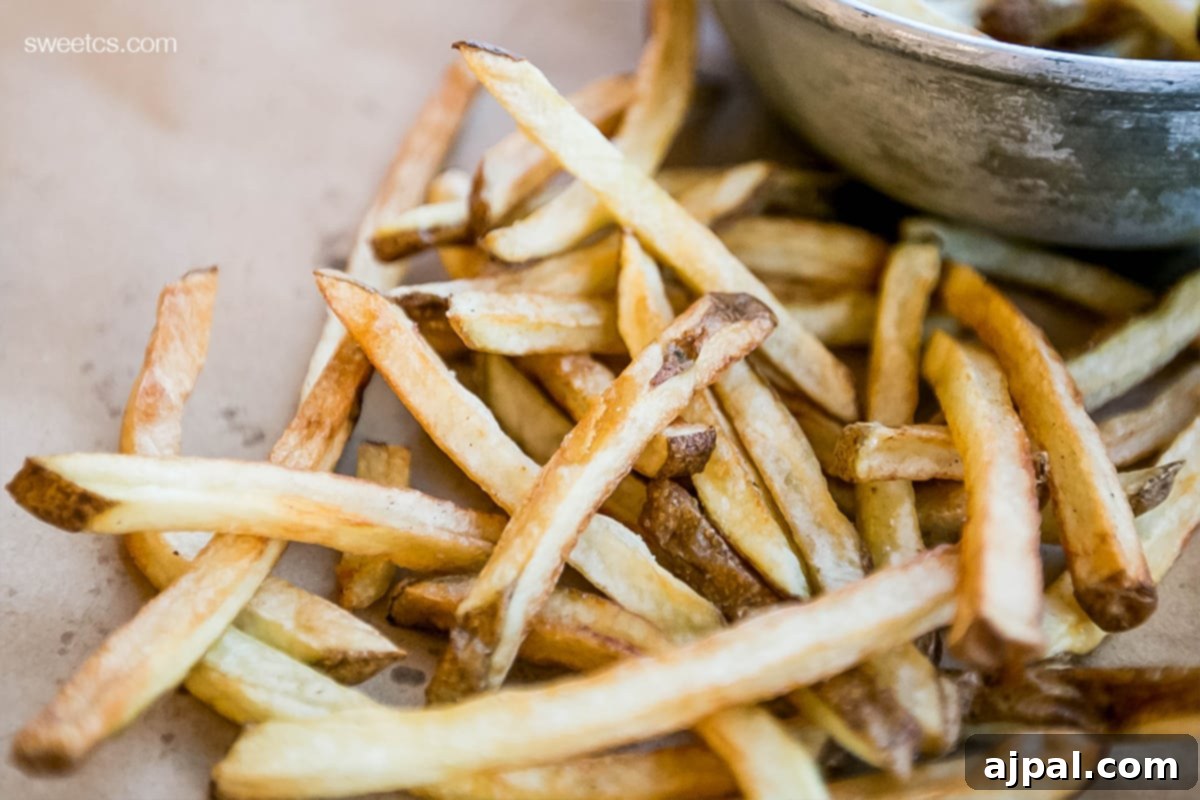
Creative Seasoning Ideas for Your Baked Fries
While classic sea salt and pepper are always a hit, these baked French fries are a fantastic canvas for a myriad of flavors. Experiment with these easy seasoning ideas to elevate your fries to new culinary heights, or let them inspire your own unique combinations:
- Garlic Parmesan Bliss: After tossing with olive oil, sprinkle with garlic powder, then immediately after baking, toss with grated Parmesan cheese and finely chopped fresh parsley. The residual heat will melt the cheese slightly and release the herb’s aroma.
- Spicy Cajun Kick: For a bold, zesty flavor reminiscent of your favorite fast-food chains, sprinkle a generous amount of Cajun seasoning over your fries along with the salt and pepper before baking. Adjust the quantity to your preferred spice level.
- Herbes de Provence Elegance: Transport your taste buds to the South of France by adding a touch of Herbes de Provence to your fries. This aromatic blend typically includes thyme, rosemary, oregano, and lavender, offering a fragrant and rustic twist.
- Smoky Paprika & Onion: Combine smoked paprika and onion powder with your salt and pepper for a deeper, more savory flavor profile. A pinch of chili powder can add a subtle warmth.
- Rosemary & Garlic Infusion: Toss the fries with olive oil, minced fresh rosemary, and crushed garlic before baking. The herbs will become wonderfully fragrant and slightly crisp.
- Lemon Pepper Zest: For a bright and tangy kick, use lemon pepper seasoning. It pairs wonderfully with the earthiness of potatoes, especially if you’re serving them with fish or chicken.
- Truffle Treat: For a gourmet touch, drizzle your freshly baked fries with a tiny amount of truffle oil and a sprinkle of truffle salt (if available). This instantly transforms them into a luxurious side.
- Chili Lime Zing: A sprinkle of chili powder and a squeeze of fresh lime juice after baking can add a vibrant, spicy, and sour note. This is particularly delicious with a cooling sour cream dip.
- Everything Bagel Seasoning: For a trendy and savory twist, generously sprinkle everything bagel seasoning on your fries before baking. The blend of sesame seeds, poppy seeds, dried garlic, and onion will create an incredibly flavorful crust.
Don’t be afraid to mix and match or adjust quantities to suit your taste. The beauty of homemade fries is the ability to customize them exactly to your liking!
Serving Suggestions & Pairing Baked Fries
Our crunchy baked fries are incredibly versatile and make a perfect accompaniment to a wide array of meals. Here are some ideas to inspire your next dinner:
- Classic Comfort: Pair them with juicy homemade burgers, sloppy joes, or grilled cheese sandwiches for the ultimate comfort food experience.
- Lean Proteins: They complement grilled chicken breasts, baked fish fillets, or pan-seared pork chops beautifully, adding a satisfying crunch without overpowering the main dish.
- Hearty Sides: Serve alongside a hearty chili, a rich stew, or even a fresh green salad for a balanced and fulfilling meal.
- Dipping Sauces Galore: While delicious on their own, don’t forget the power of a good dipping sauce! Ketchup, mayonnaise, spicy sriracha mayo, tangy barbecue sauce, a creamy ranch, or even a homemade garlic aioli can elevate the experience. Consider a simple seasoned sour cream for an easy, flavorful dip.
- Family Dinner Hero: These fries are a crowd-pleaser and ideal for family dinners or casual get-togethers. They’re easy to scale up for larger groups and always disappear quickly!
Whatever you choose to pair them with, these crispy baked fries are sure to be a delightful addition to your meal.
Storing & Reheating Baked Fries
This recipe for crunchy baked fries is typically best enjoyed immediately after baking to experience them at their crispiest peak. However, if you find yourself with leftovers (a rare occurrence!), here’s how to properly store and reheat them to minimize sogginess and revive some of their crunch:
Storage:
- Allow the fries to cool completely to room temperature before storing. This prevents condensation from forming and making them soggy.
- Transfer the cooled fries to an airtight container or a resealable bag.
- Store in the refrigerator for up to 3-4 days.
Reheating for Best Results:
Reheating fries effectively is about removing moisture and quickly crisping the exterior. Avoid the microwave, as it will only make them soft and rubbery.
- Oven Method (Recommended):
- Preheat your oven to 400°F (200°C).
- Place a baking sheet in the oven while it preheats to get it hot.
- Once the oven and sheet are hot, spread the leftover fries in a single layer on the hot baking sheet.
- Bake for 5-10 minutes, or until heated through and crispy. Watch them closely to prevent burning.
This method is excellent for restoring much of their original crispness.
- Air Fryer Method (Highly Recommended):
- Preheat your air fryer to 350-375°F (175-190°C).
- Place the leftover fries in the air fryer basket in a single layer (you may need to do this in batches).
- Cook for 3-6 minutes, shaking the basket halfway through, until they are hot and crispy.
The air fryer is a fantastic tool for reheating fries, often making them nearly as good as fresh!
- Stovetop Method (Quick & Flavorful):
- Heat a large non-stick skillet over medium-high heat with a dash of olive oil (and perhaps some minced garlic or a pinch of herbs for extra flavor).
- Once the oil is hot, add the fries in a single layer.
- Cook for 3-5 minutes, tossing frequently, until they are hot and re-crisped.
This method is great if you have a smaller batch or want to infuse them with new flavors.
For an amazingly delicious way to transform leftover fries, check out my recipe for Turn Leftover Fries into Garlic Truffle Fries – it’s a shockingly simple and incredibly tasty way to repurpose them!
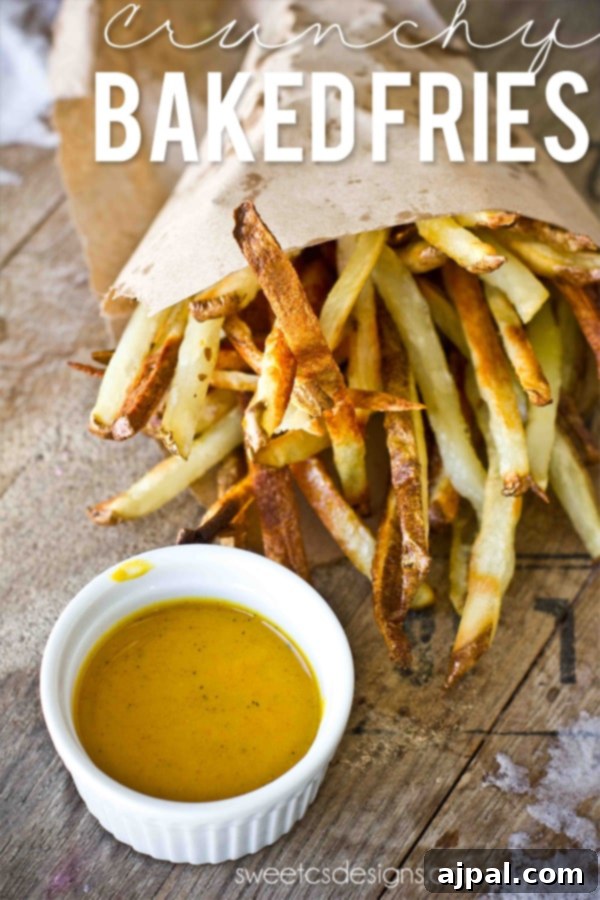
If you’ve enjoyed making these best easy crunchy baked fries, please consider giving the recipe a five-star review! Your feedback helps other home cooks discover and enjoy this delicious recipe. Don’t forget to share your creations on Facebook and Pinterest – we love seeing your culinary triumphs!

Only have 30 minutes to get dinner on the table? Sign up for my 30-minute dinner plans direct to your inbox!
Find and shop my favorite products in my Amazon storefront here!
Crunchy Baked Fries
Share by Email
Print Recipe

Crunchy baked French fries offer a delightful blend of golden-crisp exteriors and tender interiors, seasoned to perfection with a subtle hint of earthy potato goodness.
Equipment
- USA Pan Bakeware Half Sheet Pan, Set of 2, Aluminized Steel
- Befano Potato Slicer Fry Cutter for French Fries with 1/2-Inch and 3/8-Inch Blade Great for Potato, French Fries, Cucumber Vegetables Carrot, Stainless Steel
Ingredients
- 3 large russet potatoes
- 2-3 tablespoons olive oil
- Sea salt and pepper, to taste
Instructions
- Using a mandoline, slice the potatoes into fries. Don’t worry too much about the exact size; some variation is fine!
- Place the sliced potatoes in a cool water bath, ensuring they are completely submerged.
- Let fries soak for at least one hour. This step removes excess starch, which helps the fries crisp up better in the oven.
- After soaking, drain the water thoroughly and pat the fries very dry with a paper towel or clean dish towel.
- Toss the dried fries with 2-3 tablespoons of olive oil, salt, and pepper until evenly coated.
- Spread the fries out onto one or two baking sheets that have been generously sprayed with cooking spray or lightly oiled. Ensure fries are in a single layer and not overcrowded.
- Bake at 400°F (200°C) for about 30 minutes, or until the fries start to soften and turn slightly golden.
- Stir or flip the fries at this point to prevent excessive sticking and ensure even cooking on all sides.
- Increase the oven temperature to 450°F (230°C) and continue baking for another 20-30 minutes, or until crisp and golden brown.
- If you’re in a hurry for extra crispness, you can turn on the broiler for the last 3-5 minutes. Watch them very closely and stir frequently to ensure even browning and prevent burning.
Nutrition
Serving: 1g | Calories: 205kcal | Carbohydrates: 32g | Protein: 4g | Fat: 7g | Saturated Fat: 1g | Polyunsaturated Fat: 6g | Sodium: 70mg | Fiber: 3g | Sugar: 2g
Nutrition information is automatically calculated and should only be used as an approximation.
Additional Info
Tried this recipe?
Mention @sweetcsdesigns or tag #sweetcsdesigns!
More Delicious Recipes You’ll Love
Air Fryer Cajun Turkey Breast
Herb Roasted Turkey in a Bag
Easy Cranberry Fluff Salad
Cranberry Bars
Dilly Bread Recipe
Cabbage and Noodles
Lemon Chicken Tortellini Soup
Cranberry Chutney
Also be sure to try my other popular recipes like The Best Air Fryer French Fries Recipe, Easy Fogo De Chao Brazilian Cheese Bread Copycat Recipe, Easy Baked Sweet Potato Chips, Paleo Garlic Parmesan Zucchini Fries, Cheesy Sausage Potatoes and Cabbage, One Pot Cheesy Taco Skillet, The Best Easy Slow Cooker Shredded Chicken Recipe, The Best Baked Garlic Pork Tenderloin, and Easy Baked Pork Chops Recipe.