

My delightfully tangy sourdough English muffins boast a crisp, golden crust and a remarkably soft, airy interior. Each muffin is riddled with those coveted “nooks and crannies,” eagerly awaiting generous dollops of butter and your favorite jam. This simple yet rewarding sourdough English muffin recipe is destined to become a beloved breakfast staple in your home, offering a gourmet experience with every bite.

Looking for just the recipe? We’ve made it easy for you! Scroll down to the clickable table of contents just below, or simply navigate directly to the recipe card to get started right away.
Here at our kitchen, we believe that understanding the ‘why’ behind each step and ingredient empowers even the most beginner home cook. As a self-taught enthusiast, my goal is to demystify baking and cooking, helping you gain confidence in the kitchen. You’ll find plenty of detailed tips and explanations throughout this post, ensuring your sourdough English muffins turn out perfectly every time.
Table of Contents
- The Magic of Tangy Sourdough English Muffins
- Why You’ll Love This Sourdough English Muffin Recipe
- How to Make Classic English Style Muffins
- Pro Tips and Tricks for Perfect Sourdough English Muffins
- Frequently Asked Questions About Sourdough English Muffins
- Delicious Pairings: What to Enjoy with English Muffins
- Sourdough English Muffins Recipe

The Magic of Tangy Sourdough English Muffins
Growing up, English muffins were a cherished breakfast treat in our family, always enjoyed with a generous spread of butter and homemade jam. I often wondered about their distinctive dark, slightly crispy sides and unique texture. It wasn’t until I saw an episode of The Great British Bake-Off, where English muffins were a challenge, that I learned their secret: they are cooked on a griddle or skillet, giving them that characteristic golden-brown exterior dusted with cornmeal.
These sourdough English muffins capture all the beloved qualities of the traditional version, but with an added depth of flavor from the natural fermentation process. The sourdough starter imparts a subtle, pleasing tang that elevates the entire experience, making them not just a vehicle for toppings, but a star in their own right. The key to achieving truly excellent sourdough English muffins lies in starting with a vibrant, active sourdough starter and carefully controlling the cooking temperature. A medium-low to low heat is crucial, allowing the muffins to cook through to the center without burning the exterior, developing that perfect balance of crispness and fluffy interior.
Beyond their incredible taste and texture, homemade sourdough English muffins offer a wonderful sense of accomplishment. They’re a testament to the magic of slow fermentation and simple ingredients. We encourage you to try this recipe, explore the creative possibilities for toppings, and make these British-style delights a new favorite in your kitchen!
Why You’ll Love This Sourdough English Muffin Recipe
- Unforgettable Flavor: The sourdough starter infuses these muffins with a distinct, complex tang that sets them apart from store-bought versions.
- Perfect Texture: Expect a delightful contrast – a crisp, golden exterior gives way to an incredibly soft, airy interior brimming with those iconic nooks and crannies.
- Versatile Breakfast Staple: Whether topped with sweet jam, savory eggs, or used as a base for a delicious sandwich, these muffins are endlessly adaptable.
- Uses Sourdough Discard (or Active Starter): This recipe is fantastic for utilizing your sourdough starter, ensuring nothing goes to waste while creating something truly delicious.
- Rewarding Baking Experience: While requiring some patience for fermentation, the hands-on process is incredibly satisfying, leading to homemade goodness you’ll be proud of.
- Healthier Alternative: Sourdough fermentation can improve the digestibility of grains, making these a potentially healthier choice than conventional muffins.

How to Make Classic English Style Muffins
Crafting perfect sourdough English muffins at home is an incredibly rewarding experience. The process, while requiring a bit of patience for the fermentation, is straightforward and yields truly superior results compared to anything you can buy. Let’s gather our simple ingredients and walk through the steps to create these delightful breakfast treats.
Essential Ingredients:
- Active Sourdough Starter (½ cup) – The heart of our muffins! A bubbly, well-fed, active sourdough starter is paramount. It’s responsible for the signature tangy flavor and provides the natural leavening that creates the airy texture and characteristic “nooks and crannies.” Ensure it’s active and doubled in size before you begin.
- Honey (1 tablespoon) – A touch of natural sweetness from honey not only complements the sourdough’s tanginess but also aids in browning and creates a more tender crumb. Maple syrup can be a great alternative if you prefer.
- Milk (1 cup) – Warm milk contributes to a beautifully soft and tender crumb. It also enriches the dough, lending a fuller, more satisfying flavor to the final muffins. Whole milk is recommended for the best results.
- All-purpose flour (3 cups) – This forms the primary structure of our English muffins. It provides the necessary gluten development for chewiness while remaining light enough to allow for a fluffy interior. Using a good quality all-purpose flour will make a noticeable difference.
- Sea salt (1 teaspoon) – Beyond simply seasoning, sea salt plays a crucial role in strengthening the dough’s gluten structure, which is essential for that perfect rise and texture. It also balances and enhances all the other flavors.
- Cornmeal (1/3 cup) – This is the secret to the English muffin’s iconic exterior! A generous dusting of cornmeal on your work surface and the muffins themselves prevents sticking and, most importantly, creates that distinctive crispy texture and slightly gritty bottom when cooked on a griddle.

Step-by-Step Method:
Step 1: Activate Your Sourdough Starter. Begin the night before you plan to bake. In a clean jar, combine the necessary ingredients to create ½ cup of active sourdough starter. Stir thoroughly until all components are well integrated. Loosely cover the jar and allow the starter to rise at room temperature (ideally between 70-75°F or 21-24°C). By the next morning, your sourdough starter should be vibrant and ready: it should have noticeably doubled in size, exhibiting numerous bubbles on its surface and along the sides of the jar. This active state is crucial for the muffins’ rise and tangy flavor.
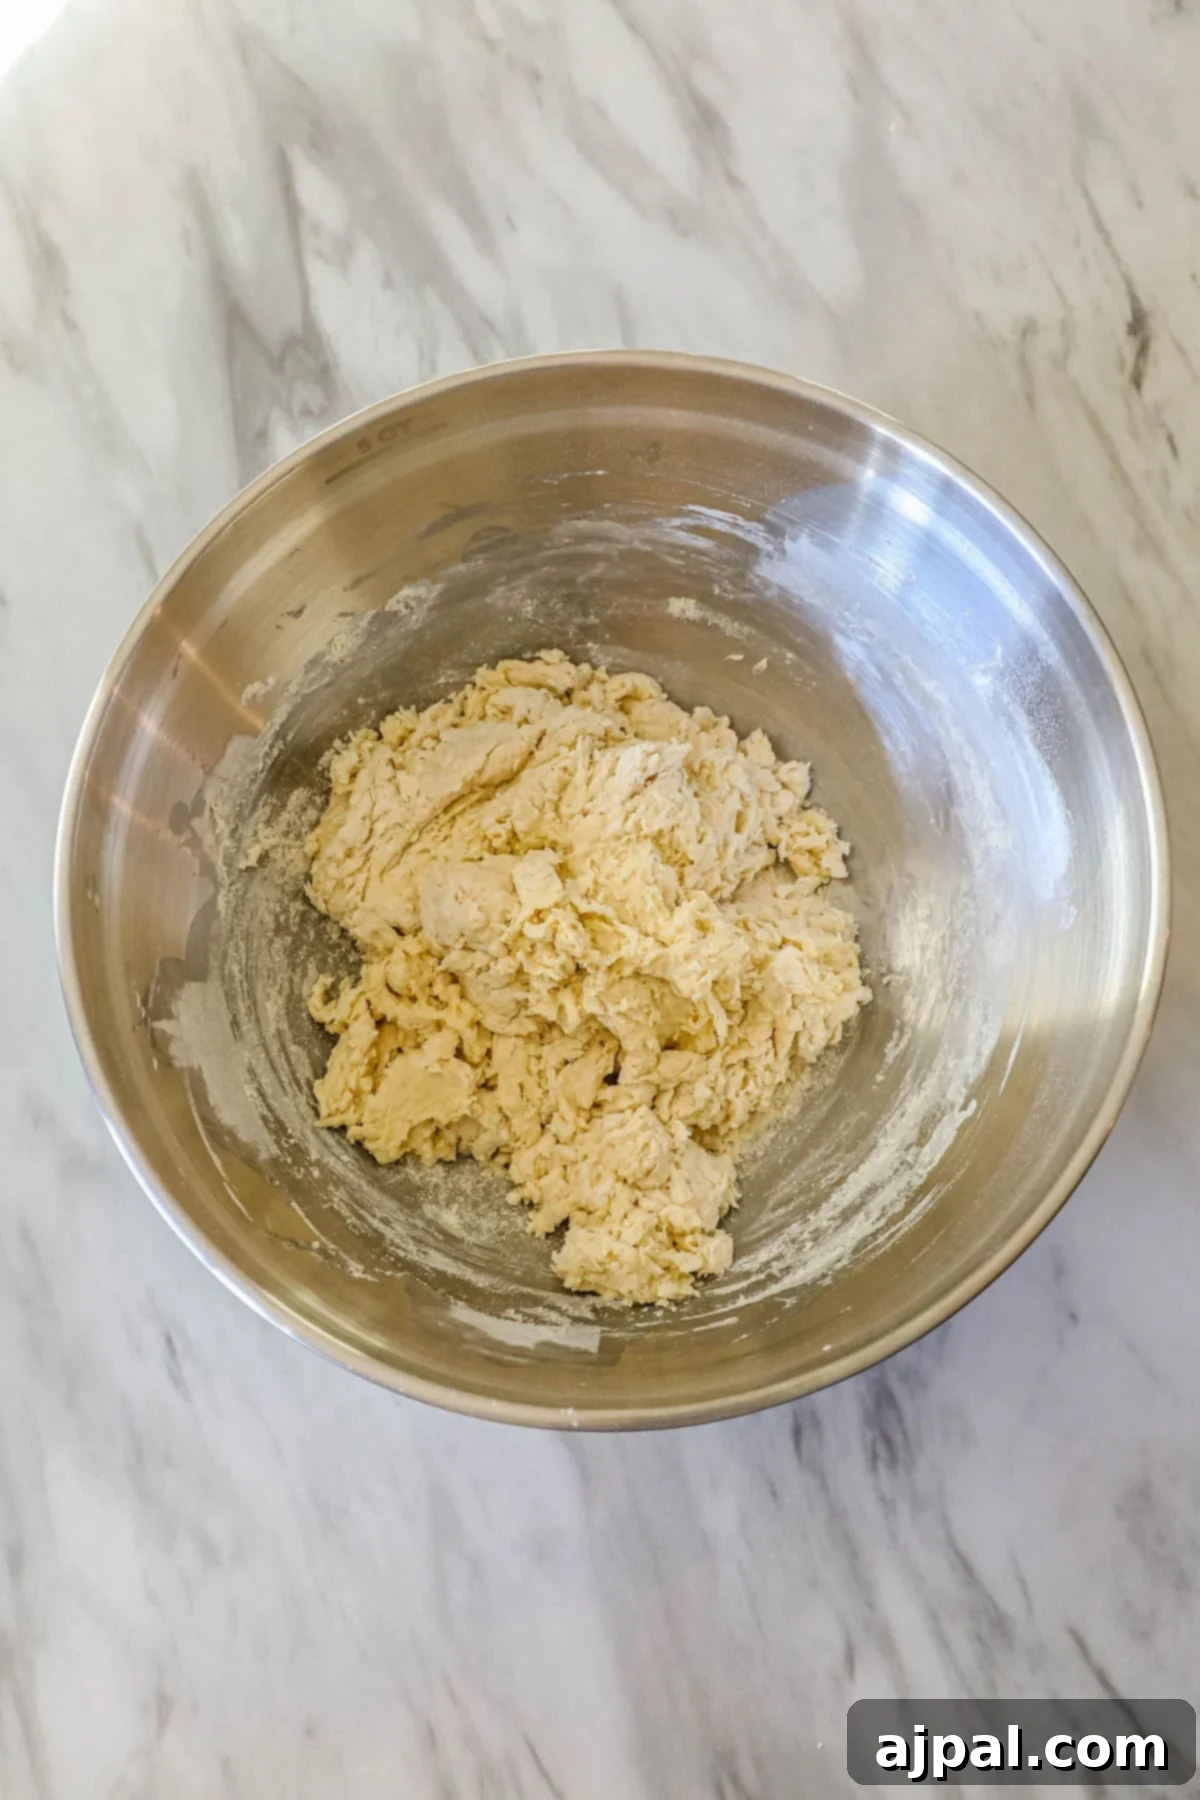
Step 2: Combine and Rest the Dough. Into a large mixing bowl, add the ½ cup of your now active sourdough starter, along with the honey, warm milk, all-purpose flour, and sea salt. Reserve the cornmeal for later. Using your hands, mix these ingredients until they are just combined and form a shaggy dough. Cover the bowl with a clean kitchen towel or plastic wrap and let the dough rest for 30-60 minutes. This resting period, known as autolyse, allows the flour to fully hydrate and the gluten to begin developing, making the subsequent kneading much easier and more effective. After resting, turn the dough out onto a lightly floured surface and knead it by hand for approximately 5 minutes until it becomes smooth and elastic. Alternatively, a stand mixer fitted with a dough hook can be used on the lowest speed for the same duration.
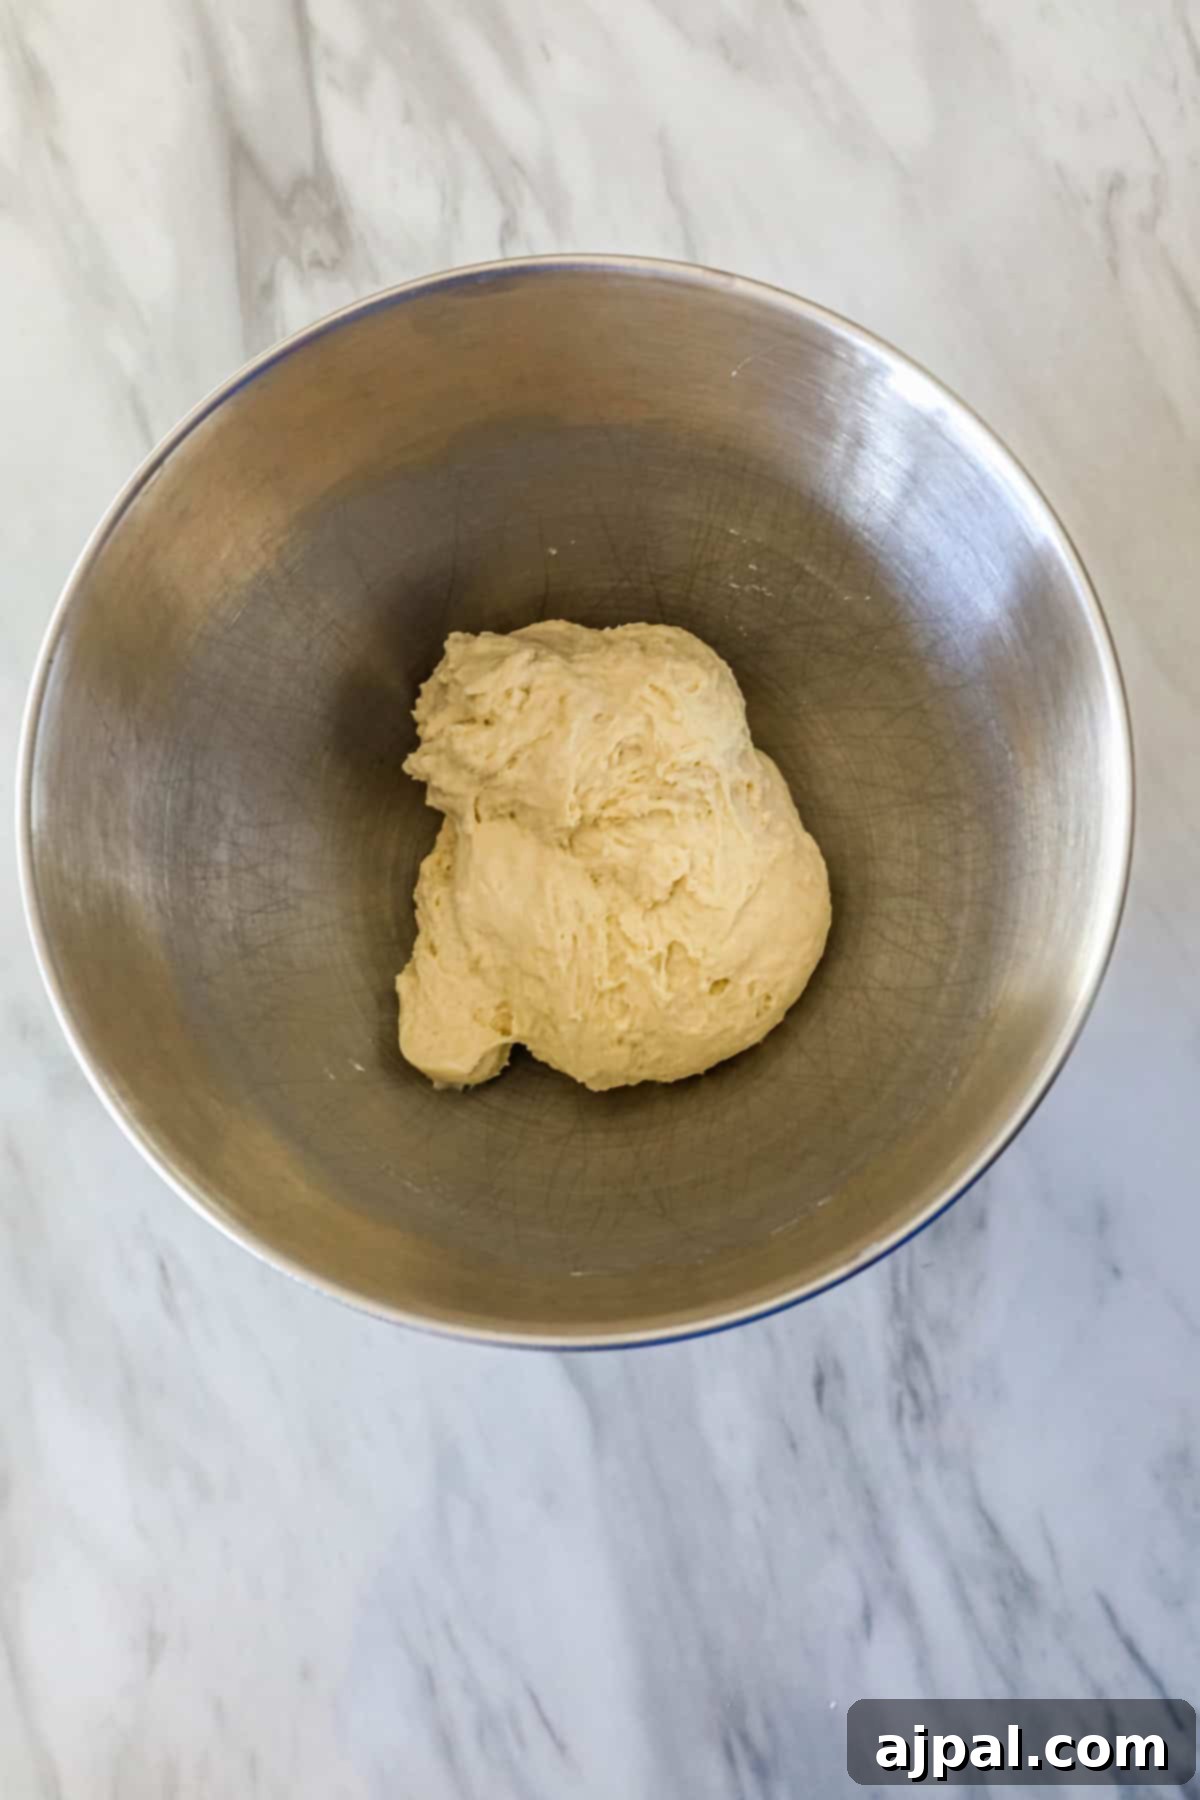
Step 3: Bulk Fermentation. Return the kneaded dough to the bowl, cover it securely, and allow it to undergo a bulk fermentation on your kitchen counter at room temperature for 8-12 hours. The precise time will depend on your room temperature and the vigor of your starter. During this extended period, the dough should significantly increase in size (often doubling or nearly tripling) as the sourdough cultures work their magic, developing complex flavors and gases that will create the signature airy texture. A cool room will require a longer fermentation, while a warmer environment will accelerate the process.
Step 4: Shape the Muffins. Once the bulk fermentation is complete, gently turn the dough out onto a generously floured surface. Lightly flour the top of the dough as well to prevent sticking. Using your fingertips, or a rolling pin if preferred, gently press the dough out until it reaches a uniform thickness of about ½ inch. Avoid overworking the dough at this stage to maintain its delicate structure.
Step 5: Cut and Proof. Take a 3-inch biscuit cutter and carefully cut out individual rounds from the dough. Try to cut as close together as possible to minimize scraps. Gather any remaining dough, gently re-knead it a couple of times, let it rest for 10 minutes, and then roll and cut more muffins. Line a baking sheet with parchment paper and generously sprinkle it with cornmeal. Place the cut dough rounds on the cornmeal-dusted parchment, ensuring a little space between each. Sprinkle the tops of the muffins with additional cornmeal. Cover the baking sheet with a clean tea towel and allow the muffins to proof at room temperature for another 1 hour. During this final proofing, the muffins should puff up slightly, indicating they are ready for cooking.
Step 6: Cook to Golden Perfection. Heat a nonstick skillet or cast-iron griddle over low to medium-low heat. This slow, gentle heat is paramount for English muffins, ensuring they cook through evenly without burning. Carefully place the proofed muffins onto the heated pan, making sure not to overcrowd them. Cook for approximately four to six minutes on each side, or until they develop a beautiful light golden-brown crust and are cooked all the way through the center. You may need to adjust the heat slightly to maintain a gentle sizzle. Once cooked, transfer the English muffins to a wire rack to cool slightly. Enjoy them warm, split with a fork, and slathered with your favorite toppings!

Pro Tips and Tricks for Perfect Sourdough English Muffins
Achieving bakery-quality sourdough English muffins at home is easier than you think with these expert tips:
- Ensure an Active Starter: The foundation of great sourdough. Your starter should be fed 4–6 hours before mixing the dough and show clear signs of activity: it should be bubbly, active, and have roughly doubled in volume. A strong starter provides the necessary lift and tangy flavor.
- Embrace Long Fermentation for Depth of Flavor: While quicker methods exist, an overnight bulk fermentation (8-12 hours at room temperature, or up to 24 hours in the fridge) is key to developing that deep, complex sourdough tang and improving the digestibility of the bread. Patience truly pays off here.
- Mind the Dough Hydration: Sourdough English muffin dough is characteristically soft and slightly sticky. It shouldn’t be overly stiff, as this can lead to tough muffins. If your dough feels too dry, add a tiny bit more milk (a teaspoon at a time). If it’s too wet to handle, lightly dust your hands and work surface with flour, but avoid adding excessive amounts to the dough itself.
- Avoid Over-Kneading: Unlike some traditional bread doughs that require extensive kneading, English muffin dough benefits from moderate kneading. Over-kneading can develop too much gluten, resulting in a dense, rather than airy, texture. Aim for a smooth but still somewhat soft and manageable dough.
- Generous Cornmeal Application: This isn’t just for looks! Dust your work surface, baking sheet, and the tops of your cut muffins generously with cornmeal or fine semolina. This prevents sticking, facilitates easy flipping, and creates the classic crispy, slightly textured bottom and top crust that defines English muffins.
- Roll Dough Evenly: Strive for a consistent thickness of ½ to ¾ inch when rolling out your dough. Uniform thickness ensures that all your muffins cook evenly and rise consistently, giving you a batch of perfectly formed treats.
- Cut Cleanly, Don’t Twist: Use a sharp 3-inch biscuit cutter for clean edges. When cutting, press straight down and lift; avoid twisting the cutter. Twisting can seal the edges of the dough, which can impede the proper rise and prevent those desirable nooks and crannies from forming.
- Proper Proofing is Crucial: After cutting, arrange your muffins on the cornmeal-dusted baking sheet and allow them a final proof for about 1–2 hours at room temperature. They should look noticeably puffy and lighter before heading to the skillet. This second rise contributes to their airy internal structure.
- Low and Slow Cooking: The most important cooking tip! English muffins require gentle, consistent heat. Use a cast-iron skillet or griddle over low to medium-low heat. High heat will quickly burn the exterior, leaving the inside raw. Cook them slowly, allowing the heat to penetrate and cook the muffin through without scorching.
- Dry Cook for Classic Crust: For that authentic English muffin crust, cook them in a dry pan – no butter or oil is needed during the initial cooking phase. The cornmeal provides the non-stick surface and helps develop the crust.
- Gentle Flipping: Once the first side is golden brown (typically after 5-7 minutes), use a wide spatula to gently flip the muffins. Handle them with care to avoid deflating them.
- Check for Doneness: To ensure your muffins are perfectly cooked all the way through, an internal temperature of around 200°F (93°C) is ideal. A quick check with an instant-read thermometer will confirm they’re ready.
- Cool Before Splitting: Resist the urge to slice them immediately! Allow the muffins to cool slightly before splitting them open with a fork. This technique is essential for preserving and enhancing those magnificent nooks and crannies that trap butter and jam so beautifully.
- Always Toast Before Eating: While good fresh, sourdough English muffins are truly *transformative* when split and toasted. The toaster brings out their crispness and further highlights their texture.
- Smart Storage: Store your cooled English muffins in an airtight container at room temperature for up to 3 days. For longer enjoyment, they freeze beautifully for up to 3 months. Simply toast them straight from the freezer for a quick and delicious breakfast!
Frequently Asked Questions About Sourdough English Muffins
Yes, absolutely! An active and bubbly sourdough starter is critical for this recipe. It’s what gives the English muffins their distinctive tangy flavor and the necessary lift. Make sure to feed your starter 4–6 hours before you plan to mix your dough, ensuring it’s at its peak activity for the best results.
Technically, yes, you can opt for a shorter fermentation. However, to truly develop the deep, complex flavors and characteristic tang of sourdough, a long, slow fermentation – ideally overnight or even up to 24 hours – is highly recommended. A shorter fermentation will result in a milder flavor profile and possibly a less airy texture.
Sourdough dough, especially English muffin dough, is often intentionally wetter and stickier than traditional yeast doughs to achieve its airy interior. If it’s overly sticky and unmanageable, try lightly flouring your hands and your work surface. Avoid incorporating too much additional flour into the dough itself, as this can make your muffins dense and tough.
The “nooks and crannies” are a hallmark of a great English muffin! To achieve them, avoid over-kneading the dough, ensure it proofs properly, and most importantly, always split the muffins open with a fork rather than cutting them with a knife. Toasting them after splitting also enhances this delightful texture.
There could be a few reasons. First, your sourdough starter might not have been active enough. Ensure it was fed and bubbly before use. Second, the dough might not have proofed long enough, either during bulk fermentation or the final rise. Third, your cooking temperature on the skillet might be too high, causing the exterior to set too quickly before the interior has a chance to fully expand.
Yes, this recipe specifically calls for all-purpose flour, which works wonderfully for a tender crumb. If you were to substitute with bread flour (which has a higher protein content), your muffins might have a slightly chewier texture. In that case, you might also need to slightly increase the liquid (milk) as bread flour absorbs more.
This is almost always a sign that your cooking heat is too high. English muffins need to be cooked on low to medium-low heat in a dry pan. This allows the heat to gently penetrate and cook the interior fully while achieving a beautiful, light golden-brown exterior without scorching.
While a cast-iron skillet or a dedicated griddle provides excellent, even heat distribution for consistent results, any heavy-bottomed nonstick pan will work effectively. The key is to ensure the pan heats evenly to prevent hot spots that could burn your muffins.
To achieve the classic English muffin texture, cooking on the stove is preferred. However, if you want to ensure a fully cooked interior after browning them on the skillet, you can transfer them to an oven preheated to 375°F (190°C) for an additional 5-10 minutes. This can be particularly helpful for thicker muffins.
Once completely cooled, store your sourdough English muffins in an airtight container at room temperature for up to 3 days. For longer storage, they freeze exceptionally well for up to 3 months. Simply grab them from the freezer and toast directly whenever you’re ready for a delicious breakfast!
Yes, this recipe can easily be adapted for a vegan diet! Simply substitute the dairy milk with your favorite plant-based milk (almond, soy, or oat milk work well), and use maple syrup instead of honey. No other changes are typically needed as sourdough itself is naturally vegan.
Absolutely! Sourdough English muffins are wonderfully versatile. For a sweeter version, you can knead in a teaspoon of cinnamon and a tablespoon of sugar with the dry ingredients. For a savory twist, incorporate a ½ cup of shredded cheddar or Monterey Jack cheese and a tablespoon of fresh chives or dried herbs (like dill or rosemary) into the dough during the kneading stage.

Delicious Pairings: What to Enjoy with English Muffins
Sourdough English muffins are incredibly versatile, serving as a perfect canvas for both sweet and savory toppings. Their unique texture and tangy flavor complement a wide array of dishes. Here are some fantastic ideas to elevate your English muffin experience:
- Classic Breakfast Toppings:
- Butter and Jam/Marmalade: The timeless combination. The nooks and crannies are perfect for capturing melted butter and sweet fruit preserves.
- Cream Cheese: A creamy spread, perhaps with a sprinkle of everything bagel seasoning for a savory kick.
- Peanut Butter or Almond Butter: For a protein-packed and satisfying start to your day.
- Honey or Maple Syrup: Drizzle over toasted muffins for a simple, sweet treat.
- Savory Breakfast & Brunch Ideas:
- Eggs Benedict: The quintessential use for English muffins! Top with Canadian bacon, poached eggs, and hollandaise sauce.
- Breakfast Sandwiches: Create your own masterpiece with scrambled eggs, cheese, sausage, or bacon.
- Omelets or Frittatas: Serve alongside a fluffy omelet or a hearty frittata for a well-rounded meal. The muffin provides a great textural contrast.
- Avocado Toast Twist: Mash avocado with salt, pepper, and a squeeze of lime, then spread it generously over toasted English muffins. Add a fried egg or chili flakes for extra flair.
- Lunch & Dinner Explorations:
- Mini Pizzas: A quick and easy lunch! Top with marinara, mozzarella, and your favorite pizza toppings, then bake until bubbly.
- Open-Faced Sandwiches: Use them as a base for tuna melts, chicken salad, or even a classic club sandwich.
- Bruschetta: Toast English muffin halves, rub with garlic, and top with fresh diced tomatoes, basil, and a balsamic glaze for an unexpected appetizer.
- Sliders: For BBQ night, use English muffins as a unique bun for pulled pork or BBQ chicken.
- Grilled Chicken or Salmon: Serve as a hearty side to grilled meats, perhaps with a dollop of fresh pesto or a spread.
- Appetizer & Dip Pairings:
- Charcuterie Board: Offer toasted English muffin pieces alongside cheeses, cured meats, olives, and various spreads.
- Hummus & Veggies: Use the toasted pieces as sturdy dippers for creamy hummus and fresh vegetable sticks.
- Spinach & Artichoke Dip: A warm, cheesy dip is heavenly when scooped up with crispy English muffin bites.
- Guacamole & Salsa: A fun and fresh alternative to chips for your favorite Mexican-inspired dips.
The possibilities are truly endless when it comes to enjoying your freshly baked sourdough English muffins. Don’t be afraid to experiment and discover your own perfect pairing!
Try these other delightful breakfast favorites:
The Best Blueberry Muffins
Easy Apple Fritter Bread Recipe
Easy Everything Low Carb Bagel
Cinnamon Apple Dutch Baby
If you loved this easy recipe for sourdough English muffins, please consider leaving a five-star rating and a comment below! Your feedback helps others discover and enjoy these delicious treats. We’d also be thrilled if you shared your creations with us on Instagram, Facebook, and Pinterest – be sure to tag us!
Share on Facebook
Share
Pin this now to find it later
Pin It
Follow on Instagram
Follow

Only have 30 minutes to get dinner on the table? Sign up for our exclusive 30-minute dinner plans direct to your inbox!
Find and shop my favorite kitchen and baking products in my Amazon storefront here!
Sourdough English Muffins
Katherine
12 muffins
20 mins
15 mins
12 hrs
Email Recipe
Print Recipe

Equipment
-
1 Amazon Basics Pre-Seasoned Cast Iron Skillet, 15-Inch
Ingredients
- ½ cup active sourdough starter
- 1 tablespoon honey, or maple syrup
- 1 cup whole milk
- 3 cups all-purpose flour
- 1 teaspoon sea salt
- ⅓ cup cornmeal, for sprinkling
Instructions
-
The night before you plan to make the English muffins, add the ingredients to make ½ cup of active sourdough starter to a clean jar. Stir until combined, loosely cover the jar and let the starter rise at room temperature (70-75°F / 21-24°C). The sourdough starter should be ready to use the next morning when it has doubled in size and there are plenty of bubbles on the surface and sides of the jar.
-
Add 1/2 cup of the active starter, 1 tablespoon honey (or maple syrup), 1 cup whole milk, 3 cups all-purpose flour, and 1 teaspoon sea salt to a large bowl. Use your hands to mix until well combined and a shaggy dough forms. Cover and let rest for 30-60 minutes. Turn the dough out onto a lightly floured surface and knead the dough by hand for 5 minutes until smooth and elastic. You can also use a stand mixer with a dough hook at the lowest speed for the same duration.
-
Place the dough back into the bowl, cover securely, and let it bulk ferment on the counter at room temperature for 8-12 hours. The dough size should significantly increase during this time (double or nearly triple), developing its characteristic flavor and texture.
-
Turn the fermented dough out onto a generously floured surface. Lightly flour the top of the dough and gently press it out using your fingertips or a rolling pin until it is ½” in thickness. Avoid overworking the dough.
-
Use a 3″ biscuit cutter to cut rounds from the dough. Place them on a parchment-lined baking sheet that’s been liberally sprinkled with cornmeal. Sprinkle the tops of the cut muffins with additional cornmeal, cover with a clean tea towel, and allow them to proof for 1 hour at room temperature. They should appear slightly puffy.
-
Heat a nonstick pan or cast-iron griddle over low to medium-low heat. Place the proofed muffins on the pan, ensuring not to overcrowd it. Cook for about four to six minutes on each side until the muffins are a light golden-brown color and cooked through. Be careful to not burn the muffins. Transfer to a wire rack to cool slightly before splitting with a fork. Enjoy!
Nutrition
Calories: 148kcal
Carbohydrates: 29g
Protein: 4g
Fat: 1g
Saturated Fat: 0.5g
Polyunsaturated Fat: 0.3g
Monounsaturated Fat: 0.3g
Cholesterol: 2mg
Sodium: 202mg
Potassium: 79mg
Fiber: 1g
Sugar: 3g
Vitamin A: 33IU
Vitamin C: 0.01mg
Calcium: 30mg
Iron: 2mg
Nutrition information is automatically calculated and should only be used as an approximation.
Additional Info
Breakfast, Muffins
American
Tried this recipe?
Mention @sweetcsdesigns or tag #sweetcsdesigns!