
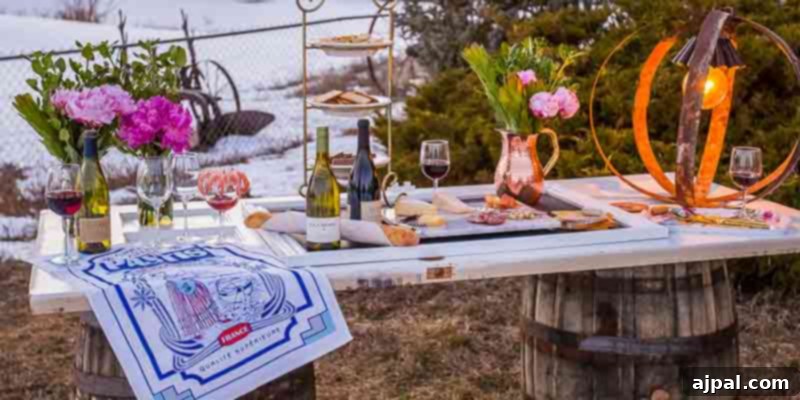
Transform discarded wine barrel rings into a captivating centerpiece with this incredibly easy and versatile rustic wine barrel ring light DIY project. Whether you’re looking for temporary party ambiance or a permanent, charming fixture for your home, this guide offers a simple, step-by-step approach. Best of all, it can be created entirely without tools for a quick, impactful setup, or with minimal drilling for a lasting piece of art. Embrace the beauty of reclaimed materials and infuse your space with unique character and warmth.
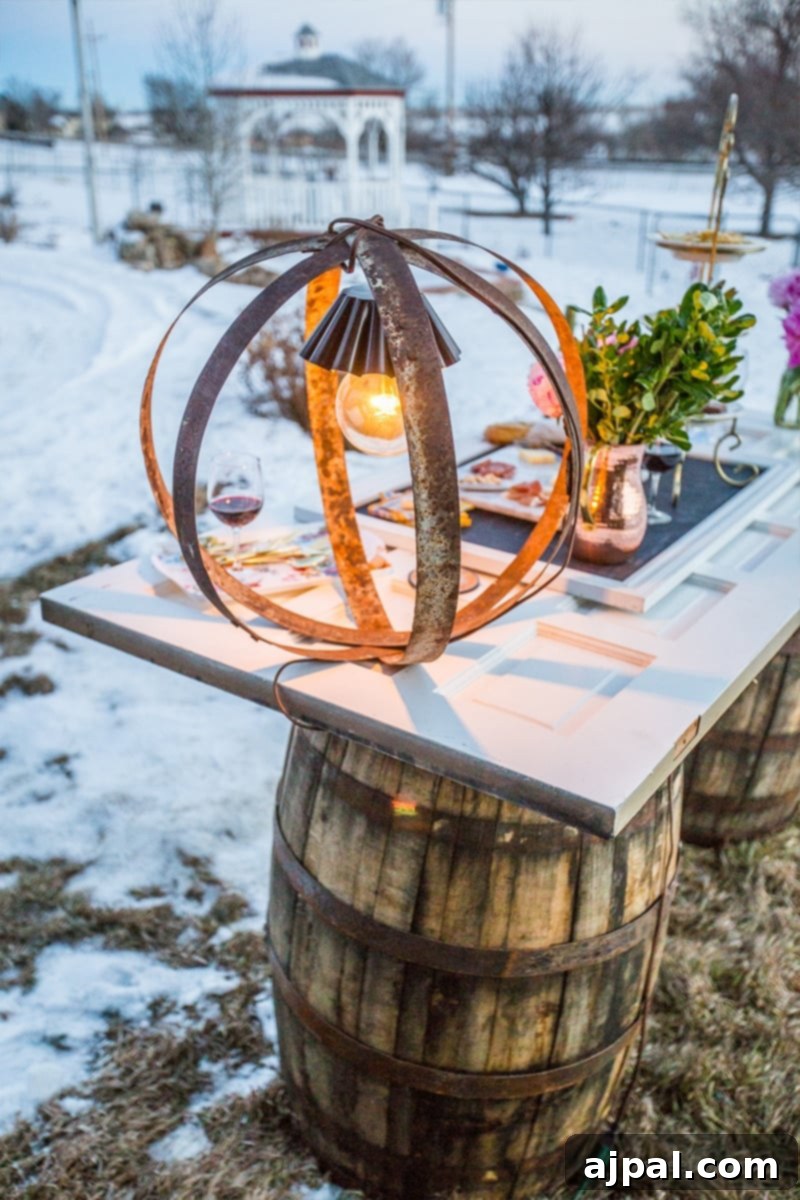
Embrace Rustic Charm: DIY Wine Barrel Ring Light for Any Occasion
There’s something uniquely satisfying about taking forgotten items and giving them new life. Our journey to creating this beautiful wine barrel ring light began with a recent move to my husband’s family farm. This transition wasn’t just about relocating; it was an adventure in merging lives, combining our possessions with generations of cherished family antiques and countless intriguing finds from my husband’s grandpa’s old barn. Amidst this exciting chaos, we stumbled upon a treasure trove of rustic potential: several old wine barrels and an astonishing collection of loose wine barrel rings.
For years, we had harbored the idea of transforming these robust wooden barrels into a unique outdoor table. However, the discovery of piles of metal rings sparked an even more exciting creative impulse. These sturdy, weathered bands, brimming with character, were just waiting for a purpose. The challenge was to harness their inherent rustic appeal into something both functional and beautiful, especially with a housewarming party on the horizon. I envisioned a setup that would perfectly complement the delicious food and exquisite La Crema Wines we planned to serve, celebrating our new chapter in a truly authentic way.
The Allure of Upcycled Wine Barrel Rings
Wine barrel rings possess a distinct charm that instantly elevates any decor. Their weathered finish, sturdy construction, and subtle curves tell a story of craftsmanship and history. Far from being mere discarded pieces of metal, they represent a sustainable approach to design, turning potential waste into striking home accents. For this project, I wanted to craft a light fixture that could serve multiple purposes: a captivating focal point for our party and a potential permanent addition to our home’s decor. The beauty of this particular DIY lies in its adaptability – it can be assembled without tools for a quick, impactful setup, or slightly modified for a more lasting installation.
Crafting Your DIY Wine Barrel Ring Light: Two Approaches
This project offers incredible flexibility, allowing you to choose between a quick, tool-free setup ideal for events and a more robust, permanent installation. Both methods yield a stunning rustic light fixture that will undoubtedly draw compliments.
Materials You’ll Need:
- Pendant Light: Opt for a plug-in pendant light. Mine was a stylish find from Urban Outfitters, but many home goods stores offer similar options. Look for one with an attractive cord, as it will be part of the design.
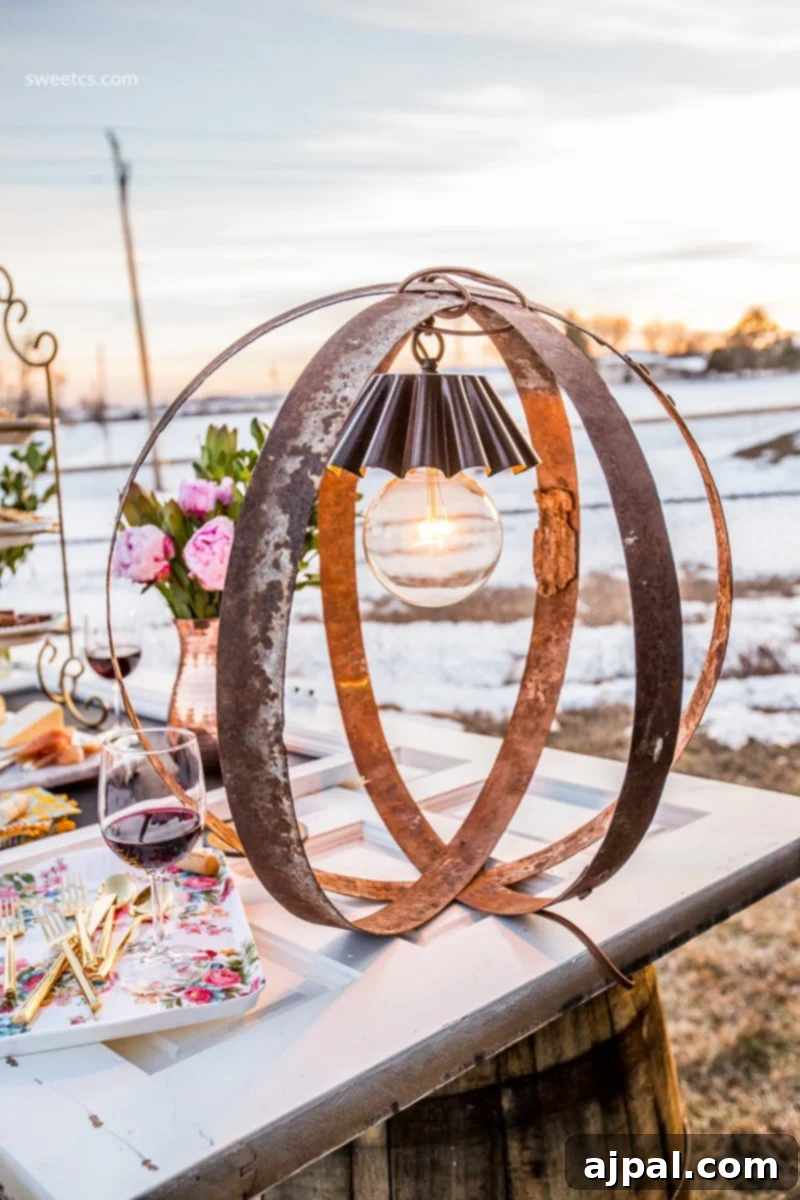
- Wine Barrel Rings: You’ll need three rings of approximately the same size to create a cohesive nested look. Their varying textures and patinas will add to the rustic appeal.
- Edison Bulb: A large, clear Edison bulb not only provides a warm, inviting glow but also complements the vintage, rustic aesthetic of the wine barrel rings beautifully.
Optional Materials for a Permanent Fixture:
- Drill: Essential for creating secure mounting points.
- Metal Drill Bit: Ensure it’s appropriate for drilling through the thick metal of the wine barrel rings.
- Long Threaded Screw: To securely fasten the pendant light within the ring structure.
- Locking Washer: Provides extra stability and prevents the screw from loosening over time.
Step-by-Step Guide: Assembling Your Rustic Light
Method 1: The Quick & Easy Tool-Free Option (Temporary Decor)
This method is perfect for events, parties, or when you want to quickly add a touch of rustic elegance without committing to a permanent fixture.
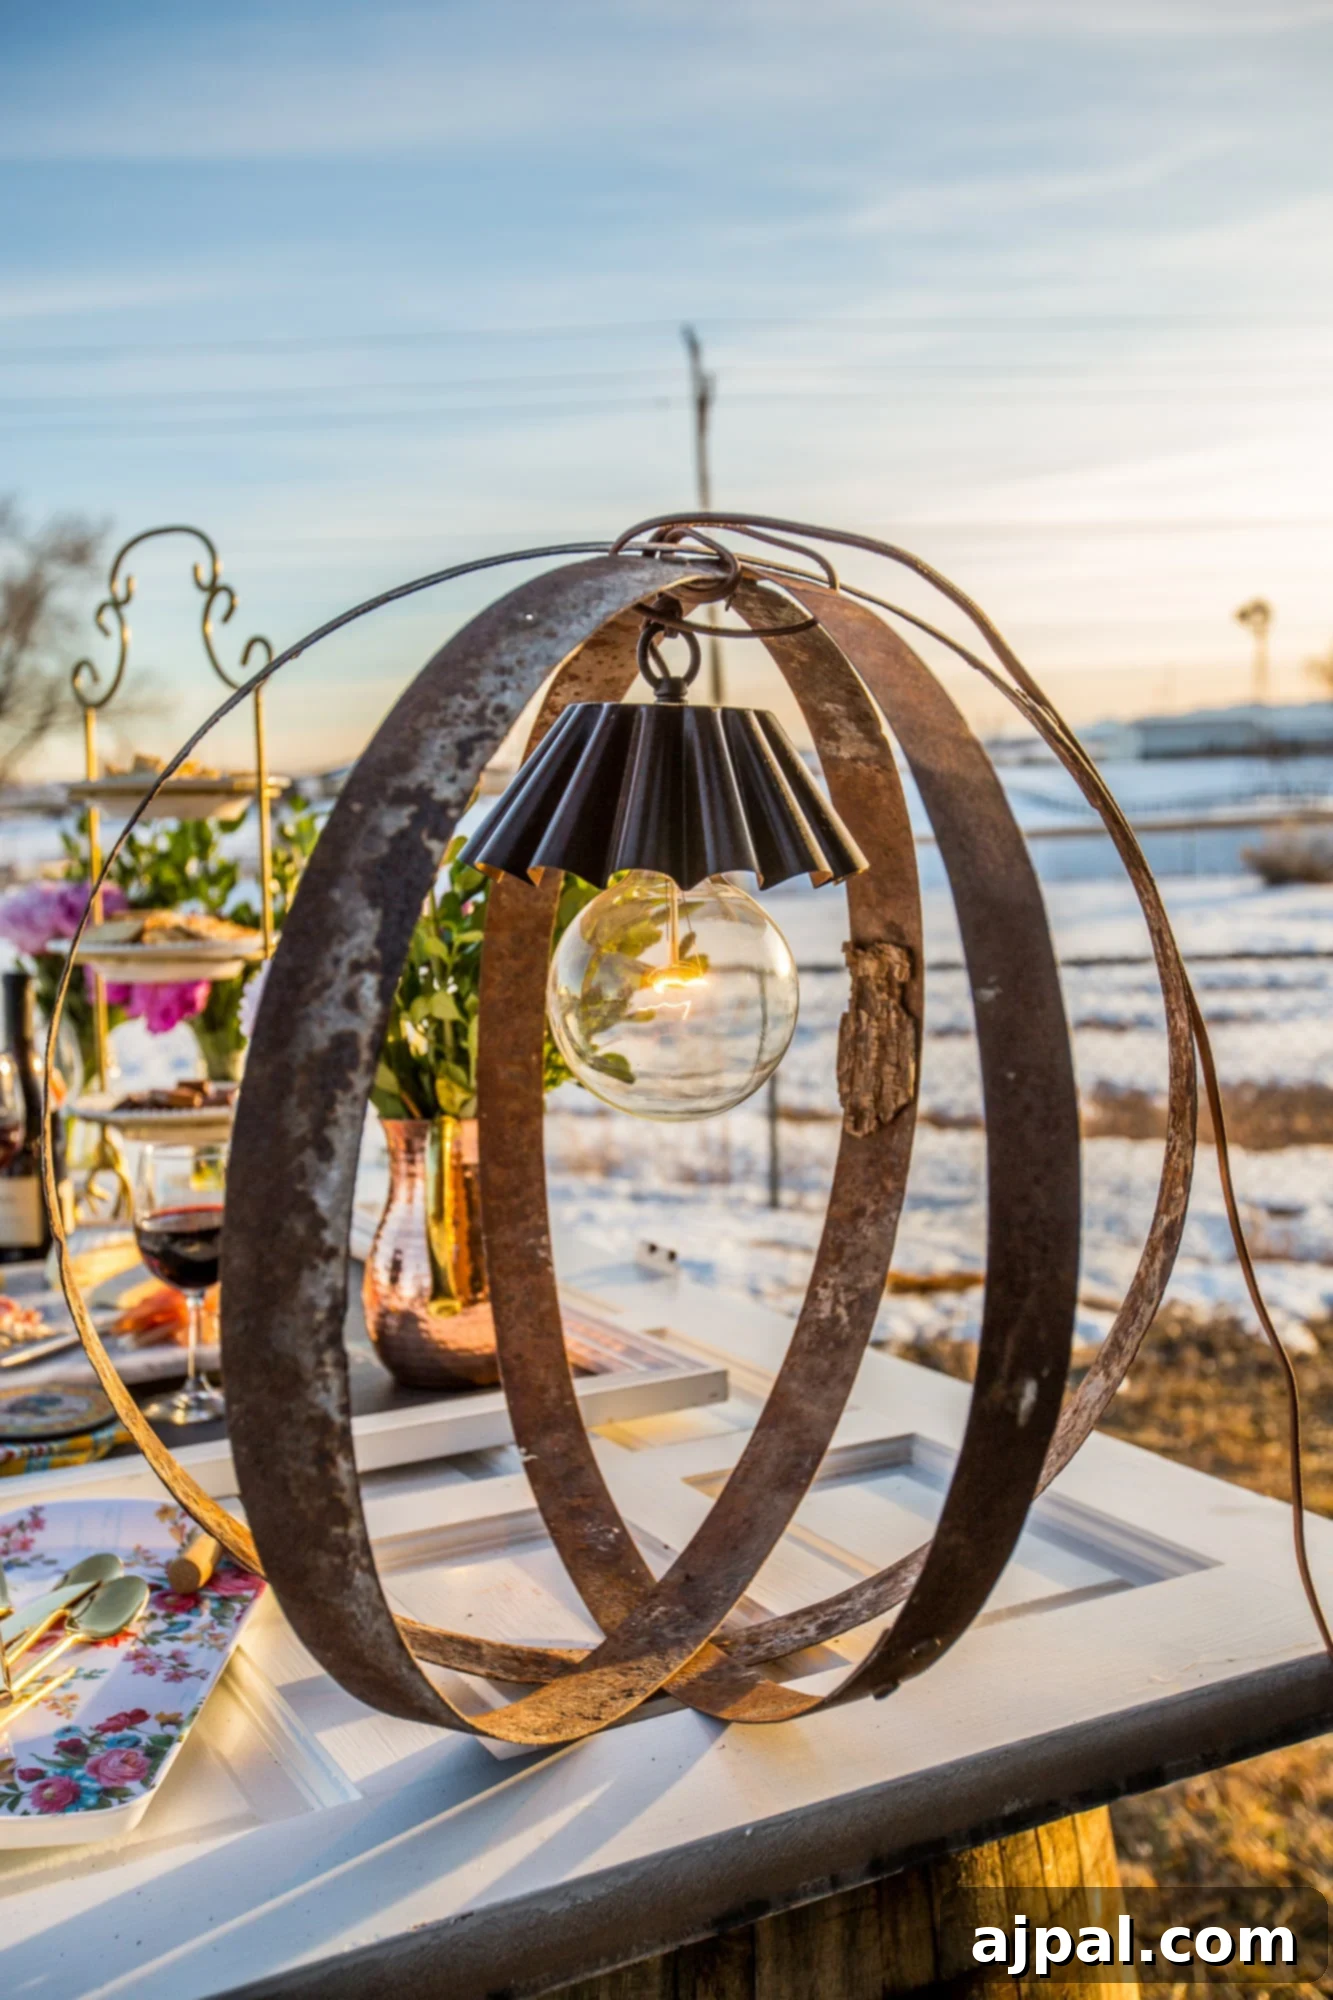
- Nest the Rings: Begin by arranging your three wine barrel rings. Gently slide the smaller rings inside the larger ones, carefully nesting them together. Experiment with different orientations and twists until you achieve a visually appealing, sculptural shape that you love. The goal is an organic, rustic cluster.
- Secure with the Pendant Cord: Holding the pendant light (without the bulb installed for safety) firmly in one hand, use your other hand to wrap its cord tightly around the nested rings. Weave the cord strategically, creating various patterns as you go. This serves two crucial purposes: it secures the rings firmly together, preventing them from sliding out of place, and it integrates the cord into the overall aesthetic. Ensure the cord is snug and holds the structure firmly.
- Final Touches and Placement: Once the rings are securely bound by the cord, plug in your pendant light and carefully screw in the Edison bulb. Your temporary rustic light is ready to illuminate! Place it on a table, a repurposed wine barrel, or any surface where its glow can enhance the atmosphere.
Important Safety Note: For this tool-free method, the lamp cord is solely for powering the bulb and securing the rings; it is not designed to bear the weight of the metal rings for hanging. Do not attempt to hang this version of the light from the lamp cord. If you wish to suspend it, ensure you hang it directly from the metal rings themselves using a separate, robust hanging mechanism designed for heavy loads.
Method 2: Creating a Permanent Rustic Fixture
For those seeking a lasting addition to their home decor, this method provides the necessary stability and durability.
- Initial Ring Arrangement: Follow the first step from the temporary method: nest and arrange your wine barrel rings into the desired sculptural form. Take your time to achieve the perfect aesthetic balance.
- Clamp for Stability: Once satisfied with the arrangement, securely clamp the rings together at a few points. This will prevent any movement and ensure stability while you drill, leading to precise holes and a sturdy final product.
- Drill the Bottom Hole: With the rings clamped, drill a small, precise hole through all three rings at the side that will ultimately become the bottom of your light fixture. This hole will serve as the entry point for securing your pendant.
- Secure the Pendant Light: Thread your long threaded screw through this newly drilled hole. Then, attach the pendant light to the screw, ensuring it’s centered and snug within the ring structure. Secure it firmly in place with a locking washer on the inside. This combination provides excellent stability for your fixture.
- Drill the Top Hole and Thread the Cord: Now, drill a second small hole through all three rings on the opposite side – this will be the top of your light fixture. Unlike the bottom, you won’t add a washer here. Instead, carefully thread the pendant lamp cord through this top hole. This will create a clean, integrated look and provide a secure pathway for the cord.
- Final Assembly and Hanging: Screw in your Edison bulb. If you intend to hang this permanent fixture from a ceiling, ensure you are hanging it directly from the sturdy metal wine barrel rings using appropriate hardware (e.g., chains, hooks, or a ceiling canopy designed for heavy light fixtures). Unless your pendant light specifically states it is designed to support significant weight, avoid hanging the entire fixture by the pendant’s electrical cord alone. Always prioritize electrical and structural safety when installing permanent lighting.
Styling Your New Wine Barrel Light
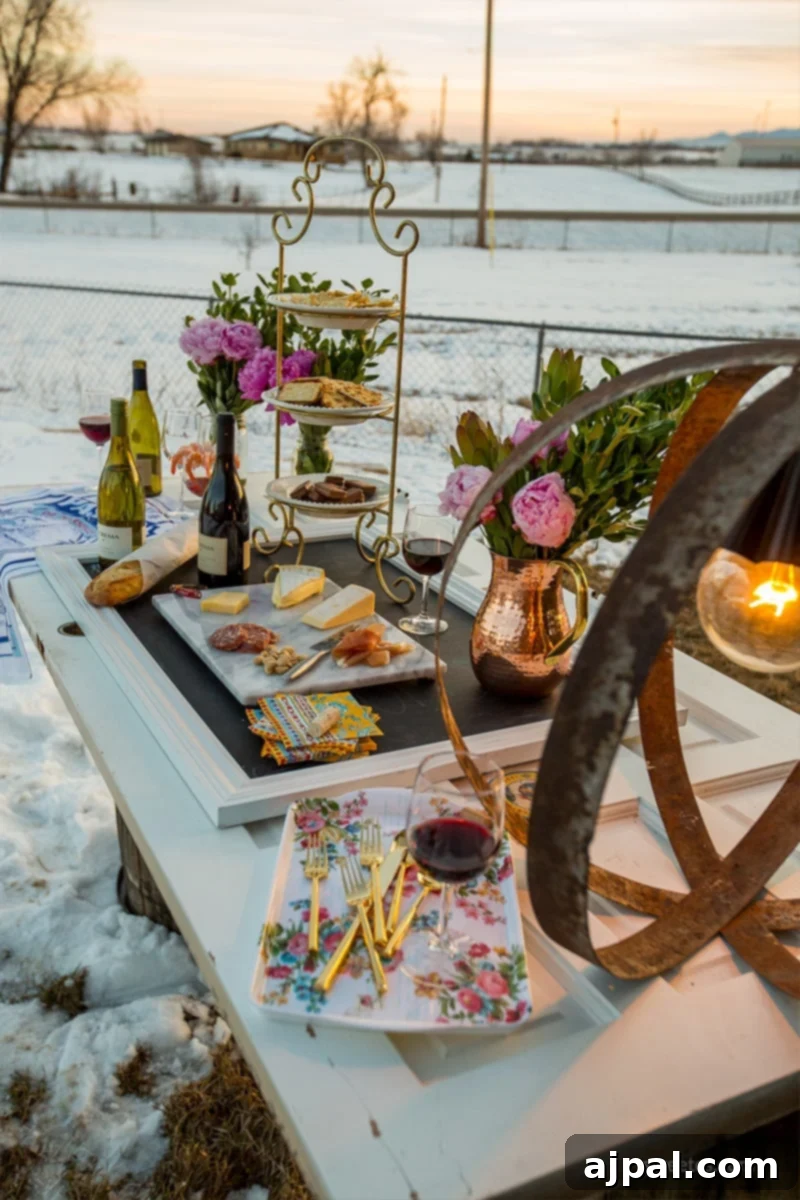
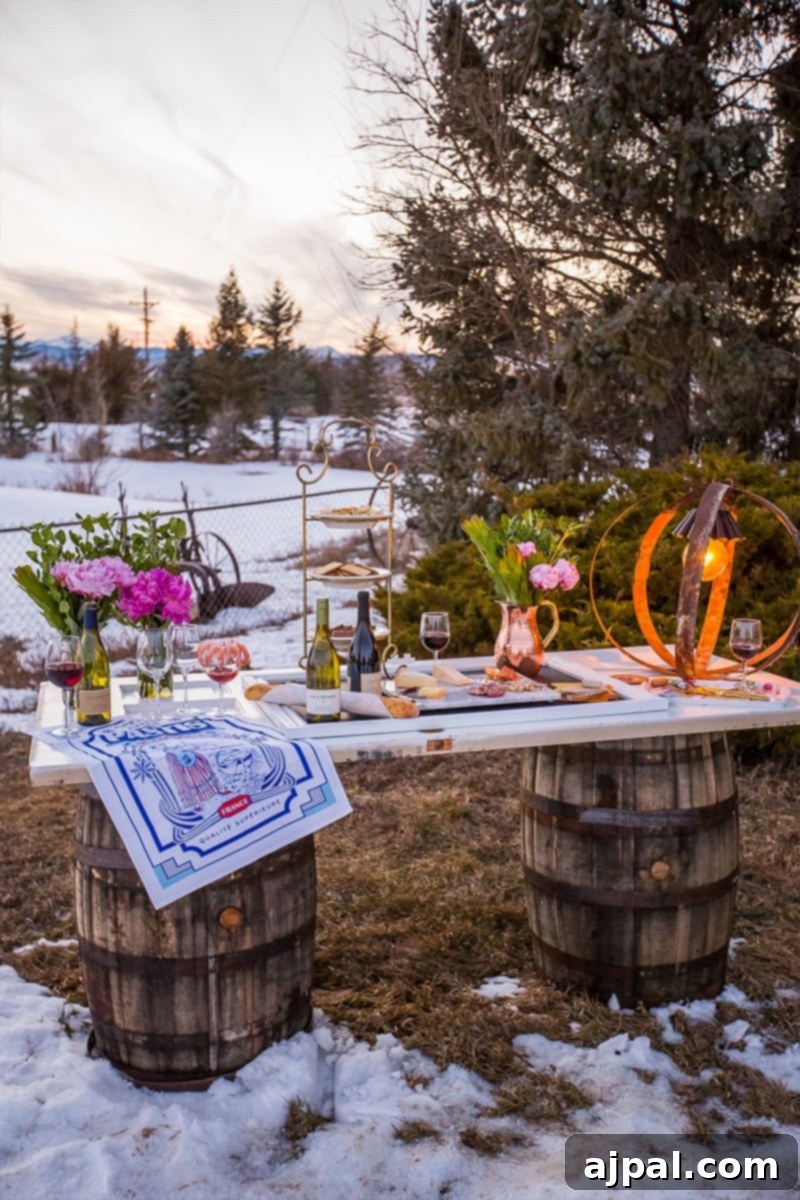
Once your rustic wine barrel ring light is complete, the styling possibilities are endless. Its unique blend of industrial and natural elements makes it a versatile piece for various decor themes. For our housewarming party, it served as a magnificent centerpiece on a reclaimed wine barrel table, perfectly setting the mood for an evening of delicious food and fine wine. Imagine it gracing a covered patio during a summer gathering, casting a warm, inviting glow as dusk settles.
This light can be a stunning addition to a farmhouse-style kitchen, a bohemian-inspired living room, or even a contemporary space seeking a touch of organic warmth. Pair it with other natural textures like distressed wood, linen fabrics, or potted greenery to enhance its rustic appeal. The warm amber glow of an Edison bulb further complements the metal, creating an ambiance that is both cozy and chic.
Beyond the Light: The Art of Reclaimed Decor
The beauty of this wine barrel ring light extends beyond its function; it embodies the spirit of creative reuse and sustainable living. In a world often driven by disposable trends, embracing reclaimed materials offers a refreshing alternative. Each scratch, dent, and patina on these rings tells a story, adding an authentic layer of history to your decor that new items simply cannot replicate. This philosophy applies to other projects as well. For instance, the accompanying table, a true showstopper at our party, was ingeniously crafted from reclaimed wine barrels and a salvaged door. It’s amazing what treasures you can create when you look at old items with fresh eyes!
For more details on how to construct that incredible wine barrel and old door table, be sure to visit the La Crema Blog. You’ll find a complete guide to turning forgotten pieces into functional and stunning furniture.
Conclusion: Illuminate Your Space with Unique DIY Style
Creating your own rustic wine barrel ring light is an incredibly rewarding project that brings unique character and a story to your home. Whether you opt for the simplicity of the tool-free method for your next garden party or the durability of a permanent fixture, you’re investing in a piece that speaks volumes about your style and appreciation for handcrafted beauty. It’s a testament to the fact that stunning decor doesn’t always come from a store, but often from creativity, ingenuity, and a little bit of reclaimed charm. So gather your rings, unleash your inner DIY enthusiast, and let your space shine with this gorgeous, easy-to-make rustic light. Enjoy the journey of creation, and revel in the warm glow of your unique design!