
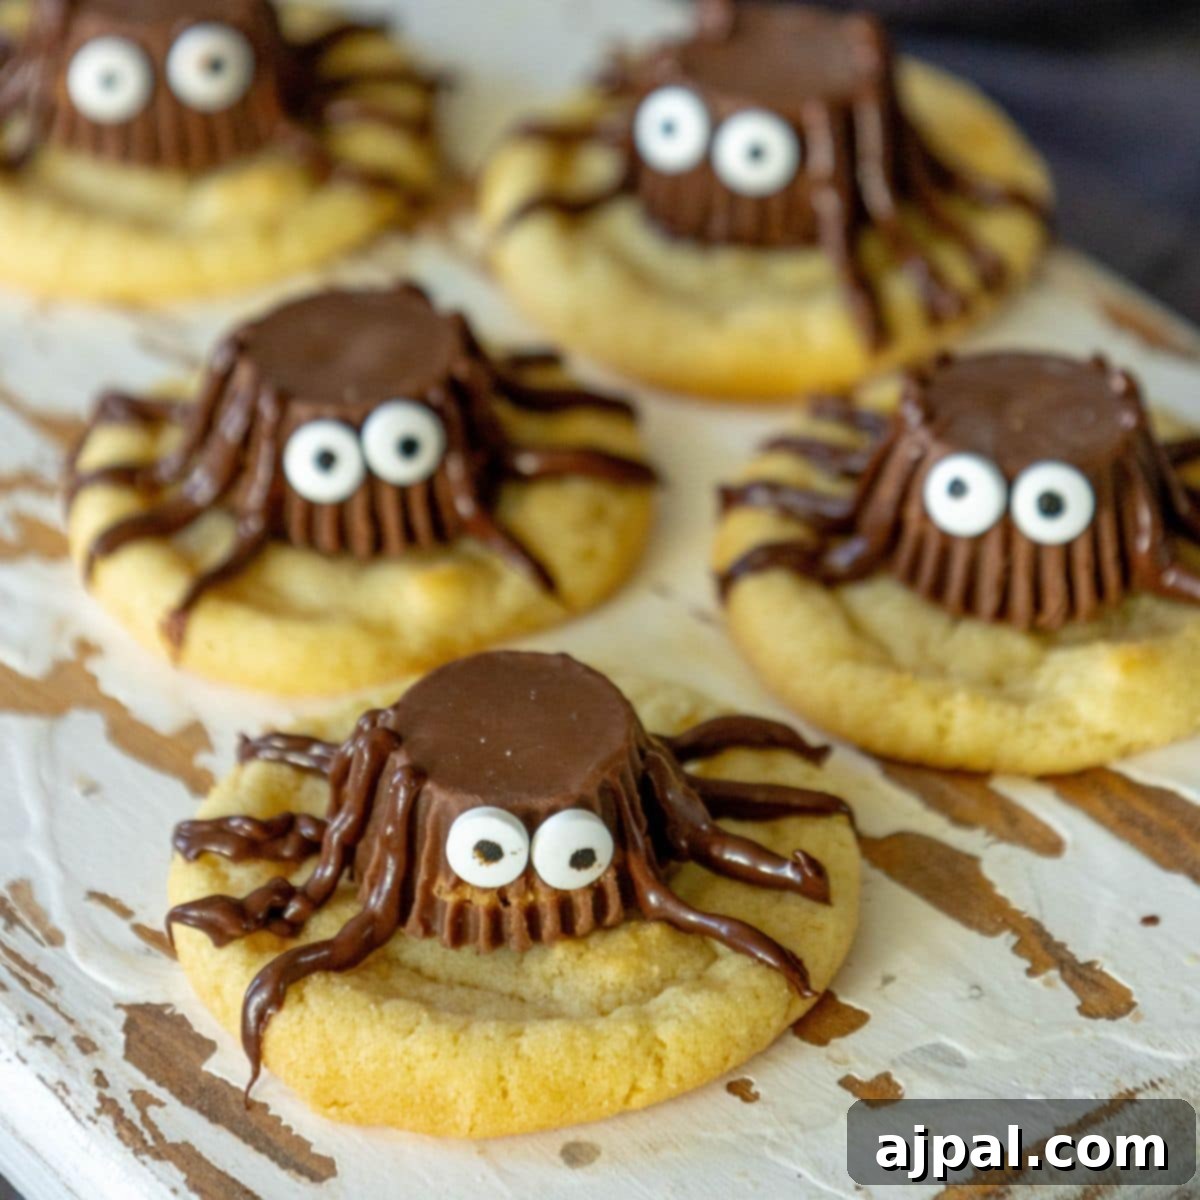
Spooktacularly Simple Halloween Spider Cookies: A Sweet Treat for Your Ghoulish Gatherings
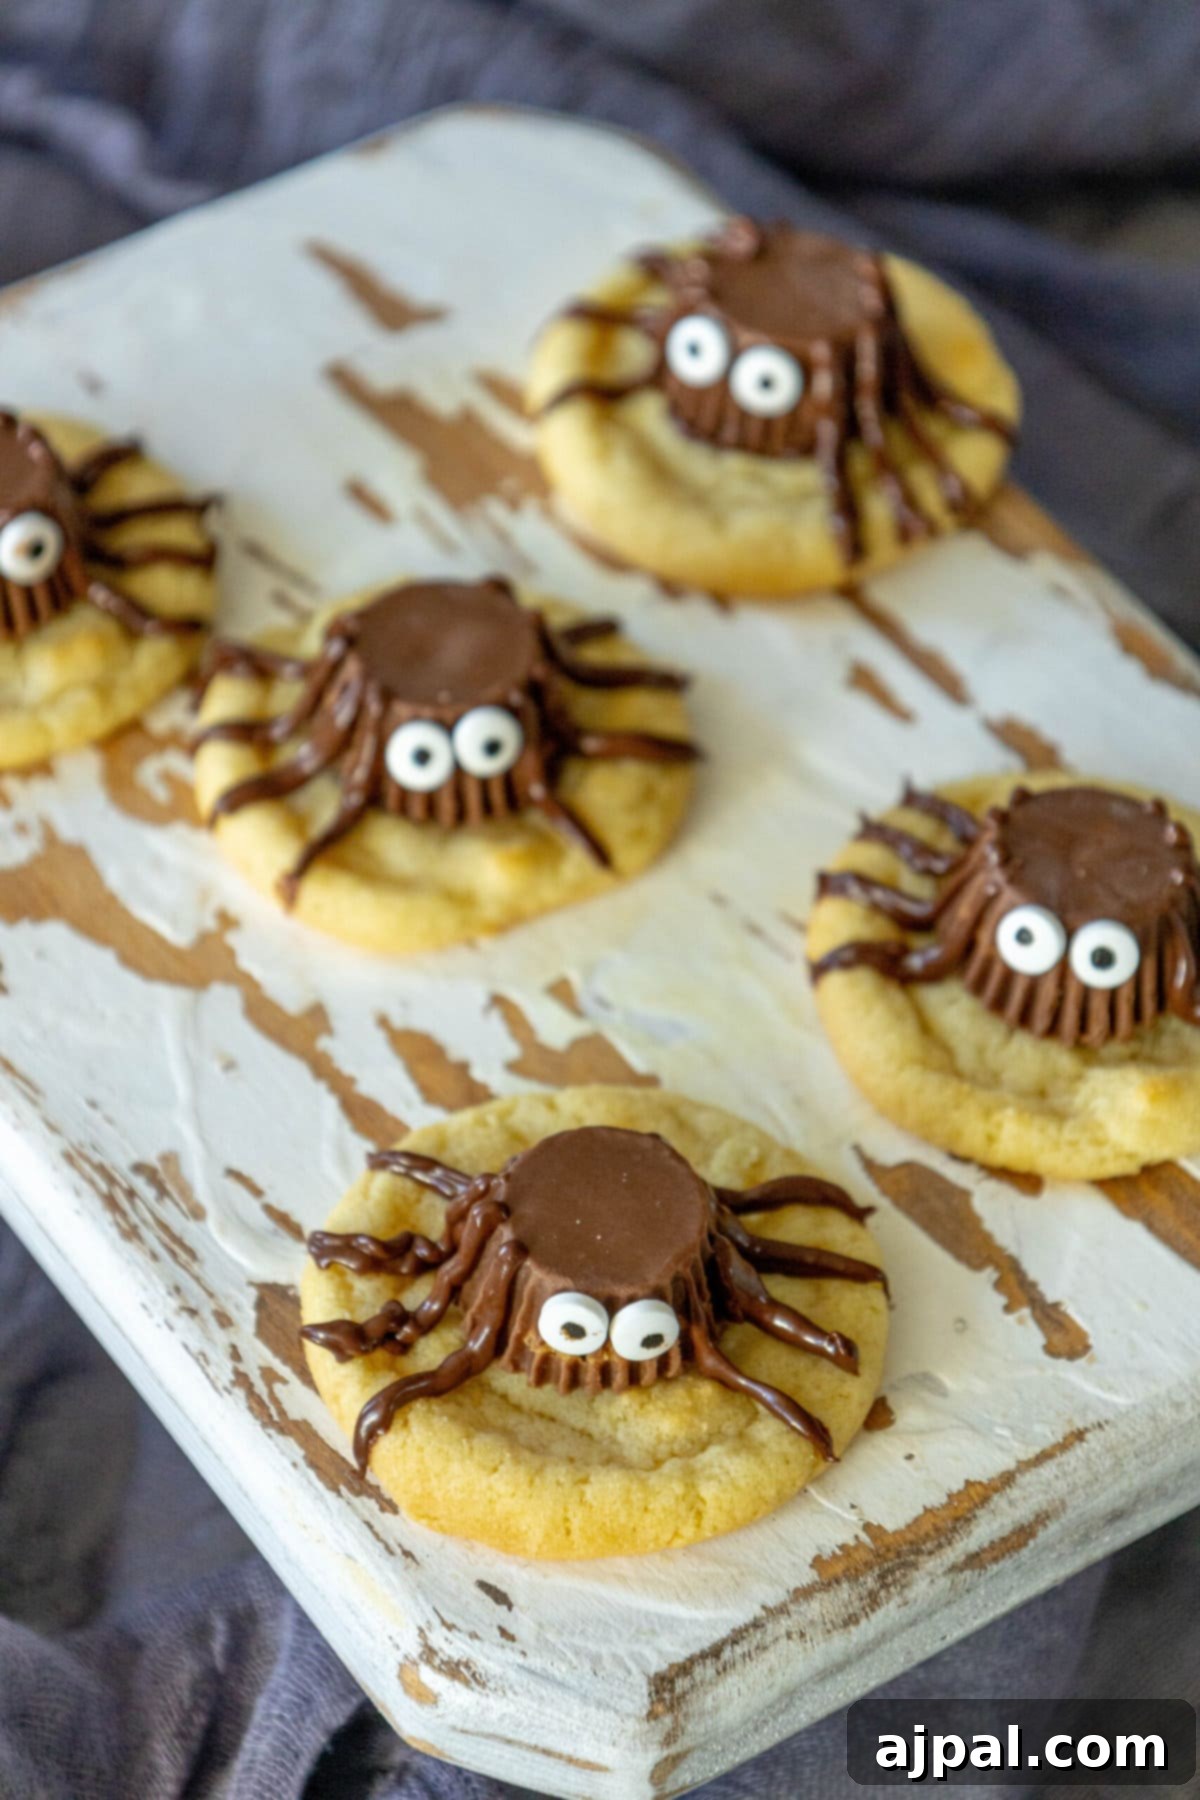
Delight your little monsters and grown-up ghouls alike with these irresistibly easy and adorable Halloween spider cookies. Crafted with the iconic combination of Reese’s Peanut Butter Cups, rich melting chocolate, and whimsical candy eyes, this dessert is your secret weapon for celebrating the spooky season with minimal fuss and maximum fun. Whether you’re a seasoned baker or a complete novice, these decorated cookies promise a memorable and delicious addition to any Halloween festivity.
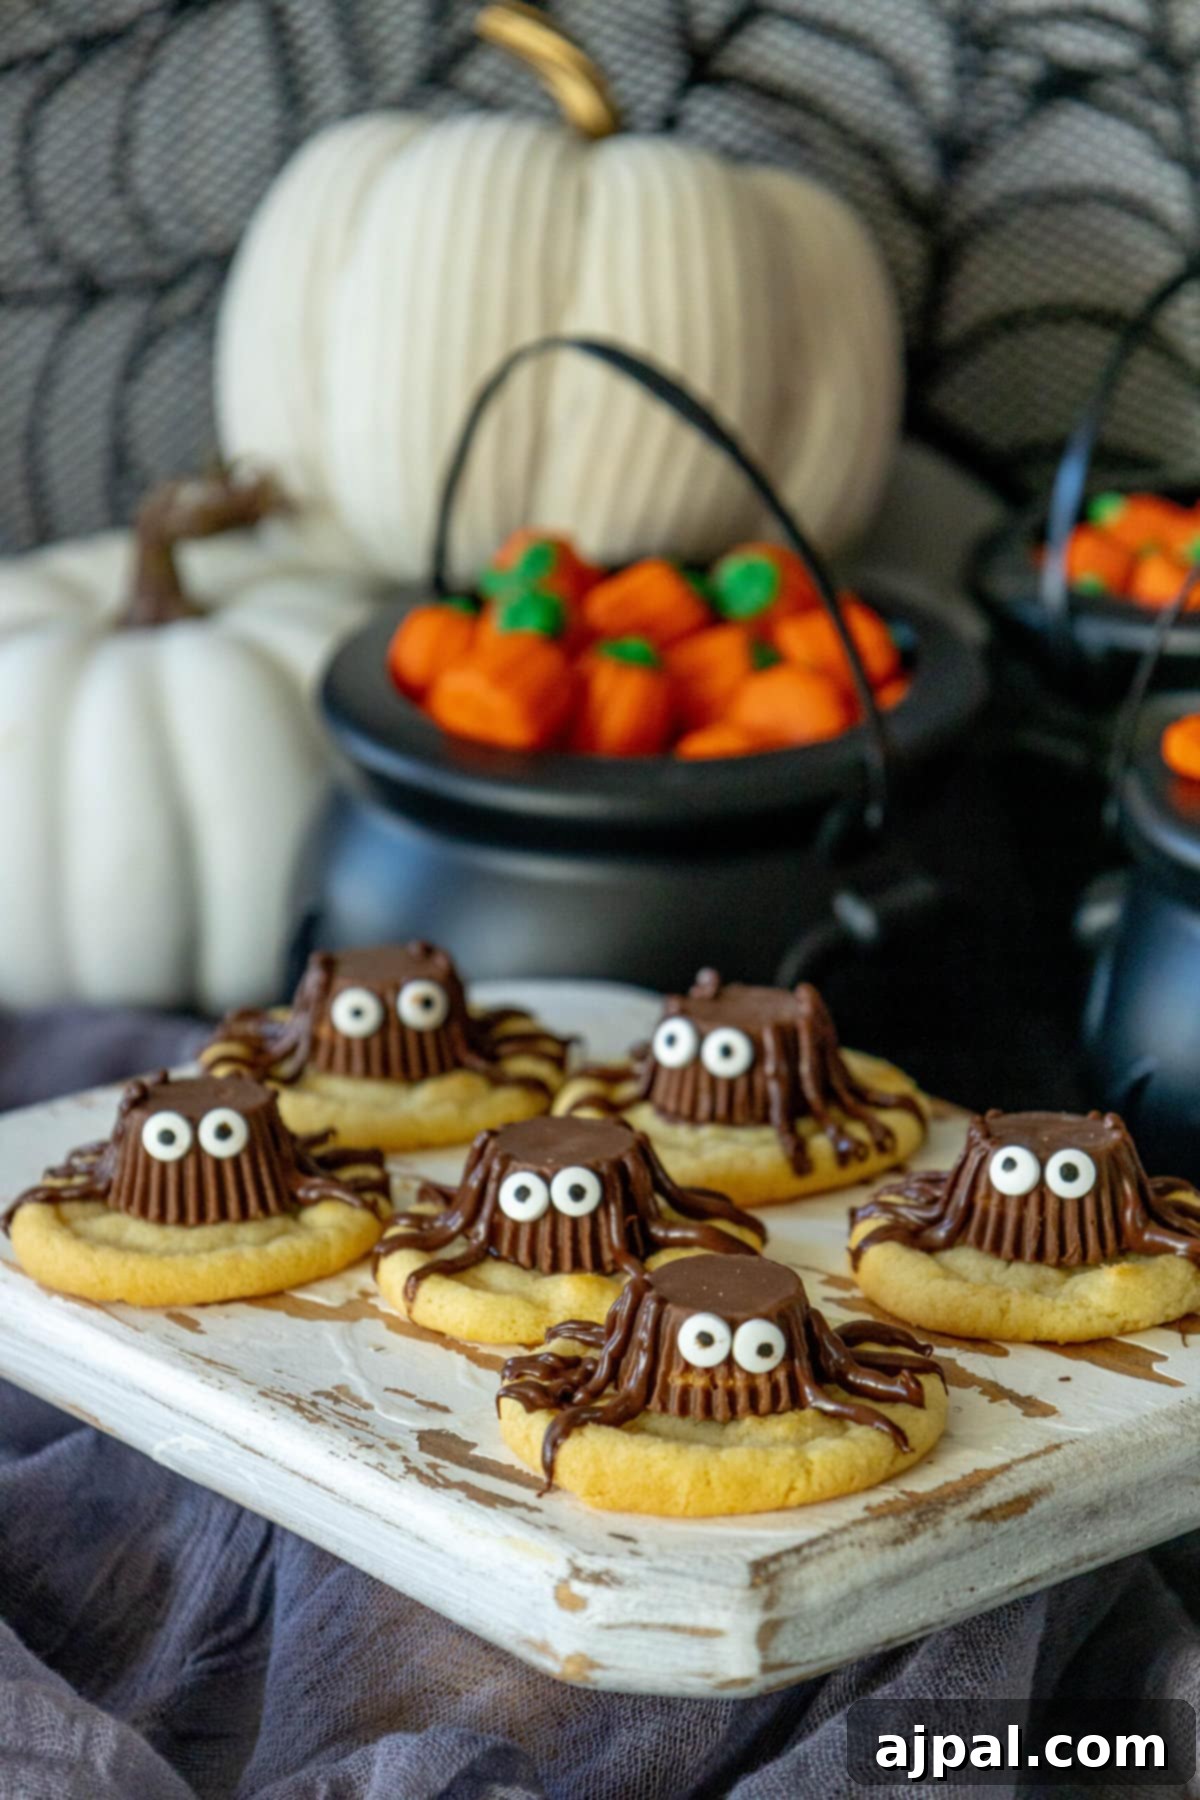
Looking for a quick recipe? You can jump directly to the instructions below or navigate through our table of contents to find exactly what you need.
Table of Contents
- The Irresistible Appeal of Reese’s Cookie Spiders
- Crafting Your Spooky Spider Cookies: A Step-by-Step Guide
- Expert Tips for Perfect Spider Cookies Every Time
- Frequently Asked Questions About Halloween Spider Cookies
- Creative Pairings: What to Serve With Your Spider Cookies
- Easy Spider Cookies Recipe Card
At Sweet C’s, we passionately believe that cooking and baking should be an enjoyable and empowering experience for everyone, regardless of their culinary background. As a home cook without any formal training, I deeply understand the value of clear, comprehensive instructions and insightful tips that explain *why* a recipe works. My personal goal is to demystify the kitchen, ensuring that even the most beginner home cook feels confident, inspired, and capable of transforming simple ingredients into delightful, memorable creations. This approach ensures you’re not just following steps, but truly understanding the process, leading to more consistent and joyful results.

The Irresistible Appeal of Reese’s Cookie Spiders
The classic combination of rich peanut butter and smooth chocolate holds an undeniable charm, especially when Halloween rolls around. It’s a timeless pairing that universally brings smiles, and if your household is anything like ours, Reese’s Peanut Butter Cups are always the first candy to disappear from the Trick-or-Treat haul! This recipe cleverly capitalizes on that beloved flavor profile, transforming everyone’s favorite Halloween candy into an absolutely adorable and surprisingly simple dessert that’s perfect for any festive gathering.
Imagine serving these charming, creepy-crawly cookies at your next Halloween party, school event, or family get-together. Not only are they incredibly easy to transport and present, but their whimsical design is guaranteed to be a conversation starter and a favorite among both kids and adults. The true beauty of this recipe lies in its remarkable flexibility: you can opt for the utmost convenience of quality store-bought cookies, making assembly a breeze, or elevate the experience by using your own homemade favorites. We particularly love making these with our chewy chocolate chip cookies for a rich, satisfying base, or our soft baked sugar cookies if you prefer a classic, sweet canvas. The delightful contrast of the sweet cookie, the creamy peanut butter, and the decadent chocolate creates a symphony of flavors that’s simply irresistible, making these spider cookies a highlight of any spooky spread.
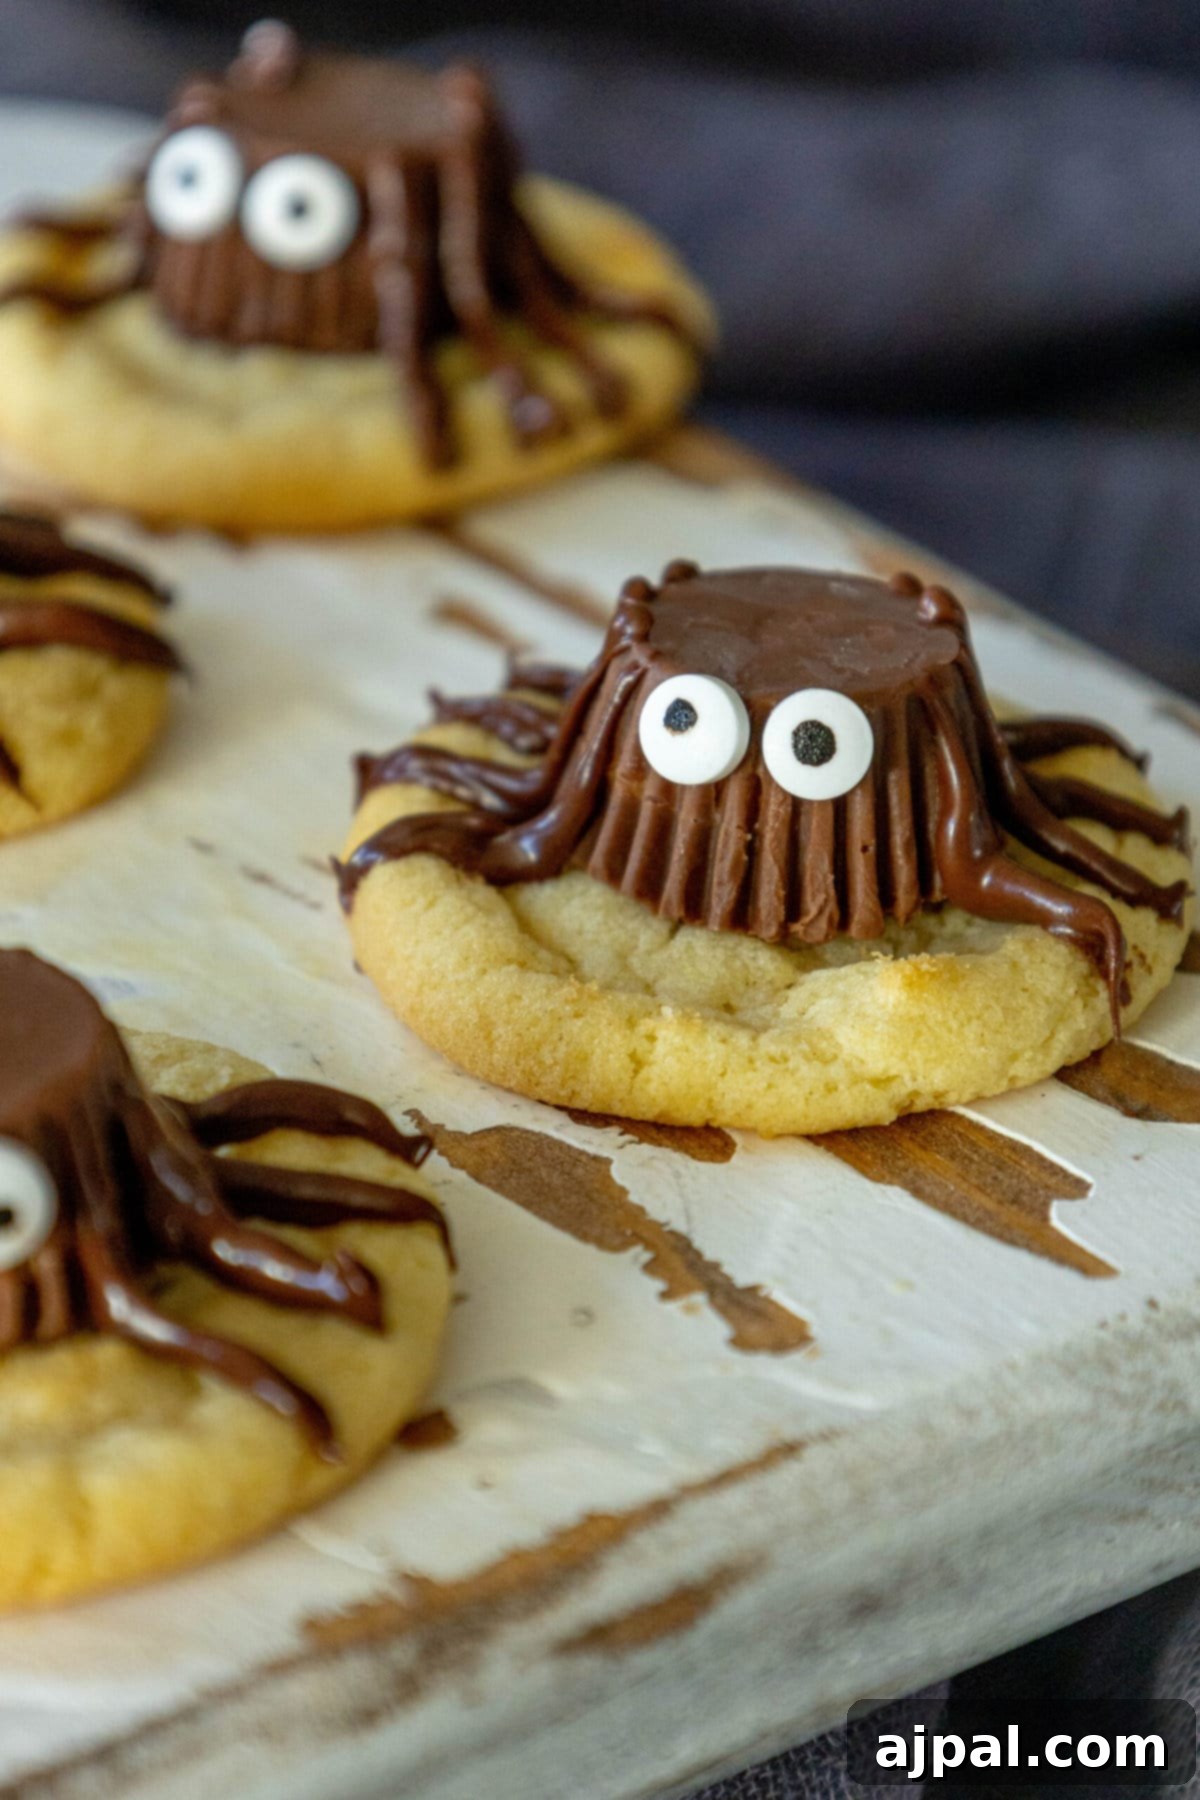
Crafting Your Spooky Spider Cookies: A Step-by-Step Guide
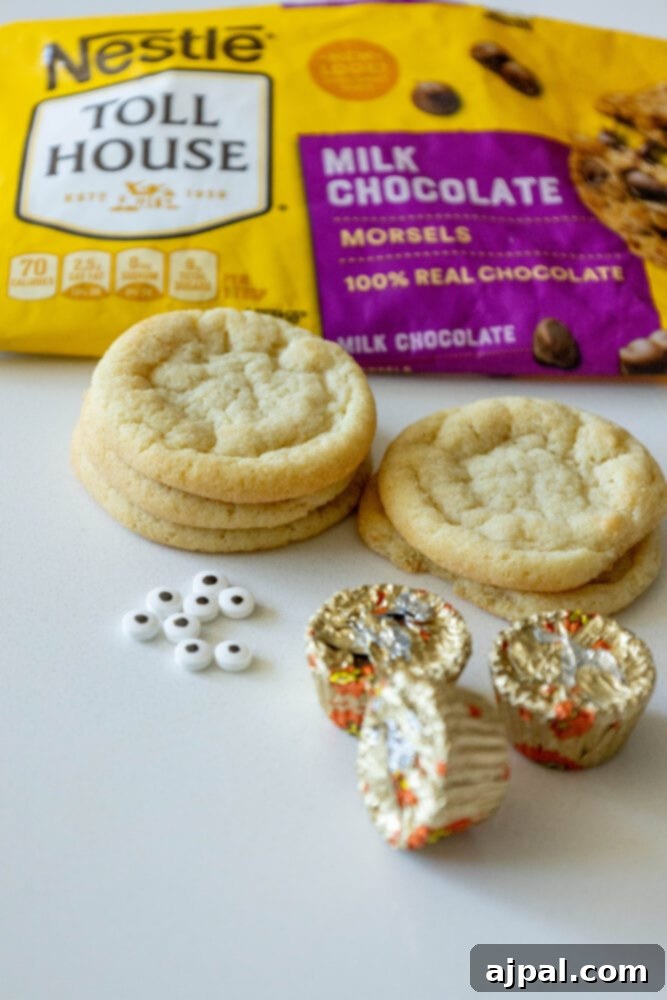
Creating these delightful spider cookies is a fun and straightforward process that even the youngest aspiring chefs can enthusiastically help with. It requires minimal baking (or no baking at all if you use pre-made cookies!) and focuses on the creative assembly. Here’s a detailed list of what you’ll need to gather to get started on your spooky cookie adventure:
- Mini Reese’s Peanut Butter Cups: These iconic candies will form the adorable, plump bodies of our friendly spiders. Their distinct shape and delicious flavor are perfect for this role.
- Chocolate Chips or High-Quality Melting Chocolate: This is your “glue” and the material for the spider legs. Dark, milk, or semi-sweet chocolate chips work wonderfully. For ease of melting and setting, chocolate melting wafers or candy melts (in brown) are also excellent choices as they often don’t require tempering.
- Candy Eyes: These small, edible googly eyes are what bring your spiders to life, adding a touch of playful spookiness and personality to each cookie. They are readily available in most craft or baking stores, especially around Halloween.
- Your Favorite Cookies: The base for your spiders! Store-bought sugar cookies, chocolate chip cookies, or even peanut butter cookies make this recipe incredibly fast and convenient. Alternatively, if you love to bake from scratch, use your beloved homemade cookie recipe. Opt for cookies that are relatively flat and stable to provide a good foundation for the Reese’s cup.
- Piping Bags or a Squeeze Bottle with a Fine Tip: These tools are essential for achieving neat, thin spider legs and for precisely securing the candy eyes. A small Ziploc bag with a tiny corner snipped off can work in a pinch, but a dedicated piping bag or a squeeze bottle will offer much better control and neater results.
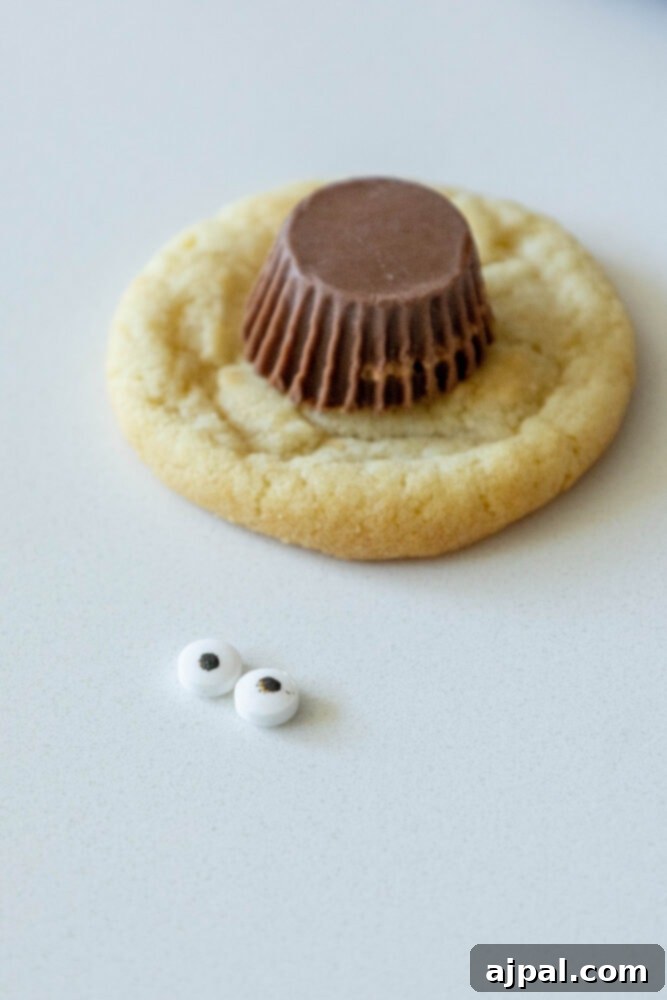
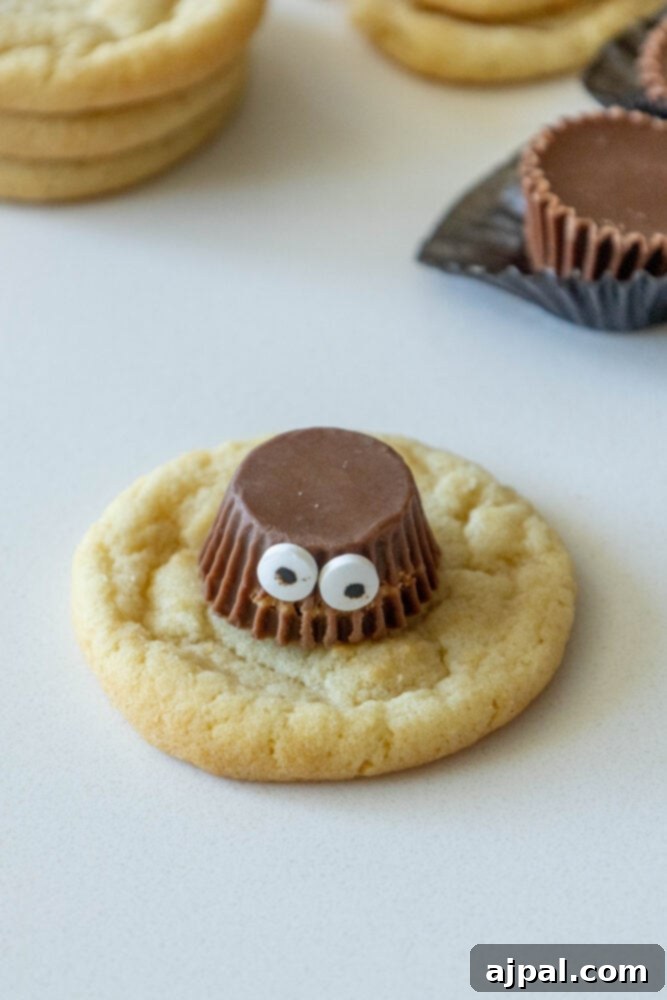
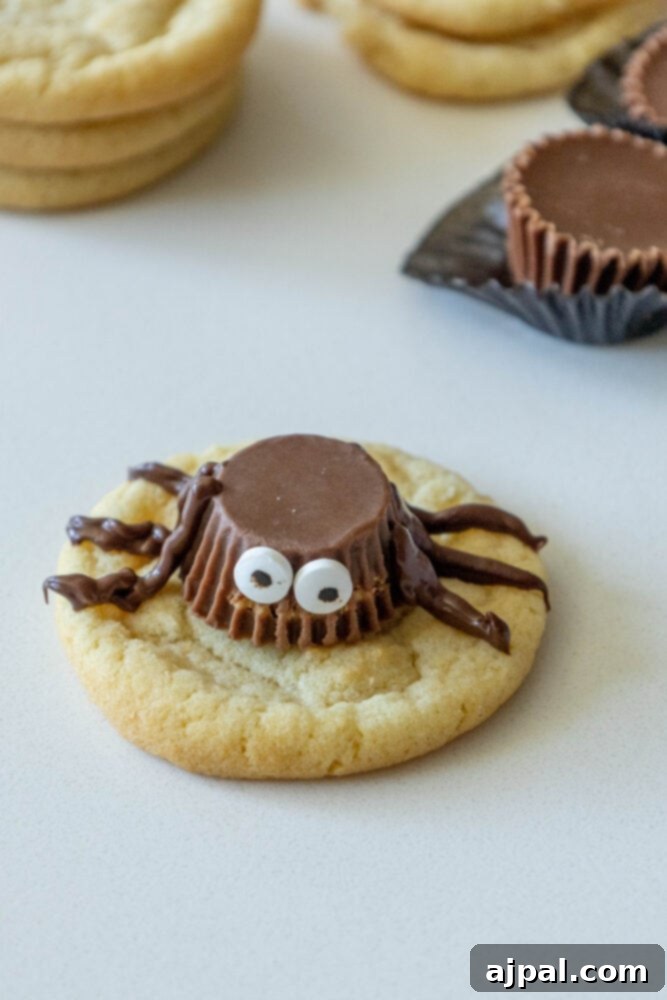
Once you’ve assembled your ingredients and tools, follow these simple, step-by-step instructions to bring your cute, creepy-crawly cookies to life:
- Preparation is Key: Begin by carefully melting your chocolate. You can do this using a double boiler, which provides a gentle, even melt, or in the microwave. If using the microwave, heat the chocolate in short 30-second bursts, stirring thoroughly after each interval to prevent burning and ensure a smooth consistency. Once melted and smooth, carefully transfer the chocolate into a piping bag or a squeeze bottle fitted with a small, round tip. Before you start decorating, remember to unwrap all your Mini Reese’s Peanut Butter Cups!
- Assemble the Spider Body: Take one of your chosen cookies and pipe a generous dot of melted chocolate onto its center. This will act as the adhesive for your spider’s body. Gently but firmly press a Mini Reese’s Peanut Butter Cup onto the chocolate dot, ensuring it’s securely attached and standing upright on the cookie. The flat base of the Reese’s cup should adhere well to the chocolate.
- Add the Eyes: Now for the playful part! Using a small amount of melted chocolate (you can dab it with a toothpick, the tip of your piping bag, or tweezers), apply it to the back of each candy eye. Carefully place two candy eyes onto the “face” of the Reese’s Peanut Butter Cup to give your spider its adorable gaze. If you notice the eyes sliding down, this is a sign that your chocolate might be too warm or runny. Allow the chocolate to cool slightly to thicken, which will provide a firmer, more stable hold for the eyes.
- Pipe the Legs: This step gives your creation the signature spider look! Using your piping bag, carefully pipe four thin, curving legs on each side of the Reese’s Peanut Butter Cup, extending outwards onto the cookie. Aim for eight distinct legs in total, giving your spider a realistic (yet still undeniably cute!) appearance. You can make them slightly wavy or straight, depending on the look you prefer.
- Allow to Set: Once all your spiders are assembled and decorated, place them on a clean baking sheet or parchment paper. Let them sit at room temperature for at least 30 minutes, or until the chocolate has fully set and hardened. This ensures everything is firm and won’t smudge or fall apart when handled. For faster setting, especially in warmer environments, you can briefly place them in the refrigerator for 10-15 minutes.
Expert Tips for Perfect Spider Cookies Every Time
Even with a recipe as straightforward as these spider cookies, a few insider tips can make all the difference, ensuring your Halloween treats are not just delicious but also look impeccably decorated and bring smiles to everyone’s faces:
- Achieve the Right Chocolate Consistency: The temperature and consistency of your melted chocolate are absolutely crucial for success. If your chocolate is too hot or too runny, you’ll find your candy eyes might slide down the Reese’s cups, and your carefully piped legs might spread out and lose their definition. To avoid this, allow the chocolate to cool slightly after melting until it reaches a thicker, more controllable consistency, but is still fluid enough to pipe smoothly. Stirring continuously as it cools helps achieve this ideal texture.
- Invest in a Quality Piping Tool: While a regular Ziploc bag with a corner snipped off can work in a pinch, a dedicated piping bag or a reusable silicone piping bulb can make the decorating process significantly easier and result in much neater designs. These specialized tools offer superior control and allow for a cleaner, more precise line when piping those delicate spider legs. Microwave-safe piping bulbs are particularly convenient as you can melt and pipe the chocolate from the same tool, minimizing cleanup and mess.
- Choose Your Cookie Base Wisely: Don’t underestimate the impact of your chosen cookie base. A flatter, wider cookie provides a stable and ample surface for the Reese’s cup and plenty of room to pipe the spider legs without overcrowding. Sugar cookies offer a neutral canvas that highlights the chocolate and peanut butter, while chocolate chip cookies add another layer of rich flavor. Experiment with different cookie types to discover your favorite combination!
- Make it a Fun Family Activity: This recipe is incredibly kid-friendly and offers a fantastic opportunity for family bonding. Let your little ones take charge of unwrapping the Reese’s cups, carefully placing the candy eyes (with a little adult assistance for the chocolate dab), or even practicing their piping skills on spare cookies. It’s a wonderful way to create cherished Halloween memories and get everyone enthusiastically involved in the festive spirit.
- Work in Manageable Batches: If you’re planning to make a large quantity of these cookies for a big party, consider working in smaller, manageable batches. This prevents your melted chocolate from cooling too much and hardening prematurely while you’re still decorating, and helps keep your workspace clean and organized, reducing stress and ensuring consistent results.
- Speed Up Setting with Refrigeration: If you’re short on time and need the chocolate to set quickly, you can place the decorated cookies in the refrigerator for about 10-15 minutes. Just be careful not to leave them in too long, as extreme cold can sometimes cause the chocolate to develop a whitish bloom, although this doesn’t affect taste.
Frequently Asked Questions About Halloween Spider Cookies
The beauty of these spider cookies lies in their incredible versatility! You can use almost any kind of cookie as your base. Store-bought sugar or chocolate chip cookies are absolutely perfect for a quick and easy option, allowing you to focus purely on the fun decorating part. For those who love to bake from scratch, our chewy chocolate chip cookies or our acclaimed easy sugar cookies make fantastic homemade foundations, adding an extra layer of deliciousness. Just ensure the cookies are relatively flat and sturdy enough to comfortably accommodate the Reese’s Peanut Butter Cup and chocolate legs.
These spooky spider cookies can be stored in an airtight container at room temperature for up to three days. To maintain their freshness and prevent the chocolate from melting, smudging, or becoming sticky, it’s crucial to keep them in a cool, dry place away from direct sunlight, humidity, or any heat sources. While they can be refrigerated, be aware that this might sometimes cause the chocolate to “bloom” (develop a whitish film on the surface) due to condensation, though they will still be perfectly safe and delicious to eat.
Absolutely! While Reese’s offer that classic, beloved peanut butter and chocolate flavor, feel free to get creative and customize your spiders. Round chocolate-covered peppermint patties, solid chocolate discs, chocolate sandwich cookies (like Oreos, though these might be a bit tall), or even large gumdrop candies can serve as an effective and fun alternative for the spider’s body. The key is to choose a candy that has a relatively flat base for stability when placed on the cookie and is roughly the right size to look like a spider body.
For the best results, good quality chocolate chips (like semi-sweet or milk chocolate) or chocolate melting wafers (also known as candy melts) are ideal. These types of chocolate are specifically formulated to melt smoothly and set firmly, making them perfect for decorating. Compound chocolate (often labeled “candy coating” or “confectionery coating”) is also an excellent option as it’s designed for easy melting and setting without the need for tempering. Try to avoid using regular chocolate bars that are not specifically intended for melting and decorating, as they might seize, become grainy, or not set properly.
Creative Pairings: What to Serve With Your Spider Cookies
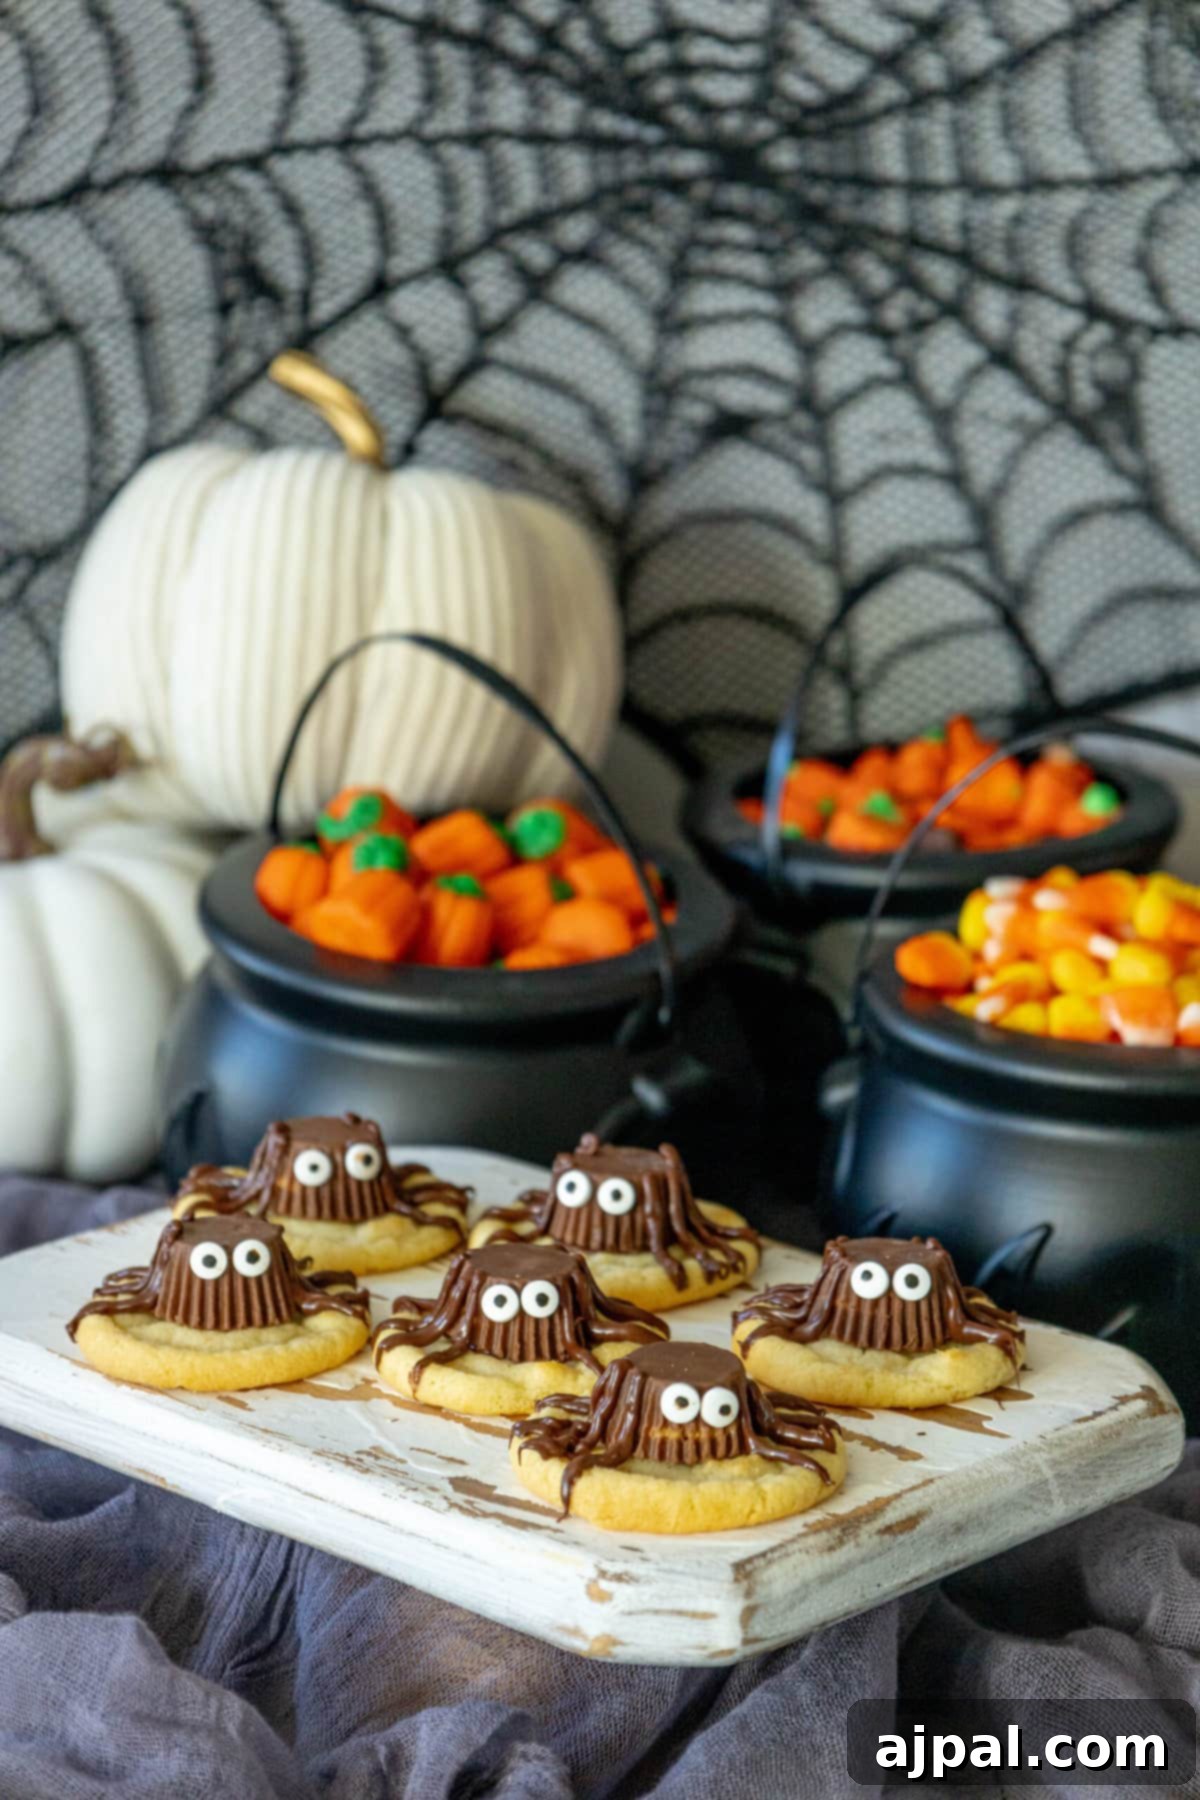
These fun and festive spider cookies are more than just a delightful dessert; they’re a true centerpiece of Halloween joy! Their playful appearance and irresistible taste make them an excellent and versatile addition to any spooky celebration. But why stop there? Elevate your Halloween party spread and create an unforgettable experience by thoughtfully pairing these adorable treats with other themed delights and activities:
- Complementary Spooky Sweets: For a truly monstrous dessert table, complement your spider cookies with our equally charming Frankenstein cookies, creating a delightful monster mash-up that guests will adore. Alternatively, offer the comforting warmth and quintessential fall flavors of our easy pumpkin hand pies, balancing the rich chocolate and peanut butter with seasonal spice.
- Chilling and Refreshing Beverages: Quench your guests’ thirst with a vibrant and mysterious beverage. Our Spooky Halloween Punch, with its eerie color and delicious flavor profile, makes it the perfect accompaniment to your sweet treats, adding an extra layer of festive fun to your drink station.
- Engaging DIY Halloween Decor & Activities: Beyond the food, immerse yourself and your guests fully in the spirit of the season with some of our favorite Halloween DIY Ideas. These creative projects range from simple crafts to more elaborate decorations that can transform your home. For the youngest attendees, consider transforming their ride-on toys into fantastic, themed creations like our DIY Batmobile or a charming DIY Cozy Coupe Firetruck. These hands-on activities add an extra layer of interactive fun to your Halloween festivities, making it a truly memorable and engaging event for everyone involved.
More Delightful Recipes You’ll Love
Cranberry Bars
Dilly Bread Recipe
Cabbage and Noodles
Lemon Chicken Tortellini Soup
Cranberry Chutney
Bacon Rye Stuffing
Air Fried Chicken Fried Steak
Garlic Roasted Rack of Lamb
Easy Spider Cookies Recipe Card
We sincerely hope you love this super easy and fun Halloween recipe! If you enjoyed making these adorable cookies, please share your thoughts by leaving a comment and rating the recipe below. Your valuable feedback helps us immensely, inspires other home cooks, and encourages us to create even more delicious content. Happy Halloween baking!
Share on Facebook
Share
Pin this now to find it later
Pin It
Follow on Instagram
Follow

Short on time for dinner? Don’t stress! Sign up for our exclusive 30-minute dinner plans, delivered directly to your inbox for delicious, quick meal ideas!
Explore our top picks! Find and shop my favorite kitchen and home products in my Amazon storefront here!
Want to save this recipe? Just enter your email and get it sent to your inbox! Plus, you’ll receive new recipes from us every week. Be sure to tag @sweetcsdesigns on social media – we love to see your creations!
★★★★★
Easy Decorated Spider Cookies
Email Share
Print Recipe
Equipment
- Prepworks by Progressive 8-Piece Frosting Bulb Decorating Kit
- Piping Bags or Squeeze Bottle
- Microwave-safe bowl or Double Boiler
Ingredients
- 12 sugar or chocolate chip cookies (store-bought or homemade)
- 1 cup chocolate chips or chocolate melting wafers
- 12 mini peanut butter cups, unwrapped
- 24 candy eyes
Instructions
- Melt Chocolate: Melt chocolate chips or wafers in a double boiler until smooth, or in a microwave-safe bowl in 30-second intervals, stirring well after each. Transfer the melted chocolate to a piping bag with a fine tip or a squeeze bottle.
- Attach Spider Body: Pipe a generous dot of melted chocolate onto the center of each cookie. Press one mini peanut butter cup onto the chocolate dot to secure it, forming the spider’s body.
- Add Eyes: Dip the back of two candy eyes into melted chocolate or dab a tiny bit of chocolate onto them. Press the eyes onto the front of each peanut butter cup. If eyes slide, let the chocolate cool slightly to thicken.
- Pipe Legs: Using the piping bag, pipe four thin, curving legs on each side of the peanut butter cup, extending onto the cookie, to create eight spider legs in total.
- Set and Enjoy: Allow the decorated cookies to set at room temperature for at least 30 minutes, or briefly in the refrigerator (10-15 minutes) until the chocolate is firm. Serve and enjoy your spooky treats!
Nutrition
Calories: 178 kcal
Carbohydrates: 31g
Protein: 1g
Fat: 7g
Saturated Fat: 3g
Polyunsaturated Fat: 3g
Sodium: 37mg
Fiber: 1g
Sugar: 23g
Nutrition information is automatically calculated and provided as an approximation based on the ingredients listed. Please consult a qualified nutritionist for precise dietary advice tailored to your needs.
Additional Info
Tried this recipe?
Mention @sweetcsdesigns or tag #sweetcsdesigns on Instagram!