

Welcome to the ultimate guide for crafting the most delectable and effortlessly satisfying Ham and Cheese Sliders! Imagine golden-baked Hawaiian rolls, generously filled with savory ham and a blend of perfectly melted cheeses, all brought together with a zesty mustard and creamy ranch sauce. These aren’t just sandwiches; they’re miniature masterpieces, designed to deliver maximum flavor with minimal effort. Whether you’re planning a casual family dinner, a lively game day get-together, or a festive holiday party, these sliders are guaranteed to be a crowd-pleaser that will have everyone reaching for more.

Here at our kitchen, we believe that cooking should be an enjoyable and empowering experience for everyone, regardless of their culinary background. That’s why we pack our recipes with detailed tips, explanations, and insights into why each ingredient and step matters. Our goal is to ensure that even the most novice home cook feels confident and inspired to create delicious meals. This comprehensive guide to Easy Ham and Cheese Sliders is no exception, designed to equip you with all the knowledge you need for a perfectly executed dish every time.
Table of Contents
- Easy Ham and Cheese Sliders: A Crowd-Pleasing Favorite
- Crafting Your Ham and Cheese Sliders: Ingredients & Preparation
- Essential Ingredients for Irresistible Sliders
- Step-by-Step Guide to Assembling and Baking Your Sliders
- Expert Tips and Tricks for Perfect Ham and Cheese Sliders
- Common Questions About Ham and Cheese Sliders (FAQ)
- Perfect Pairings: What to Serve with Ham and Cheese Sliders
- Easy Ham and Cheese Sliders Recipe
Easy Ham and Cheese Sliders: A Crowd-Pleasing Favorite
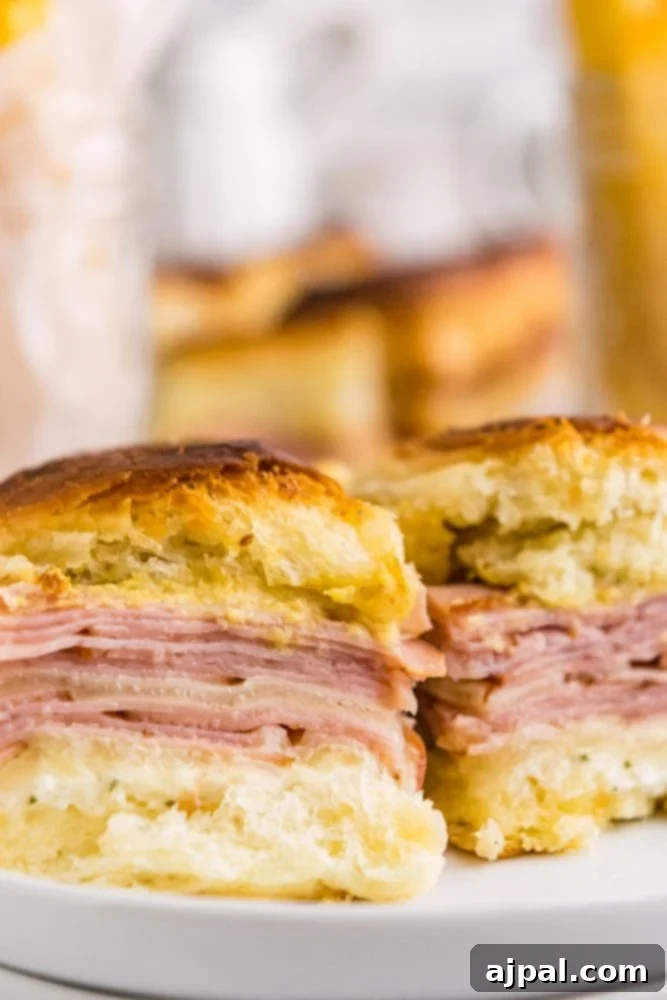
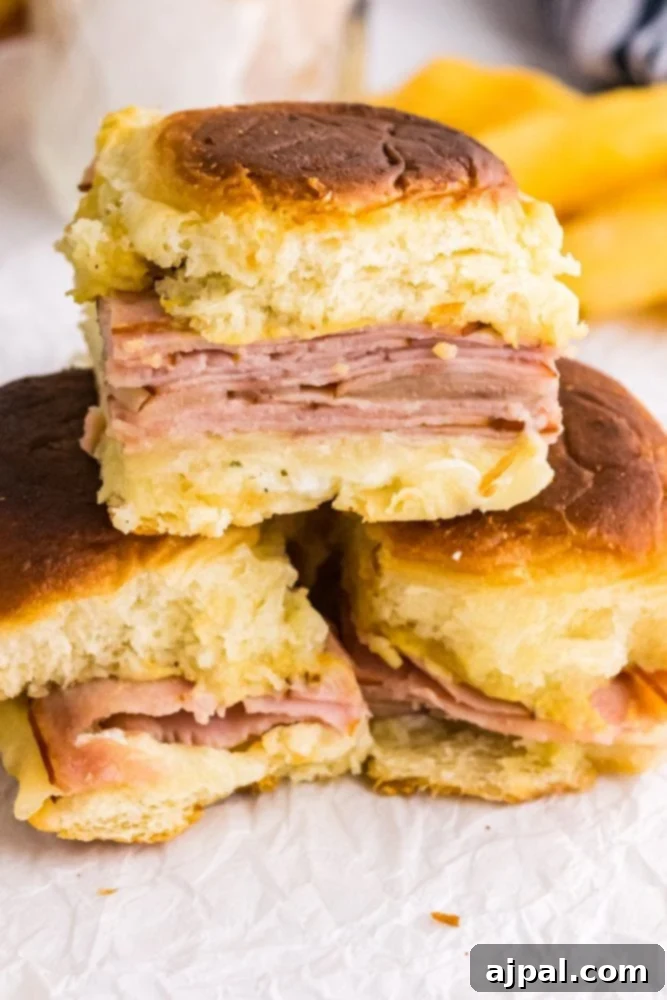
There’s something undeniably magical about the combination of savory ham and gooey, melted cheese, especially when nestled in a soft, sweet roll and baked to golden perfection. These easy ham and cheese sliders elevate the classic sandwich into a portable, party-ready treat that’s as simple to make as it is delicious. They are the epitome of effortless entertaining, requiring minimal prep time and delivering maximum flavor. Imagine a platter of these golden, savory-sweet bites disappearing in a flash at your next gathering – that’s the power of these sliders!
What makes these ham and cheese sliders truly stand out is their incredible versatility and customizable nature. While the classic combination of ham, Swiss, and cheddar is a winner, you can easily adapt the recipe to suit your preferences or what you have on hand. The process is straightforward: layer your chosen fillings onto sweet Hawaiian rolls, slather with a savory butter sauce, and bake until the cheese is bubbling and the tops are beautifully toasted. It’s a snap to prepare a large batch for a crowd, making them ideal for everything from casual weeknight dinners to game day feasts, holiday brunches, or even a comforting meal prep option for the week ahead.
We particularly love making these sliders with our delicious buttery soft dinner rolls for an extra touch of homemade goodness, though store-bought Hawaiian rolls work wonderfully for convenience. They pair beautifully with crispy air-fried french fries, a hearty easy vegetable soup, or a fresh, vibrant salad. Even the most selective eaters can rarely resist the charm of these mini sandwiches. They are truly a family favorite, beloved for their comforting flavors and satisfying texture. We are confident that you and your loved ones will adore these simple yet spectacular sandwiches as much as we do!

Crafting Your Ham and Cheese Sliders: Ingredients & Preparation
Essential Ingredients for Irresistible Sliders
The magic of these sliders lies in the harmonious blend of simple, high-quality ingredients. Each component plays a crucial role in creating that irresistible balance of sweet, savory, tangy, and rich flavors. Here’s a closer look at what you’ll need and why:
- Hawaiian Rolls: These sweet, soft, and slightly chewy rolls are the ideal foundation for your sliders. Their unique sweetness perfectly complements the savory fillings, and their connected nature allows for easy slicing and assembly, keeping all your mini sandwiches intact. While Hawaiian rolls are highly recommended, if you’re looking for alternatives, soft brioche buns or even potato rolls can provide a similar texture, though you might miss the distinctive sweetness of Hawaiian rolls. When using other rolls, simply separate them and build individual sliders.
- Ranch Dip or Dressing: Ranch brings a rich, creamy, and herbaceous savory punch to these sliders. Its blend of buttermilk, garlic, onion, and herbs adds a depth of flavor that is hard to beat. While mayonnaise can be used as a substitute for creaminess, you’ll lose the complex savory notes that ranch provides. For an extra special touch, consider a homemade ranch dressing.
- Dijon Mustard: Dijon mustard is key for adding a bright, tangy, and slightly spicy “zing” that cuts through the richness of the cheese and ham. Unlike milder yellow mustard, Dijon, often made with white wine, offers a more sophisticated flavor profile with a subtle horseradish kick. This balance is crucial for a well-rounded slider.
- Melted Butter: Butter is indispensable for achieving that beautiful golden-brown crust and a wonderfully soft texture on the top of your rolls. It also serves as the perfect vehicle for infusing garlic flavor into the bread, ensuring every bite is rich and savory. Using unsalted butter allows you to control the overall saltiness of the dish.
- Garlic Powder: A foundational flavor, garlic powder provides a savory, aromatic warmth without the intensity of fresh garlic. It blends seamlessly with the melted butter to create an irresistible topping. If you prefer a more pungent garlic flavor, you can certainly use a finely minced fresh garlic clove, just be mindful not to overdo it.
- Swiss Cheese: Swiss cheese is known for its excellent melting properties and mild, nutty flavor. It melts beautifully, creating a gooey, satisfying layer that helps bind the ham and rolls together without overpowering the other flavors. Look for good quality, thinly sliced Swiss for the best results.
- White Cheddar Cheese: To add a sharp, robust, and unmistakably cheesy bite, white cheddar is an excellent choice. Its distinct tang provides a fantastic contrast to the sweetness of the rolls and the richness of the ham. Combining it with Swiss gives you the best of both worlds: superb melt and intense flavor.
- Sliced Ham: The star of the show! High-quality, thinly sliced ham is essential. You have many options here: cured or uncured, honey-baked for a sweeter profile, peppered for a subtle kick, or a classic smoked deli ham. The key is thin slices, as this allows for even layering and prevents the sliders from becoming too bulky. Aim for a ham that isn’t overly salty, as the other ingredients will contribute plenty of savory notes.

Step-by-Step Guide to Assembling and Baking Your Sliders
Once you’ve gathered all your delicious ingredients, the assembly process for these ham and cheese sliders is remarkably simple. Follow these steps for perfectly baked, gooey, and golden sliders:
- Preheat Oven: Begin by preheating your oven to 375°F (190°C). This ensures that your rolls toast quickly and your cheese melts efficiently once assembled.
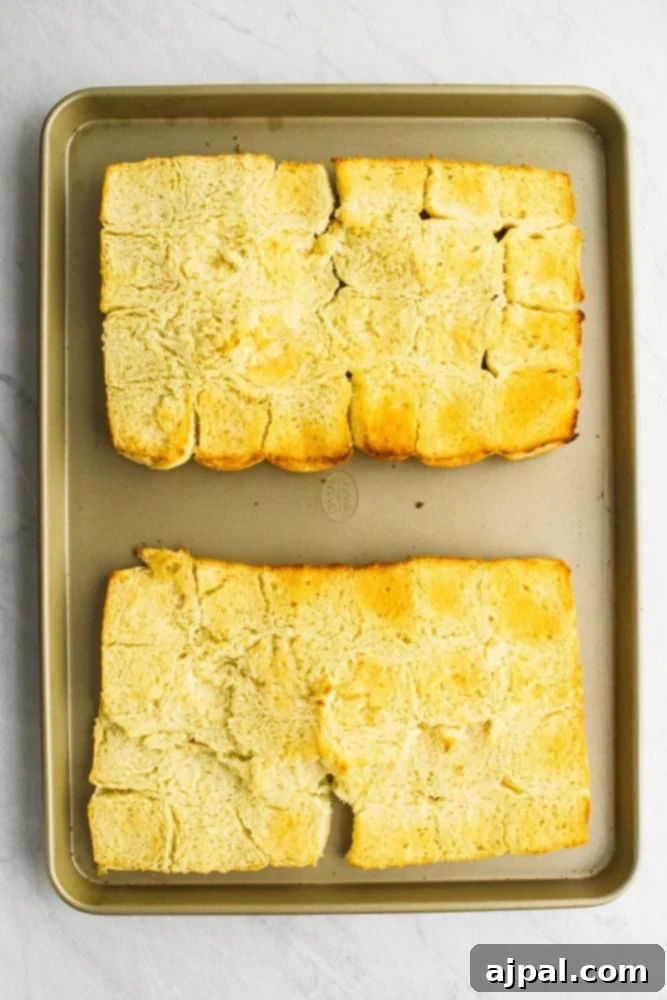
- Prep Rolls: Carefully remove the entire block of Hawaiian rolls from its packaging. Using a long serrated knife, slice the rolls horizontally through the middle, creating a top half and a bottom half, keeping the rolls connected as a single unit. This makes the assembly much quicker and easier. Place both the top and bottom halves, cut-side up, on a large baking sheet.
- Light Toasting: Transfer the baking sheet with the separated rolls to the preheated oven. Bake for approximately 5-8 minutes, or until the cut sides are lightly golden and slightly toasted. This crucial step helps prevent the rolls from becoming soggy once the sauces and fillings are added and adds a pleasant texture.
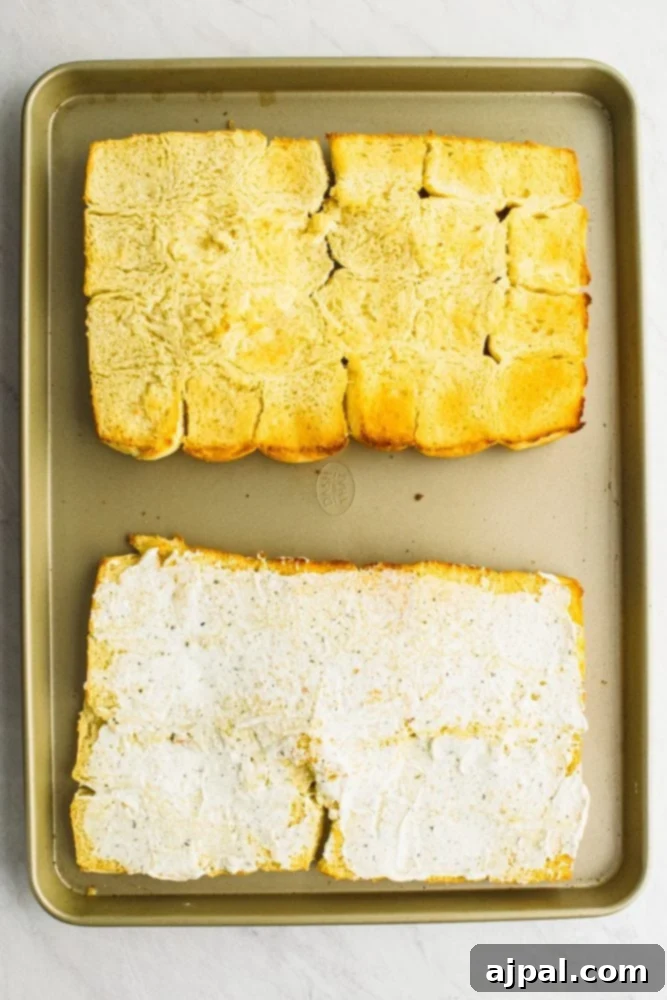
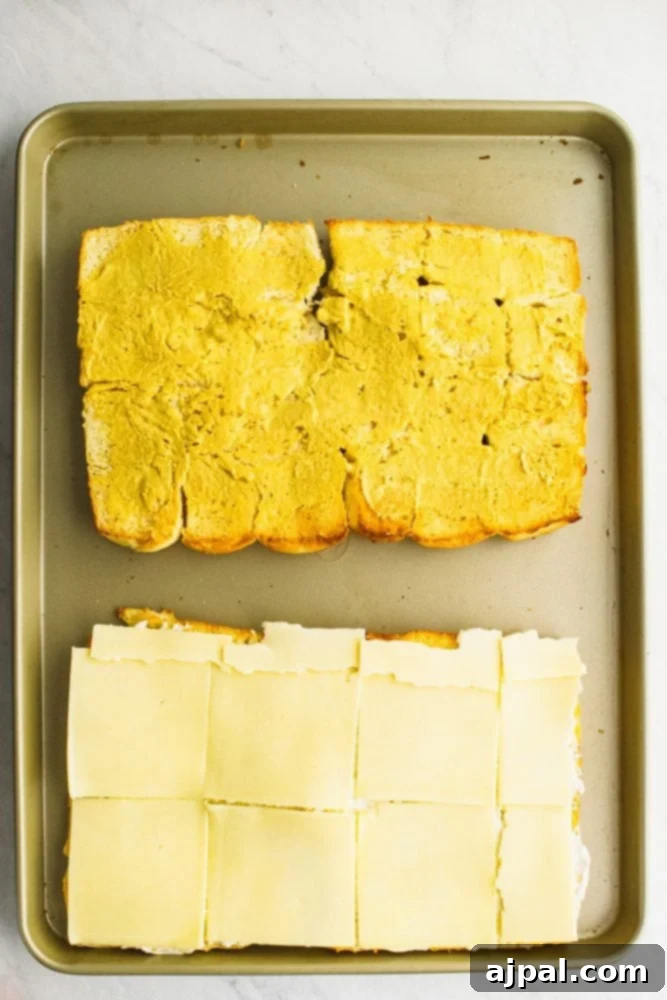
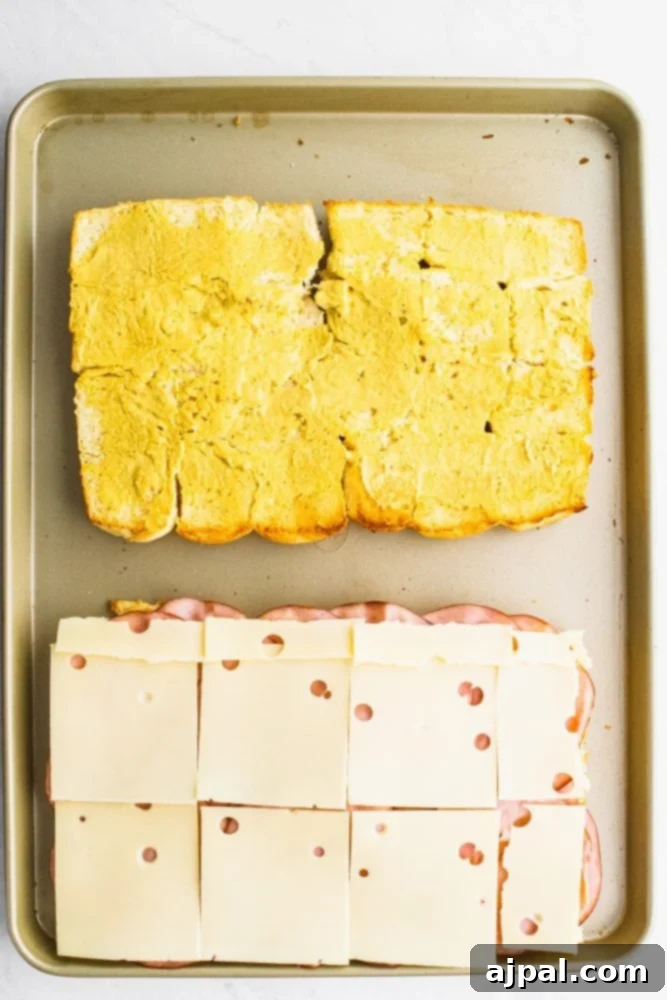
- Spread Sauces: Once lightly toasted, remove the rolls from the oven. Evenly spread the Dijon mustard across the cut side of the top buns. On the cut side of the bottom buns, spread the creamy ranch dip or dressing. Ensure an even coating on both sides for balanced flavor in every bite.
- Layer Cheese: Arrange the slices of white cheddar cheese evenly over the ranch-coated bottom buns. This will be your first layer of cheesy goodness.
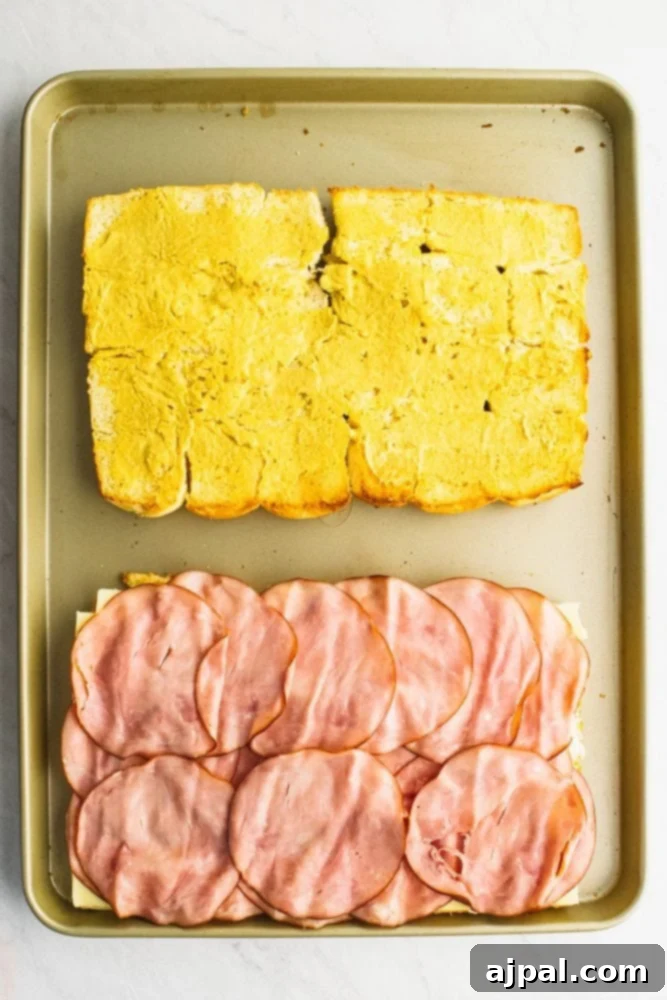
- Add Ham (First Layer): Next, place half of your sliced ham evenly over the white cheddar cheese. Try to cover the entire surface to ensure every slider gets a generous portion.
- Layer Swiss Cheese: Follow with the Swiss cheese slices, distributing them evenly over the first layer of ham. This cheese will provide that classic ham and cheese flavor and a fantastic melt.
- Add Remaining Ham: Place the remaining sliced ham evenly over the Swiss cheese. This double layer of ham and cheese ensures a satisfyingly robust filling for each slider.
- Complete Assembly: Gently place the Dijon-coated top buns back onto the assembled bottom halves, aligning them carefully to reform the original block of rolls.
- Prepare Butter Topping: In a small bowl, combine the melted butter and garlic powder. Mix thoroughly until the garlic powder is fully incorporated.
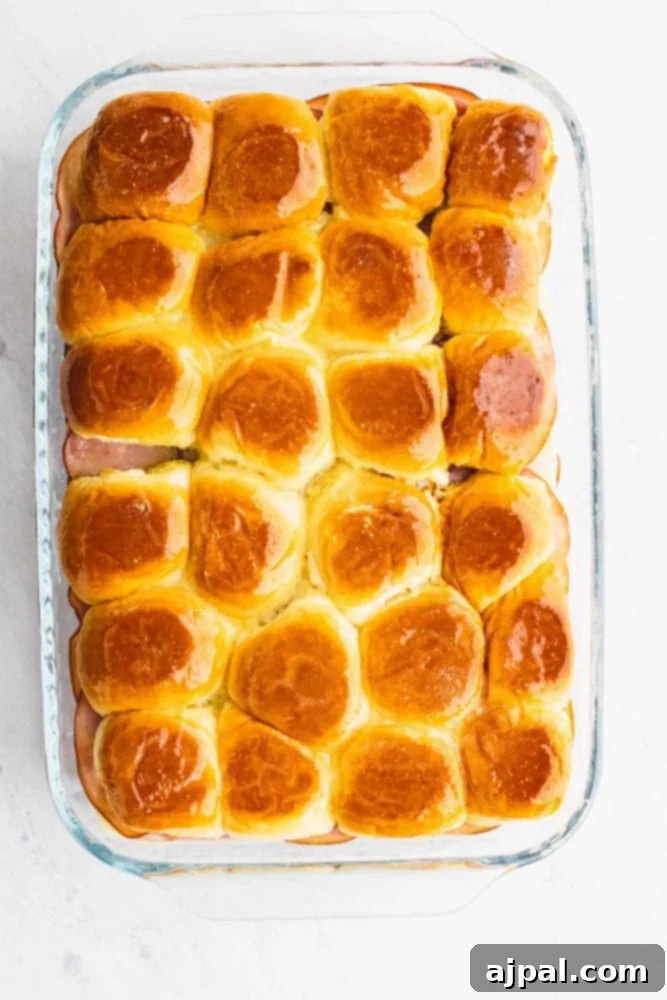
- Brush and Infuse: Using a pastry brush, generously and evenly brush the garlic butter mixture over the tops of the assembled rolls. Be sure to get some of the butter into the cracks between the individual rolls; this will help them separate cleanly after baking and ensure every part of the roll is infused with flavor.
- Bake to Perfection: Carefully transfer the assembled sliders into a 9×13 inch casserole dish. Place the dish back into the oven and bake for another 15-20 minutes, or until the cheese is bubbling and completely melted, and the tops of the rolls are a beautiful golden brown and crispy. The exact time may vary depending on your oven and desired crispiness.
- Serve and Enjoy: Remove the casserole dish from the oven. Let the sliders rest for a few minutes before slicing them along the natural divisions of the rolls. Serve warm and watch them disappear!

Expert Tips and Tricks for Perfect Ham and Cheese Sliders
Achieving perfectly irresistible ham and cheese sliders is incredibly easy, but a few expert tips can elevate your batch from great to extraordinary. Here’s how to ensure every slider is a delightful bite:
- Customize Your Bake Time: The listed 15-minute cook time is a general guideline. Feel free to adjust it to your personal preference. Some people love their rolls extra crispy with deeply melted, slightly browned cheese, while others prefer a softer roll with just-melted, gooey cheese. Keep an eye on them, especially towards the end, and pull them out when they reach your desired level of golden perfection.
- Experiment with Cold Cuts & Cheeses: Don’t be afraid to get creative! These sliders are incredibly forgiving. Swap out ham for thinly sliced turkey, roast beef, or even pepperoni. For cheese, try provolone, mozzarella, cheddar, or a smoky gouda. The possibilities are truly endless, allowing you to tailor the flavors to your liking or use up whatever you have in the fridge.
- Perfect for Packed Lunches: These sliders are not only fantastic fresh out of the oven but also make excellent leftovers. Once cooled, store them in an airtight container in the refrigerator. They reheat beautifully in the microwave or a toaster oven, making them a delicious and convenient option for packed lunches or quick snacks throughout the week.
- Smart Roll Slicing: Slicing Hawaiian rolls uniformly can be tricky without a long serrated knife. If you don’t have one, simply cut as far as you can from one side, then flip the block of rolls and cut from the other side until your knife meets in the middle. Most standard bread knives are just long enough to manage this technique, ensuring a clean separation into top and bottom halves.
- Add a Savory Crunch with Poppy Seeds: For an extra layer of texture and a subtle nutty flavor, consider sprinkling a tablespoon of poppy seeds or sesame seeds over the garlic butter topping before baking. This adds a beautiful visual appeal and a delightful crunch to the finished sliders.
- Prepare Ahead of Time: These sliders are a fantastic make-ahead option, especially when entertaining. You can assemble the entire batch, including brushing with the garlic butter, wrap them tightly in foil, and refrigerate for up to 24 hours. When ready to bake, simply pop them into the preheated oven, adding an extra 5-10 minutes to the baking time to ensure they heat through properly.
- Explore Sauce Variations: While ranch and Dijon are a winning combination, don’t hesitate to explore other sauce options. A sweet honey mustard sauce, a smoky BBQ sauce, or even a spicy sriracha mayo could offer an exciting twist. A simple savory butter sauce with Worcestershire or onion powder also works wonders.
- Prevent Soggy Bottoms: To ensure your sliders remain perfectly crisp on the bottom, avoid overcrowding the baking dish. Also, the initial light toasting of the rolls helps create a barrier. If you’re particularly concerned, you can place a layer of parchment paper at the bottom of your casserole dish.
Common Questions About Ham and Cheese Sliders (FAQ)
These baked sliders are best enjoyed fresh, but they will keep well in the refrigerator for up to four days. Store them in a plastic bag or an airtight container to maintain freshness. When reheating, a toaster oven or air fryer works best for crisping up the rolls, or a microwave for a quicker, softer option.
Absolutely! While Hawaiian rolls are excellent for their sweetness and ease of cutting as a single block, you can use any soft dinner rolls you prefer. Keep in mind that you might need to separate and fill each roll individually, which can add a little extra prep time compared to the convenient Hawaiian roll block.
Yes, you can freeze them! For best results, assemble the sliders completely (including the butter topping) but do not bake them. Wrap the entire casserole dish tightly with plastic wrap and then with aluminum foil. They can be frozen for up to 1-2 months. When ready to bake, remove from the freezer, unwrap, and bake from frozen at 375°F (190°C) for 30-40 minutes, or until heated through and golden, covering loosely with foil if the tops start to brown too quickly.
The best ham is thinly sliced, good-quality deli ham. Options like black forest ham, honey ham, or even simple smoked ham work wonderfully. The key is to choose a ham that isn’t too thick, as thin slices layer better and create a more balanced slider. Avoid overly wet or excessively salty hams.
While the recipe is designed for a large pack of Hawaiian rolls, you can certainly scale it down. Simply use fewer rolls (e.g., half a pack), adjust the sauce and filling quantities proportionally, and bake in a smaller baking dish or on a sheet pan for less time, watching closely for doneness.
Perfect Pairings: What to Serve with Ham and Cheese Sliders
These ham and cheese sliders deliver big flavor with minimal fuss, guaranteed to elicit happy sighs at your dinner table or party! Their savory, slightly sweet, and cheesy profile makes them incredibly versatile, pairing beautifully with a wide array of side dishes. Here are some of our favorite accompaniments to create a truly unforgettable meal:
Loaded Twice Baked Potatoes
These rich and creamy potatoes, loaded with cheese, bacon, and chives, offer a hearty and comforting side that perfectly complements the sliders’ savory profile.
Homemade French Fries in Air Fryer
A classic pairing! Crispy, golden French fries, especially when made in an air fryer for a healthier twist, are the ultimate companion to savory sliders.
Creamy Garlic Butter Beans
A comforting and flavorful side, these creamy beans offer a lovely textural contrast and a rich, garlicky addition to your meal.
Best Easy Pasta Salad
A refreshing pasta salad with vibrant vegetables and a zesty dressing provides a wonderful, light contrast to the rich sliders.
Best Grilled Corn on the Cob
Sweet, smoky grilled corn on the cob adds a touch of summer flavor and a satisfying crunch that complements the sliders beautifully.
The Best Easy Coleslaw – Just 4 Ingredients
Crunchy, creamy, and refreshing, coleslaw offers a perfect textural and flavor contrast to the warm, cheesy sliders.
Greek Potato Salad
For a lighter, zestier potato option, this Greek potato salad with fresh herbs, olives, and feta offers a bright and tangy counterpoint.
Funeral Potatoes
For ultimate comfort food, cheesy funeral potatoes provide a rich, creamy, and incredibly satisfying side that perfectly complements baked sliders.
In addition to these favorites, here are a few more complementary side dish ideas:
- Lighter Options: A simple green salad with a vinaigrette dressing, a fresh fruit platter, or blanched asparagus are excellent choices to add freshness and lighten the meal.
- Vegetable Sides: Consider roasted broccoli, green bean casserole, or creamy mashed potatoes for more comforting, hearty options.
- Appetizers & Snacks: Alongside these sliders, Crunchy Baked Fries, Easy Baked Parmesan Crisps, Garlic Parmesan Zucchini Fries, or even Blistered Shishito Peppers add variety and fun.
For more delicious sandwich and burger ideas, be sure to explore our collection of favorite burger and sandwich recipes!
Easy Ham and Cheese Sliders Recipe
We hope you thoroughly enjoy these irresistible Ham and Cheese Sliders! If you loved this easy recipe, please take a moment to give it a five-star rating below and share your comments. Your feedback helps us create more delicious content! Don’t forget to share your creations on Instagram, Facebook, and Pinterest – we love seeing what you make!
Share on Facebook
Share
Pin this now to find it later
Pin It
Follow on Instagram
Follow

Only have 30 minutes to get dinner on the table? Sign up for our exclusive 30-minute dinner plans direct to your inbox for quick and delicious meal solutions!
Discover our hand-picked favorite kitchen products in our Amazon storefront here!
For a quick visual overview of this delightful recipe, be sure to check out our engaging web story here!
Easy Ham and Cheese Sliders Recipe
Courtney O’Dell
12
sliders
10 minutes
30 minutes
40 minutes

Equipment
-
Hiware Extra Large Bamboo Cutting Board for Kitchen, Heavy Duty Wood Cutting Boards with Juice Groove, 100% Organic Bamboo, Pre Oiled, 18″ x 12″
-
HENCKELS Classic Razor-Sharp 7-inch Bread Knife, Cake Knife, German Engineered Informed by 100+ Years of Mastery
-
OXO Good Grips Silicone Basting & Pastry Brush – Small
-
USA Pan Bakeware Rectangular Cake Pan, 9 x 13 inch, Nonstick & Quick Release Coating, Made in the USA from Aluminized Steel
Ingredients
-
1
Large Pack of Hawaiian Rolls,
24 pack -
½
Cup
Ranch Dip or Dressing -
½
Cup
Dijon Mustard
-
¼
Cup
Melted Butter -
½
TSP
Garlic Powder
-
8
Slices
Swiss Cheese -
8
Slices
White Cheddar Cheese -
2
Pounds
Sliced Ham
Instructions
-
Preheat your oven to 375°F (190°C).
-
Remove the Hawaiian rolls from the package and carefully cut them in half horizontally, creating a top and bottom section for the sandwiches.
-
Place both halves with the cut sides facing up on baking sheets and toast lightly in the oven for about 8 minutes, until slightly golden.
-
Remove from oven and spread Dijon mustard generously on the top buns and ranch dip/dressing on the bottom buns.
-
Place the white cheddar cheese slices evenly on the bottom buns.
-
Top with half of the sliced ham, ensuring it’s evenly distributed over the cheese.
-
Place the Swiss cheese slices evenly over the ham.
-
Add the remaining ham, spacing evenly across the Swiss cheese.
-
Carefully place the top buns back onto the assembled bottoms, reforming the block of rolls.
-
In a small bowl, combine the garlic powder and melted butter, mixing well. Brush this mixture evenly over the top buns, making sure to get it into the cracks between the buns for maximum flavor and browning.
-
Place the assembled sliders in a 9×13 inch casserole dish and return to the oven for 15-20 minutes, or until the cheese is thoroughly melted and bubbly, and the tops are beautifully toasted and golden brown.
Nutrition
Serving:
1
g
Calories:
356
kcal
Carbohydrates:
4
g
Protein:
27
g
Fat:
26
g
Saturated Fat:
11
g
Polyunsaturated Fat:
12
g
Trans Fat:
1
g
Cholesterol:
99
mg
Sodium:
1315
mg
Fiber:
1
g
Sugar:
2
g
Nutrition information is automatically calculated, so should only be used as an approximation.
Additional Info
Main Dishes
American