
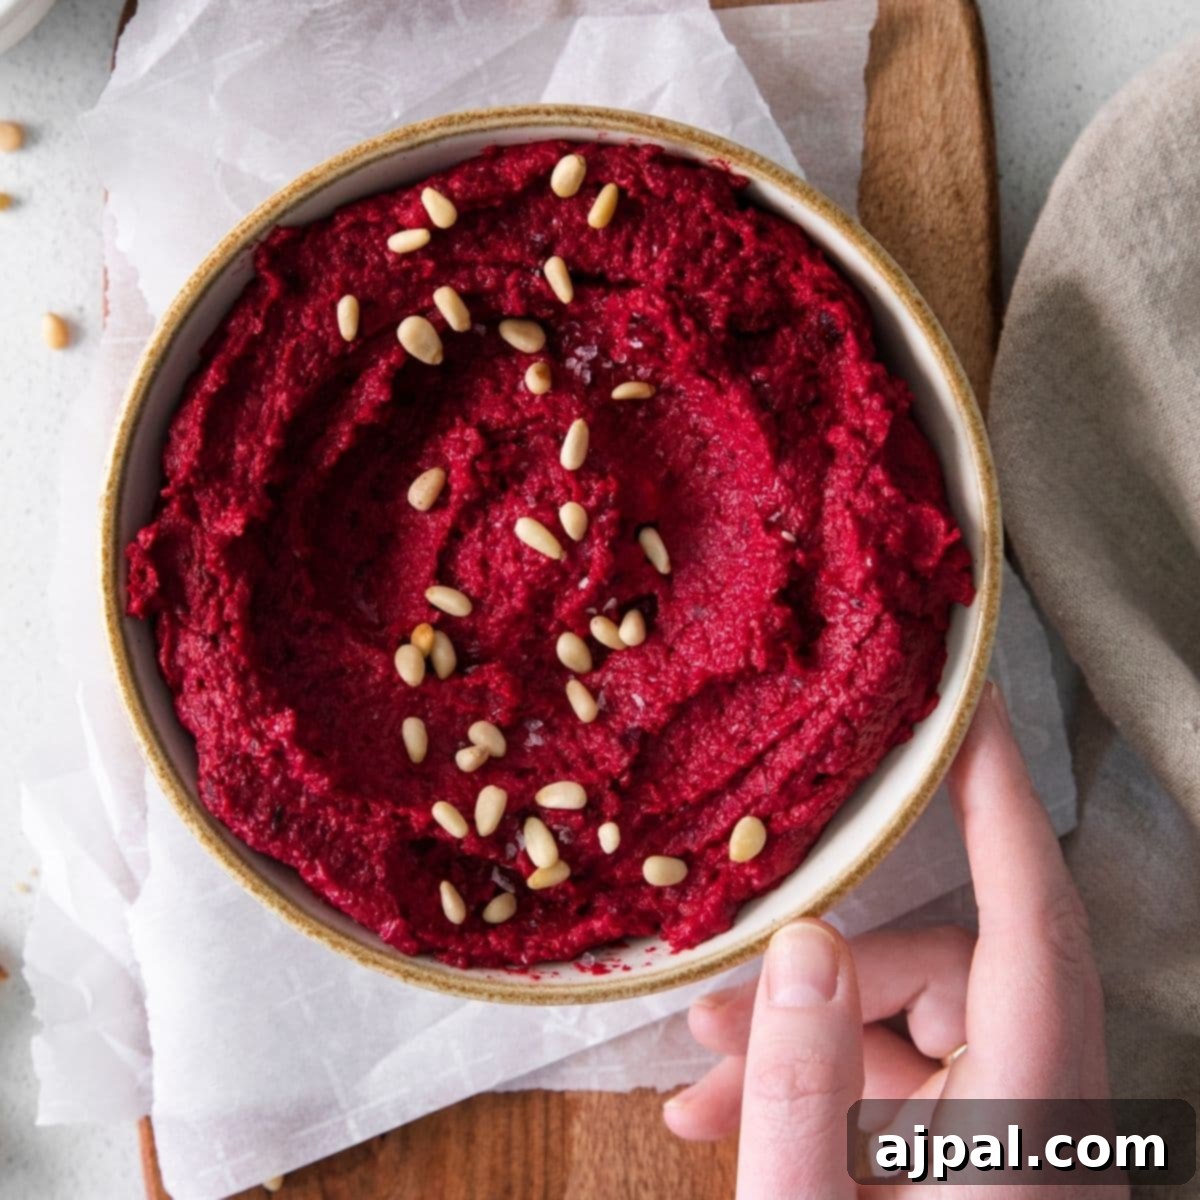
Vibrant Roasted Beet Hummus: A Healthy & Delicious Dip
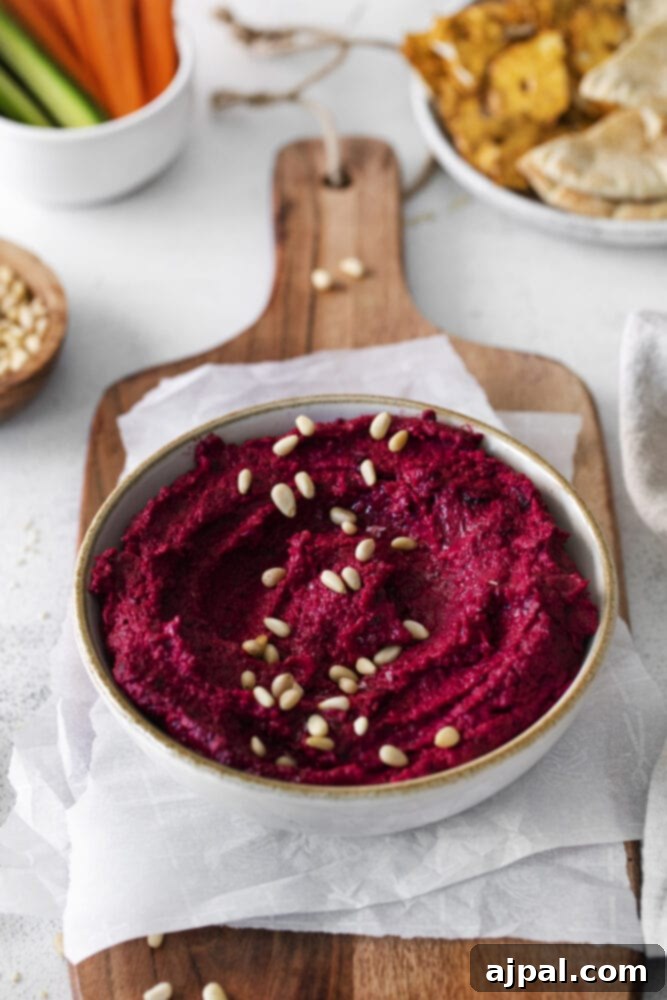
Indulge in the vibrant hues and delectable flavors of our Roasted Beet Hummus, a delightful twist on a classic dip that promises both health and taste. This stunningly pink, subtly sweet, and incredibly creamy spread is more than just an appetizer; it’s a celebration of wholesome ingredients and simple culinary artistry. Whether you’re a seasoned hummus enthusiast or new to the world of homemade dips, this recipe for healthy beet hummus is sure to become a cherished favorite. Its eye-catching color and rich, earthy-sweet flavor profile make it an instant crowd-pleaser and a perfect addition to any meal or gathering. Get ready to transform ordinary ingredients into an extraordinary culinary experience.
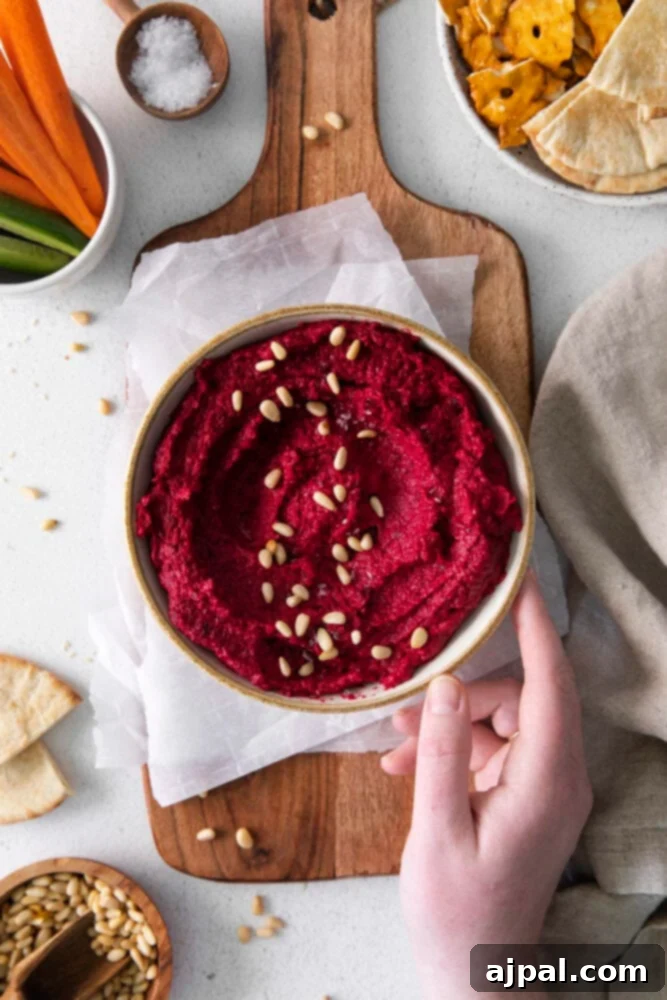
Homemade Roasted Beet Hummus: Why You’ll Love It
Hummus, traditionally a savory spread made from ground chickpeas, tahini, olive oil, lemon, and garlic, takes on a delightful new dimension with the addition of roasted beets. This homemade version offers a unique blend of sweetness and earthiness, creating an unforgettable experience. Here’s why this roasted beet hummus recipe will quickly earn a permanent spot in your culinary repertoire:
- Unrivaled Smoothness and Creaminess: Our homemade roasted beet hummus achieves an exceptional velvety texture that is truly a cut above. The slow roasting of the beets intensifies their natural sweetness and softens them perfectly, allowing them to blend seamlessly with the creamy chickpeas and rich tahini. This process creates a luxurious mouthfeel that elevates it far beyond your average store-bought variety, making it an ideal gourmet beet dip for any occasion.
- Quick and Effortless Preparation: Despite its sophisticated appearance, this easy beet hummus recipe comes together in a flash. With the magic of a food processor, you’ll transform a handful of fresh ingredients into a sensational dip in under 15 minutes of active prep time. Even if you choose to roast your own beets, the process is straightforward and largely hands-off, requiring minimal effort and leaving you more time to savor your culinary creation.
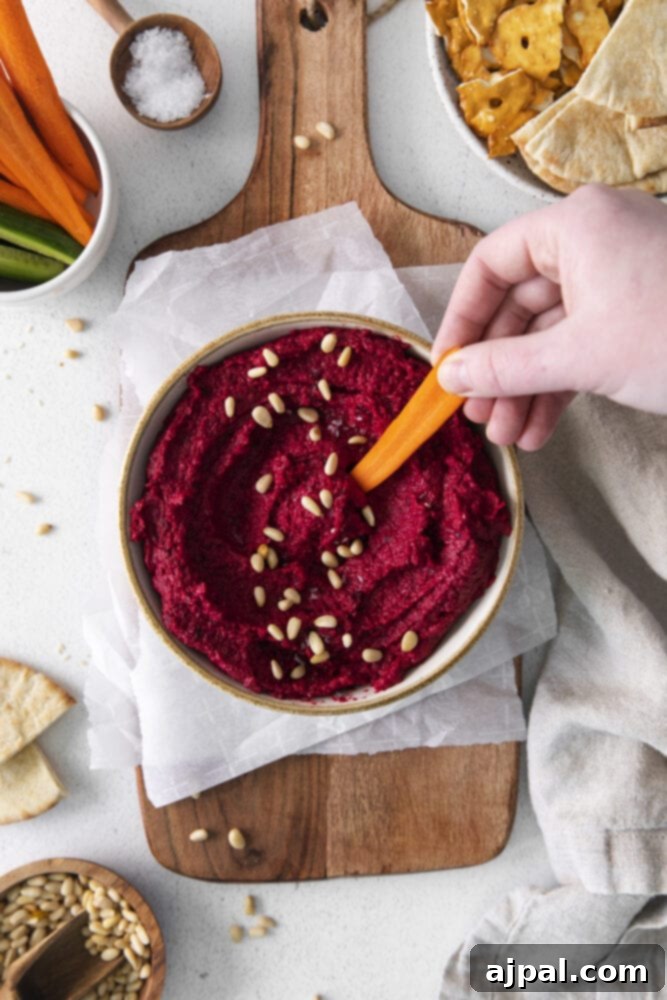
- Visually Stunning & Impressive: The striking, naturally vibrant pink color of this vibrant pink hummus makes it an absolute showstopper on any table. It’s the perfect centerpiece for entertaining, adding a dramatic pop of color and an unexpected flavor profile that will surely impress your guests. Serve it at parties, family gatherings, or simply enjoy it as a wholesome, healthy snack that looks as good as it tastes. Its unique hue is a conversation starter in itself!
- Nutrient-Rich and Wholesome: Beyond its stunning color and incredible taste, this beetroot hummus is packed with nutritional benefits. Beets are renowned for their antioxidants, fiber, and essential vitamins (like folate and manganese), while chickpeas provide plant-based protein, complex carbohydrates, and additional fiber, making this dip a truly guilt-free indulgence. It’s an excellent way to incorporate more vegetables into your diet in a delicious, satisfying, and appealing manner.
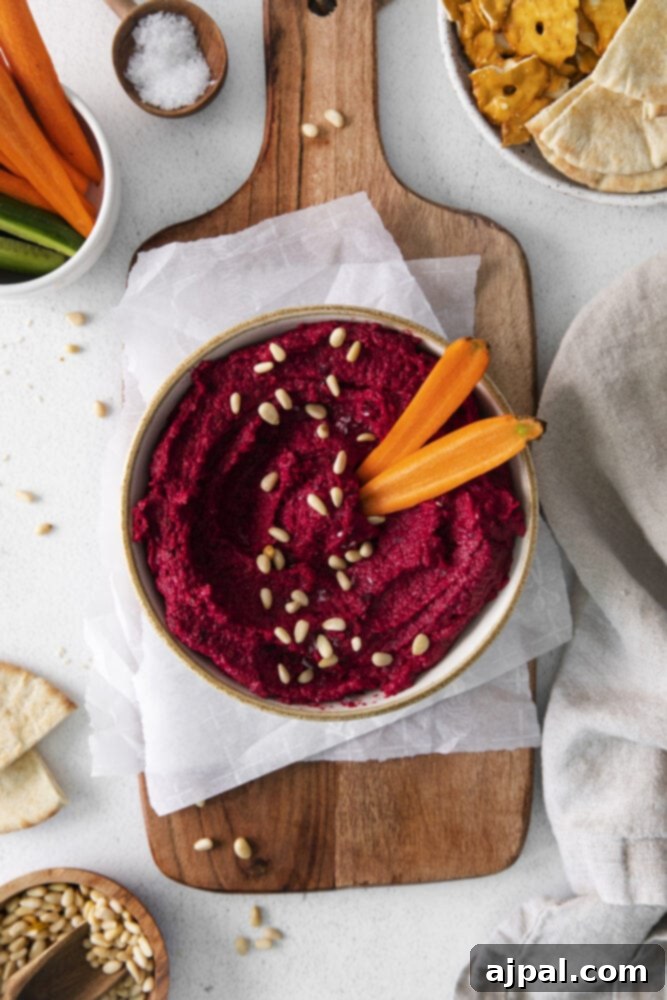
How To Make Roasted Beet Hummus: Essential Ingredients
Crafting this perfect roasted beet hummus is simpler than you might imagine, requiring just a few key ingredients. Each component plays a vital role in achieving the desired flavor, color, and creamy consistency. Here’s a closer look at what you’ll need and why each ingredient is important:
- Beets: The star of our dish, fresh beets, lend their characteristic earthy sweetness and gorgeous hue. While buying pre-roasted beets can be a handy shortcut to save time, roasting them yourself enhances their flavor profile significantly, bringing out deeper, more complex notes and a subtle caramelization. Choose firm, smooth beets for the best results. If short on time, consider pre-cooked or canned beets (ensure they’re thoroughly drained and rinsed) which can be roasted briefly for added flavor without the extensive prep work of peeling and dicing raw beets.
- Olive Oil: A high-quality extra virgin olive oil is crucial for both roasting the beets to perfection and achieving the silky-smooth consistency of the hummus. Its fruity, sometimes peppery, notes complement the earthy beets and creamy chickpeas, adding a layer of richness and depth that truly elevates the dip. The recipe calls for olive oil to be divided, using some for roasting and the rest for the hummus itself, ensuring maximum flavor infusion and optimal texture.
- Tahini: This rich, earthy sesame paste is a non-negotiable ingredient for authentic hummus. It provides a distinct nutty, slightly bitter undertone that beautifully balances the sweetness of the beets, and is absolutely key to creating that desirable creamy, almost airy texture. For the best results, use a tahini that is smooth and pourable, not thick and pasty, as this indicates good quality and a smoother blend.
- Garbanzo Beans (Chickpeas): Canned chickpeas are a convenient and reliable base for this hummus, providing its classic body and texture. Always remember to drain and thoroughly rinse them to remove excess sodium and any starchy liquid from the can, which can affect the hummus’s flavor and texture. For an even smoother hummus, some chefs recommend peeling the chickpeas, but this is an optional step reserved for those seeking an ultra-creamy, gourmet result.
- Garlic: Freshly minced garlic is highly recommended for its pungent, aromatic kick that cuts through the richness of the hummus and adds a layer of sharp, savory flavor. If you’re pressed for time, pre-minced garlic can be used, though the flavor might be slightly less intense. Adjust the amount to your personal preference for garlic intensity – some like a gentle hint, others prefer a bold punch.
- Fresh Thyme: The subtle, aromatic notes of fresh thyme complement the earthy beets beautifully, adding a layer of herbaceous freshness. While thyme is a superb choice, feel free to experiment with other fresh herbs like rosemary for a more robust flavor, or fresh parsley for a brighter, fresher note. Using fresh herbs makes a noticeable difference compared to dried, providing a more vibrant and aromatic outcome.
- Lemon Juice: Freshly squeezed lemon juice is absolutely essential for brightening the overall flavor profile of the hummus, adding a zesty acidity that prevents it from tasting flat and brings all the flavors into harmony. Half a lemon typically yields about 1-2 tablespoons of juice, providing the perfect tang. Always opt for fresh over bottled lemon juice for a superior, more vibrant taste.
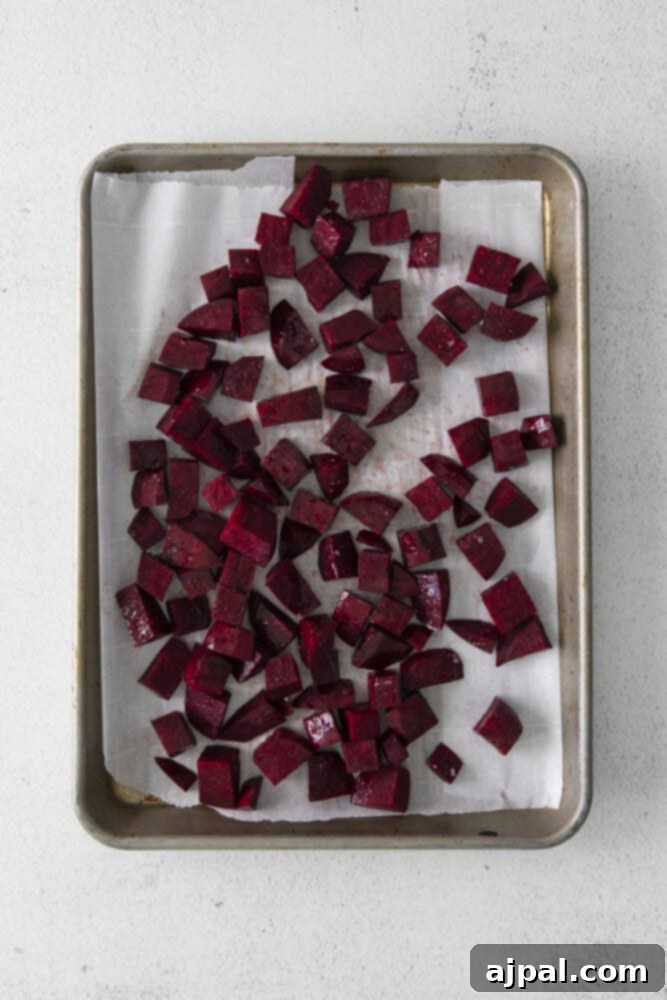
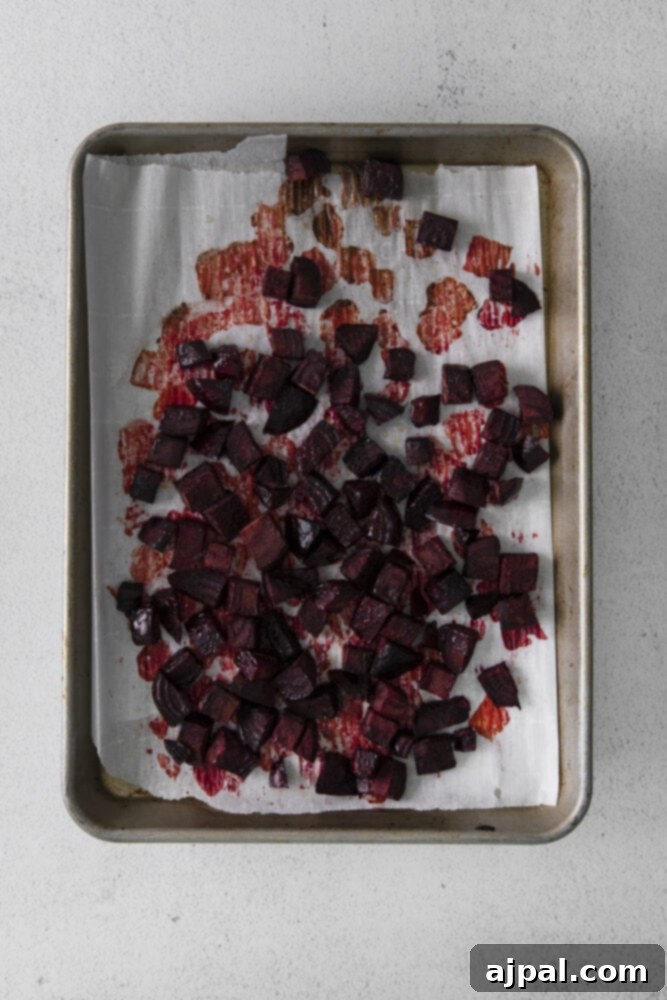
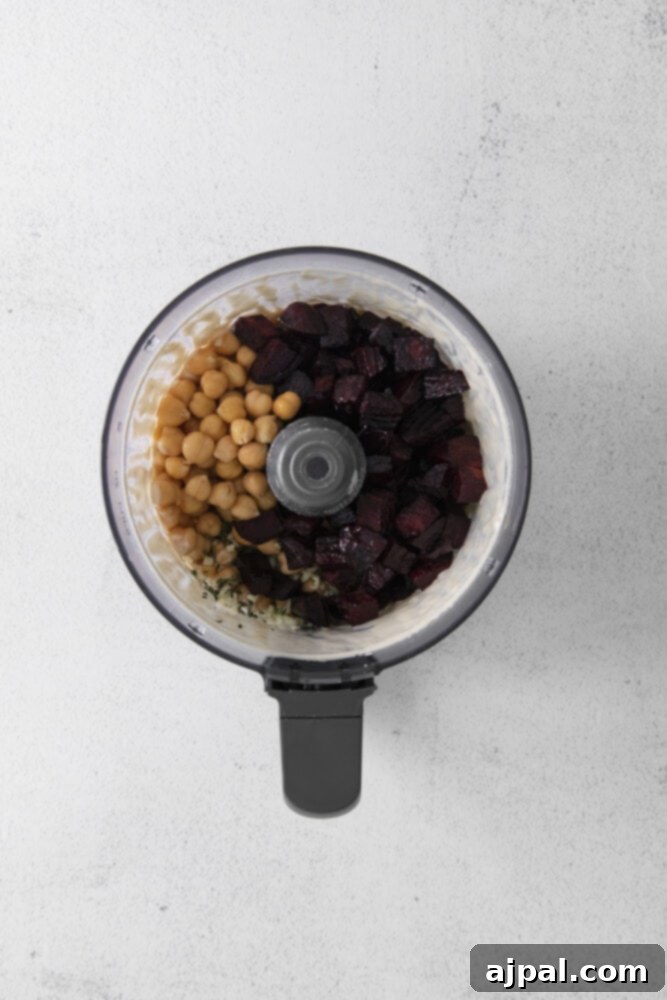
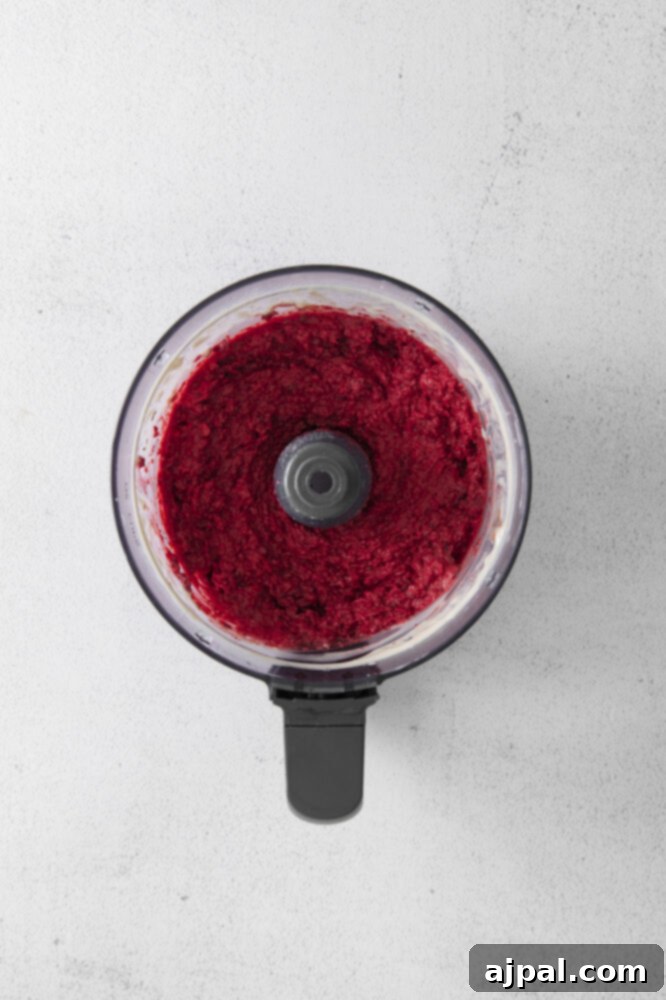
If you opt for pre-roasted or canned beets that are already prepared, you can conveniently skip the initial roasting steps of this recipe. Otherwise, follow these detailed instructions for a perfectly smooth and flavorful homemade beet dip!
- First, preheat your oven to a robust 400°F (200°C). Carefully trim off both ends of the fresh beets, then peel the skin using a vegetable peeler. Cut the peeled beets into uniform ½-inch cubes. Uniformity is key here for even cooking, ensuring every piece becomes perfectly tender. Place the cubed beets onto a sturdy baking sheet, ideally lined with parchment paper for easy cleanup.
- Generously drizzle the cubed beets with 1 tablespoon of your chosen high-quality olive oil. Toss them gently to ensure each beet cube is lightly coated. Season liberally with salt and freshly ground black pepper to taste. This initial seasoning helps to draw out their natural sweetness and encourages delicious caramelization during roasting.
- Slide the baking sheet into your preheated oven and roast the beets for approximately 30-55 minutes. The exact time will vary based on your oven and the size of your beet cubes. The goal is for them to be fork-tender and slightly caramelized. Once tender, remove them from the oven and allow them to cool completely to room temperature. This cooling step is crucial; adding warm beets to the food processor can negatively affect the hummus’s texture.
- Next, you will begin making the hummus. Add the tahini to the bowl of a powerful food processor. Begin processing on low speed. While the processor is running, slowly drizzle in ¼ cup of cold water. Continue to process for 10-15 seconds, or until the tahini transforms from a thick paste into a lighter, fluffy, almost pale emulsion. This process, known as ‘whipping the tahini,’ is a secret to incredibly creamy hummus.
- To the whipped tahini, add your roasted and cooled beets, the drained and rinsed garbanzo beans (chickpeas), minced garlic, fresh thyme leaves, and freshly squeezed lemon juice.
- Process all these ingredients on low speed first. Allow the food processor to run until the garbanzo beans and beets are broken down into tiny, coarse pieces. This initial low-speed blending helps to integrate everything evenly without over-processing too quickly.
- With the food processor still on low speed, gradually drizzle in the remaining ¼ cup of olive oil. Continue processing until everything is well combined and starting to smooth out. At this stage, season the mixture with additional salt and pepper, adjusting to your taste preferences. Taste and adjust as needed to achieve the perfect balance.
- Finally, increase the food processor speed to high. Allow it to process for approximately 45 seconds, or until your roasted beet hummus reaches your desired level of smoothness and creaminess. Scrape down the sides of the bowl as needed to ensure an even blend. For an extra-velvety texture, you can process for a bit longer, pausing occasionally to prevent overheating.
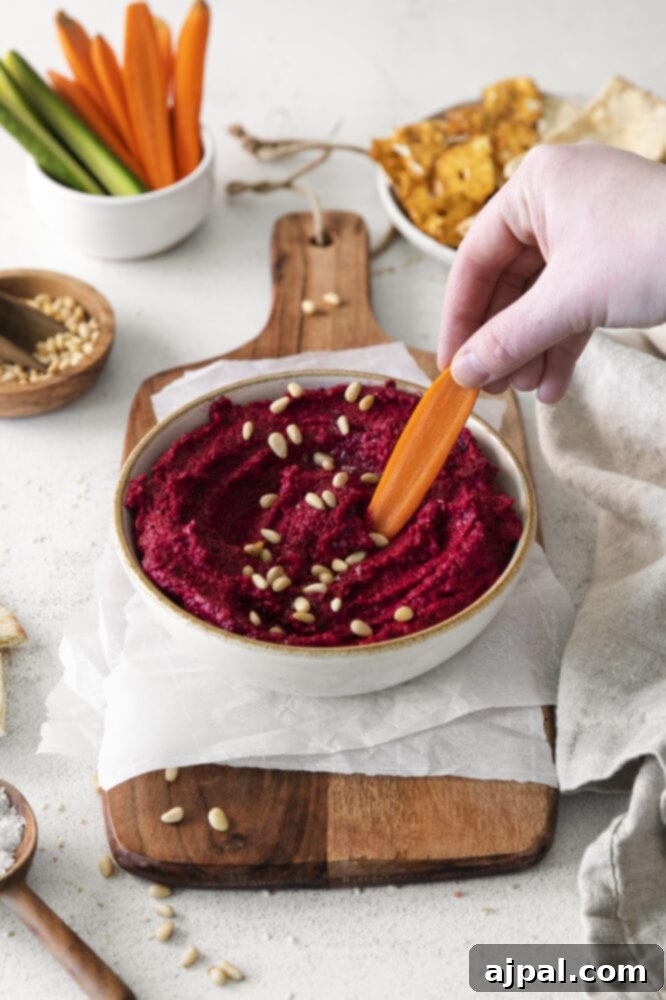
- Transfer your vibrantly colored, freshly made beetroot hummus to a serving bowl. Drizzle with a touch more olive oil, garnish with fresh thyme sprigs, a sprinkle of sesame seeds, or a pinch of smoked paprika for added flair, and serve immediately. Enjoy this delightful dip with your favorite accompaniments!
- Any leftover hummus should be stored in an airtight container in the refrigerator, where it will stay fresh and delicious for up to 5 days.
Expert Tips for Perfect Roasted Beet Hummus & FAQs
Achieving a truly exceptional roasted beet hummus is easy with a few insider tips and answers to common questions. Follow these guidelines to ensure your dip is always at its best:
Tips and Tricks:
- Achieving Fork-Tender Beets: The secret to perfectly smooth beet hummus lies in properly roasted beets. They should be soft enough that a fork easily pierces them without resistance. Depending on their size and your oven, this can take anywhere from 30 to 55 minutes. Always check for tenderness periodically to avoid over or under-roasting, which can affect both flavor and texture.
- Whipping Your Tahini: Do not skip the crucial step of processing the tahini with cold water first! This essential technique emulsifies the tahini, making it lighter, fluffier, and more receptive to blending with the other ingredients. This small but mighty step is key to achieving that signature smooth, creamy hummus texture that everyone loves.
- Customizing Consistency: The processing time in your food processor directly dictates the final texture of your hummus. For an exceptionally smooth and creamy dip, process on high for at least 45 seconds, or even longer if preferred, stopping to scrape down the sides. If you enjoy a slightly chunkier, more rustic texture, you can shorten the processing time. Feel free to adjust to your personal preference.
- Blender vs. Food Processor: While a food processor is generally ideal for achieving a consistently smooth hummus with minimal effort, a high-speed blender can also be used. However, you might need to scrape down the sides more frequently and add a touch more liquid (water or olive oil) to get the ingredients moving smoothly. Be aware that a blender might not yield quite the same silky-smooth texture as a powerful food processor.
- Taste and Adjust: Always taste your hummus before serving! Adjust seasonings like salt, freshly ground black pepper, and lemon juice as needed. Sometimes a little extra lemon can brighten the flavors, or a pinch more salt can bring everything into harmonious balance. Don’t be afraid to tweak it until it’s absolutely perfect for your palate.
Frequently Asked Questions:
For optimal flavor and tenderness, roast your beets at 400°F (200°C). This temperature allows them to caramelize slightly, intensifying their natural sweetness and making them wonderfully soft, which is absolutely crucial for a silky-smooth hummus.
If you’re roasting fresh beets from scratch, anticipate about 10-15 minutes of active preparation time, plus 30-55 minutes for roasting. Factor in cooling time for the beets, and you’re looking at approximately an hour to an hour and a half for this entire homemade beet dip process. If using pre-roasted beets, you can significantly cut down the total time to just 10-15 minutes of active prep.
Any leftover roasted beet hummus should be transferred to an airtight container and stored in the refrigerator. It will maintain its freshness and delicious flavor for up to 5 days. For best results and to prevent it from drying out, you can drizzle a thin layer of olive oil over the top before sealing the container.
Yes, you absolutely can freeze roasted beet hummus! Store it in an airtight, freezer-safe container or freezer bags for up to 3-4 months. When ready to enjoy, thaw it in the refrigerator overnight. You might notice a slight change in texture upon thawing; simply give it a good stir, and if needed, add a tablespoon or two of cold water or olive oil and re-process briefly in a food processor to regain its creamy consistency.
Hummus often tends to thicken after being stored in the refrigerator. To restore it to its perfect, dippable consistency, simply add 1 tablespoon of cold water or a drizzle of olive oil at a time, mixing well after each addition, until you achieve your desired texture. A quick pulse in the food processor can also help to smooth it out.
Absolutely! This recipe is wonderfully versatile. For a smoky flavor, try adding a pinch of smoked paprika or a dash of liquid smoke. For extra tang, incorporate a tablespoon of apple cider vinegar or a bit more lemon juice. You can also experiment with different herbs like fresh mint, cilantro, or dill for a unique twist, or add a hint of spice with a pinch of red pepper flakes or a finely diced jalapeño. Roasted carrots or sweet potatoes could also be added for a different flavor profile.
What To Serve With Roasted Beet Hummus
The versatility of Roasted Beet Hummus makes it a perfect accompaniment to a wide array of dishes and snacks. Its vibrant color and unique flavor profile allow it to shine in many culinary contexts, from casual snacking to elegant entertaining.
- Classic Dippers: Traditional choices like warm pita bread, fluffy pita chips, or crunchy Tortilla Chips are always a hit. The sturdy nature of these dippers provides the perfect scoop for this creamy spread.
- Fresh Vegetable Medley: For a lighter, healthier option, pair your hummus with an assortment of crisp raw vegetables. Think vibrant carrot sticks, refreshing cucumber slices, colorful bell pepper strips (red, yellow, or orange for contrasting colors), crisp celery sticks, tender broccoli florets, or even blanched green beans. The freshness of the veggies beautifully complements the rich, earthy hummus.
- Elegant Appetizers: Elevate your appetizer game by serving this vibrant pink hummus on a sophisticated Cheese Plate or charcuterie board. Its striking color adds immense visual appeal, while its unique flavor provides a delightful contrast to various cheeses, cured meats, and other gourmet bites. Consider serving it alongside our Easy Baked Parmesan Crisps for a fantastic low-carb, crunchy companion that is both delicious and impressive.
- Spread & Sandwich Filler: Beyond dipping, use beetroot hummus as a healthy and flavorful spread for sandwiches, wraps, or even as a vibrant base for open-faced toasts. It adds moisture, flavor, and a significant nutritional boost to your lunchtime meals. Try it with grilled vegetables or avocado for a satisfying vegetarian sandwich.
- Salad Topping: Dollop a generous spoonful of this hummus onto your favorite green salad for an extra creamy texture and a burst of flavor. It works wonderfully as a dressing component, especially in hearty grain bowls, alongside grilled chicken, or with crispy falafel.
- Unique Combinations: Don’t shy away from creative pairings! Try serving it with grilled halloumi cheese, alongside roasted sweet potatoes or Brussels sprouts, or even as a flavorful accompaniment to scrambled eggs or a savory breakfast bowl for a distinctive morning meal. Its versatility knows no bounds!
More Delicious Dips & Spreads
Spicy Red Pepper Feta White Bean Dip
Homemade Ranch Dressing
Homemade Caesar Dressing
Lemon Garlic Aioli
Chicken Jalapeno Popper Dip
Pepperoncini Baked Feta Dip
Caramel Apple Dip
Smoked Chorizo Queso
For even more delicious dip recipes, click here.
Roasted Beet Hummus Recipe
We hope you adore this Roasted Beet Hummus as much as we do! It’s a simple yet elegant recipe that brings a touch of healthy indulgence and vibrant color to any meal or gathering. If you’ve tried this recipe and loved it, please take a moment to rate it with five stars below and share your thoughts in the comments section. Your feedback helps other home cooks discover and enjoy this delicious creation!
Share on Facebook
Share
Pin this now to find it later
Pin It
Follow on Instagram
Follow
Only have 30 minutes to get dinner on the table? Sign up for my 30 minute dinner plans direct to your inbox!
Find and shop my favorite products in my Amazon storefront here!
Roasted Beet Hummus Recipe
Email Recipe
Print Recipe

Equipment
- Maldon Salt, Sea Salt Flakes
- Cuisinart Mini Prep Plus Food Processor
Ingredients
- 2 medium beets
- ½ cup + 1 tablespoon olive oil, divided
- ¼ cup tahini
- ¼ cup cold water
- 1 15 ounce can garbanzo beans, drained and rinsed
- 1 clove garlic, minced
- 1 teaspoon fresh thyme leaves
- ½ lemon, juiced
Instructions
- Preheat the oven to 400°F (200°C).
- Remove the ends from the beets and peel off the skins. Cut the beets into ½” cubes and place them on a baking sheet.
- Drizzle with 1 tablespoon olive oil and season with salt and pepper (to taste).
- Roast the beets for 30-55 minutes, or until they are fork tender. Then, remove the beets from the oven and allow them to cool completely to room temperature.
- To make the hummus, add the tahini to the bowl of a food processor. With the food processor on low speed, slowly drizzle in the cold water. Process for 10-15 seconds until the tahini is smooth and light.
- Add the roasted and cooled beets, along with the garbanzo beans, garlic, thyme, and lemon juice.
- Process on low speed until the beans and beets are broken up into small pieces. With the food processor still on low speed, slowly drizzle in the remaining ¼ cup olive oil. Season with salt and pepper to taste.
- Once all of the olive oil has been added, turn the food processor to high speed and process until the hummus is your desired consistency. I like a really smooth hummus so I process mine for about 45 seconds.
- Serve the hummus with pita chips or vegetables and enjoy.
- Store any leftovers in an airtight container in the fridge for up to five days.
Notes
- I’m roasting fresh beets but if you find roasted beets in the grocery store, that would be a great shortcut. You can also roast canned cut beets if you don’t want to peel them yourself.
- Olive oil helps the beets roast but it also makes a smooth and rich hummus. Make sure to use a good quality olive oil in this recipe– it really makes a difference.
- Tahini adds an earthy nutty flavor that is delicious with beets and garbanzo beans.
- Adding cold water to the tahini whips it into a light and fluffy spread– it will make the hummus more creamy and help it incorporate more smoothly into the garbanzo beans.
- Garbanzo beans are the classic bean used in hummus– just make sure to drain and rinse them very well.
- Garlic and thyme are my flavorings of choice– they pair deliciously with roasted beet. Feel free to swap out the herbs for what you have on hand– rosemary or parsley would also work!
- Lemon juice adds freshness and acidity to the hummus. ½ of a lemon should yield about 1-2 tablespoons of juice.
Nutrition
Nutrition information is automatically calculated, so should only be used as an approximation.
Additional Info
Tried this recipe?
Mention @sweetcsdesigns or tag #sweetcsdesigns!